
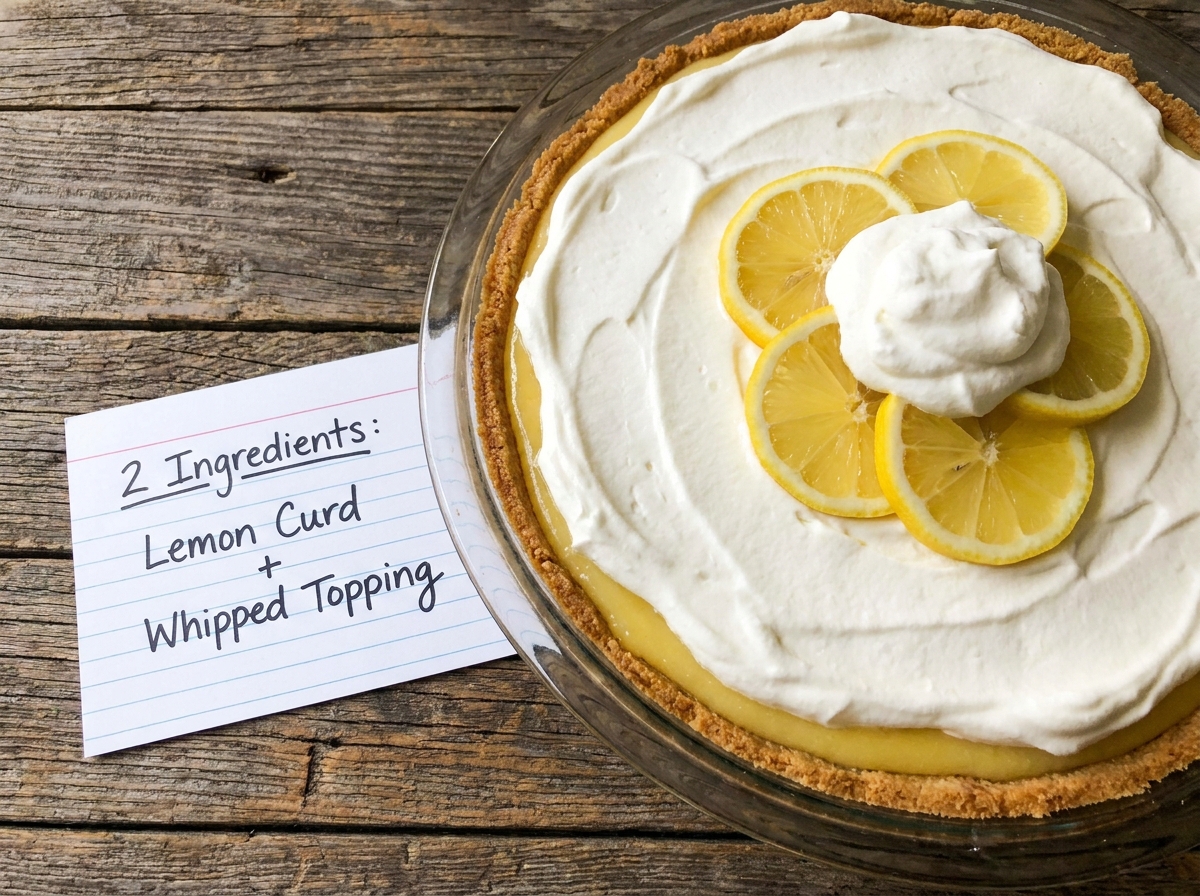
2-Ingredient No-Bake Lemon Cream Pie
Bright, creamy, and refreshingly lemony, this effortless pie comes together with only two ingredients and no oven required.
Thank you for reading this post, don't forget to subscribe!
Bright, creamy, and refreshingly lemony, this effortless pie comes together with only two ingredients and no oven required. Lemon pie filling spooned into a prepared graham cracker crust chills into a pie that tastes far more special than its short ingredient list would ever suggest.
There’s no crust to bake, no custard to cook on the stovetop, and no need to babysit anything in the oven. Spoon, spread, and chill, that’s the entire process, and the payoff is a bright, tangy-sweet pie ready to slice in just a couple of hours.
It’s the kind of dessert that works just as well for a quick weeknight treat as it does dressed up for a spring or summer gathering.
Why This Recipe Works
A prepared graham cracker crust already has the sweet, crumbly base a pie needs, which means there’s no baking or pressing a crust together from scratch. Lemon pie filling, meanwhile, is already thickened and flavored, ready to go straight into the crust without any cooking, whisking, or setting agent to manage on your own.
Because the filling is already stabilized during manufacturing, all it needs is time in the refrigerator to firm up fully once it’s inside the crust, giving you a sliceable, creamy pie without ever touching a stovetop or an oven.
Why a Prepared Crust Makes This So Easy
Using a store-bought graham cracker crust skips an entire step that a traditional pie would otherwise require, pressing and baking a crust from scratch. This lets the whole recipe focus on just one thing, letting the lemon filling chill into a pie, which is part of why this comes together in only a few minutes of hands-on time.
What You’ll Need
- 1 can lemon pie filling
- 1 prepared graham cracker pie crust
That’s the entire list. This recipe makes 8 slices.
A Note on Ingredient Choices
Canned lemon pie filling gives the most reliable set and the truest tangy-sweet lemon flavor, since it’s already been thickened and balanced during manufacturing. A standard graham cracker crust works well here, though a slightly deeper crust can hold a bit more filling if you’d like a taller pie.
Equipment You’ll Need
A spatula for spreading the filling evenly and the prepared crust itself are really all you need here; there’s no mixer, saucepan, or thermometer required for this recipe at all.
How to Make It
- Spoon the filling. Spoon the lemon pie filling into the graham cracker crust.
- Spread. Spread evenly and smooth the top.
- Chill. Refrigerate for at least 2 hours, until chilled and set.
- Slice. Slice and serve cold.
Getting an Even Fill
Spreading the filling evenly to the edges of the crust, rather than just mounding it in the center, is what gives every slice a consistent amount of filling once it’s cut. A offset spatula or the back of a spoon both work well for smoothing the top into a neat, level layer.

Getting the Right Set
This pie needs a full 2 hours in the refrigerator to firm up enough to slice cleanly, and rushing that chill time is the most common reason a slice looks loose or runny once cut. If you have the time, chilling for a few hours or overnight gives an even firmer, more sliceable result.
Knowing When It’s Done Chilling
The pie is ready once the filling looks fully set and no longer shifts when the pie plate is gently tilted. Because there’s no baking involved to signal doneness the way a golden crust would, relying on the full chill time and a quick jiggle test is the most reliable way to know it’s ready.
Tips for Perfect Lemon Cream Pie
Use a full can of lemon pie filling for the best coverage across a standard crust; using less can leave the pie looking thin once sliced. Chill the pie for a few hours or overnight if you have the time, since the extra time firms it up even further and makes for cleaner, more defined slices.
Troubleshooting Common Issues
My pie is too soft to slice. Give it more time in the refrigerator; a full 2 hours is the minimum, and overnight chilling gives an even firmer texture.
My filling looks uneven. Spread it more thoroughly to the edges of the crust before chilling, using an offset spatula for a level top.
My crust cracked when slicing. Let the pie warm very slightly at room temperature for a minute or two before slicing, and use a sharp, thin knife.
My pie tastes too tart. A dollop of whipped topping on each slice helps balance the tanginess of the lemon filling nicely.

A Few Ways to Make It Yours
Whipped Topping Swirl
Swirl a layer of whipped topping over the filling before chilling for a lighter, creamier finish.
Fresh Lemon Zest
A scatter of fresh lemon zest over the top adds color and a brighter citrus punch.
Mint Garnish
A few fresh mint leaves on each slice add a pop of color and a fresh, herbal note.
Graham Crumb Topping
A light sprinkle of extra graham cracker crumbs over the top adds a bit of texture to each bite.
The plain version is worth trying first so you know the baseline flavor before adding any extras.
How to Store Lemon Cream Pie
Store the pie covered in the refrigerator for up to 4 days, keeping it away from strong-smelling foods so it doesn’t pick up other flavors. Cover the cut surface loosely with plastic wrap once slices have been removed to keep the filling from drying out.
When to Serve This Pie
This pie works well as a bright, refreshing finish to a spring or summer meal, a quick contribution to a potluck dessert table, or a make-ahead treat for a warm afternoon when you don’t want to turn on the oven. Its tangy-sweet flavor also makes it a nice counterpoint to a heavier main course.
A Word on Texture
The finished pie has a smooth, custard-like texture that sits somewhere between a traditional lemon meringue filling and a light cheesecake, dense enough to hold a clean slice but soft enough to feel genuinely creamy on the fork. That texture comes almost entirely from the canned filling itself, which is part of why using it exactly as directed, rather than thinning it out or adding extra liquid, is important for getting a pie that slices the way you’d expect.
Nutrition and Serving Information
Because this pie is built from a canned lemon filling and a prepared crust, exact calorie and fat content will vary depending on the specific brands used, so checking the labels on your particular can and crust gives the most accurate picture for your needs. This recipe isn’t appropriate for anyone with a dairy or gluten sensitivity, given the graham cracker crust and any dairy content in the filling.
Make-Ahead Tips
This pie can be made a day or two ahead and stored covered in the refrigerator, which actually improves the texture by giving it more time to firm up fully. Because it needs a chill time regardless, it’s naturally suited to being prepared well before you plan to serve it.
The Science Behind a No-Bake Filling
Canned pie fillings like this one are already thickened during manufacturing using starches and stabilizers that set further as the filling cools, which is why refrigeration alone is enough to bring it to a sliceable texture. Unlike a traditional lemon meringue pie, which relies on eggs and a cooked custard base, this filling needs nothing more than time and cold temperatures to reach its final, sliceable set.
Portioning and Yield
This recipe makes 8 slices from a single standard pie, a good size for a small gathering or a few days of dessert. If you’d like to serve more people, using two crusts and two cans of filling works well without changing the technique at all.
A Little Bit of History
Icebox pies built around canned or prepared fillings became a home-kitchen staple once shelf-stable pie fillings made it possible to skip a cooked custard base entirely. Lemon as a pie flavor has a long history on its own, and pairing it with a no-bake graham crust brings that same bright, citrus flavor into an especially quick and low-effort format.
Serving Suggestions
Serve the pie chilled, straight from the refrigerator, for the firmest texture and the brightest lemon flavor. A dollop of whipped topping or a few fresh lemon slices on top dresses it up nicely for company, and it travels well if you’re bringing it somewhere as a potluck contribution.
Choosing the Right Pie Filling
A standard canned lemon pie filling gives the most reliable set and the truest citrus flavor, since it’s specifically formulated to hold its shape once chilled. A lemon curd or lemon pudding-style filling can work as a substitute in a pinch, though the texture and tartness may vary slightly from a true pie filling.
Why This Recipe Is So Beginner-Friendly
If you’ve never made a pie before, this is about as forgiving a place to start as you’ll find. There’s no crust to bake or blind-bake, no custard to cook and stir constantly on the stovetop, and no risk of a curdled or lumpy filling. With only two ingredients and one simple step, spooning the filling into the crust, there’s very little room for the kind of small mistakes that can derail a more complicated pie. This makes it a genuinely approachable dessert for a first-time baker or a child who wants to help spoon and spread the filling, since the process is simple, safe, and has real, visible results within a couple of hours.
Adjusting the Flavor to Your Taste
As written, this pie gets its entire flavor from the canned lemon filling, giving a result that’s bright and tangy-sweet without much fuss. If you’d like a more pronounced citrus punch, stirring in a bit of fresh lemon zest before spreading the filling into the crust sharpens the flavor nicely. A dollop of whipped topping folded gently over the top can also soften the tartness if you prefer a milder pie. Because this pie has so few ingredients to begin with, small additions tend to have an outsized effect on the final flavor, so it’s worth trying the plain version first before deciding what, if anything, you’d like to add.
Pairing This Pie With Other Desserts and Drinks
Because the flavor here is bright, tangy, and distinctly citrus-forward, this pie pairs naturally with richer, more indulgent options if you’re serving more than one dessert. A dense chocolate cake or a rich peanut butter treat balances nicely against the lightness of the lemon, giving a dessert table some real contrast in flavor and texture. On the drink side, this pie is a natural match for iced tea or a light sparkling lemonade, while a splash of cream in coffee leans into a nice, creamy pairing. If you’re building out a larger dessert spread, this pie reads as one of the lighter, more refreshing options, so pairing it with something richer helps the whole table feel varied rather than one-note.
A Quick Note on Serving Temperature
This pie is good served cold, straight from the refrigerator, which is really the best way to enjoy its bright, creamy texture. Unlike a baked dessert that can be served warm or at room temperature, this pie depends on being cold both for its sliceable texture and for the brightest lemon flavor, since the citrus notes come through most clearly when chilled. Keeping it refrigerated until just before serving also helps it hold its shape longer once it’s out on the table.
Why This Recipe Is Naturally Kid-Friendly to Make
Because this recipe involves no oven, no hot ingredients, and no sharp knife work beyond the final slicing, it’s a genuinely safe dessert to make with kids from start to finish. Spooning the filling into the crust and spreading it evenly are both simple, hands-on tasks that give a real sense of accomplishment once the finished pie comes out of the refrigerator looking bright and inviting.
A Quick Note on Portion Control
Because this pie is rich and creamy, a modest slice goes further here than it would with a lighter, airier dessert. Cutting the pie into 10 smaller slices rather than 8 standard-sized ones is an easy way to stretch it a bit further for a larger gathering, while still giving everyone a satisfying, full-flavored taste of the lemon.
A Note on Ingredient Proportions
The one-can-to-one-crust ratio in this recipe was chosen carefully, and it’s worth understanding why before making adjustments. A standard can of lemon pie filling holds just enough volume to fill a standard graham cracker crust evenly, without overflowing the edges or leaving the crust looking underfilled. If you use a deeper or larger crust without adjusting the amount of filling, the pie may look thin once sliced; if you use a smaller crust, some of the filling may need to be set aside or used elsewhere. This particular pairing is what gives the pie its balanced ratio of tangy filling to sweet, crumbly crust, so it’s worth treating the stated proportions as a tested baseline.
Why This Recipe Is So Reliable
Because both the filling and the crust are already stabilized and tested products before they ever reach your kitchen, there’s very little variability from one attempt to the next. Unlike a scratch-made custard pie, where the eggs could scramble if overheated or the filling could fail to set if undercooked, this version relies entirely on ingredients that have already been engineered to behave predictably. That reliability is a big part of why this recipe is worth keeping in a back pocket for whenever you need a dessert that’s guaranteed to turn out.
A Note on Presentation
How you finish this pie changes the impression it makes almost as much as the flavor itself. Served plain, straight from the crust, it reads as a simple, homey dessert for a weeknight. Topped with a swirl of whipped topping, a few lemon slices, and a sprig of mint, the same pie suddenly looks like something from a bakery case, which makes this a surprisingly versatile recipe to keep in rotation for both quiet nights in and gatherings where presentation matters a little more.
A Quick Word on Why This Recipe Travels So Well
Because this pie firms up completely in the refrigerator and holds its shape well once sliced, it’s an easy dessert to transport to a potluck, a picnic, or a friend’s house without worrying about it falling apart along the way. Keeping it in its original pie tin with a lid, or transferring it carefully to a container with a secure cover, is the simplest way to make sure it arrives looking as neat as it did coming out of the refrigerator.
A Final Thought on This Recipe
What makes this pie worth returning to again and again isn’t just how little effort it takes, it’s how consistently good the result is every single time. There’s no guesswork about oven temperatures, no risk of a curdled custard, and no waiting anxiously to see if a filling will set. Once you’ve made it a time or two, it becomes the kind of dessert you can put together on a whim, confident that it will turn out exactly the way you want it to.
Common Questions
Can I use a homemade lemon curd instead of canned filling?
Yes, though homemade curd may be softer and take a bit longer to fully set in the refrigerator.
Why is my pie too soft to slice?
This usually means it needs more chill time; give it the full 2 hours, or longer for a firmer set.
Can I make this ahead of time?
Yes, it can be made a day or two ahead and stored covered in the refrigerator, which actually helps it firm up further.
Can I use a different crust?
Yes, a shortbread or vanilla wafer crust both work well as substitutes for the graham cracker crust.
How long does this pie need to chill?
Plan on at least 2 hours in the refrigerator, or overnight for an even firmer texture.
How should I store leftovers?
Keep the pie covered in the refrigerator for up to 4 days.
Can I freeze this pie?
Freezing isn’t recommended, since the texture of the filling can turn watery once thawed.
2-Ingredient No-Bake Lemon Cream Pie turns a can of lemon filling and a prepared crust into a bright, tangy-sweet dessert with almost no effort at all. Spoon, spread, chill, and slice, that’s the entire process, and the result tastes far more special than its short ingredient list would ever suggest. Keep both ingredients on hand and this pie is never more than a couple of hours away from the table.