
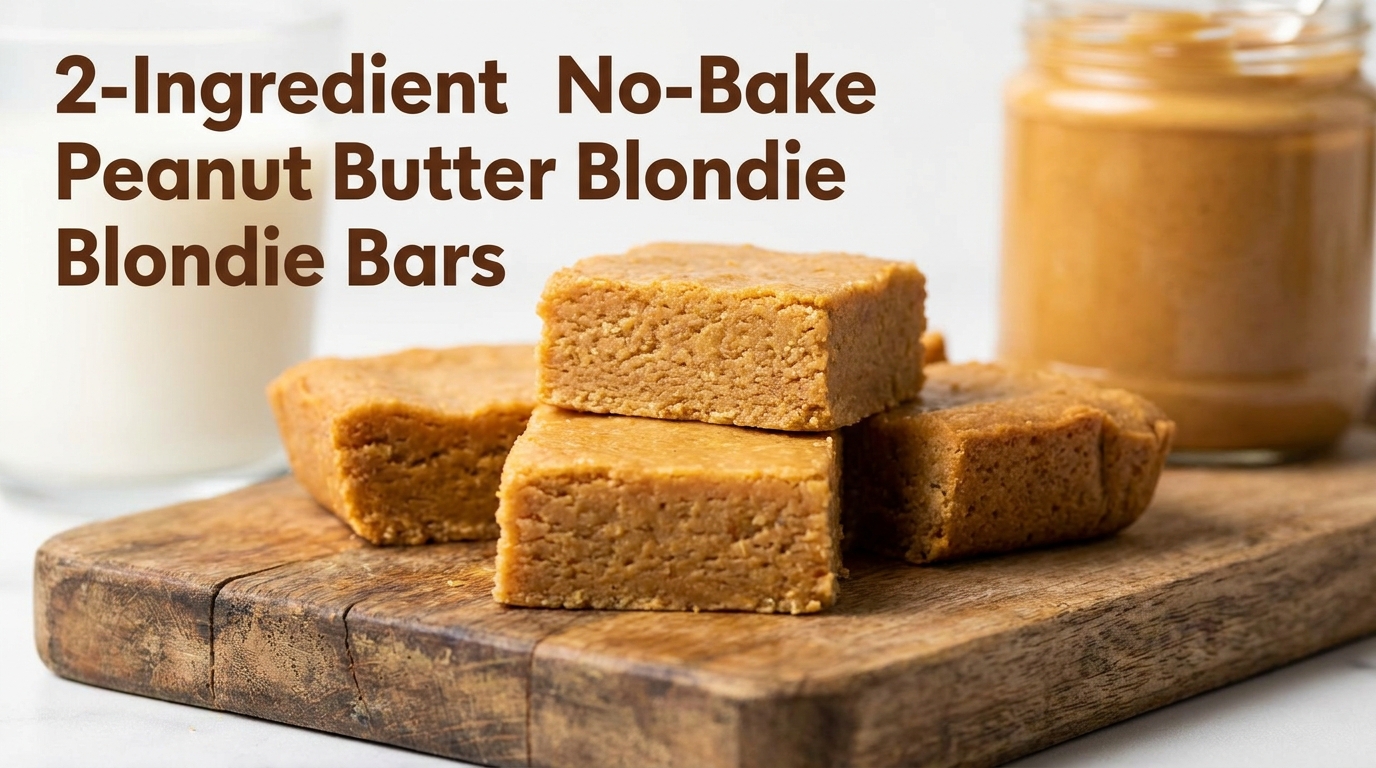
2-Ingredient No-Bake Peanut Butter Blondie Bars
Creamy peanut butter and vanilla frosting stirred together and pressed into a pan — no oven, no eggs, no flour, just a rich, fudgy bar after a few hours in the refrigerator.
Thank you for reading this post, don't forget to subscribe!
2-Ingredient No-Bake Peanut Butter Blondie Bars prove that two pantry staples, a jar of creamy peanut butter and a tub of vanilla frosting, are all it takes to make a rich, fudgy bar with real blondie flavor. There’s no flour, no eggs, and no oven involved anywhere in the process; the peanut butter and frosting simply get warmed slightly, stirred together until smooth, and pressed into a pan to firm up in the refrigerator.
What comes out the other side tastes remarkably close to a bakery blondie, dense, sweet, and deeply peanut-buttery, but the entire process takes about five minutes of actual hands-on effort. The vanilla frosting supplies all of the sugar and vanilla flavor a traditional blondie batter would normally get from creaming butter and sugar together, while the peanut butter provides the richness, structure, and unmistakable flavor that makes these bars so satisfying.
It’s a genuinely simple recipe to keep in your back pocket for whenever a peanut butter craving hits and turning on the oven feels like too much effort.
Why This Recipe Works
Vanilla frosting is essentially a fully finished dessert component on its own, already sweetened, flavored, and given a smooth, spreadable texture through careful blending of sugar and fat. When it’s combined with peanut butter, that same smooth fat structure becomes the backbone of a dense, no-bake dough, with the peanut butter adding its own fat and protein content to thicken the mixture further and give it real structural body once chilled. The result tastes surprisingly close to a from-scratch blondie, since frosting already contains much of the sugar and vanilla flavor a blondie batter would need, just in a pre-mixed, ready-to-use form.
Chilling the pressed mixture, rather than baking it, is what allows the combined fats from the peanut butter and frosting to firm back up into a bar sturdy enough to slice. As the pan cools in the refrigerator, that fat content solidifies throughout the mixture, locking it into a dense, fudgy texture that holds a clean edge when cut, all without ever needing heat to set.
Why No Baking Is Needed Here
A traditional blondie relies on eggs, flour, and oven heat to build its structure, but this recipe skips all three by leaning entirely on the natural fat content already present in peanut butter and frosting. Once the two ingredients are warmed slightly and stirred smooth, pressing the mixture into a lined pan and letting it chill is the only remaining step: the cold temperature firms the fat throughout the dough, holding the bar together well enough to slice cleanly, even though nothing has ever touched an oven.
What You’ll Need
- 2 cups creamy peanut butter
- 2 cups vanilla frosting
That’s the entire list. Each bar comes out to roughly 210 calories, and the recipe makes 16 bars.
A Note on Peanut Butter and Frosting Type
A standard, well-stirred creamy peanut butter gives the smoothest, most cohesive result, while a natural peanut butter, with its extra oil, will make a softer mixture that may need a slightly longer chill to firm up fully before slicing. Any standard tub of vanilla frosting works well here, though a whipped frosting will yield a slightly lighter, less dense bar compared to a traditional buttercream-style frosting.
Equipment You’ll Need
An 8×8-inch baking pan lined with parchment paper is all you need for this recipe, since it functions purely as a mold rather than going anywhere near an oven. A microwave-safe bowl makes warming the peanut butter quick and easy, and a sturdy spoon or spatula handles the mixing and pressing steps. The parchment lining makes lifting the finished bars out for slicing much easier.
How to Make It
- Line the pan. Line an 8×8-inch baking pan with parchment paper.
- Warm the peanut butter. In a microwave-safe bowl, heat the peanut butter for 20–30 seconds until easy to stir.
- Combine. Add the vanilla frosting and mix until smooth and fully combined.
- Press into the pan. Spread the mixture evenly into the prepared pan.
- Chill. Refrigerate for 2–3 hours, or until firm.
- Slice and serve. Slice into bars and serve chilled.
Getting an Even, Firmly Packed Layer
Because there’s no batter to self-level the way a baked blondie would, spreading the mixture evenly and pressing it down gently but firmly is what gives these bars a clean, uniform shape once sliced. The back of a spoon or the flat bottom of a measuring cup works well for smoothing the top, applying steady, even pressure across the whole pan so the mixture settles into a solid, level layer rather than staying uneven at the edges.

Spreading the Mixture Evenly
Take a few extra moments to spread the mixture into every corner of the pan, since gaps or thin spots will chill unevenly and can crumble when you go to slice them. Working from the center outward with a spatula helps distribute the mixture uniformly, and a final smoothing pass across the top gives a clean, even surface that looks polished once cut into bars.
Knowing When They’re Ready
The bars are ready to slice once they feel firm to the touch all the way through, not just around the edges. Press gently in the center of the pan; if it still feels soft or gives easily, give it another 20 to 30 minutes in the refrigerator. A fully chilled batch should hold a clean edge when cut, without the mixture oozing out at the sides.
Tips for Perfect Peanut Butter Blondie Bars
Use room-temperature peanut butter for the easiest mixing, since cold peanut butter straight from the refrigerator can be stiff and slower to combine evenly with the warmed frosting. Spread the mixture evenly into the pan for the cleanest slices, and give the bars the full chill time before cutting, since rushing this step is the most common reason bars turn out soft instead of sliceable.
Troubleshooting Common Issues
My bars felt too soft to slice. This usually means the bars need more time in the refrigerator, or the peanut butter was overheated and made the mixture too thin. Chill longer and warm the peanut butter for a shorter time next round.
My mixture felt too thick to spread. If the peanut butter and frosting seized up while mixing, a few extra seconds of gentle warming in the microwave usually loosens it back up.
My mixture felt greasy or wouldn’t hold shape. This can happen with a very oily natural peanut butter. A standard, well-stirred creamy peanut butter gives a firmer, more reliable mixture.
My bars tasted too sweet. Some frostings are sweeter than others; a natural, unsweetened peanut butter can help balance a very sweet frosting.

A Few Ways to Make It Yours
Chocolate Chip Add-In
Fold a handful of mini chocolate chips into the mixture before pressing it into the pan for a chocolate chip blondie version.
Peanut Drizzle Finish
Warm a little extra peanut butter and drizzle it over the chilled bars right before serving for a more finished look.
Chopped Peanut Topping
Press chopped peanuts into the top of the mixture before chilling for a bit of crunch in every bite.
Sea Salt Finish
Sprinkle a pinch of flaky sea salt over the top after slicing for a sweet-and-salty contrast.
The plain two-ingredient version is worth trying first so you know the baseline flavor and texture before adding any extras.
How to Store Peanut Butter Blondie Bars
Store the bars in an airtight container in the refrigerator for up to a week, since they’re built to stay cold and can soften considerably at room temperature. They also freeze well; place them in a freezer-safe container with parchment between layers and thaw in the refrigerator before serving.
When to Serve These Bars
These bars work well as a quick after-school snack, a lunchbox addition, or a simple dessert for a weeknight, since their small size and rich flavor make them satisfying without much effort. They’re also an easy option for a bake sale or potluck, since they need no oven time at all and travel well once fully chilled.
Nutrition and Serving Information
The recipe estimates approximately 210 calories per bar when the batch is divided into 16 pieces, based on standard peanut butter and vanilla frosting measurements. This is only an estimate, since exact calorie and fat content will vary depending on the specific brands used. Because this recipe is built around peanut butter, it isn’t appropriate for anyone with a peanut allergy, and standard frosting also typically contains dairy.
Make-Ahead Tips
These bars keep well in the refrigerator for a week or more, making them an excellent make-ahead treat for a busy week or an upcoming gathering. Make the full batch a day or two ahead and store in an airtight container, since the chilled texture actually holds up well with a longer rest than it does right after the initial chill time.
The Science Behind a No-Bake Set
Peanut butter is an emulsion of fat, protein, and finely ground peanut solids, and vanilla frosting is built around a similar structure of fat and sugar. At room temperature, both are soft and spreadable, which is exactly what allows them to combine into a smooth, pourable mixture once the peanut butter is gently warmed. Once the pan goes into the refrigerator, the cold temperature causes the combined fat content to solidify, the same way butter hardens when chilled, locking the mixture into a firm, sliceable structure. This is the same basic principle behind no-bake fudge and refrigerator candy, just applied here to a two-ingredient dough built around peanut butter and frosting instead of chocolate and condensed milk.
Portioning and Yield
This recipe makes about 16 bars from two cups each of peanut butter and vanilla frosting, a good amount for a small gathering or a couple weeks of snacks. If you’d like larger portions, cutting the pan into 9 or 12 pieces instead of 16 makes a more substantial dessert portion, while sticking with 16 smaller squares stretches the batch further for a crowd. The recipe doubles cleanly in a 9×13-inch pan if you’d like a bigger batch, though the chill time may need to extend slightly given the larger volume of mixture.
A Little Bit of History
No-bake bars built around a jar of peanut butter and a pre-made sweet component have long been a fixture of home kitchens looking for a dessert that doesn’t require turning on the oven, especially during hot summer months or busy holiday baking seasons when oven space is at a premium. This recipe follows that same practical tradition, standing on the shoulders of decades of no-bake peanut butter treats, from peanut butter fudge to peanut butter and rice cereal bars, while simplifying the process down to just two ready-made ingredients and a refrigerator instead of a stovetop.
Serving Suggestions
Serve these bars straight from the refrigerator, cold and firm, for the cleanest slices and the best texture. A glass of cold milk alongside plays up the classic peanut butter flavor nicely, and a light dusting of powdered sugar over the top adds a simple, finished look if you’re serving them for a gathering. Arranged on a small platter, they also work well as part of a larger dessert spread alongside other no-bake treats.
Why This Recipe Comes Together So Quickly
Because both ingredients here are already fully finished products, most of the work that would normally go into a from-scratch blondie, creaming butter and sugar, whisking in eggs, measuring out flour and leavening, is already built into the frosting straight out of the tub. That leaves only the warming and stirring steps as genuinely hands-on work, which is what makes this recipe realistic to pull together in five minutes flat, even on a busy weeknight or with very little advance planning.
Understanding the Texture
It helps to know what to expect before your first batch: these bars are dense, fudgy, and a little chewy, closer to a refrigerator fudge than to a light, cakey baked blondie. That density is a direct result of skipping the oven, since there’s no leavening or egg-based rise to lighten the texture the way a baked blondie would have. Once you know to expect a dense, no-bake texture rather than a fluffy one, these read as a rich, satisfying treat in their own right rather than a recipe that’s missing something a real blondie would have.
Choosing the Right Frosting
A standard vanilla buttercream-style frosting, when you can find one, gives the closest flavor match to a traditional baked blondie, with a warm, buttery vanilla note that plays well against the peanut butter. A whipped vanilla frosting is a lighter alternative and works just as well structurally, though the finished bars will be a touch airier rather than densely fudgy. Either option provides the same sugar content and binding structure this recipe depends on, so the choice really comes down to whichever texture you prefer and whichever tub is easiest to find at your local store.
Why This Recipe Is Naturally Kid-Friendly to Make
Because there’s no oven, no raw eggs, and no hot stovetop involved anywhere in the process, this is a genuinely easy recipe to make with kids, whether that means letting them measure the peanut butter and frosting or handing them the job of spreading the mixture evenly into the pan. Stirring the two ingredients together also happens to be a satisfying, hands-on task, since the mixture goes from two separate textures to a smooth, cohesive one in just a minute or two of stirring, which makes it a good starter recipe for a young or first-time baker who wants to see quick, tangible results without any safety concerns around heat.
Adjusting the Texture to Your Preference
If you prefer a softer, fudgier bar, a shorter chill time of about two hours will leave the bars slightly more tender when sliced, while a longer chill of three hours or more firms them up into a denser, sturdier bar that holds its shape well even at room temperature for a little while. Some of this comes down to the specific peanut butter used as well; a natural, oilier peanut butter tends to stay a touch softer even after a full chill, while a standard commercial peanut butter, with its added stabilizers, sets up firmer and holds a cleaner slice. Neither approach is wrong, so it’s worth trying both ends of the chill time to see which texture you and your family prefer before settling on a standard chill time for future batches.
Getting Clean, Even Slices
A sharp knife run under hot water and wiped dry between cuts makes the cleanest slices through a dense, chilled bar like this one, since the warmth of the blade helps it glide through the firm mixture rather than dragging or crumbling the edges. Cutting the bars while they’re still cold, straight from the refrigerator, also helps considerably, since the mixture is at its firmest right out of the cold and will only soften and become harder to slice neatly the longer it sits at room temperature. If you’re serving a crowd and want uniform pieces, marking out a grid lightly on the surface before cutting all the way through helps keep every bar close to the same size.
A Quick Note on Portion Control
Because these bars are so rich and dense, a smaller portion goes further here than it would with a lighter, airier baked treat. Cutting the pan into 20 smaller squares rather than 16 standard bars is an easy way to stretch the batch a bit further for a party, while still giving everyone a satisfying, full-flavored bite of peanut butter and vanilla frosting goodness.
Common Questions
Can I use chocolate frosting instead of vanilla?
Yes, though the bars will taste more like a peanut butter chocolate fudge than a classic blondie once you swap the frosting flavor.
Why did my bars turn out too soft?
They likely need more time in the refrigerator, or the peanut butter was overheated and made the mixture too thin before pressing it into the pan.
Can I use natural peanut butter?
Yes, though the mixture will be softer and may need a longer chill time to firm up fully before slicing.
Can I freeze these bars?
Yes, freeze them in a freezer-safe container with parchment between layers and thaw in the refrigerator before serving.
Do these need to stay refrigerated?
Yes, since there’s no baking to set the structure permanently, these bars are best kept chilled and can soften noticeably at room temperature.
Can I double this recipe?
Yes, this recipe doubles cleanly in a 9×13-inch pan; just allow a little extra chill time given the larger volume of mixture.
What if my mixture feels too oily?
This usually happens with a very natural, oily peanut butter. Try a standard creamy peanut butter for a firmer, more cohesive mixture.
2-Ingredient No-Bake Peanut Butter Blondie Bars turn a jar of peanut butter and a tub of vanilla frosting into a dense, chewy bar with real blondie flavor and zero oven time. Warm, stir, press, chill, and slice, that’s the entire process, and the result is a rich, satisfying treat that comes together with barely five minutes of hands-on effort.