
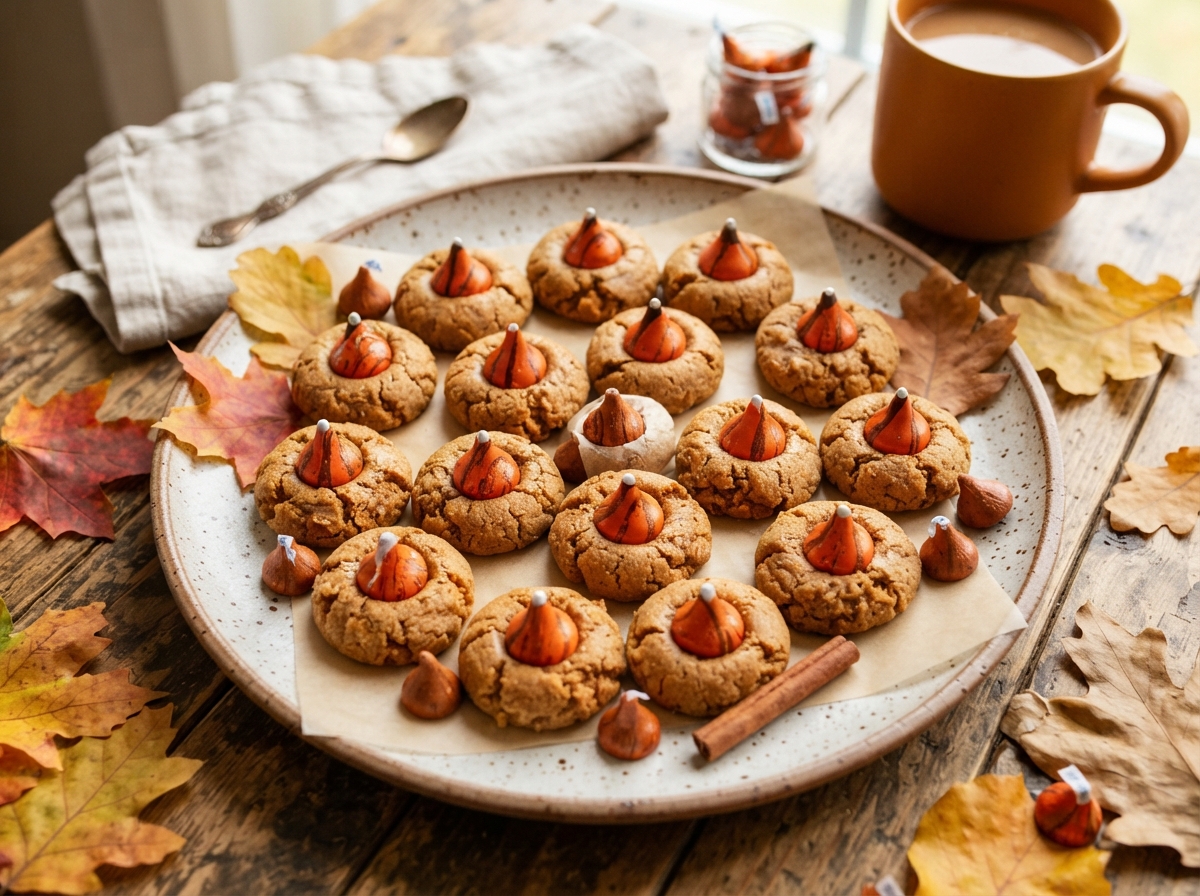
2-Ingredient No-Bake Pumpkin Spice Kiss Cookies
Crushed pumpkin spice sandwich cookies and a chocolate kiss come together for an easy, no-oven fall treat.
Thank you for reading this post, don't forget to subscribe!
These 2-Ingredient No-Bake Pumpkin Spice Kiss Cookies turn a package of pumpkin spice sandwich cookies and a bag of chocolate kisses into an easy fall treat with no oven and no complicated technique. Crushing the cookies into crumbs, shaping them into balls, and pressing a chocolate kiss into the center is the entire process, then the refrigerator does the rest.
The crushed sandwich cookies come together into a soft, moldable dough on their own, since the cream filling inside already provides enough moisture and sweetness to hold everything together without any butter or eggs. Pressing a chocolate kiss into the center of each one and chilling until firm turns the whole batch into a treat that looks like a classic peanut butter blossom but tastes entirely of pumpkin spice.
It’s an easy no-bake cookie for a Halloween party or a Thanksgiving dessert tray, and one that comes together with almost no cleanup beyond a food processor and a bowl.
Why This Recipe Works
Pumpkin spice sandwich cookies already contain flour, sugar, fat, and a sweet cream filling in one neat package, so pulsing them into fine crumbs and pressing them back together gives you a workable dough without adding a single extra ingredient. Chocolate kisses, pressed into the center of each shaped cookie, firm up in the refrigerator into a glossy, snappable topping that mirrors a classic blossom cookie.
Because the cream filling inside the sandwich cookies provides the moisture that holds the crumbs together, there’s no need for butter, eggs, or any binder, and no oven is ever involved.
Why the Food Processor Matters
Pulsing the sandwich cookies in a food processor gives you consistently fine crumbs far faster and more evenly than crushing them by hand in a bag. Fine, even crumbs are what let the mixture come together into a smooth, moldable dough rather than a crumbly, uneven one.
What You’ll Need
- 1 package pumpkin spice sandwich cookies
- 24 chocolate kisses, unwrapped
You’ll also need a food processor and a parchment-lined tray. This recipe makes 24 cookies, approximately 100 calories each.
A Note on Ingredient Choices
Pumpkin spice-flavored sandwich cookies, found in most grocery stores during the fall season, give this recipe its strongest seasonal flavor and are worth seeking out specifically. Dark, milk, or white chocolate kisses can all be used depending on which flavor pairing you prefer with the pumpkin spice.
Equipment You’ll Need
A food processor, a mixing bowl, and a parchment-lined tray are all you need; no oven or stovetop cooking required.
How to Make It
- Crush. Place the pumpkin spice sandwich cookies in a food processor and pulse until they become fine crumbs.
- Form the dough. Transfer the crumbs to a bowl and mix until they come together into a soft, moldable mixture.
- Shape. Scoop out small portions and roll them into balls. Place them on a parchment-lined tray and gently flatten.
- Add the kisses. Press one unwrapped chocolate kiss into the center of each cookie.
- Chill. Refrigerate for at least 30 minutes, or until the cookies are firm.
- Serve. Enjoy chilled or let them sit at room temperature for a few minutes before serving.
Getting the Dough to Come Together
Mixing the crumbs firmly until they hold together when pressed between your fingers is the sign the mixture is ready to shape. If the crumbs still feel dry and won’t hold their shape, a few extra pulses in the food processor helps release a bit more of the cream filling’s moisture.

Getting an Even Shape
Using a consistent scoop size for each ball of dough helps every cookie chill and firm up at the same rate. Flattening each one gently with your palm before adding the kiss keeps the cookies uniform in height across the whole batch.
Knowing When They’re Done
These cookies are ready once they feel firm to a light touch and hold their shape when lifted from the tray. If they still feel soft after 30 minutes, give them another 10 to 15 minutes in the refrigerator before serving.
Tips for Perfect Pumpkin Spice Kiss Cookies
Pulse the cookies until the crumbs are genuinely fine, since larger chunks can keep the dough from holding together smoothly. Press the chocolate kiss in firmly enough that it won’t wobble or fall out once the cookie is chilled and handled.
Troubleshooting Common Issues
My dough won’t hold together. The crumbs likely weren’t fine enough, or the mixture needs a firmer press; try a few more pulses in the food processor. My cookies are too soft to hold their shape. They likely need more chilling time; a fully firm batch holds together much better. My chocolate kiss keeps falling out. Press it in more firmly while the dough is still soft and pliable, right after shaping. My cookies taste bland. Make sure you’re using pumpkin spice-flavored sandwich cookies specifically, since a plain cookie won’t carry the same seasonal flavor.
A Few Ways to Make It Yours
White Chocolate Kisses
Use white chocolate kisses instead of milk or dark for a sweeter, creamier finish.
Cinnamon Sugar Coating
Roll each ball in cinnamon sugar before flattening for a sparkly, extra-spiced exterior.
Cream Cheese Drizzle
Top with a small dollop of sweetened cream cheese instead of a chocolate kiss for a cheesecake-inspired twist.
Mini Pretzel Base
Press each ball onto a mini pretzel before adding the kiss for a sweet-and-salty crunch underneath.
The classic version is worth trying first so you know the baseline flavor before adding any extras.
How to Store Pumpkin Spice Kiss Cookies
Keep the cookies refrigerated in an airtight container for up to 5 days. Because these cookies are built around a soft, cream-based dough, refrigeration keeps them holding their shape rather than softening at room temperature.
When to Serve These Cookies
These cookies work well for a Halloween party, a Thanksgiving dessert tray, or an easy autumn sweet any afternoon. They also make a fun, hands-on project for kids, since rolling the dough into balls and pressing in the kisses are both easy, low-mess tasks.
Nutrition and Serving Information
The recipe estimates approximately 100 calories per cookie when the batch makes 24 cookies, based on standard measurements for pumpkin spice sandwich cookies and chocolate kisses. This is only an estimate, since exact calorie content will vary depending on the specific brands used. Because this recipe contains dairy and gluten, it isn’t appropriate for anyone avoiding those ingredients.
Make-Ahead Tips
These cookies are a genuinely good make-ahead treat, since they need to chill before they can be served, and they hold their texture well in the refrigerator for days afterward. Making a batch a day or two before a party removes any last-minute pressure.
The Science Behind a Two-Ingredient Cookie
Sandwich cookies already contain fat and sugar in a form that becomes moldable once crushed and pressed back together, since the cream filling redistributes through the crumbs and acts as a natural binder. Chocolate kisses, pressed in while the dough is still soft, firm back up once chilled thanks to the way cocoa butter resolidifies at cold temperatures, giving the topping its classic glossy, snappable finish.
Portioning and Yield
This recipe makes 24 cookies from a single package of sandwich cookies, a good amount for a party platter or a few days of fall snacking. Doubling both ingredients works well for a larger batch, though it’s easiest to process the cookies into crumbs in two separate rounds so the food processor isn’t overloaded.
A Little Bit of History
Cookie-and-kiss blossom treats have long been a holiday baking staple, with the classic peanut butter blossom cookie serving as the inspiration for countless flavor variations. This no-bake pumpkin spice version leans into that same tradition, swapping a baked peanut butter dough for crushed sandwich cookies to get the same blossom look without ever turning on the oven.
Serving Suggestions
Serve these cookies chilled straight from the refrigerator, or let them sit out for a few minutes if you prefer a slightly softer bite. A platter of them alongside cider or hot cocoa makes for an easy, festive fall dessert spread.
Choosing the Right Sandwich Cookies
Pumpkin spice-flavored sandwich cookies, widely available during the fall baking season, give the strongest and most authentic seasonal flavor here. A plain vanilla or spice-flavored sandwich cookie can be substituted in a pinch, though the pumpkin spice version is really what makes this recipe feel like a fall treat.
Why This Recipe Is So Beginner-Friendly
If you’ve never made a no-bake cookie before, this is about as forgiving a place to start as you’ll find. There’s no oven temperature to worry about, no risk of overbaking or underbaking, and no delicate technique required beyond pulsing cookies into crumbs and pressing a kiss into each one. With only two main ingredients and a handful of simple steps, there’s very little room for the kind of mistakes that can derail a more involved baked cookie. This makes it a genuinely approachable recipe for a first-time baker or a child who wants to help with the rolling and pressing, since the process is simple, safe, and produces a real, visible result within 45 minutes.
Adjusting the Flavor to Your Taste
As written, these cookies get their flavor almost entirely from the pumpkin spice sandwich cookies and the chocolate kiss on top, giving a warm, classic fall taste. If you’d like a bolder chocolate flavor, dark chocolate kisses shift the balance toward a richer, less sweet finish. If you’d prefer something sweeter and creamier, white chocolate kisses lean the other direction. Because this recipe has so few ingredients to begin with, small changes tend to have a noticeable effect on the final flavor, so it’s worth trying the classic version first before deciding what, if anything, you’d like to change.
Pairing These Cookies With Other Desserts and Drinks
Because the flavor here is warm, spiced, and chocolatey, these cookies pair naturally with lighter options if you’re serving more than one dessert, since the contrast keeps a spread from feeling too heavy. A crisp, light cookie or a fruit-based treat balances the density of these cookies nicely, while another spiced or chocolate dessert leans further into the same cozy, fall direction. On the drink side, these cookies pair well with hot cider, chai, or a tall glass of cold milk.
A Note on Ingredient Proportions
Using one full package of sandwich cookies to 24 chocolate kisses gives roughly one kiss per cookie once the dough is portioned into small balls, and it’s worth understanding why that balance matters before adjusting it. Enough crumbs need to come from the crushed cookies to make a full batch of evenly sized cookies, while each one needs just enough surface area to hold a single kiss without the topping overwhelming the base. Making the dough balls too large relative to the number of kisses on hand will leave some cookies without a topping, while making them too small can make the kiss look oversized on top. This particular ratio is what gives the finished batch its classic blossom-cookie proportions, so it’s worth treating the stated amounts as a tested baseline.
A Quick Note on Serving Temperature
These cookies taste good at any temperature, but they hold their shape best served chilled or at a cool room temperature, since warmth can soften the cream-based dough and make the cookies harder to handle. If serving at a fall gathering, keeping the platter in a cool spot until just before serving helps them stay firm.
Why This Recipe Is Naturally Kid-Friendly to Make
Because this recipe involves crushing cookies in a food processor and pressing kisses into soft dough balls, it’s a genuinely simple treat to make with kids, provided an adult handles the food processor. Rolling the dough into balls and pressing in the chocolate kisses are satisfying, hands-on tasks that give a real sense of accomplishment once the finished cookies come out of the refrigerator set and ready to serve.
A Quick Note on Portion Control
Because these cookies are rich with both cookie crumbs and chocolate, one or two goes a long way here compared to a lighter treat. Making smaller dough balls is an easy way to stretch the batch further and keep portions naturally smaller for a party platter.
A Note on Presentation
How you serve these cookies changes the impression they make almost as much as the flavor itself. Arranged plainly on a plate, they read as a simple, homemade fall treat. Displayed on a decorative fall-themed platter with a mini pumpkin or scattered autumn leaves nearby, the same cookies suddenly look like something from a styled dessert table, which makes this a surprisingly versatile recipe to keep in rotation for both casual snacking and holiday entertaining.
Why This Recipe Is So Reliable
Part of what makes these cookies such a good recipe to keep on hand for fall is how little can actually go wrong with them, as long as the crumbs are fine and the dough is pressed together firmly. There’s no oven temperature to manage and no delicate baking chemistry to worry about, the cream filling binds the crumbs predictably every time, and pressing in a chocolate kiss doesn’t introduce any tricky steps of its own. As long as the dough holds together and the cookies are given enough time to chill, the result is consistent nearly every time, which is exactly the kind of dependability worth having in a go-to fall treat.
A Final Thought on This Recipe
Recipes built around just two pantry staples tend to earn their place in a regular rotation not because they’re flashy, but because they solve a real problem: a fall party needs a dessert tray filled quickly, or a craving for something pumpkin-spiced hits, and a full baking session isn’t always realistic. 2-Ingredient No-Bake Pumpkin Spice Kiss Cookies answers that need reliably, using ingredients that are easy to find during the fall season, and turning them into something that looks like a classic blossom cookie while tasting entirely of pumpkin spice. That combination of simplicity and payoff is exactly why this recipe is worth keeping close at hand.
A Word on Texture
The texture of these cookies sits somewhere between a soft truffle and a classic blossom cookie, and that in-between quality is part of what makes them feel special despite how few ingredients go into them. Because the crumbs are bound by the cookies’ own cream filling rather than butter or eggs, the base stays dense and slightly fudgy, while the chocolate kiss on top adds a firm, snappable contrast. A cookie that’s chilled the full amount of time holds its shape cleanly when picked up, while still giving easily to a bite.
A Note on Crumb Texture
Pulsing the cookies into very fine, sandy crumbs gives the smoothest, most cohesive dough and the cleanest finished shape. A slightly coarser crumb, left a little chunkier on purpose, gives the cookies a more rustic, textured look that some bakers prefer for a homier presentation.

A Final Note on Batch Size
This recipe is sized for a single package of sandwich cookies, which keeps the whole process quick and manageable well under an hour. For a bigger batch to fill out a longer dessert table, process the cookies into crumbs in two or three separate rounds rather than overloading the food processor at once, since a bowl packed too full won’t crush evenly and can leave larger chunks mixed in with the fine crumbs. Working through the cookies in smaller batches keeps the texture consistent across every ball of dough, and it’s a small extra step that makes a real difference once the whole platter is chilled and ready to serve.
Common Questions
Can I use a different flavor of sandwich cookie?
Yes, though the flavor will be milder without the pumpkin spice notes the specific cookie provides.
Why won’t my dough hold together?
The crumbs likely weren’t fine enough; a few extra pulses in the food processor usually solves this.
Can I use white or dark chocolate kisses?
Yes, any chocolate kiss flavor works well; it’s mostly a matter of personal preference.
How do I know when these cookies are fully set?
They should feel firm to a light touch and hold their shape when lifted from the tray.
Can I double this recipe?
Yes, process the cookies into crumbs in two rounds so the food processor isn’t overloaded.
How should I store leftovers?
Keep the cookies refrigerated in an airtight container for up to 5 days.
Can I freeze these cookies?
Yes, they freeze well in an airtight container for up to 2 months; thaw in the refrigerator before serving.
2-Ingredient No-Bake Pumpkin Spice Kiss Cookies turn a package of sandwich cookies and a bag of chocolate kisses into an easy fall treat with almost no effort at all. Crush, shape, press, and chill, that’s the entire process, and the result looks like a classic blossom cookie with a genuine pumpkin spice flavor throughout.