
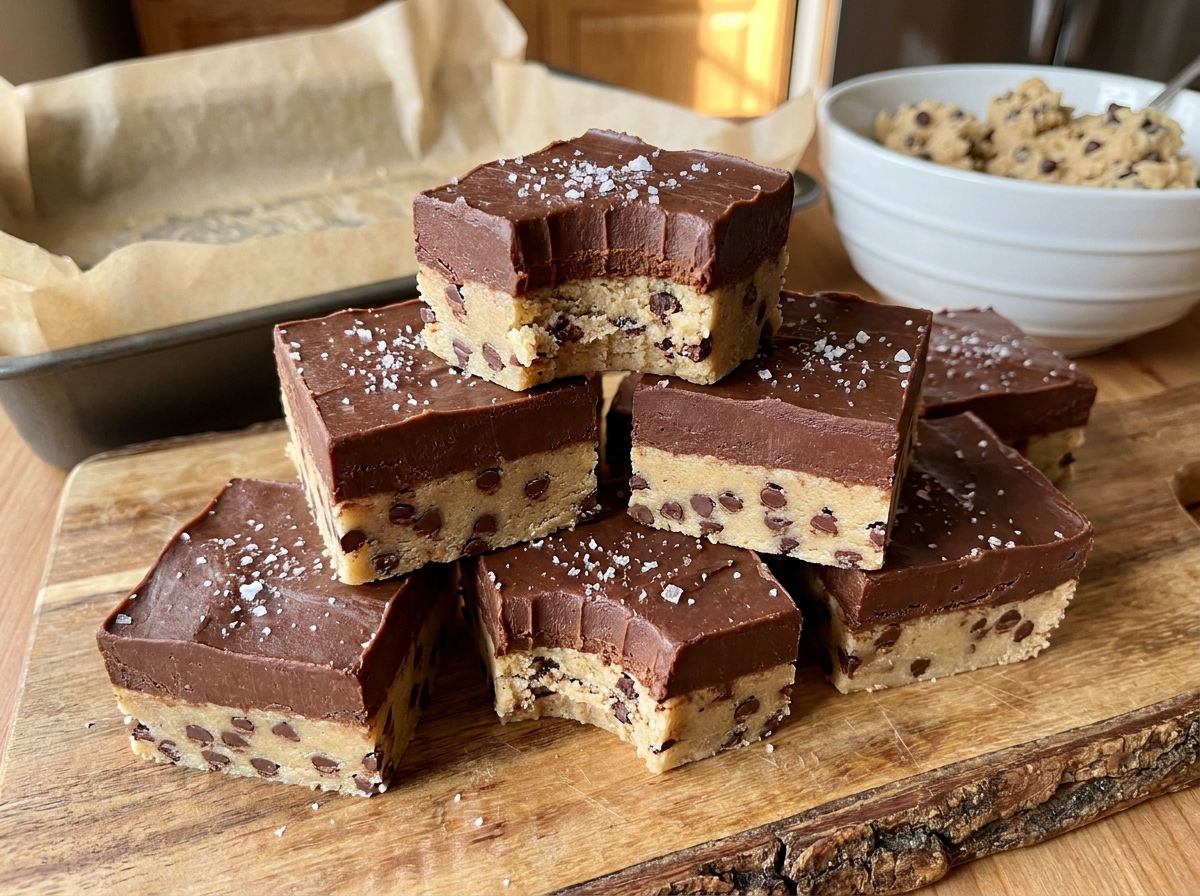
Chocolate Chip Cookie Dough Fudge Squares
A pressed, heat-treated cookie dough base topped with a rich stovetop chocolate fudge layer — two favorite treats stacked into one sliceable square.
Thank you for reading this post, don't forget to subscribe!
Chocolate Chip Cookie Dough Fudge Squares stack two of the most beloved treats in dessert making into a single sliceable bar. A heat-treated, egg-free cookie dough presses into the bottom of a pan as the base layer, and a rich, glossy fudge made from sweetened condensed milk and semisweet chocolate chips pours over the top, setting into a firm, dense layer as it chills.
Because the cookie dough is heat-treated rather than baked into an actual cookie, it stays soft and dough-like even in the finished bar, giving you that eat-the-dough texture people love, safely, on top of a dense, fudgy chocolate layer underneath. There’s no oven time for the dough itself beyond the quick flour treatment, and the fudge layer only needs a few minutes on the stovetop before it’s ready to pour.
The result is a square that delivers both textures and both flavors in every bite — soft, chocolate-chip-studded cookie dough on top, dense, rich fudge on the bottom — and it all comes together well ahead of when you actually plan to serve it, since the chilling time does the real work of firming everything up.
Why This Recipe Works
This recipe gets its two distinct layers from two very different techniques happening back to back. The cookie dough layer relies on heat-treating the flour briefly in the oven, which makes it safe to eat without baking the dough all the way through, so it stays soft and fudgy-textured rather than turning into an actual baked cookie. The fudge layer works on a completely different principle, melting sweetened condensed milk and chocolate chips together over gentle stovetop heat until smooth, then pouring that mixture over the pressed dough layer to set as it cools and chills.
Because the cookie dough is pressed into the pan first and the fudge poured over the top afterward, the two layers stay distinct rather than blending together, giving each bite a clear top layer of dough and bottom layer of fudge, similar to a two-layer bar cookie.
Why Heat-Treating the Flour Matters
Raw flour can carry bacteria that are normally killed off during baking, which is why edible cookie dough recipes call for heat-treating the flour separately before using it in a no-bake or partially baked application. Spreading the flour on a baking sheet and baking it briefly at 350°F raises its temperature enough to eliminate that risk without cooking it into anything resembling bread or cake. Letting it cool completely afterward is just as important as the heating step, since warm flour would begin melting the butter prematurely when mixed into the dough.
What You’ll Need
- 1 cup unsalted butter, softened
- 1 cup brown sugar
- 1 teaspoon vanilla extract
- 2 cups all-purpose flour
- 1 (14-ounce) can sweetened condensed milk
- 2 cups semi-sweet chocolate chips
- 1/2 cup mini chocolate chips
Each square comes out to roughly 320 calories, and the recipe makes 16 squares.
A Note on the Two Types of Chocolate Chips
This recipe uses two different chocolate chips for two different jobs. Mini chocolate chips fold into the cookie dough layer, distributing more evenly and giving a better bite-to-bite ratio of chocolate throughout the softer dough. Standard semi-sweet chocolate chips melt into the fudge layer along with the condensed milk, where their larger size doesn’t matter since they’re melting down into a smooth mixture rather than staying as distinct pieces.
Equipment You’ll Need
A baking sheet is needed briefly for heat-treating the flour, and a hand mixer or stand mixer makes quick work of beating the butter and brown sugar. An 8-inch square pan lined with parchment paper, leaving overhang on two sides, holds both layers and lifts out cleanly once chilled. A small saucepan is needed for melting the condensed milk and chocolate together, and a sturdy spatula helps with both pressing the dough into the pan and spreading the fudge evenly over the top.
How to Make It
- Heat-treat the flour. Preheat the oven to 350°F. Spread the flour on a baking sheet and heat-treat it for 5–7 minutes. Allow it to cool completely.
- Beat the butter and sugar. Beat the butter and brown sugar until creamy.
- Add vanilla and flour. Add the vanilla and cooled flour. Mix until combined.
- Fold in mini chips. Stir in the mini chocolate chips.
- Prep the pan. Line an 8-inch square pan with parchment paper.
- Press the dough. Press the cookie dough mixture firmly into the bottom of the pan.
- Melt the fudge. In a saucepan over low heat, combine the sweetened condensed milk and semi-sweet chocolate chips.
- Stir until smooth. Stir constantly until melted and smooth.
- Pour the fudge. Pour the chocolate fudge mixture over the cookie dough layer.
- Chill. Refrigerate for at least 3 hours, or until completely firm.
- Slice. Remove from the pan, slice into squares, and serve chilled.
Getting the Cookie Dough Layer Right
Beat the butter and brown sugar until the mixture looks noticeably lighter in color and creamy in texture, which usually takes a couple of minutes with a hand mixer. This step builds a smooth base for the vanilla and cooled flour to mix into evenly. Add the flour gradually rather than all at once, mixing just until it’s combined, since overmixing at this stage can make the dough tougher rather than keeping it soft.

Pressing the Dough Firmly
An evenly pressed dough layer gives the fudge on top a level surface to set on, so take a little extra time here. Use lightly dampened fingers or the bottom of a measuring cup to press the dough firmly and evenly into the corners and along the edges of the pan before smoothing the center. A dough layer with high and low spots will cause the fudge to pool unevenly once it’s poured over the top.
Melting the Fudge Layer Without Scorching
Low, gentle heat is essential when melting sweetened condensed milk and chocolate together, since both can scorch relatively easily, especially the condensed milk, which contains milk sugars that burn faster than plain cream or milk. Stir constantly and continuously rather than letting the mixture sit, and pull it from the heat as soon as it looks fully smooth and glossy. If you notice any graininess or a slightly burnt smell, the heat was likely too high; lowering it and stirring more frequently the next time usually solves this.
Pouring and Spreading the Fudge Layer
Pour the melted fudge mixture over the pressed cookie dough slowly and from a lower height, rather than dumping it all at once, to avoid disturbing the dough layer underneath. A spatula helps spread it evenly to the edges and corners of the pan, especially since the fudge mixture is fairly thick and won’t spread completely on its own the way a thinner batter would.

Why the Full Chill Time Matters
Refrigerating the pan for at least 3 hours gives the fudge layer time to firm up completely, since it’s essentially a dense, poured candy that needs to cool and set fully before it can be sliced cleanly. A shorter chill will leave the fudge soft and prone to smearing when cut. If your kitchen runs warm or your refrigerator is fairly full, lean toward the longer end of the chilling window, or even let the pan sit overnight for the cleanest slices.
Tips for Perfect Cookie Dough Fudge Squares
Let the heat-treated flour cool completely before mixing it into the dough, and press the dough firmly and evenly into the pan so the fudge layer has a level base. Melt the fudge over low heat, stirring constantly, and pour it slowly to avoid disturbing the dough underneath. Give the pan the full chilling time before slicing, and use a sharp knife wiped clean between cuts for the neatest squares.
Troubleshooting Common Issues
My fudge layer turned out grainy. This usually happens from overheating the condensed milk and chocolate mixture. Melt over low heat, stirring constantly, and remove from the heat as soon as it’s smooth.
The cookie dough layer is too soft to hold its shape. Make sure the heat-treated flour was fully cooled before mixing, since warm flour can make the dough greasy and loose.
My squares fell apart when I sliced them. The fudge layer likely needed more chilling time. Give the pan the full 3 hours, or longer, before cutting.
The two layers separated when I sliced. This can happen if the dough layer wasn’t pressed firmly enough before the fudge was poured. Press with real, even pressure next time.
A Few Ways to Make It Yours
Sea Salt Finish
Sprinkle flaky sea salt over the cookie dough layer before pressing it into the pan, as pictured, for a sweet-salty contrast.
Chocolate Drizzle
Melt a little extra chocolate to drizzle over the finished squares for a bakery-style presentation.
Peanut Butter Swirl
Swirl a few tablespoons of peanut butter into the fudge layer right after pouring for a chocolate-peanut-butter version.
Nut Topping
Fold chopped walnuts or pecans into the fudge layer for extra crunch and a more classic fudge flavor profile.
The classic version with just the two layers is worth making first so you have a baseline for the texture and richness before adding any extras.
How to Store Cookie Dough Fudge Squares
Store the squares in an airtight container in the refrigerator for up to a week, since both the cookie dough and fudge layers hold up well to cold storage. Layer parchment paper between stacked squares to keep them from sticking together. These squares also freeze well; wrap them individually or layer with parchment in a freezer-safe container, and thaw in the refrigerator before serving.
When to Serve These Squares
These squares work well as a rich dessert for a holiday gathering, a bake sale, or a potluck, since their dense, layered texture makes them feel a little more special than a simple bar cookie. Because they’re make-ahead by nature, needing time to chill regardless, they’re a convenient dessert to prepare a day or two before an event. Cut them into smaller pieces for a dessert table with other treats, since they’re rich enough that a small square goes a long way.
Nutrition and Serving Information
The recipe estimates approximately 320 calories per square when the batch is divided into 16 pieces, based on standard butter, flour, condensed milk, and chocolate chip measurements. This is only an estimate, since exact calorie and fat content will vary depending on the specific brands used and how the squares are cut. Because this recipe contains wheat flour, dairy, and both regular and mini chocolate chips, check labels carefully for allergens if you’re serving a crowd, and note that some chocolate products and condensed milk brands are processed in facilities that also handle tree nuts.
Make-Ahead Tips
Because the fudge layer needs at least 3 hours to set regardless, this is a naturally make-ahead dessert. Prepare the full pan a day or two ahead and keep it covered in the refrigerator, slicing just before serving so the cut edges look their cleanest. If you’re transporting the squares somewhere, carrying the uncut slab and slicing on arrival helps keep the presentation neat.
The Science Behind Two Layers That Set Differently
The cookie dough and fudge layers in this recipe firm up through two entirely different mechanisms, which is part of why they stay so distinct from one another even after chilling together in the same pan. The cookie dough layer firms primarily through the cold temperature solidifying the butter within it, the same way any raw cookie dough gets firmer in the refrigerator, since there’s no baking or protein-setting reaction happening. The fudge layer, on the other hand, sets through a genuine transformation: as the melted chocolate and condensed milk cool, the cocoa butter in the chocolate re-solidifies into a crystalline structure, and the sugars from the condensed milk help bind everything into a dense, uniform mass, which is exactly the process that makes traditional stovetop fudge firm up in the first place. Because the fudge layer is essentially a candy while the dough layer is essentially a soft raw dough, they hold together as two structurally different layers rather than merging into one uniform bar, giving you that distinct textural contrast in every slice.
Portioning and Yield
This recipe fills an 8-inch square pan and is typically cut into 16 squares, a reasonable size given how rich both layers are together. For a dessert table serving a larger group, cutting the pan into 20 smaller pieces stretches the batch further while still giving everyone a proper taste of both layers. For a more indulgent, plated dessert portion, cutting the pan into 9 or 12 larger pieces works well. To double the recipe for a bigger batch, use a 9×13-inch pan and double all the ingredients, keeping an eye on both the flour heat-treating time and the fudge melting time, since a larger batch of fudge may take slightly longer to melt smoothly and evenly over the stovetop.
A Little Bit of History
Edible, egg-free cookie dough has become its own dessert category in recent years, growing out of the near-universal habit of sneaking a taste of raw dough straight from the mixing bowl while baking. Once heat-treating flour became a widely known technique for making that habit food-safe, an entire genre of no-bake cookie dough treats followed, from dough bites and dough bars to dough-topped brownies. Fudge, meanwhile, has its own much older history as a stovetop candy built around sugar, butter, and milk boiled to a precise stage, though the modern shortcut version using sweetened condensed milk and chocolate chips has made it accessible to home cooks without a candy thermometer. This recipe brings those two separate dessert traditions together, layering a no-bake cookie dough over an easy stovetop fudge, so each half gets to be exactly what it’s known for rather than compromising into something in between.
Serving Suggestions
A tall glass of cold milk is the classic pairing for these squares, since the rich, dense combination of dough and fudge practically calls for something to balance it. For a dessert platter, arrange the squares alongside a small bowl of extra mini chocolate chips or a few whole cookies for a cohesive, cookie-dough-themed spread. Because these squares are quite rich, cutting them smaller than a standard bar and serving them alongside a scoop of vanilla ice cream turns a single square into a more substantial plated dessert. They also hold up well at room temperature for a short stretch, making them a good candidate for a dessert table at a party where food sits out over the course of an afternoon or evening.
Choosing the Right Butter and Sugar
Unsalted butter gives you full control over the salt level in the dough layer, which matters since the fudge layer on top already carries plenty of sweetness on its own. If you only have salted butter on hand, it will still work fine; just consider skipping any additional salt the recipe might otherwise call for. Brown sugar, rather than white, is what gives the cookie dough layer its deeper, slightly caramelized flavor and softer texture, since the molasses in brown sugar adds both moisture and flavor that white sugar can’t replicate. Light and dark brown sugar both work here, with dark brown sugar producing a slightly richer, more molasses-forward flavor in the finished dough.
Common Questions
Is it safe to eat the cookie dough layer raw?
Yes, as long as the flour has been properly heat-treated as described in step one and no eggs are used, which this recipe avoids entirely.
Can I use a different type of chocolate for the fudge layer?
Yes, milk chocolate chips will make a sweeter, softer-set fudge, while dark chocolate chips will make a firmer, less sweet fudge layer.
Can I freeze these squares?
Yes, wrap individual squares or layer them with parchment in an airtight, freezer-safe container, then thaw in the refrigerator before serving.
Why is my fudge layer too soft?
This usually means the pan needs more chilling time. Give it the full 3 hours, or longer if your refrigerator runs warm.
Do I have to heat-treat the flour?
Yes, this step is important for food safety, since the cookie dough layer isn’t baked and raw flour can carry bacteria that heat-treating eliminates.
Can I add nuts or other mix-ins to the dough?
Yes, chopped nuts or extra chocolate chips can be added to the dough layer. Keep in mind this will change the exact calorie count per square.
How do I get clean slices?
Make sure the squares are completely chilled and firm before cutting, and use a sharp knife wiped clean, or warmed under running water, between each cut.
Chocolate Chip Cookie Dough Fudge Squares bring together two of the most-loved treats in home baking into one rich, layered bar. Heat-treat, beat, press, melt, pour, and chill — that’s the entire process, and the result is a dense, chocolatey square with a soft cookie dough top and a fudgy chocolate base that’s worth the wait for the fudge to set, and worth making again the next time two desserts sound better than one.