
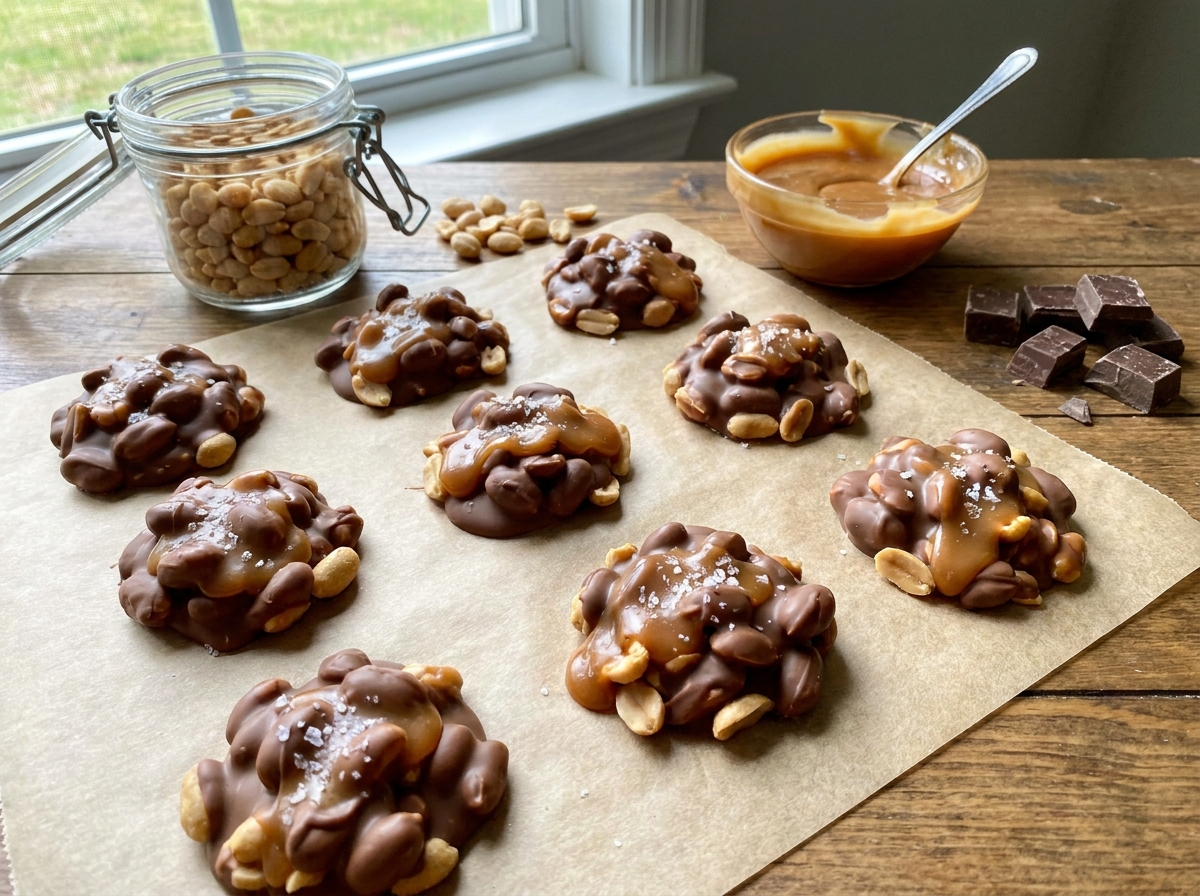
Homemade Snickers Clusters
Melted chocolate, soft caramel, and roasted peanuts layered into clusters and chilled until set — all the flavor of the classic candy bar in an easy, no-bake bite.
Thank you for reading this post, don't forget to subscribe!
These Homemade Snickers Clusters layer melted chocolate, soft caramel, and roasted salted peanuts into a bite-sized treat that tastes remarkably close to the classic candy bar, without any candy thermometer or nougat-making involved. Built up in layers on a parchment-lined tray and chilled until set, these clusters capture the same chocolate, caramel, and peanut combination that makes the original candy bar so popular.
There’s no nougat to make from scratch here, which is normally the most involved part of a homemade candy bar recipe. Instead, this version leans on soft caramel candies, melted down with a little heavy cream, to recreate that same gooey, chewy layer, while roasted salted peanuts provide the crunch and the salty contrast against all that sweetness.
Because everything comes together with just a double boiler-style microwave melt and a bit of assembly, this is one of the more approachable homemade candy recipes for someone who’s never made candy from scratch before.
Why This Recipe Works
A classic candy bar depends on several distinct components, nougat, caramel, peanuts, and a chocolate coating, each requiring its own cooking process to get right. This recipe simplifies that considerably by skipping the nougat layer entirely and building each cluster around just three key elements: a chocolate base, a caramel and peanut middle, and a chocolate topping. Using soft caramel candies rather than making caramel from scratch removes the trickiest and most temperature-sensitive step in candy making, since these candies melt down predictably with a bit of added cream, rather than requiring precise sugar-cooking temperatures.
Layering the components rather than trying to mix them all together also matters here, since it lets each element, the crisp chocolate base, the chewy caramel, and the crunchy peanuts, stay distinct in the finished cluster, echoing the layered structure of the original candy bar rather than blending into one uniform texture.
Why Soft Caramel Candies Work So Well Here
Soft caramel candies are already fully cooked and stabilized, which means they melt down into a smooth, pourable caramel with just a bit of added heavy cream to loosen them, without any of the risk of burning or crystallizing that comes with cooking caramel from raw sugar. This makes them a reliable shortcut for getting that classic chewy caramel layer without needing a candy thermometer or any real candy-making experience.
What You’ll Need
- 2 cups milk chocolate chips
- 1 cup roasted salted peanuts
- 1 cup soft caramel candies
- 2 tablespoons heavy cream
That’s the entire list. Each cluster comes out to roughly 190 calories, and the recipe makes 16 clusters.
A Note on Peanuts and Chocolate
Roasted, salted peanuts give the closest match to the original candy bar’s flavor, with that essential salty contrast against the sweet chocolate and caramel; unsalted peanuts will work, but the flavor will lean sweeter overall without that salty edge. Standard milk chocolate chips melt smoothly and give the classic candy bar flavor, though a mix of milk and dark chocolate can add a slightly less sweet, more balanced finish if you prefer.
Equipment You’ll Need
A microwave-safe bowl is all you need to melt the chocolate, and a small saucepan works well for melting the caramel candies with the heavy cream over low heat. A parchment-lined baking sheet holds the clusters as they’re assembled and chilled, and a spoon helps portion and drizzle each layer.
How to Make It
- Line a tray. Line a baking sheet with parchment paper.
- Melt the chocolate. Melt the chocolate chips in the microwave in 30-second intervals, stirring until completely smooth.
- Form the base. Spoon small circles of melted chocolate onto the parchment.
- Melt the caramel. Melt the caramel candies with the heavy cream in a saucepan over low heat, stirring until smooth.
- Add caramel. Spoon a small amount of caramel over each chocolate circle.
- Add peanuts. Sprinkle roasted peanuts over the caramel.
- Top with chocolate. Spoon or drizzle additional melted chocolate over the top to cover the clusters.
- Chill. Refrigerate for 30–45 minutes, or until completely set.
- Rest and serve. Let sit at room temperature for a few minutes before serving.
Building the Layers in Order
Working in the order given, chocolate base first, then caramel, then peanuts, then a final chocolate layer, ensures each cluster holds together well once chilled. Starting with a solid chocolate circle gives the caramel and peanuts something firm to sit on, rather than spreading out too thin across the parchment paper.

Getting the Caramel Layer Right
Melting the caramel candies with the heavy cream over low heat, stirring frequently, keeps the mixture from scorching on the bottom of the pan and helps it come together into a smooth, pourable sauce rather than staying lumpy. If the caramel seems too thick even after melting, a small extra splash of cream loosens it up without changing the flavor much.
Knowing When They’re Ready
The clusters are ready once the chocolate coating feels completely firm to the touch, both on top and underneath. Press one gently at the edge; if the chocolate still feels soft, give the batch another 10 to 15 minutes in the refrigerator. A fully and properly set cluster should lift cleanly and easily off the parchment paper without sticking or tearing.
Tips for Perfect Homemade Snickers Clusters
Work quickly once the caramel is melted, since it firms up as it cools, and have all your ingredients measured and ready before you start assembling. Give the clusters the full chill time before serving, and let them sit at room temperature for a few minutes afterward so the caramel isn’t too firm to bite into comfortably.
Troubleshooting Common Issues
My caramel was too thick to spoon easily. Add an extra splash of heavy cream while it’s still warm on the stove to loosen it up.
My chocolate seized while melting. This usually happens from overheating or a stray drop of moisture; use shorter microwave intervals and make sure your bowl is completely dry.
My clusters stuck to the parchment. Make sure the clusters are fully chilled before trying to lift them; a still-soft cluster is much more likely to stick.
My caramel layer slid around instead of staying put. Letting the chocolate base firm up slightly before adding the caramel gives it a more stable surface to sit on.

A Few Ways to Make It Yours
Sea Salt Finish
Sprinkle a pinch of flaky sea salt over the top before chilling for a sweet-and-salty contrast.
Dark Chocolate Version
Use dark chocolate instead of milk chocolate for a richer, less sweet cluster.
Cashew Swap
Use roasted cashews in place of peanuts for a different but equally rich nutty flavor.
Extra Caramel Drizzle
Reserve a bit of extra caramel to drizzle over the finished, chilled clusters for a more dramatic look.
The classic peanut and milk chocolate version is worth trying first so you know the baseline flavor before adding any extras.
How to Store Homemade Snickers Clusters
Store the clusters in an airtight container in the refrigerator for up to two weeks, since the caramel layer stays chewiest when kept cold. They also freeze well; place them in a freezer-safe container with parchment between layers and thaw in the refrigerator before serving.
When to Serve These Clusters
These clusters work well as a homemade candy for a holiday gathering, a bake sale, or a homemade gift, since they hold their shape and flavor well for weeks in the refrigerator. Their small, bite-sized format also makes them an easy addition to a candy or dessert tray alongside other homemade treats.
Nutrition and Serving Information
The recipe estimates approximately 190 calories per cluster when the batch is divided into 16 pieces, based on standard milk chocolate chips, roasted peanuts, and soft caramel candies. This is only an estimate, since exact calorie and fat content will vary depending on the specific brands used. This recipe contains peanuts and dairy, so check labels carefully if you’re serving guests with either of those allergies.
Make-Ahead Tips
These clusters keep well for two weeks or more, making them an excellent make-ahead treat for a holiday gathering or homemade gift. Make the full batch several days ahead and store in an airtight container, since the flavors settle nicely with a bit of time in the refrigerator.
The Science Behind a No-Cook Caramel Layer
Soft caramel candies are made from sugar that’s already been cooked to the right stage and combined with milk fat and stabilizers, which is what gives them their chewy, pliable texture at room temperature. Gently remelting them with a bit of added cream loosens that structure just enough to make the mixture pourable again, without needing to cook raw sugar to a specific temperature the way a from-scratch caramel would require. This is what allows this recipe to recreate a convincing caramel layer using nothing more than a saucepan and low heat, sidestepping the crystallization risks that make homemade caramel notoriously tricky for first-time candy makers.
Portioning and Yield
This recipe makes about 16 clusters from 2 cups of chocolate chips, a cup each of peanuts and caramel candies, and 2 tablespoons of cream, a good amount for a party or a couple of weeks of treats. If you’d like smaller clusters, using less chocolate and caramel per portion will stretch the batch to 20 or more, while larger portions bring the yield down closer to 12 for a more substantial candy bar-sized bite. The recipe doubles cleanly if you’d like a bigger batch for gifting or a larger gathering.
A Little Bit of History
The Snickers candy bar, first introduced in the 1930s, built its lasting popularity on the combination of nougat, caramel, peanuts, and chocolate, a combination that’s remained largely unchanged for decades because the flavor and texture contrast works so well. Homemade versions built around cluster-style assembly, rather than trying to replicate the layered bar shape exactly, have become a popular way for home cooks to capture that same flavor combination without needing to make nougat from scratch, which is by far the most technically demanding part of recreating the original candy bar at home.
Serving Suggestions
Serve these clusters at room temperature or just slightly chilled, since the caramel is at its chewiest and most enjoyable when it’s not too cold. Arranged on a small platter or packaged in a decorative tin, they make a natural addition to a holiday candy tray, and a light sprinkle of flaky sea salt over the top dresses them up nicely for a gathering or gift.
Understanding the Texture
These clusters have a satisfying mix of textures in every bite, a crisp chocolate shell, a soft, chewy caramel layer, and a crunchy handful of roasted peanuts. That contrast is the whole point of the recipe, echoing the layered experience of biting into the original candy bar even though the assembly method here is quite different. Once you know to expect several distinct textures working together rather than one uniform bite, these clusters read as a genuinely well-executed homemade candy rather than an approximation that falls short.
Choosing the Right Peanuts
Roasted, salted peanuts give the closest flavor match to the original candy bar, since that salty edge is an essential part of what makes the sweet chocolate and caramel combination work so well. Dry-roasted peanuts tend to have the cleanest, most pronounced roasted flavor, while oil-roasted peanuts can taste slightly richer and a bit greasier in comparison. Whichever type you choose, avoid raw or unsalted peanuts if possible, since the salt really does make a noticeable difference in balancing out the sweetness of the finished cluster.
Why This Recipe Is a Fun Project to Make With Others
Because the assembly process involves several distinct, hands-on steps, spooning chocolate circles, adding caramel, sprinkling peanuts, and drizzling more chocolate on top, this is a genuinely fun candy recipe to make with a partner, a friend, or older kids who can safely handle the warm, but not scalding, melted chocolate and caramel. Setting up an assembly line, with one person managing the chocolate and another handling the peanuts, speeds up the process considerably and turns what could be a solitary kitchen task into a shared activity, especially useful around the holidays when a bigger batch is often needed for gifting to several people at once.
Adjusting the Caramel-to-Peanut Ratio
If you love the caramel layer and want it to be the star of each cluster, using a slightly more generous spoonful of the melted caramel mixture on each chocolate base, and correspondingly fewer peanuts, shifts the balance toward a chewier, gooier bite. If you prefer more crunch and a less sticky texture, going a little lighter on the caramel and more generous with the peanuts gives a cluster that leans closer to a classic peanut cluster with just a hint of caramel running through it. Both directions use the same basic method, so it’s worth experimenting with the ratio on your first batch to find the balance you and your family enjoy most.
Working With Melted Caramel Safely
Melted caramel holds heat for a surprisingly long time and can cause a nasty burn if it comes into contact with skin, so it’s worth taking a moment of extra care when spooning it over the chocolate bases, especially if kids are helping with other parts of the process. Letting the caramel cool for a minute or two off the heat before spooning it out reduces this risk somewhat while still keeping it fluid enough to pour and spread easily over each cluster. Keeping a damp cloth nearby for quick cleanup also helps, since a few stray drips are almost inevitable with a recipe that involves this much spooning and drizzling of warm, sticky ingredients.
Pairing These Clusters With Drinks and Other Treats
A cold glass of milk is a truly natural pairing for these rich, candy-bar-inspired clusters, since the sweetness and density of the chocolate and caramel practically call for something cold to cut through them. Coffee also works surprisingly well, especially a slightly bitter cup that balances the sweetness nicely without competing with the peanut and caramel flavors. If you’re putting together a larger holiday candy or dessert tray, these clusters pair naturally alongside other homemade candies like fudge or bark, since they all share a similar no-bake, chocolate-forward profile and hold up well sitting out at a party for a couple of hours.
A Note on Ingredient Proportions
The ratio of 2 cups of chocolate to a cup each of peanuts and caramel candies, loosened with 2 tablespoons of cream, was balanced to give each cluster a satisfying amount of every component without any one element overwhelming the others. Using significantly more caramel than called for can make the clusters too soft and sticky to hold their shape well once chilled, while using extra chocolate without adjusting the other ingredients will dilute the caramel and peanut flavor that makes these taste like the classic candy bar in the first place. Sticking close to the ratio given here on a first batch is the most reliable way to get a feel for how the layers should look and behave before adjusting anything.
A Note on Serving Temperature
These clusters taste noticeably different depending on the temperature at which they’re served, since the caramel layer firms up considerably in the cold and softens back into a chewier texture as it warms. Straight from the refrigerator, the caramel is firmer and the whole cluster is a bit easier to handle without getting sticky, while letting them sit at room temperature for several minutes beforehand brings back more of that classic gooey, pull-apart caramel texture people expect from the original candy bar. Trying them both ways on your first batch is a simple way to decide which temperature you and your family prefer before settling into a routine for future batches.
Common Questions
Can I use chocolate bark instead of chocolate chips?
Yes, melting wafers or bark work well and can sometimes melt even more smoothly than standard chocolate chips.
Why did my caramel seize or turn grainy?
This can happen if the heat was too high; melt it over low heat and stir frequently for the smoothest result.
Can I use unsalted peanuts?
Yes, though the flavor will lean sweeter overall without the salty contrast the salted variety provides.
Can I freeze these clusters?
Yes, freeze them in a freezer-safe container with parchment between layers and thaw in the refrigerator before serving.
How long do these clusters keep?
Store them in an airtight container in the refrigerator for up to two weeks.
Can I double this recipe?
Yes, this recipe doubles cleanly using the same ratios for a bigger batch.
What if my caramel layer is too thick to spoon?
Add an extra splash of heavy cream while it’s still warm on the stove to loosen it up before assembling.
Homemade Snickers Clusters turn melted chocolate, soft caramel, and roasted peanuts into a bite-sized candy with all the flavor of the classic bar. Melt, layer, chill, and rest — that’s the entire process, and the result is a genuinely chewy, crunchy, richly chocolatey treat that’s ready in about an hour, with no candy thermometer and no nougat-making required at any point.