
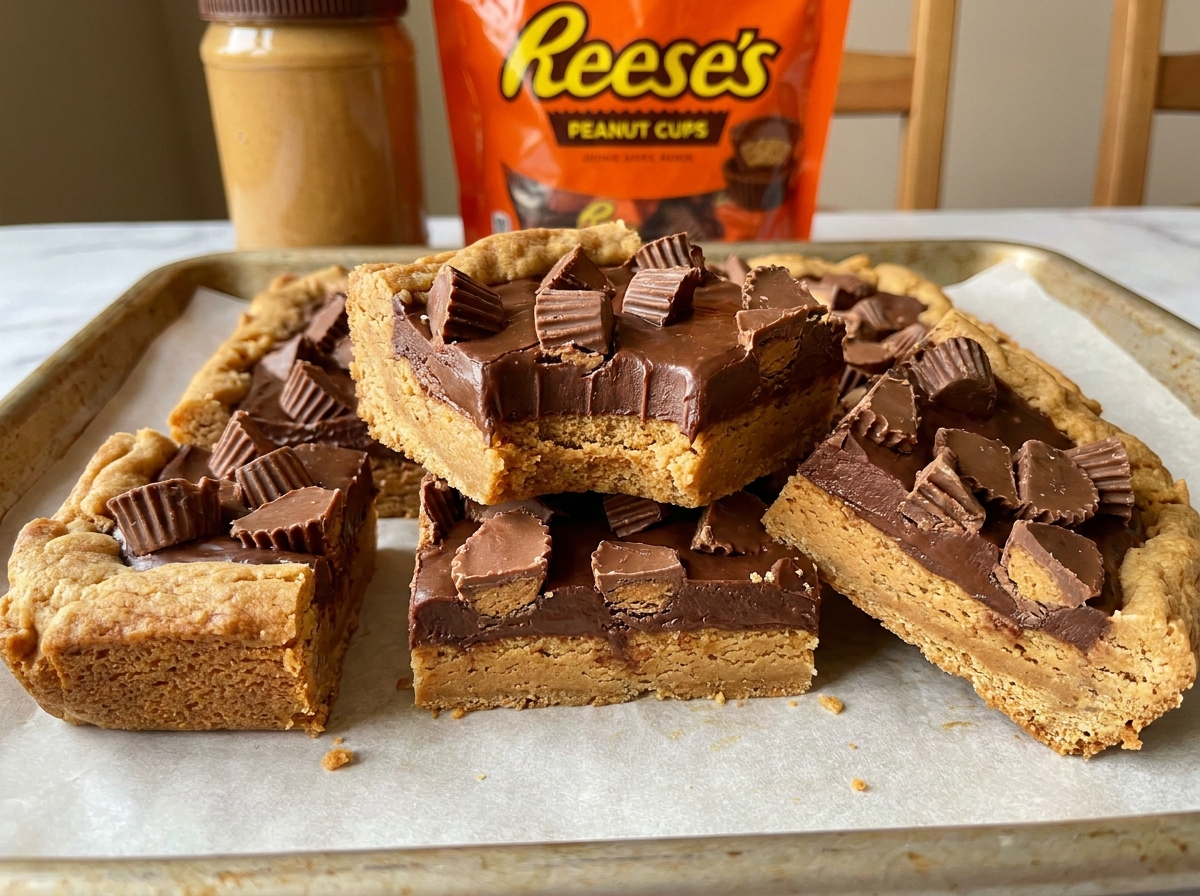
3-Ingredient Peanut Butter Reese’s Fudge Cookie Bars
Refrigerated peanut butter cookie dough layered with peanut butter and studded with Reese’s Pieces — a rich, chewy bar with almost no prep work at all.
Thank you for reading this post, don't forget to subscribe!
These 3-Ingredient Peanut Butter Reese’s Fudge Cookie Bars turn a tub of refrigerated peanut butter cookie dough, a jar of peanut butter, and a bag of Reese’s Pieces into a rich, chewy bar with almost no measuring or mixing involved. Pressed into a pan in layers and baked until golden, these bars taste like a from-scratch peanut butter dessert despite leaning almost entirely on convenient shortcuts.
There’s no creaming butter and sugar, no separate cookie dough to make, and no complicated layering technique. Refrigerated cookie dough handles both the base and the crumbled top layer, while a straightforward peanut butter layer in the middle gives these bars their signature rich, fudgy center.
Because everything comes together with a bit of pressing and crumbling rather than any real baking technique, this is one of the most approachable bar recipes for a beginner or for anyone short on time.
Why This Recipe Works
Refrigerated peanut butter cookie dough is already perfectly balanced in fat, sugar, and flour, which means it presses into an even base layer and bakes up reliably golden without any of the guesswork of a from-scratch dough. Using two-thirds of the dough for the bottom layer and crumbling the rest over the top creates a cookie bar structure with almost no extra effort, echoing a classic streusel-topped bar without needing a separate streusel mixture.
Spreading a full cup of peanut butter directly over the base layer, rather than mixing it into the dough, creates a distinct, fudgy middle layer that sets it apart from an ordinary peanut butter cookie bar. As the bars bake, that peanut butter layer softens and melts slightly into the surrounding dough, giving the finished bars a rich, almost fudge-like center.
Why Crumbling the Top Layer Matters
Crumbling the remaining third of the dough over the peanut butter layer, rather than pressing it into a solid sheet, creates small gaps that let the peanut butter layer peek through as the bars bake. This also gives the top a more rustic, textured look, similar to a classic crumb bar, and helps the Reese’s Pieces settle into the surface rather than sliding off a completely smooth top layer.
What You’ll Need
- 1 package (16.5 oz) refrigerated peanut butter cookie dough
- 1 cup creamy peanut butter
- 1½ cups Reese’s Pieces, divided
That’s the entire list. Each bar comes out to roughly 310 calories, and the recipe makes 16 bars.
A Note on Cookie Dough and Peanut Butter
A standard tub of refrigerated peanut butter cookie dough gives the most reliable base and topping texture; if peanut butter cookie dough isn’t available, a sugar cookie dough works as a substitute, though the peanut butter flavor will be a bit less pronounced throughout. Standard creamy peanut butter spreads most evenly over the base layer; a natural peanut butter will work too, but its looser consistency can make it harder to spread in an even layer.
Equipment You’ll Need
An 8×8-inch baking pan lined with parchment paper is all you need to bake these bars, and a spatula or the back of a measuring cup helps press the dough into an even layer. A butter knife or offset spatula makes spreading the peanut butter layer easier, and your hands are the best tool for crumbling the remaining dough over the top.
How to Make It
- Preheat and prep. Preheat oven to 350°F. Line an 8×8-inch baking pan with parchment paper.
- Press the base. Press about two-thirds of the cookie dough evenly into the bottom of the prepared pan.
- Add peanut butter. Spread the peanut butter evenly over the cookie dough.
- Crumble the top. Crumble the remaining cookie dough over the peanut butter layer.
- Add Reese’s Pieces. Sprinkle Reese’s Pieces evenly over the top and gently press them into the dough.
- Bake. Bake for 25–30 minutes, or until the edges look golden brown and the center is fully set.
- Cool. Allow the bars to cool completely before slicing into squares.
Getting an Even Base Layer
Pressing the base layer evenly into every corner of the pan, rather than leaving it thicker in the middle, helps the bars bake through at the same rate across the whole pan. Lightly wetting your fingers or the back of a spatula keeps the dough from sticking as you press it into an even layer from edge to edge.

Spreading the Peanut Butter Layer
Warming the peanut butter slightly, either by microwaving it for 15 to 20 seconds or simply using a room-temperature jar, makes it noticeably easier to spread in an even layer without dragging up the cookie dough underneath. Working from the center outward with an offset spatula or the back of a spoon helps distribute it evenly all the way to the edges of the pan.
Knowing When They’re Done
Look for edges that are visibly golden brown and pulling slightly away from the sides of the pan, with a center that looks set rather than wet or glossy. Because there’s a peanut butter layer in the middle, a toothpick test isn’t especially useful here; the visual cues of golden edges and a set-looking center are more reliable indicators of doneness.
Tips for Perfect Reese’s Fudge Cookie Bars
Let the cookie dough soften slightly at room temperature before pressing it into the pan, and spread the peanut butter layer evenly for a consistent fudgy center throughout. Let the bars cool fully and completely before slicing, since they’re much more likely to fall apart or smear messily if cut while still warm.
Troubleshooting Common Issues
My bars fell apart when I sliced them. This usually means they weren’t given enough time to cool. Let them cool completely, or even chill briefly, before slicing for the cleanest bars.
My base layer baked unevenly. This can happen if the dough wasn’t pressed into an even layer. Take an extra minute to press it flat and level from edge to edge before adding the peanut butter.
My peanut butter layer looked separated after baking. This is normal and mostly cosmetic; the peanut butter softens and can look slightly oily right out of the oven, but firms back up as the bars cool.
My Reese’s Pieces sank into the dough. Pressing them in gently rather than firmly, and adding them right before baking, helps them stay closer to the surface.

A Few Ways to Make It Yours
Chocolate Drizzle
Drizzle melted chocolate over the cooled bars for an extra layer of flavor and a more finished look.
Chopped Peanut Butter Cups
Swap some or all of the Reese’s Pieces for chopped peanut butter cups for bigger pockets of chocolate and peanut butter.
Sea Salt Finish
Sprinkle a pinch of flaky sea salt over the top before baking for a sweet-and-salty contrast.
Extra Peanut Butter Swirl
Drizzle a bit of warmed peanut butter over the crumbled top layer before baking for extra richness.
The classic version made with just the three listed ingredients is worth trying first so you know the baseline flavor before adding any extras.
How to Store Reese’s Fudge Cookie Bars
Store the bars in an airtight container at room temperature for up to 5 days, or in the refrigerator for up to 10 days if you’d like them to keep longer. They also freeze well; place them in a freezer-safe container with parchment between layers and thaw at room temperature before serving.
When to Serve These Bars
These bars work well as an after-school treat, a lunchbox addition, or a simple dessert for a weeknight, since their short ingredient list makes them realistic to pull together even on a busy day. They’re also a good option for a bake sale or potluck, since they travel well and don’t require any special serving equipment.
Nutrition and Serving Information
The recipe estimates approximately 310 calories per bar when the batch is divided into 16 pieces, based on standard refrigerated cookie dough, peanut butter, and Reese’s Pieces. This is only an estimate, since exact calorie and fat content will vary depending on the specific brands used. This recipe contains peanuts, gluten, and dairy, so check labels carefully if you’re serving guests with any of those allergies.
Make-Ahead Tips
These bars keep well for nearly a week at room temperature, making them a convenient make-ahead treat for a busy week or an upcoming gathering. Bake the full batch a day or two ahead and store in an airtight container, since the flavor and texture hold up nicely with a bit of time to rest.
The Science Behind the Fudgy Center
Peanut butter is roughly half fat by weight, and that fat doesn’t fully absorb into the surrounding cookie dough during the relatively short bake time these bars need. Instead, it stays as a distinct, softened layer sandwiched between the base and crumbled top, giving the middle of each bar a dense, fudgy quality that a standard peanut butter cookie, with the peanut butter mixed directly into the dough, wouldn’t have. This layered approach is really what separates a cookie bar like this one from an ordinary batch of cookies made from the same dough.
Portioning and Yield
This recipe makes about 16 bars from one package of cookie dough, a cup of peanut butter, and a cup and a half of Reese’s Pieces, a good amount for a family or a small gathering. If you’d like smaller portions, cutting the pan into 20 or 25 pieces stretches the batch further for a crowd, while cutting it into 9 larger squares makes a more substantial dessert portion. The recipe doubles cleanly in a 9×13-inch pan if you’d like a bigger batch.
A Little Bit of History
Cookie bars built around convenient, pre-made cookie dough became a popular shortcut in home baking as refrigerated dough products grew more widely available, letting home bakers skip the mixing and creaming steps while still ending up with a homemade-tasting result. Layering in a filling, whether that’s peanut butter, jam, or a chocolate spread, between two layers of dough is a technique borrowed from classic crumb bars, adapted here around the specific combination of peanut butter and chocolate candy that Reese’s built its reputation on.
Serving Suggestions
Serve these bars slightly warm with a scoop of vanilla ice cream for an easy, crowd-pleasing dessert that plays up the contrast between the warm cookie bar and the cold ice cream. Arranged on a platter at room temperature, they also work well for a party or bake sale table, and a drizzle of melted chocolate over the top adds a more finished look if you’re serving them for a special occasion.
Understanding the Texture
These bars have a chewy, cookie-like base and top with a noticeably softer, fudgier layer running through the middle, closer to a peanut butter blondie with a filling than to a uniform cookie bar. That contrast is a direct result of the peanut butter layer staying distinct rather than blending into the dough, so don’t be surprised if the very center of each bar feels softer and richer than the edges. Once you know to expect that layered texture, these read as a well-executed treat rather than a bar that didn’t bake evenly.
Choosing the Right Cookie Dough
A dedicated peanut butter cookie dough gives the most pronounced peanut butter flavor throughout the bars, layering nicely with the peanut butter filling in the middle. A standard sugar cookie dough works as a substitute if peanut butter dough isn’t available, though the overall flavor will lean a bit more toward the peanut butter filling and Reese’s Pieces and less toward the dough itself. Whichever dough you use, letting it soften slightly at room temperature before working with it makes both pressing and crumbling considerably easier.
Why This Recipe Is a Good Weeknight Baking Project
Because two of the three ingredients here, the cookie dough and the Reese’s Pieces, are already fully prepared, this recipe skips nearly every time-consuming step a from-scratch cookie bar would normally require: no creaming butter and sugar, no measuring out flour and leavening, and no waiting for butter to soften before starting. That leaves pressing, spreading, and crumbling as the only real hands-on work, which is realistic to knock out in about ten minutes even on a weeknight when a homemade dessert would otherwise feel out of reach. The bake time itself needs no attention beyond a timer, making this an easy project to start right after dinner and have ready to slice within the hour.
Adjusting the Peanut Butter Layer to Your Taste
If you’d like an even richer, more pronounced peanut butter flavor running through the center, spreading a slightly thicker layer than the standard cup called for here intensifies that fudgy middle section, though it may need a few extra minutes of bake time to fully set. For a lighter touch where the cookie dough and Reese’s Pieces take center stage instead, using a slightly thinner layer, closer to three-quarters of a cup, still gives a distinct middle layer without it dominating the overall flavor. Either direction uses the same basic method, so it’s worth experimenting on a first batch to find the balance that suits your own taste.
Working With Different Candy Add-Ins
While Reese’s Pieces are the classic choice here, thanks to their crunchy candy shell that holds its shape well through baking, this recipe is flexible enough to work with other candies if you’d like to switch things up. M&M’s provide a similar crunchy shell and colorful appearance, though the flavor leans more toward straightforward milk chocolate rather than the peanut butter notes Reese’s Pieces bring. Chopped peanut butter cups melt more into the surrounding dough as they bake, creating warm, gooey pockets rather than the more distinct, intact pieces that Reese’s Pieces retain, so the choice really comes down to whether you want a melted, integrated candy layer or one with more texture and definition.
Pairing These Bars With Drinks and Other Desserts
A cold glass of milk is the classic pairing for anything peanut butter and chocolate flavored, and these bars are no exception, since their rich, dense texture practically calls for something cold to balance it out. Coffee also works nicely alongside them, particularly a slightly bitter cup, since it plays well against the sweetness of the cookie dough and candy. If you’re building out a larger dessert table, these bars pair naturally alongside other bar-style desserts like brownies or blondies, since they all share a similar format and none of them require special serving equipment.
A Note on Serving Temperature
These bars taste slightly different depending on when you serve them relative to baking. Warm from the oven, the peanut butter layer is at its softest and most fudgy, closer to a spoonable filling than a set layer, which some people love for the extra gooeyness. Once fully cooled, the peanut butter firms back up and the bars hold together more neatly for slicing and handling, making cooled bars the better choice for packing into a lunchbox or serving at a gathering where clean slices matter. Trying both ways on a first batch is a simple way to decide which you and your family prefer.
A Note on Ingredient Proportions
The one-package-to-one-cup ratio of cookie dough to peanut butter was balanced specifically to leave enough dough for both a solid base and a properly crumbled top layer while still giving the peanut butter room to form a distinct, fudgy middle. Using significantly more peanut butter than called for can leave the center too loose to hold together well once sliced, while using less dough than a full package may leave gaps in the base or top layer where the peanut butter can seep through unevenly during baking.
Common Questions
Can I use a different cookie dough?
Yes, a sugar cookie dough works as a substitute if peanut butter cookie dough isn’t available.
Why did my bars fall apart when sliced?
They likely needed more time to cool. Let them cool completely, or chill briefly, before slicing for the cleanest bars.
Can I use chunky peanut butter?
Yes, though it will be a bit harder to spread evenly than a creamy peanut butter.
Can I freeze these bars?
Yes, freeze them in a freezer-safe container with parchment between layers and thaw at room temperature before serving.
Can I substitute chopped peanut butter cups for the Reese’s Pieces?
Yes, chopped peanut butter cups work well and add bigger pockets of chocolate and peanut butter.
How long do these bars keep?
Store them in an airtight container at room temperature for up to 5 days, or in the refrigerator for up to 10 days.
Can I double this recipe?
Yes, this recipe doubles cleanly in a 9×13-inch pan using two packages of cookie dough.
3-Ingredient Peanut Butter Reese’s Fudge Cookie Bars turn a tub of cookie dough, a jar of peanut butter, and a bag of candy into a rich, chewy bar with a fudgy center. Press, spread, crumble, and bake carefully — that’s the entire process, and the result is a genuinely satisfying, rich treat that’s ready in about 40 minutes with almost no real prep work involved at all.