
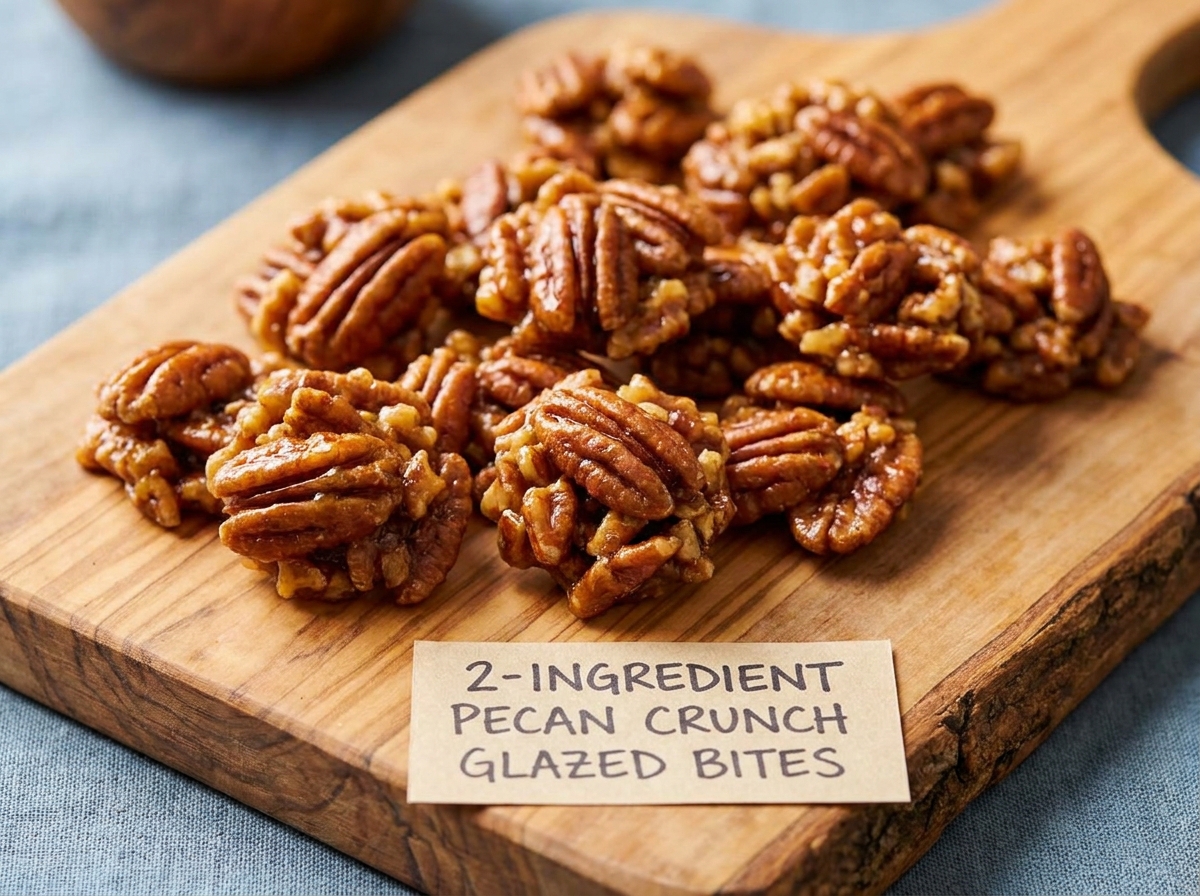
2-Ingredient Pecan Crunch Glazed Bites
Crunchy pecan halves and a sweet caramel candy glaze come together into an irresistible bite-sized treat.
Thank you for reading this post, don't forget to subscribe!
These 2-Ingredient Pecan Crunch Glazed Bites turn a bag of pecan halves and a bit of caramel-flavored melting candy into an irresistible, crunchy bite-sized treat. Melting the candy coating and folding in the pecans is the entire process, no oven, no candy thermometer, and no cooked sugar syrup to manage.
The melted candy coating clings to every pecan half, setting up into a thin, glossy shell that holds each cluster together once chilled, while the pecans themselves keep all of their natural crunch and toasty flavor. The result tastes like a simplified version of a classic pecan praline cluster.
It’s an easy treat to pull together for a holiday tray, a party, or just an afternoon when a sweet, crunchy snack sounds good, and it comes together with almost no active effort beyond melting and stirring.
Why This Recipe Works
Caramel-flavored melting candy is formulated to melt smoothly and set back up predictably, giving these bites their glossy, glazed shell without needing a candy thermometer or a cooked sugar syrup. Because the candy coating is thin relative to the amount of pecans folded in, it acts more like a glaze holding the cluster together than a thick candy shell, which is what keeps the pecans’ own crunch as the star of the bite.
Dropping the coated pecans in small spoonfuls, rather than pressing them into a pan, gives each bite its own irregular, cluster-like shape, which is part of what makes these feel more like a candy shop treat than a sliced bar.
Why Full Coating Matters
Stirring the pecans gently but thoroughly through the melted candy coating, so every piece gets coated rather than just the top layer, is what gives each bite an even glaze all the way through once it sets. A quick, light stir tends to leave some pecans under-coated and dull rather than glossy.
What You’ll Need
- 2 cups pecan halves
- 1 cup vanilla or caramel-flavored melting candy
That’s the entire list. This recipe makes about 18 bite-sized clusters.
A Note on Ingredient Choices
Whole pecan halves give the prettiest cluster shape once coated and dropped onto the baking sheet; roughly chopped pecans work too for a more rustic, crumbly bite. Caramel-flavored melting candy gives a deeper, richer flavor than a plain vanilla coating, though both set up the same way.
Equipment You’ll Need
A baking sheet lined with parchment paper, a microwave-safe bowl or small saucepan for melting, and a spoon for stirring and dropping are all you need; no oven, mixer, or candy thermometer required.
How to Make It
- Line the sheet. Line a baking sheet with parchment paper.
- Melt. Melt the candy coating according to the package directions, stirring until completely smooth.
- Coat. Add the pecans and gently stir until fully coated.
- Drop. Drop small spoonfuls of the mixture onto the prepared baking sheet.
- Chill. Refrigerate for 20–30 minutes, or until the coating is completely set.
- Serve. Serve chilled or at room temperature.
Getting an Even Drop
Using a small spoon or a cookie scoop to portion out roughly equal amounts of the coated pecan mixture helps the bites set into a similar size, which matters most if you’re serving them on a tray where consistency in size looks more polished.

Getting an Even Melt
Melting the candy coating in short 20 to 30 second bursts in the microwave, stirring between each one, helps keep it from overheating and turning clumpy. Following the package directions closely for melting time and technique gives the most reliable, smooth result.
Knowing When It’s Done
These bites are ready to serve once the coating feels firm and matte-glossy to the touch, with no stickiness when lightly pressed. If the coating still feels tacky after 30 minutes, give the tray another 10 to 15 minutes in the refrigerator.
Tips for Perfect Glazed Bites
Stir the pecans into the melted coating gently but thoroughly, making sure every piece gets covered rather than just the top layer. Drop the spoonfuls onto the parchment paper right away, since the mixture becomes harder to portion neatly the longer it sits and cools.
Troubleshooting Common Issues
My candy coating seized while melting. This usually happens from overheating or a drop of water getting into the bowl; melt more slowly in shorter bursts next time. My bites are sticky rather than firm. They likely need more time in the refrigerator to fully set. My clusters fell apart when I picked them up. The coating may not have covered the pecans evenly; stir a bit longer next time so every piece is coated. My coating looks dull rather than glossy. This can happen if the coating overheated slightly; melt gently and avoid letting it get too hot.

A Few Ways to Make It Yours
Sea Salt Finish
A light sprinkle of flaky sea salt over the top right after dropping the clusters adds a nice contrast to the sweetness.
Cinnamon Spice
A pinch of ground cinnamon stirred into the melted coating adds a warm, spiced note that pairs well with pecans.
Chocolate Drizzle
A drizzle of melted chocolate over the set clusters adds a decorative touch and a rich, contrasting flavor.
Mixed Nuts
Swap in a mix of pecans and walnuts for a slightly different flavor and texture in every bite.
The plain version is worth trying first so you know the baseline flavor before adding any extras.
How to Store Pecan Crunch Bites
Store the bites in an airtight container at room temperature for up to a week, or in the refrigerator for a longer shelf life. Keeping them in a single layer, or with parchment between layers, helps prevent the clusters from sticking together.
When to Serve These Bites
These bites are an easy addition to a holiday cookie tray, a simple homemade gift, or a quick sweet snack to keep on hand for guests. Their bite-sized shape also makes them an easy, low-mess option for a party or a potluck dessert table.
Nutrition and Serving Information
The recipe estimates approximately 110 calories per bite when the batch is divided into 18 pieces, based on standard measurements for pecans and melting candy. This is only an estimate, since exact calorie and fat content will vary depending on the specific brands used. Because this recipe is built around pecans, it isn’t appropriate for anyone with tree nut sensitivities.
Make-Ahead Tips
These bites can be made several days ahead and stored in an airtight container, making them a convenient make-ahead treat for a holiday tray or a gathering. Because they need only a short chill to set, they’re also easy to make the same day if time is tight.
The Science Behind a Two-Ingredient Glazed Bite
Melting candy coatings are formulated with stabilized fats that melt smoothly at a low temperature and re-solidify predictably once cooled, which is why they set up glossy and firm without the finicky sugar chemistry of a traditional cooked praline. Because the coating is thin relative to the volume of pecans, it sets as a glaze around the nuts rather than a thick shell, letting the pecans’ own crunch and toasty flavor come through clearly in every bite.
Portioning and Yield
This recipe makes about 18 bite-sized clusters from 2 cups of pecans, a good amount for a holiday tray or a homemade gift bag. Doubling both ingredients works well for a larger batch, especially if you’re making these for a party or to give away.
A Little Bit of History
Candied and glazed pecan clusters have long been a Southern confectionery tradition, with classic pecan pralines cooked from sugar, butter, and cream into a soft, candied coating over toasted pecans. This shortcut version borrows that same beloved pecan-and-sweet-glaze pairing, using a melting candy coating to skip the traditional candy-thermometer process entirely.
Serving Suggestions
Serve these bites at room temperature for the best balance of crunch and glaze, or slightly chilled if you prefer a firmer coating. Piled into a small bowl or arranged on a platter, they make an easy, elegant addition to a holiday dessert spread.
Choosing the Right Candy Coating
A caramel-flavored melting candy gives the richest, most praline-like flavor here. A plain vanilla-flavored coating works just as well structurally and gives a lighter, sweeter flavor if you’d prefer something less deep than caramel.
Why This Recipe Is So Beginner-Friendly
If you’ve never made homemade candy before, this is about as forgiving a place to start as you’ll find. There’s no candy thermometer to watch, no risk of a sugar syrup crystallizing at the wrong moment, and no delicate technique required beyond melting one ingredient and stirring in another. With only two ingredients and a handful of simple steps, there’s very little room for the kind of mistakes that can derail a more involved candy recipe. This makes it a genuinely approachable recipe for a first-time candy maker or a child who wants to help with the stirring and dropping step, since the process is simple, safe, and produces a real, visible result within under an hour.
Adjusting the Flavor to Your Taste
As written, these bites get their flavor from the caramel or vanilla candy coating paired with toasty pecans. If you’d like a warmer, more spiced flavor, a pinch of ground cinnamon or a touch of vanilla extract stirred into the melted coating deepens the flavor nicely. A pinch of flaky salt sprinkled over the clusters right after dropping can also sharpen the sweetness. Because this recipe has so few ingredients to begin with, small additions tend to have a noticeable effect on the final flavor, so it’s worth trying the plain version first before deciding what, if anything, you’d like to add.
Pairing These Bites With Other Desserts and Drinks
Because the flavor here is rich, toasty, and distinctly caramel, these bites pair naturally with lighter, brighter options if you’re serving more than one treat on a holiday tray. A simple fruit-based candy or a citrus cookie cuts through the richness nicely, while another caramel or chocolate treat leans further into the same indulgent direction. On the drink side, these bites pair especially well with coffee or a warm mug of spiced cider.
A Note on Ingredient Proportions
The two cups of pecans to one cup of melting candy ratio in this recipe was chosen carefully, and it’s worth understanding why before making adjustments. This balance gives enough coating to bind the pecans into clusters and set with a glossy shine, while keeping the pecans as the dominant texture and flavor rather than drowning them in candy coating. Using significantly more candy relative to the pecans can make the bites taste more like plain candy than a pecan treat, while using less can leave the clusters too loose to hold together. This particular ratio is what gives the bites their balanced texture, so it’s worth treating the stated proportions as a tested baseline.
A Quick Note on Serving Temperature
These bites are good served at room temperature, where the coating is at its glossiest and the pecans taste their most toasty, or chilled for a firmer, snappier bite. Both temperatures work well, which is part of what makes this such a flexible treat to keep on a dessert table.
Why This Recipe Is Naturally Kid-Friendly to Make
Because this recipe involves melting one ingredient and stirring in another, it’s a genuinely simple treat to make with kids, provided an adult handles the melting step on the stovetop or microwave. Stirring the pecans into the melted coating and dropping spoonfuls onto the baking sheet are satisfying, hands-on tasks that give a real sense of accomplishment once the finished bites come out of the refrigerator glossy and ready to serve.
A Quick Note on Portion Control
Because these bites are rich and sweet in small doses, a single cluster is a satisfying portion without feeling like too much. Dropping smaller spoonfuls to make 24 bites rather than 18 is an easy way to stretch the batch further for a larger gathering, while still giving everyone a taste of the pecan crunch.
A Note on Presentation
How you finish these bites changes the impression they make almost as much as the flavor itself. Dropped plainly onto parchment paper, they read as a simple, homey snack for an afternoon treat. Arranged neatly on a small platter with a dusting of flaky salt, the same batch suddenly looks like something from a specialty candy shop, which makes this a surprisingly versatile recipe to keep in rotation for both everyday snacking and holiday gift-giving.
Why This Recipe Is So Reliable
Part of what makes these bites such a good recipe to keep on hand for the holidays is how little can actually go wrong with it. There’s no candy thermometer to watch and no delicate sugar-cooking chemistry to worry about, melting candy coating melts and sets predictably as long as it isn’t overheated. As long as the pecans are stirred in thoroughly and the tray is given enough time to chill, the result is consistent nearly every time, which is exactly the kind of dependability worth having in a go-to holiday candy recipe.
A Final Thought on This Recipe
Recipes built around just two pantry staples tend to earn their place in a regular rotation not because they’re flashy, but because they solve a real problem: a holiday tray needs one more easy treat, or a sweet, crunchy craving needs answering right now, and there’s no time or patience for a candy thermometer. 2-Ingredient Pecan Crunch Glazed Bites answer that need reliably, using ingredients that are easy to keep on hand, and turning them into something that looks and tastes like real effort went into it. That combination of simplicity and payoff is exactly why this recipe is worth keeping close at hand.
A Word on Texture
The texture of these bites is really the whole point, since it’s the contrast between the thin, glossy candy shell and the crunchy, toasty pecan halves underneath that makes every bite satisfying. A bite with too little coating tends to fall apart before it even reaches the plate, while one with too much starts to taste more like plain candy than a pecan treat. Getting that balance right is mostly a matter of stirring the pecans in thoroughly so every piece gets a thin, even coat, then dropping the clusters while the mixture is still warm and easy to portion into loose, irregular shapes.
A Note on Cluster Size
Dropping the coated pecan mixture in smaller spoonfuls gives you more, daintier bites that work well for a holiday tray where guests are likely sampling several different treats. Larger spoonfuls make a heartier, more substantial bite that’s better suited to a snack bowl or a gift bag where each piece is meant to be more filling. Either size sets up the same way in the refrigerator, so the choice really comes down to how you plan to serve them.
A Final Note on Batch Size
Because this recipe scales so easily, it’s worth thinking ahead about how many bites you’ll actually want on hand. A single batch of 18 disappears quickly at a holiday gathering, so doubling the pecans and candy coating for a party is often worth the small bit of extra time, especially since the process itself doesn’t get any more complicated with a larger batch, just a bit more melting and stirring.
Common Questions
Can I use walnuts instead of pecans?
Yes, walnuts work well as a substitute and give a similarly crunchy, toasty result.
Why did my candy coating seize while melting?
This usually happens from overheating or moisture getting into the bowl; melt more slowly in shorter bursts next time.
Can I toast the pecans first?
Yes, lightly toasting the pecans beforehand deepens their flavor and adds extra crunch to the finished bites.
How do I know when these are fully set?
Look for a firm, matte-glossy coating with no stickiness when lightly pressed.
Can I double this recipe?
Yes, simply double both ingredients; the melting and coating process stays the same.
How should I store leftovers?
Keep the bites in an airtight container at room temperature for up to a week, or refrigerate for longer freshness.
Can I freeze these bites?
Yes, freeze in a single layer and thaw at room temperature before serving.
2-Ingredient Pecan Crunch Glazed Bites turn a bag of pecans and a bit of melted candy coating into a crunchy, glossy treat with almost no effort at all. Melt, coat, drop, and chill, that’s the entire process, and the result tastes like a simplified pecan praline.