
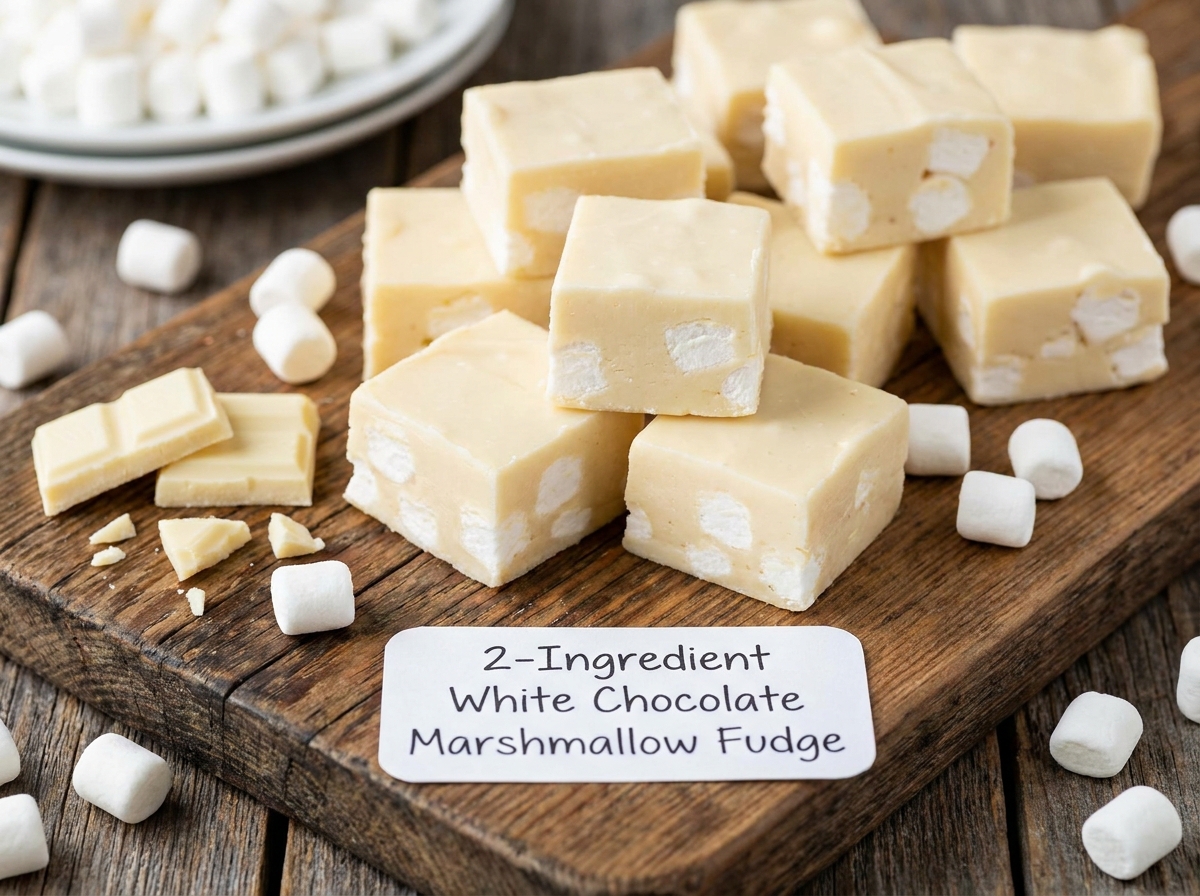
2-Ingredient White Chocolate Marshmallow Fudge
Melted white chocolate and mini marshmallows combine into a smooth, creamy fudge with soft pockets of marshmallow throughout.
Thank you for reading this post, don't forget to subscribe!
This 2-Ingredient White Chocolate Marshmallow Fudge turns a bag of white chocolate chips and a bag of mini marshmallows into a smooth, creamy fudge with soft pockets of marshmallow throughout. Melting the white chocolate gently and folding in the marshmallows right at the end is the entire process, no candy thermometer, no cooked sugar syrup, and no complicated technique.
The white chocolate melts into a smooth, pourable base, and folding in the marshmallows quickly, before the chocolate has a chance to cool and firm up, keeps some of those marshmallows intact rather than melting them completely, giving the finished fudge little soft, chewy pockets running through an otherwise dense, creamy square.
It’s about as simple as a rich, from-scratch-tasting fudge gets, and it comes together in one bowl with almost no active work beyond melting and folding.
Why This Recipe Works
White chocolate chips are formulated to melt smoothly and set back up reliably, giving this fudge its dense, creamy base without needing a candy thermometer or a cooked sugar syrup. Folding in the mini marshmallows right after melting, rather than cooking them into the chocolate, is what keeps some of them from fully dissolving, leaving soft pockets of marshmallow scattered through the finished fudge instead of a completely smooth, uniform texture.
Because both ingredients are already stable and food-safe on their own, combining them doesn’t introduce any tricky chemistry, the white chocolate just needs to be melted gently and given time to firm back up once pressed into the pan.
Why Speed Matters Here
Folding in the marshmallows quickly, right after the white chocolate is removed from the heat, is what keeps them from melting away completely into the mixture. Waiting too long lets the residual heat soften the marshmallows past the point of holding their shape, giving a smoother but less textured fudge.
What You’ll Need
- 2 cups white chocolate chips
- 2 cups mini marshmallows
That’s the entire list. This recipe makes 16 squares from a square pan.
A Note on Ingredient Choices
Standard white chocolate chips give the most reliable melt and the truest classic fudge flavor; white chocolate melting wafers can be substituted for an even smoother result. Fresh mini marshmallows fold in most easily; if yours have gone a bit stale and firm, they’ll still work but may hold their shape even better once folded in.
Equipment You’ll Need
A square pan lined with parchment paper, a microwave-safe bowl or small saucepan for melting, and a spatula for folding and pressing are all you need; no candy thermometer, mixer, or oven required.
How to Make It
- Line the pan. Line a square pan with parchment paper.
- Melt. Melt the white chocolate chips gently, stirring until smooth.
- Fold. Remove from the heat and quickly fold in the mini marshmallows.
- Press. Press the mixture into the prepared pan.
- Chill. Refrigerate for 1–2 hours until firm.
- Slice. Cut into small squares and serve.
Getting an Even Press
Pressing the fudge mixture evenly into every corner of the pan right after folding, while it’s still warm and workable, gives the finished squares a uniform thickness once chilled and sliced. A piece of parchment paper pressed on top helps smooth the surface without the marshmallows sticking to your hands or a spatula.

Getting a Clean Set
A level refrigerator shelf and a pan that sits flat, without tilting, helps the fudge set into an even layer from edge to edge. Covering the pan loosely with plastic wrap while it chills also keeps the surface from developing a dry, dull film.
Knowing When It’s Done
This fudge is ready to slice once it feels firm and cool to the touch straight from the refrigerator, with no give when pressed gently in the center. If the center still feels soft after 2 hours, give the pan another 30 minutes of chilling.
Tips for Perfect White Chocolate Fudge
Melt the white chocolate slowly and gently, since it scorches more easily than dark or milk chocolate due to its higher milk solid content. Fold the marshmallows in with a light hand rather than stirring vigorously, so they keep some of their shape rather than dissolving completely.
Troubleshooting Common Issues
My white chocolate seized while melting. This usually happens from overheating or a drop of water getting into the bowl; melt more slowly in shorter bursts next time. My marshmallows fully melted into the fudge. They were likely folded in while the chocolate was still very hot; let it cool for a minute before folding next time. My fudge is too soft to slice cleanly. It likely needs more time in the refrigerator to fully set. My fudge stuck to the pan. Be sure to line the pan with parchment paper and leave enough overhang to lift the whole block out cleanly.

A Few Ways to Make It Yours
Toasted Coconut
Fold in a handful of toasted coconut along with the marshmallows for a tropical twist on the classic flavor.
Sprinkles
Press colorful sprinkles into the top of the fudge right after pressing it into the pan for a festive, birthday-cake look.
Crushed Graham Crackers
Stir in crushed graham crackers along with the marshmallows for a texture that echoes a classic s’mores flavor.
Vanilla Extract
A few drops of vanilla extract stirred into the melted white chocolate deepens the flavor with a warm, classic note.
The plain version is worth trying first so you know the baseline white chocolate and marshmallow flavor before adding any extras.
How to Store White Chocolate Fudge
Store the fudge in an airtight container in the refrigerator for up to a week, or at room temperature for up to 3 days if your kitchen isn’t too warm. Keeping it chilled helps preserve the texture of the marshmallow pockets longest.
When to Serve This Fudge
This fudge works well as a simple homemade gift for the holidays, a quick contribution to a bake sale, or a make-ahead treat to keep on hand for guests. Its pale, snowy color also makes it a natural fit for a winter dessert tray or a baby shower.
Nutrition and Serving Information
The recipe estimates approximately 130 calories per square when the pan is cut into 16 squares, based on standard measurements for white chocolate chips and mini marshmallows. This is only an estimate, since exact calorie and fat content will vary depending on the specific brands used. Because this recipe is built around white chocolate, which contains dairy, it isn’t appropriate for anyone avoiding dairy.
Make-Ahead Tips
This fudge can be made several days ahead and stored covered in the refrigerator, making it a convenient make-ahead treat for a holiday tray or a gift box. Because it needs to chill fully before slicing anyway, it’s naturally suited to being made in advance.
The Science Behind a Two-Ingredient Fudge
White chocolate sets through the crystallization of cocoa butter and milk fat as it cools, and folding in marshmallows right after melting interrupts that crystallization in pockets, since the marshmallows themselves don’t fully melt into the surrounding chocolate. The result is a fudge with a mostly smooth, dense structure punctuated by soft, chewy pockets, rather than the completely uniform texture you’d get from a fudge made with only melted chocolate.
Portioning and Yield
This recipe makes 16 squares from a single square pan, a good size for a holiday tray or a few days of after-dinner treats. Doubling both ingredients into a larger pan works well for a bigger batch, though the chill time may need to extend slightly given the greater volume.
A Little Bit of History
Fudge made from melted chocolate and marshmallows, rather than a traditionally cooked sugar syrup, became a popular home-kitchen shortcut once bagged marshmallows and chocolate chips were both widely available, letting bakers skip the finicky candy-thermometer stage of classic fudge entirely. This white chocolate version follows that same shortcut tradition, swapping in white chocolate for a paler, sweeter take on the format.
Serving Suggestions
Serve this fudge chilled straight from the refrigerator for the firmest, cleanest slices, or let it sit at room temperature for a few minutes for a softer, creamier bite. A glass of cold milk alongside is the classic pairing for anything sweet and rich like this.
Choosing the Right White Chocolate
Standard white chocolate chips give the most reliable melt and the classic sweet, creamy flavor this fudge is known for. White chocolate melting wafers, sometimes labeled candy melts, can be substituted for an even smoother, glossier result if you have them on hand.
Why This Recipe Is So Beginner-Friendly
If you’ve never made homemade fudge before, this is about as forgiving a place to start as you’ll find. There’s no candy thermometer to watch, no risk of a sugar syrup crystallizing at the wrong moment, and no delicate technique required beyond melting one ingredient and folding in another. With only two ingredients and one simple step, there’s very little room for the kind of mistakes that can derail a more involved fudge recipe. This makes it a genuinely approachable recipe for a first-time cook or a child who wants to help with the folding and pressing step, since the process is simple, safe, and produces a real, visible result within a couple of hours.
Adjusting the Flavor to Your Taste
As written, this fudge gets its flavor from the white chocolate and marshmallows in balance, giving a mild, sweet, creamy result. If you’d like a more rounded flavor, a few drops of vanilla extract stirred into the melted chocolate before folding in the marshmallows deepens the flavor nicely. A pinch of flaky salt over the top before chilling can also cut some of the sweetness. Because this recipe has so few ingredients to begin with, small additions tend to have a noticeable effect on the final flavor, so it’s worth trying the plain version first before deciding what, if anything, you’d like to add.
Pairing This Fudge With Other Desserts and Drinks
Because the flavor here is sweet, mild, and creamy, this fudge pairs naturally with richer, deeper options if you’re serving more than one dessert on a holiday tray. A dense chocolate fudge or a spiced cookie balances the sweetness nicely, while a fruit-based candy leans into a brighter, lighter direction if that’s the mood you’re after. On the drink side, this fudge pairs well with hot cocoa or a cup of coffee for an afternoon treat.
A Note on Ingredient Proportions
The two cups of white chocolate to two cups of marshmallows ratio in this recipe was chosen carefully, and it’s worth understanding why before making adjustments. This balance gives enough white chocolate to set the fudge firm enough to slice cleanly, while the marshmallows still provide plenty of soft, chewy pockets throughout. Using significantly more marshmallows relative to the chocolate can leave the fudge too loose to hold together when sliced, while using fewer marshmallows can make the texture closer to plain white chocolate bark than a proper marshmallow fudge. This particular ratio is what gives the fudge its balanced texture, so it’s worth treating the stated proportions as a tested baseline.
A Quick Note on Serving Temperature
This fudge is good served chilled straight from the refrigerator or at room temperature after sitting out for a few minutes, which is part of what makes it such a flexible treat to have on hand. Chilled, the fudge is at its firmest and cleanest to slice; at room temperature, it softens into a creamier, more melt-in-the-mouth bite.
Why This Recipe Is Naturally Kid-Friendly to Make
Because this recipe involves melting one ingredient and folding in another, it’s a genuinely simple treat to make with kids, provided an adult handles the melting step on the stovetop or microwave. Folding the marshmallows into the melted chocolate and pressing the mixture into the pan are satisfying, hands-on tasks that give a real sense of accomplishment once the finished fudge comes out of the refrigerator firm and ready to slice.
A Quick Note on Portion Control
Because this fudge is rich and sweet in small doses, a modest square goes further here than it would with a lighter dessert. Cutting the pan into 20 smaller squares rather than 16 is an easy way to stretch the batch a bit further for a larger gathering, while still giving everyone a satisfying taste of white chocolate and marshmallow.
A Note on Presentation
How you finish this fudge changes the impression it makes almost as much as the flavor itself. Cut into plain squares, it reads as a simple, homey treat for an afternoon snack. Pressed with colorful sprinkles on top or dusted with a little extra crushed graham cracker, the same batch suddenly looks like something from a bakery case, which makes this a surprisingly versatile recipe to keep in rotation for both everyday snacking and holiday gift-giving.
Why This Recipe Is So Reliable
Part of what makes this fudge such a good recipe to keep on hand is how little can actually go wrong with it. There’s no candy thermometer to watch and no delicate sugar-cooking chemistry to worry about, white chocolate melts and sets predictably as long as it isn’t overheated, and folding in marshmallows doesn’t introduce any tricky steps of its own. As long as the chocolate is melted gently and the marshmallows are folded in quickly, the result is consistent nearly every time, which is exactly the kind of dependability worth having in a go-to fudge recipe.
A Final Thought on This Recipe
Recipes built around just two pantry staples tend to earn their place in a regular rotation not because they’re flashy, but because they solve a real problem: a holiday tray needs one more easy treat, or a sweet craving needs answering right now, and there’s no time or patience for a candy thermometer. 2-Ingredient White Chocolate Marshmallow Fudge answers that need reliably, using ingredients that are easy to keep on hand, and turning them into something that looks and tastes like real effort went into it. That combination of simplicity and payoff is exactly why this recipe is worth keeping close at hand.
A Word on Texture
The texture of this fudge is really what sets it apart from a plain melted-chocolate bark, since it’s the contrast between the dense, creamy white chocolate base and the soft, chewy pockets of marshmallow that makes every bite interesting. A fudge with too little marshmallow starts to taste more like plain white chocolate bark, while one with too much can turn gooey and difficult to slice cleanly. Getting that balance right is mostly a matter of folding quickly and gently right after the chocolate comes off the heat, so the marshmallows keep their shape rather than dissolving into the mixture entirely.
A Note on Cutting Clean Squares
Because this fudge contains pockets of marshmallow, a cold, dull knife can drag or tear rather than slicing through cleanly. Running a sharp knife under warm water and wiping it dry between cuts helps it glide through the dense chocolate base without crushing the marshmallow pockets, giving cleaner, more even squares for serving or packaging as a gift.
Common Questions
Can I use regular-sized marshmallows instead of mini?
Yes, cut them into smaller pieces first so they distribute evenly through the fudge.
Why did my white chocolate seize while melting?
This usually happens from overheating or moisture getting into the bowl; melt more slowly in shorter bursts next time.
Can I use white chocolate melting wafers instead of chips?
Yes, melting wafers tend to melt even more smoothly and set back up predictably.
How do I know when this fudge is ready to slice?
Look for a firm, cool feel with no give when pressed gently in the center.
Can I double this recipe?
Yes, use a larger pan and double both ingredients, allowing extra chilling time.
How should I store leftovers?
Keep the fudge in an airtight container in the refrigerator for up to a week.
Can I freeze this fudge?
Yes, wrap tightly and freeze for up to 2 months; thaw in the refrigerator before serving.
2-Ingredient White Chocolate Marshmallow Fudge turns white chocolate chips and mini marshmallows into a smooth, creamy treat with almost no effort at all. Melt, fold, press, and chill, that’s the entire process, and the result tastes like a proper homemade fudge.