
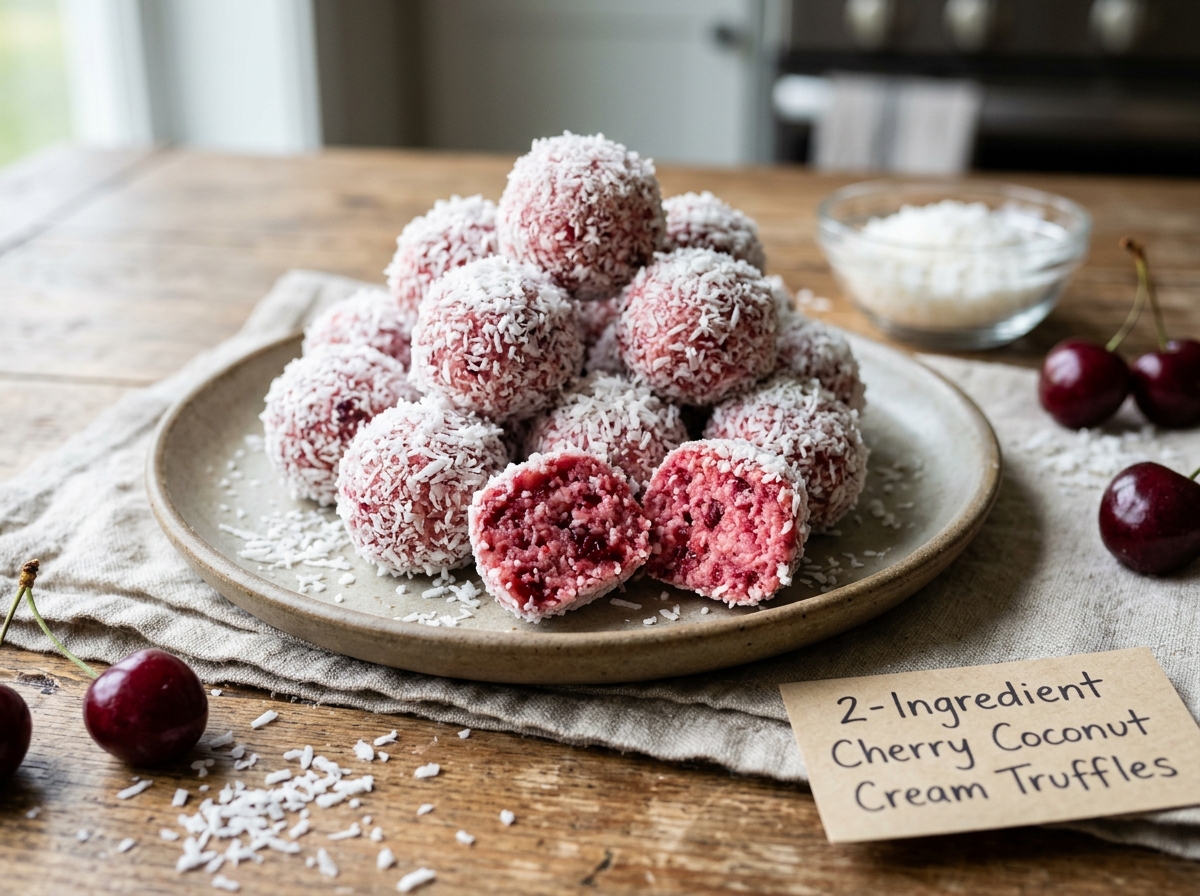
2-Ingredient Cherry Coconut Cream Truffles
Maraschino cherries and sweet shredded coconut blended into a soft pink filling, rolled into balls, and coated in snowy coconut.
Thank you for reading this post, don't forget to subscribe!
Just two ingredients turn into soft, sweet, wonderfully coconutty truffles with a pretty pink center, with no oven, no stovetop, and no melting required. There’s maraschino cherries and sweetened shredded coconut pulsed together in a food processor, rolled into little balls, and finished in a snowy coat of more coconut.
Drying the cherries well, pulsing them with coconut until the mixture holds together, chilling it briefly, and rolling it into bite-sized balls is most of the process here. A short final chill is all that’s left before these cheerful little snowballs are ready to share.
Sweet, chewy, and full of bright cherry flavor, these truffles are perfect for holiday dessert trays, Christmas cookie boxes, Valentine’s Day treats, or any time you want something pretty and sweet without turning on the oven.
Why This Recipe Works
Sweetened shredded coconut is naturally moist, sticky, and full of sugar, which means that when it’s pulsed with something juicy, it binds into a dough that holds its shape without any butter, chocolate, or condensed milk. The maraschino cherries provide just enough moisture to bring the coconut together, along with sweetness, a candied-cherry flavor, and that bright pink color. Because there’s no melting or cooking involved, the cherries keep their bright, fruity flavor, and the truffles come together in just a few minutes of hands-on time.
Rolling the finished truffles in more coconut gives them a snowy white coat that contrasts beautifully with the pink inside, so every bite looks festive and tastes like a classic cherry coconut candy.
Why Drying the Cherries Matters
Patting the cherries completely dry with paper towels, as the recipe stresses, is the key to truffles that hold their shape. Maraschino cherries are packed in syrup, and too much liquid makes the mixture loose and sticky. Well-dried cherries give a thick, moldable dough that rolls into neat balls with almost no effort.
What You’ll Need
- 1 cup (240g) maraschino cherriesVery well drained and patted completely dry.
- 3 cups (240g) sweetened shredded coconutDivided: 2 cups for the filling, the rest for coating.
You’ll also need a food processor, paper towels, and a tray lined with parchment paper. This recipe makes about 18 truffles.
A Note on Ingredient Choices
Sweetened shredded coconut is essential here, since its moisture and sugar help the mixture stick together; unsweetened coconut is too dry to bind. Classic red maraschino cherries give the brightest pink color, while dark cherries packed in syrup create a deeper, ruby-colored center. Fresh coconut from a newly opened bag binds best, since coconut that has dried out in the pantry may need extra cherries to hold together.
Equipment You’ll Need
A food processor, a colander, plenty of paper towels, a small cookie scoop or spoon, a shallow bowl for the coating, and a tray lined with parchment paper are all you need; no oven, stovetop, or microwave required. A small food processor works best for this size batch, since the mixture gathers more easily in a smaller bowl.
How to Make It
- Dry the cherries. Pat the cherries thoroughly dry with paper towels. Excess moisture can make the mixture too soft.
- Combine. Add the cherries and 2 cups of shredded coconut to a food processor.
- Pulse. Pulse until the mixture becomes thick, sticky, and holds together when pressed.
- Adjust. If the mixture is too soft, gradually add more coconut until it can be shaped.
- Chill. Refrigerate for 20–30 minutes to firm up.
- Roll. Roll the mixture into small, bite-sized balls.
- Coat. Coat each truffle with the remaining shredded coconut.
- Chill again. Refrigerate for another 30 minutes before serving.
Getting the Right Consistency
Pulse in short bursts rather than running the processor continuously, which keeps a little texture in the coconut and gives the truffles a pleasant chew. The mixture is ready when you can pinch a little and it holds together firmly without feeling wet. If it’s too sticky, add coconut a tablespoon at a time; if it’s crumbly, a cherry or two more will bring it together. Scraping down the sides of the processor bowl once or twice ensures everything blends evenly.

Getting Even Truffles
Using a small cookie scoop or a level tablespoon for each portion keeps the truffles the same size, so they chill evenly and look tidy on the plate. Roll each portion firmly between your palms for a few seconds to compact it, then drop it straight into the coconut coating. If the mixture starts to feel sticky as you work, return it to the refrigerator for 10 minutes before rolling the rest.
Knowing When They’re Done
These truffles are ready once they feel firm to the touch and hold their round shape when lifted. After the final 30-minute chill, they should be cool and set; if they still feel soft, give them a little longer in the refrigerator. A good test is to lift one truffle; if it holds its round shape and doesn’t leave a sticky mark on the parchment, the batch is ready.
Tips for Perfect Cherry Coconut Truffles
Drying the cherries well and chilling the mixture before rolling are the two biggest secrets to neat truffles. Rolling the balls in the coating right after shaping, while the surface is still slightly sticky, helps the coconut cling in a generous, snowy layer. Letting the drained cherries sit on fresh paper towels for 10 minutes before processing removes even more moisture.
Troubleshooting Common Issues
My mixture is too wet to roll. The cherries weren’t dry enough; add more coconut a little at a time and chill longer. My mixture is crumbly. It needs a bit more moisture; add another cherry and pulse again. The coating won’t stick. Roll the truffles in coconut right after shaping. My truffles are flattening. They need more time in the refrigerator.
A Few Ways to Make It Yours
White Chocolate Dipped
Dip the chilled truffles in melted white chocolate before rolling in coconut.
Almond Cherry
Add a drop of almond extract to the mixture for a classic cherry-almond flavor.
Cherry Center
Hide a whole dried maraschino cherry inside each truffle.
Toasted Coconut
Roll the truffles in lightly toasted coconut for a golden finish.
The classic version is worth trying first so you know the baseline flavor before adding any extras.
How to Store These Truffles
Keep the truffles in an airtight container in the refrigerator for up to one week, with parchment between layers so they don’t stick together. Because the cherries contain moisture, they’re best stored cold. They can also be frozen for up to two months and thawed in the refrigerator. Keep any extra coconut for re-rolling, since a fresh coat of coconut brightens up truffles that have been stored for a few days.
When to Serve These Truffles
These truffles work beautifully on a Christmas cookie tray, at a holiday party, for Valentine’s Day, or as part of a bridal or baby shower dessert table. Their snowy white coats make them especially festive during the winter holidays. They’re also a pretty addition to a winter wedding dessert table or a cozy holiday tea party.
Nutrition and Serving Information
This recipe makes about 18 truffles at roughly 95 calories each, though exact calorie content will vary depending on the size of each truffle. Because this recipe contains coconut, it isn’t appropriate for anyone with a coconut allergy. It’s naturally dairy-free and gluten-free, though it’s worth checking the labels on your coconut and cherries.
Make-Ahead Tips
These truffles are a genuinely good make-ahead treat, since they keep well for a week in the refrigerator. Making them a few days before a holiday means one less thing to do when the busy season arrives. You can also make the mixture a day ahead, keep it covered in the refrigerator, and roll and coat the truffles the next day.
The Science Behind These Truffles
Sweetened shredded coconut is processed with sugar and kept moist, so its fibers are soft and sticky. When pulsed with cherries, the coconut fibers break down and absorb the cherries’ juice, creating a paste that clings together. Chilling firms up the natural fat in the coconut, which helps the truffles hold their shape once rolled. Coconut is naturally rich in fat that firms up when cold, which is why a short chill makes such a big difference in how easily these truffles roll.
Portioning and Yield
This recipe makes about 18 truffles using a level tablespoon for each. Using a teaspoon gives about 30 mini truffles, which are perfect for gift boxes and party platters. Mini truffles also chill and firm up a little faster, which is helpful when you’re short on time.
A Little Bit of History
Coconut snowballs have long been a favorite holiday candy in many countries, from coconut ice in Britain to coconut balls across Latin America and the Caribbean. Maraschino cherries became a popular candy ingredient in the twentieth century, and pairing them with coconut creates a cheerful, pink-centered treat that feels right at home on a holiday table.
Serving Suggestions
Serve these truffles chilled, piled on a rustic plate or set in mini paper candy cups, with a few fresh cherries scattered around. A sprinkle of extra coconut on the plate adds to their snowy look. For a holiday platter, pair them with chocolate truffles for a striking mix of white and dark colors.
Choosing the Right Cherries
Jarred maraschino cherries are the classic choice and give the brightest pink color. Fresh cherries aren’t recommended, since they release too much juice, while dried cherries can be used with a splash of syrup to help the mixture bind. Whatever you use, drain them in a colander for several minutes before patting them dry for the best results.
Why This Recipe Is So Beginner-Friendly
If you’ve never made truffles before, this is a genuinely forgiving place to start, since there’s no melting, no tempering, and no cooking. With two ingredients and a food processor, the only real trick is drying the cherries well. Even if a few truffles come out a little uneven, the fluffy coconut coating hides any imperfections beautifully.
Adjusting the Flavor to Your Taste
As written, these truffles are sweet, fruity, and coconutty. A drop of almond or vanilla extract adds depth, while a little lime zest gives them a bright, tropical twist. Because the recipe is so simple, small changes make a big difference. Dipping the bottoms in melted dark chocolate also adds a rich contrast to the sweet cherry coconut filling.
Pairing These Truffles With Other Treats and Drinks
Because the flavor here is fruity and light, these truffles pair nicely with rich chocolate fudge or peanut butter treats on a holiday tray. On the drink side, they’re lovely with hot tea, coffee, or a glass of cold milk. A cup of hot cocoa makes an especially cozy match on a winter evening.
A Note on Ingredient Proportions
Using one cup of well-dried cherries with two cups of coconut for the filling gives a mixture that’s moist enough to bind but firm enough to roll, and it’s worth understanding why that balance matters before adjusting it. More cherries make the mixture too soft, while more coconut leaves it dry and crumbly. This ratio is a tested baseline, with extra coconut on hand for adjusting.
A Quick Note on Serving Temperature
These truffles taste best chilled, when they’re firm and chewy. If left out too long in a warm room, they can soften, so bring out only a few at a time. If they soften on the table, a few minutes back in the refrigerator brings them right back to the perfect texture.
Why This Recipe Is Naturally Kid-Friendly to Make
With no heat involved at any point, this is a genuinely fun treat to make with kids. Little helpers love patting the cherries dry, rolling the balls, and coating them in coconut snow. Because there’s no heat or sharp tools beyond the food processor, which an adult can run, it’s one of the safest candy recipes to make with young children.
A Quick Note on Portion Control
At around 95 calories each, these small truffles are a lighter sweet treat, and their bite-sized shape makes it easy to enjoy just one or two.

A Note on Presentation
How you finish these truffles changes the impression they make almost as much as the flavor itself. Served plain, they read as a simple homemade candy. Rolled in fluffy coconut, set in paper cups, and arranged with fresh cherries, the same truffles suddenly look like something from a holiday candy shop, which makes this a recipe worth dressing up for a party or keeping simple for an everyday treat.
A Final Note on Batch Size
This recipe makes about 18 truffles. For a bigger batch, double everything and process the mixture in two rounds so the food processor isn’t overloaded.
A Word on Texture
The texture of these truffles is soft and chewy inside, with a light, fluffy coconut coating outside. Pulsing rather than blending keeps a pleasant chew in the coconut. Toasting a little of the coating coconut adds a light crunch and a golden color to the outside.
A Note on Working With Shredded Coconut
Sweetened shredded coconut can dry out once the bag is opened, so use fresh coconut and keep leftovers sealed. If your coconut seems dry, the mixture may need an extra cherry or two to bind. Breaking up any clumps in the coconut before measuring gives a more accurate amount and a smoother coating.
A Note on Gifting This Batch
Packed in a small box lined with parchment, with each truffle in its own paper cup, these snowballs make a lovely holiday gift. Keep them chilled until delivery. A clear box shows off their pretty snowy coating, and a note to keep them chilled is a thoughtful touch.
A Note on Scaling Down the Batch
For a smaller batch, use half a cup of cherries and one cup of coconut for the filling, with extra coconut for coating. A smaller batch is easier to process in a mini chopper and makes about nine truffles.
A Note on Choosing Your Serving Platter
A dark plate makes the white coconut coating stand out beautifully, while a white plate gives a soft, snowy look. Either way, a chilled platter helps the truffles stay firm. Scattering a little extra coconut around the platter makes the presentation look like freshly fallen snow.
Why Chilling Fully Matters
Chilling the mixture before rolling and again after coating firms up the coconut, so the truffles hold their round shape and are easy to pick up. Skipping the chill often leads to sticky hands and lopsided truffles, so the extra half hour is well worth it.
Common Questions
Can I use unsweetened coconut?
It’s too dry to bind well; sweetened shredded coconut works best.
Why is my mixture too wet?
The cherries weren’t dried enough; add more coconut a little at a time.
Do I need a food processor?
It’s the easiest way, but you can finely chop the cherries and mix by hand.
Can I add chocolate?
Yes, dip the chilled truffles in melted white or dark chocolate.
Are they dairy-free?
Yes, as written they contain no dairy; just check your ingredient labels.
How long do they keep?
Up to one week in an airtight container in the refrigerator.
Can I freeze them?
Yes, for up to two months; thaw in the refrigerator.
However you coat them and whoever you share them with, these 2-ingredient cherry coconut cream truffles deliver sweet, chewy, snowy cherry coconut goodness from just two simple ingredients. They’re proof that a festive homemade candy can be as easy as pulse, roll, and chill.