3-Ingredient Frozen Bounty Bars

✨ Easy Frozen Treat ✨

Creamy Coconut Chocolate Frozen Bounty Bliss Bars

Thank you for reading this post, don't forget to subscribe!
⏱️ Prep: 15 mins ❄️ Freeze: 45 mins 🍫 Only 3 Ingredients 🍬 Makes ~12 Bars
Homemade frozen bounty bars stacked on a plate

Okay so I have to tell you about these bars because honestly?? I made them on a Tuesday night with basically zero effort and my whole family went absolutely crazy for them. Like, the kind of reaction where you’re immediately asked “when are you making these again” before everyone’s even finished eating 😂

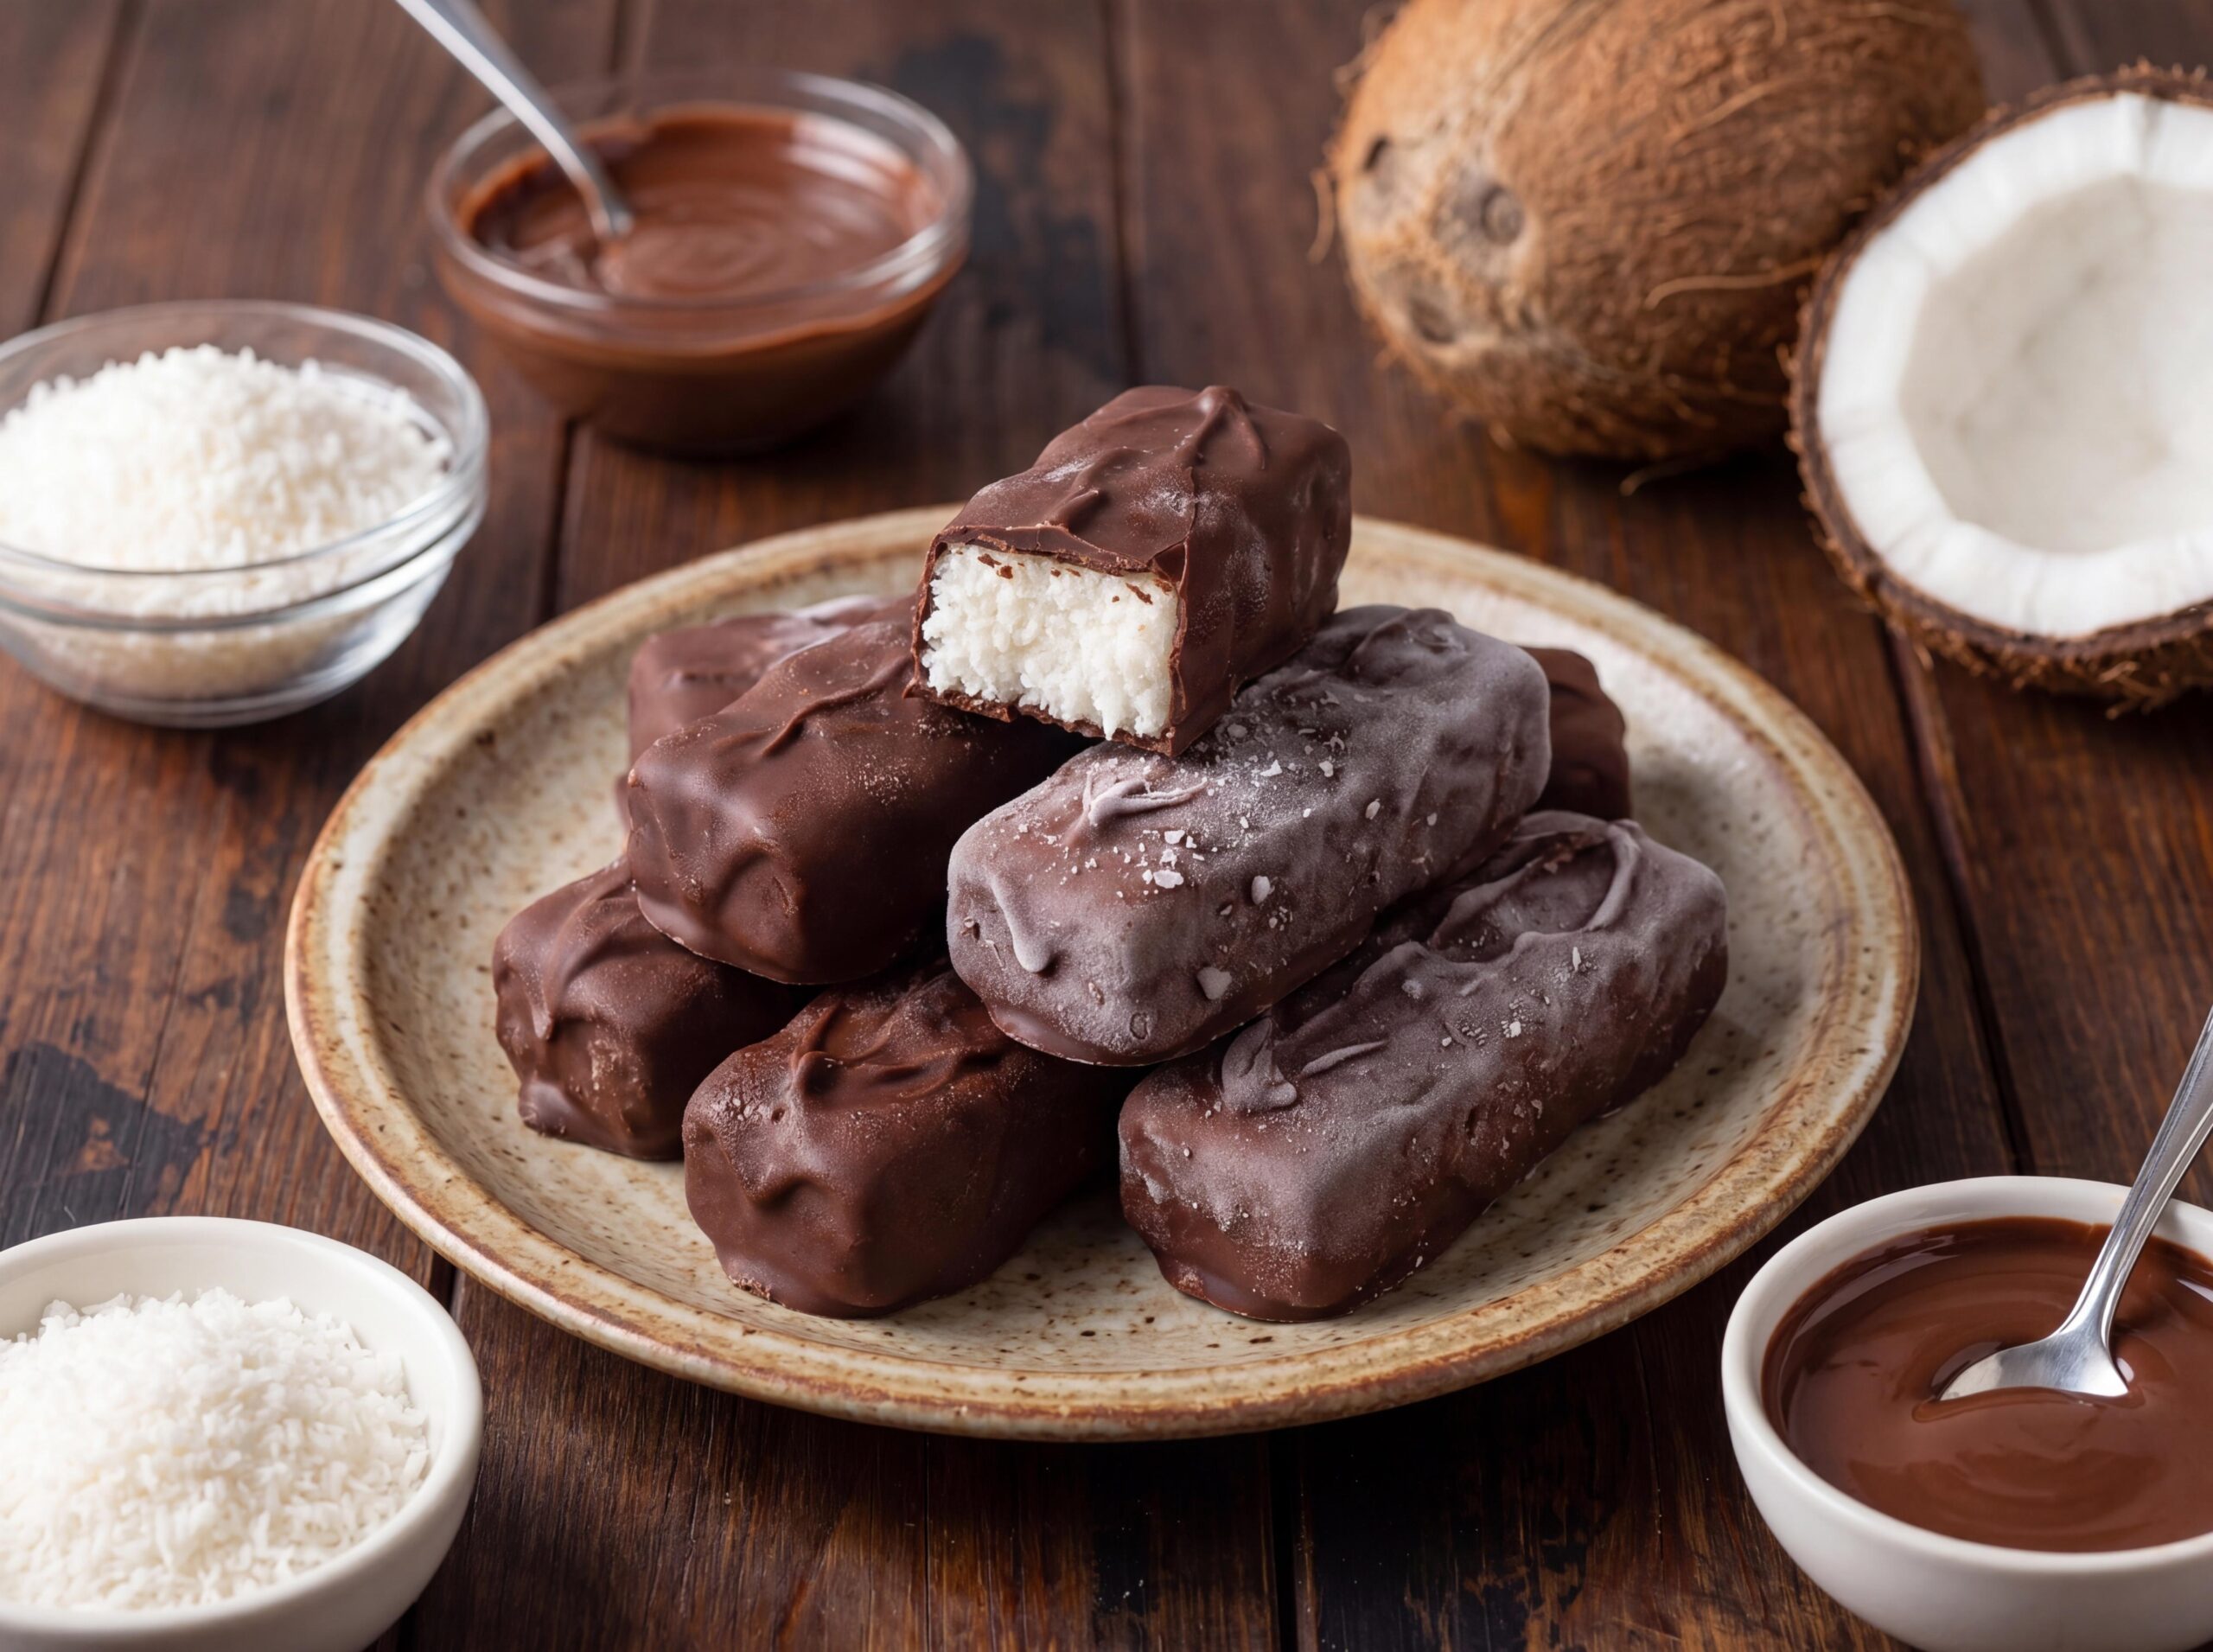
These are those dreamy coconut-chocolate bars — you know the ones — except homemade, frozen, and SO much better than the store-bought version. The coconut filling is thick and sweet and chewy, and the chocolate shell snaps perfectly when you bite in. Plus… only three ingredients. That’s it. I promise.

They’re great straight from the freezer on a warm day, and they keep for weeks — though they never last that long around here, haha!

Frozen bounty bars stacked showing coconut filling
🥥 Coconut Chocolate Bars
Homemade bounty bars next to Bounty wrapper
🍫 The Real Deal
Chocolate covered coconut bites on plate
✨ Chocolate Coated Bites
Bounty bars with fresh coconut and melted chocolate
🍬 Ready to Enjoy!

🛒 Ingredients

  • 2 cups shredded coconut
  • 1 cup sweetened condensed milk
  • 2 cups milk chocolate chips (melted)

👩‍🍳 How to Make Them

1
Line an 8×8-inch pan with parchment paper. I usually let the paper hang over the edges a bit — makes it so much easier to lift everything out later!
2
In a mixing bowl, combine the shredded coconut and sweetened condensed milk. Stir until everything is really well mixed — it’ll become thick and sticky, almost like a dough. That’s exactly what you want!
3
Press the coconut mixture firmly into the prepared pan, creating an even layer. I like to use the back of a spoon or the bottom of a measuring cup to really pack it in tight. This helps the bars hold together once frozen.
4
Pop the pan in the freezer for 30–45 minutes until the coconut layer is completely firm. Don’t rush this step — if it’s not fully solid, the bars will fall apart when you try to cut them.
5
Remove from freezer and cut into bar shapes. I cut mine into about 12 rectangles, but you can make them bigger or smaller — totally up to you!
6
Dip each bar into the melted chocolate, coating it completely. Let any excess drip off before placing it back on the parchment paper. Work quickly — the frozen coconut sets the chocolate super fast, which is actually perfect!
7
Return the bars to the freezer for another 10–15 minutes until the chocolate is fully set. Then they’re ready! Store in an airtight container in the freezer for up to a month.

💡 Little Tips from My Kitchen

  • Use desiccated coconut for a smoother bar — shredded coconut gives a chewier texture which I personally love!
  • Melt your chocolate in 30-second microwave bursts, stirring between each, to avoid burning it.
  • For a fancier look, drizzle white chocolate over the top once the milk chocolate has set.
  • Dark chocolate works beautifully here too if you want something less sweet!
  • Best eaten straight from the freezer — they soften quickly at room temperature.
🩷 Hope you love these as much as we do! Tag me if you make them!
— Happy baking & freezing, friends