
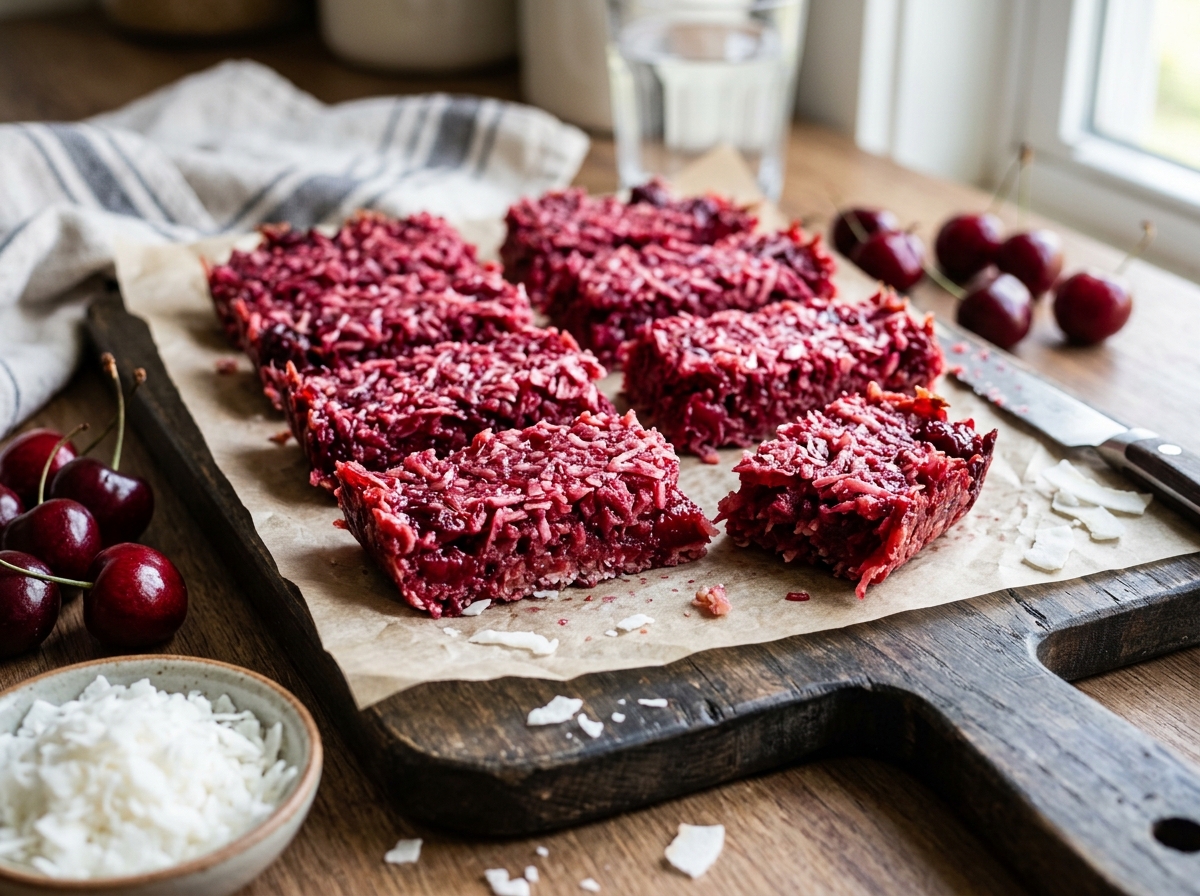
Cherry Coconut Bars
Shredded coconut and thick cherry preserves pressed into a pan and chilled into sweet, fruity, colorful bars.
Thank you for reading this post, don't forget to subscribe!
Just two ingredients turn into a sweet, chewy bar with bright cherry color and plenty of coconut texture, no oven and no candy thermometer required. There’s a simple mixture of shredded coconut and thick cherry preserves that’s pressed firmly into a pan and chilled until firm enough to slice.
Mixing shredded coconut with cherry preserves until evenly combined, pressing that mixture firmly into a lined pan, and smoothing the top is most of the process here. A long chill in the refrigerator is all that’s left before these bars are ready to lift out and slice.
Sweet, fruity, and colorful, these bars are an easy no-bake treat for a potluck, a lunchbox, or any time a quick coconut-cherry dessert sounds appealing.
Why This Recipe Works
Mixing shredded coconut directly with thick cherry preserves creates a sticky, cohesive mixture without any cooking or melting required, since the preserves act as both the sweetener and the binder holding the coconut together. Because the preserves are thick rather than runny, the mixture presses firmly into a pan and holds its shape once chilled, rather than spreading out thin.
Pressing the mixture firmly and smoothing the top with a spatula gives these bars their clean, even shape, so they slice into neat rectangles once fully chilled.
Why Preserve Thickness Matters
Using a thick cherry preserve rather than a runny cherry syrup or jam is what allows these bars to hold together once pressed and chilled. A thinner mixture tends to stay loose and won’t firm up into sliceable bars no matter how long it chills.
What You’ll Need
- 2 cups (160g) sweetened shredded coconut
- 1 cup (240g) thick cherry preserves
You’ll also need an 8×8-inch pan lined with parchment paper. This recipe makes about 12 bars.
A Note on Ingredient Choices
Sweetened shredded coconut gives these bars their soft, chewy base, and a thick, jam-style cherry preserve rather than a thinner cherry syrup keeps the mixture cohesive enough to press into bars. Checking the label for a preserve described as thick or extra-set, rather than a pourable cherry sauce, makes a real difference in how well the bars hold together.
Equipment You’ll Need
A mixing bowl, a spatula, and an 8×8-inch pan lined with parchment paper are all you need; no oven and no stovetop required.
How to Make It
- Prep. Line an 8×8-inch pan with parchment paper.
- Mix. Mix the shredded coconut and cherry preserves in a bowl until evenly combined.
- Press. Press the mixture firmly into the prepared pan, smoothing the top with a spatula.
- Chill. Refrigerate for 2–3 hours, or until the mixture is firm enough to slice.
- Slice. Cut into bars and serve chilled.
Getting an Even Press
Pressing the coconut-cherry mixture firmly and evenly across the pan, using the back of a spatula or a flat-bottomed measuring cup, gives the most consistent thickness across every bar. An unevenly pressed layer can leave some bars thin and crumbly while others end up thick and dense.

Getting a Clean Slice
Lifting the fully chilled slab out of the pan using the parchment overhang, then slicing it on a cutting board with a sharp knife, gives the cleanest bars. Wiping the blade clean between cuts keeps the sticky cherry preserve from dragging across each new slice.
Knowing When It’s Done
These bars are ready to slice once the mixture feels firm throughout, with no soft or sticky give left in the center of the pan. If the middle still feels soft after 3 hours, give the pan more time, checking every 30 minutes until it firms up fully.
Tips for Perfect Cherry Coconut Bars
Stirring the coconut and preserves together thoroughly, rather than just folding them loosely, helps every strand of coconut get coated in the sticky cherry mixture. Pressing with real pressure, rather than just patting the mixture down lightly, is what gives these bars their sliceable structure.
Troubleshooting Common Issues
My bars won’t hold together. The preserve was likely too thin; look for a thicker, more jam-like preserve or reduce a runnier one slightly on the stove first and let it cool. My bars are crumbling when I slice them. They likely weren’t pressed firmly enough into the pan; next time, press down with real pressure using a flat tool. My bars taste too sweet. Use an unsweetened shredded coconut instead of sweetened, which cuts back on the overall sweetness noticeably. My knife is dragging through the bars instead of cutting cleanly. Wipe the blade clean between cuts, and consider warming it slightly under hot water first.
A Few Ways to Make It Yours
Toasted Coconut Version
Toast the shredded coconut lightly before mixing for a nuttier, golden flavor.
Dark Chocolate Drizzle
Drizzle melted dark chocolate over the chilled bars before slicing for extra richness.
Different Fruit Preserve
Swap the cherry preserves for raspberry or strawberry for a different fruity flavor.
Whole Cherry Addition
Fold in a few chopped dried cherries along with the preserves for extra fruit flavor and texture.
The classic version is worth trying first so you know the baseline flavor before adding any extras.
How to Store Cherry Coconut Bars
Keep the bars in an airtight container in the refrigerator for up to a week, since the sticky cherry preserve needs to stay cool to hold its texture. Let them sit for just a minute or two at room temperature before serving for the best bite.
When to Serve These Bars
These bars work well for a potluck dessert table, a lunchbox treat, or any time a quick, no-bake coconut-cherry dessert sounds appealing. They also make a colorful addition to a dessert spread alongside other simple no-bake treats.
Nutrition and Serving Information
This recipe makes about 12 bars at roughly 105 calories per serving, though exact calorie content will vary depending on the specific brands of coconut and cherry preserves used. Because this recipe contains coconut, it isn’t appropriate for anyone with a coconut allergy.
Make-Ahead Tips
These bars are a genuinely good make-ahead treat, since they hold their shape and flavor well in the refrigerator for several days after chilling. Making a batch a day or two before a gathering removes any last-minute pressure entirely.
The Science Behind This Bar
Cherry preserves get their thick, spreadable consistency from pectin and sugar, which together create a gel-like structure that’s sturdy enough to bind loose shredded coconut into a cohesive mass without any cooking. Chilling the pressed mixture firms up that gel structure even further, which is why this mixture goes from sticky and loose to firm and sliceable after its time in the refrigerator.
Portioning and Yield
This recipe makes about 12 bars from a single 8×8-inch pan, a good amount for a small gathering or a few lunchboxes. Doubling the ingredients and using a 9×13-inch pan works well for a larger batch, and since there’s no cooking involved, scaling up is simply a matter of mixing more coconut and preserves together at once.
A Little Bit of History
Coconut and cherry is a pairing that shows up across many classic desserts, from coconut-cherry cakes to candy bars built around the same combination, prized for how well the tropical sweetness of coconut balances the tartness of cherry. This bar version strips that pairing down to its simplest form, needing nothing more than a bowl and a pan to bring the two flavors together.
Serving Suggestions
Serve these bars cut into neat squares on a wood board or platter, with a few whole cherries and a small bowl of shredded coconut nearby for a simple, pretty presentation. A light dusting of extra coconut over the top just before serving adds a nice finishing touch.
Choosing the Right Cherry Preserve
A thick, jam-style cherry preserve labeled as extra-set or low-sugar-but-thick works best here, since it holds the coconut together without making the bars too wet. If the only preserve available seems runny, straining out a little of the liquid before mixing, or reducing it briefly on the stove and letting it cool, helps it behave more like a thicker preserve.
Why This Recipe Is So Beginner-Friendly
If you’ve never made a no-bake bar before, this is about as forgiving a place to start as you’ll find. There’s no cooked sugar stage, no oven, and no candy thermometer, just stirring two ingredients together, pressing, and chilling. With only two ingredients and a handful of simple steps, there’s very little room for the kind of mistakes that can derail a more involved recipe, which makes this a great project for a first-time cook or a kid who wants to help mix and press the bars into the pan.
Adjusting the Flavor to Your Taste
As written, these bars get their flavor almost entirely from the sweetened coconut and the cherry preserves, giving a tropical, fruity taste. If you’d like a different flavor profile, swapping in a different fruit preserve, like raspberry or strawberry, shifts the whole bar in a new direction while keeping the same simple method. Because this recipe has so few ingredients to begin with, small changes tend to have a noticeable effect on the final flavor, so it’s worth trying the classic version first before deciding what, if anything, you’d like to change.
Pairing These Bars With Other Treats
Because the flavor here is sweet, fruity, and a little tropical from the coconut, these bars pair naturally with richer, more chocolate-forward treats if you’re serving more than one dessert, since the contrast keeps a spread feeling balanced. A rich chocolate fudge or a dark chocolate treat rounds out a dessert table nicely alongside these, while another fruit-based treat leans further into the same bright direction. On the drink side, these bars pair well with hot tea, coffee, or a glass of cold milk.
A Note on Ingredient Proportions
Using 2 cups of shredded coconut against 1 cup of cherry preserves gives a mixture that’s sticky enough to hold its shape without tasting overly fruity or being too wet to press, and it’s worth understanding why that balance matters before adjusting it. Too much preserve relative to the coconut leaves the mixture too loose to press firmly, while too little leaves it dry and crumbly. This particular ratio is what gives the finished bars their classic chewy bite, so it’s worth treating the stated amounts as a tested baseline.
A Quick Note on Serving Temperature
These bars taste good straight from the refrigerator, which is also how they hold their shape best, since a warm bar can soften enough for the mixture to lose its form. If serving at a warm gathering, keeping the platter in a cooler or shaded spot helps the bars hold.
Why This Recipe Is Naturally Kid-Friendly to Make
Because this recipe involves nothing more than stirring two ingredients together and pressing them into a pan, it’s a genuinely fun treat to make with kids from start to finish. Smoothing the top with a spatula and deciding how to slice the finished bars are simple, satisfying tasks that make this an easy weekend project.
A Quick Note on Portion Control
Because these bars are sweet from both the coconut and the cherry preserves, one or two go a long way here compared to a lighter snack. Cutting slightly smaller bars is an easy way to stretch the batch further and keep portions naturally smaller for a lunchbox or a larger gathering.

A Note on Presentation
How you finish these bars changes the impression they make almost as much as the flavor itself. Cut plainly into squares, they read as a simple homemade candy bar. Arranged on a wood board with fresh cherries and a bowl of shredded coconut scattered around, the same bars suddenly look like a proper bakery display, which makes this a recipe worth dressing up for a gathering or keeping simple for an everyday treat.
A Final Note on Batch Size
This recipe is sized to make about 12 bars from a single 8×8-inch pan, which keeps the whole process manageable within about three hours including the chilling step. For a bigger batch to fill out a longer dessert table, mix the coconut and preserves in separate rounds and use a larger pan rather than trying to scale everything up into a single 8×8 pan all at once, since too large a volume of sticky mixture can be noticeably harder to combine and press down evenly.
A Word on Texture
The texture of these bars is chewy and a little sticky throughout, with the shredded coconut giving a slight chew against the smooth, jammy cherry preserve binding it together. That contrast is part of what makes these bars interesting to eat, and it’s why using a properly thick preserve matters so much, since a looser mixture loses that same satisfying chew once chilled.
A Note on Working With Sticky Mixtures
Mixing coconut and cherry preserves together can get messy, since the preserve clings to a spoon or spatula more than a drier mixture would. Using a lightly dampened spatula when pressing the mixture into the pan helps keep it from sticking too much, and keeping a bowl of water nearby to rinse the spatula between steps makes the whole process go much more smoothly.
A Note on Gifting This Batch
Because they hold their shape well once chilled, these bars travel reasonably well as a homemade gift, provided they’re kept cool along the way in an insulated bag or small cooler. Layered into a small tin with parchment between layers, a dozen bars makes a simple, colorful gift for a friend or a lunchbox treat exchange.
A Note on Scaling Down the Batch
If a full batch of 12 bars is more than you need, this recipe halves easily using a smaller pan, since the ratio between coconut and cherry preserves stays simple to work out either way. A smaller batch is a good option for a quick craving or a single gift box without committing to a full pan, and it still only takes the same handful of minutes to mix, press, and chill before the bars are ready to slice.
A Note on Natural Color
One of the nicer things about this recipe is that its pink-to-red color comes entirely from the cherry preserves themselves, without a single drop of food coloring added anywhere in the process. That makes these bars a good option for anyone trying to limit artificial dyes, since the pretty color here is simply a byproduct of good cherry preserves rather than anything synthetic. A preserve made from dark sweet cherries tends to give a deeper, more saturated color once mixed with the coconut, while a lighter cherry variety gives a softer, more pastel pink.
A Note on Portioning for a Crowd
Because this recipe comes together so quickly and needs no cooking, it scales up easily for a larger gathering simply by mixing multiple batches in sequence rather than trying to combine everything into one oversized bowl. Keeping each batch at the stated two-to-one ratio of coconut to preserve, rather than eyeballing a bigger combined batch, is the simplest way to make sure a larger quantity still presses and holds together the same way a single batch does.
Common Questions
Can I use a different fruit preserve instead of cherry?
Yes, raspberry or strawberry preserves both work well using the same method.
Why won’t my bars hold together?
The preserve was likely too thin; look for a thicker, jam-style preserve for the best results.
Can I use unsweetened coconut instead of sweetened?
Yes, this cuts back on the overall sweetness, which some people prefer.
How do I know when the bars are fully set?
They should feel firm throughout, with no soft or sticky give left in the center.
Can I double this recipe?
Yes, simply double both ingredients and use a 9×13-inch pan instead of an 8×8-inch pan.
How should I store leftovers?
Keep the bars in an airtight container in the refrigerator for up to a week.
Can I freeze these bars for longer storage?
Yes, they freeze well in an airtight container for up to 2 months; thaw in the refrigerator before serving.
However you slice them and whoever you share them with, these cherry coconut bars deliver bright, fruity flavor and a chewy, satisfying bite with nothing more than two simple ingredients. It’s proof that a quick no-bake treat can still be a genuinely pretty addition to any dessert table.