
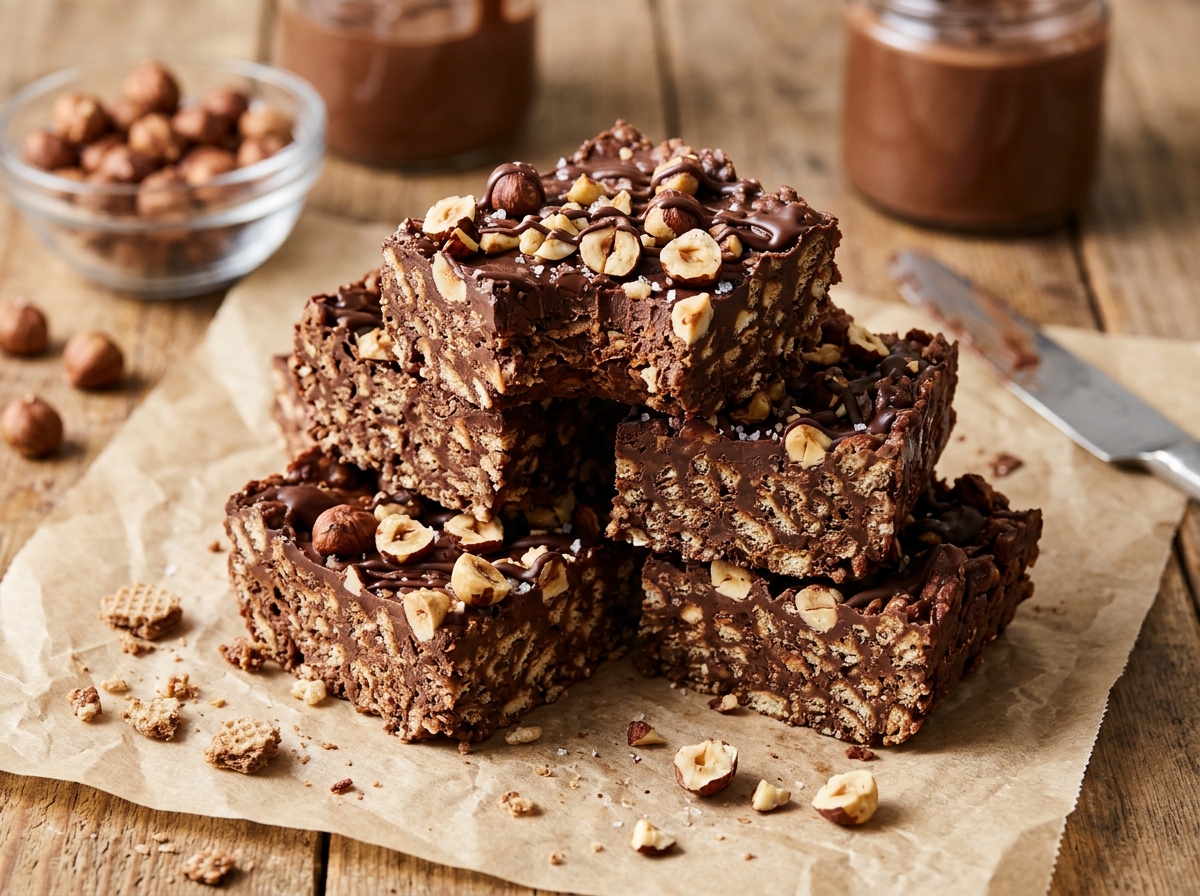
3-Ingredient Chocolate Hazelnut Crunch Squares
Creamy milk chocolate blended with chocolate hazelnut spread and folded with crispy rice cereal, pressed into a pan, and chilled into crunchy squares.
Thank you for reading this post, don't forget to subscribe!
Just three ingredients turn into rich, chocolatey squares with a nutty hazelnut flavor and a satisfying crunch in every bite, with no oven required. There’s creamy milk chocolate melted until smooth, swirled together with chocolate hazelnut spread, and folded with crispy rice cereal before being pressed into a pan to chill.
Melting the chocolate chips, stirring in the hazelnut spread, gently folding in the cereal, and pressing the mixture into a lined pan is most of the process here. A couple of hours in the refrigerator is all that’s left before the slab is firm enough to cut into twelve generous squares.
Chocolatey, nutty, and crisp, these squares are a quick no-bake dessert for a family movie night, a bake sale, a lunchbox treat, or any time you want something sweet to share with friends.
Why This Recipe Works
The chocolate hazelnut spread is what makes these squares special. Stirred into melted milk chocolate, it adds a toasty, nutty flavor that tastes like a favorite breakfast spread, and its creamy texture keeps the chocolate softer and silkier as it sets. Instead of a hard, snappy bar, you get squares with a tender, fudgy bite that still holds a clean edge.
Crispy rice cereal provides the contrast. Its light, airy grains crackle with every bite and keep the squares from feeling heavy or dense, much like a homemade version of a classic chocolate crunch bar with a European chocolate hazelnut twist.
Why Folding Gently Matters
Crispy rice cereal is delicate, and stirring it too hard crushes the grains into crumbs, taking away the very crunch that defines these squares. Folding with slow, sweeping turns of a spatula, as the recipe notes advise, coats every piece in chocolate while keeping the grains whole, so each square stays light and crisp.
What You’ll Need
- 2 cups (340g) milk chocolate chips
- ½ cup (150g) chocolate hazelnut spread
- 2 cups (55g) crispy rice cereal
You’ll also need an 8-inch square baking pan lined with parchment paper. Chopped toasted hazelnuts for the top are optional. This recipe makes 12 squares.
A Note on Ingredient Choices
Milk chocolate chips give these squares a sweet, creamy, candy-bar flavor, while dark or semisweet chips, as the recipe notes suggest, make a less sweet, more grown-up version that lets the hazelnut flavor stand out. Any chocolate hazelnut spread works, and fresh, crisp cereal is a must, since stale cereal won’t give the same crackle. If you decide to add hazelnuts like the ones in the photos, toast them in a dry skillet for a few minutes and rub off the papery skins for the best flavor.
Equipment You’ll Need
A large microwave-safe bowl, a rubber spatula, an 8-inch square baking pan lined with parchment paper, and a sharp knife are all you need; no oven or stovetop required. A flat-bottomed measuring cup is also handy for pressing the mixture into an even layer.
How to Make It
- Prepare the pan. Line an 8-inch square baking pan with parchment paper.
- Melt. Melt the milk chocolate chips in a microwave-safe bowl in 20-second intervals, stirring between each interval until smooth.
- Add the spread. Stir the chocolate hazelnut spread into the melted chocolate until fully combined.
- Fold. Gently fold in the crispy rice cereal until evenly coated.
- Press. Transfer the mixture to the prepared pan and press it into an even layer.
- Chill. Refrigerate for about 2 hours, or until firm.
- Cut. Lift the mixture out of the pan, cut into 12 squares, and serve.
Getting a Smooth Chocolate Hazelnut Base
Stirring the hazelnut spread into the chocolate while it’s still warm lets the two melt together into one glossy, uniform mixture. If the spread is cold or thick, warm the jar briefly or let it sit at room temperature first so it blends in easily without leaving streaks. The finished base should look shiny and smooth, with no visible streaks of spread, before you add the cereal.

Getting an Even Layer
Pressing the mixture firmly into the pan, rather than simply spreading it, packs the cereal tightly together so the squares hold their shape when cut. Use the back of a spatula or the flat bottom of a measuring cup, working from the center outward, and give the corners extra attention so the edge pieces come out as neat as the middle ones. A sheet of parchment laid over the top while you press keeps the mixture from sticking to your spatula or cup. If any cereal pieces poke up above the surface, simply press them back down so the top sets flat and smooth.
Knowing When It’s Done
The slab is ready to cut once it feels firm and solid across the whole pan, with no soft give in the center. Two hours is usually enough; because the hazelnut spread keeps these squares slightly softer than plain chocolate, give them a little extra time if the middle still feels tacky. A good test is to press gently on the center with a fingertip; if it feels firm and springs back without leaving a dent, the squares are ready to lift out and cut.
Tips for Perfect Chocolate Hazelnut Crunch Squares
Melting the milk chocolate slowly in short bursts keeps it smooth, since milk chocolate scorches more easily than dark. For clean squares, let the slab sit at room temperature for a few minutes before slicing, then press straight down with a large, sharp knife rather than sawing back and forth. Measuring the cereal before you start melting also helps, since you’ll want to fold it in while the chocolate is still warm and fluid.
Troubleshooting Common Issues
My chocolate turned thick or grainy. It was overheated; melt in shorter bursts and stir more often. My squares crumble when cut. The mixture wasn’t pressed firmly enough; pack it tightly into the pan. My cereal lost its crunch. It may have been stale or overmixed; use fresh cereal and fold gently. My squares are too soft. Give them more time in the refrigerator.
A Few Ways to Make It Yours
Toasted Hazelnut Topping
Press chopped toasted hazelnuts over the top before chilling.
Dark Chocolate Version
Use dark or semisweet chips for a less sweet square.
Sea Salt Finish
Sprinkle flaky salt over the top for a sweet-salty contrast.
Hazelnut Drizzle
Warm a little extra spread and drizzle it over the chilled squares.
The classic version is worth trying first so you know the baseline flavor before adding any extras.
How to Store These Squares
Store the squares in an airtight container in the refrigerator for up to one week, with parchment between any layers. Keeping them sealed is especially important, since crispy rice cereal softens quickly when exposed to moisture in the air. They can also be frozen for up to two months and thawed in the refrigerator. If you’re stacking them in a tin, chill them fully first so the layers don’t press into each other.
When to Serve These Squares
These squares work beautifully as an after-school snack, a bake sale treat, a movie-night dessert, or part of a holiday cookie tray. Because they’re so easy to make and transport, they’re also a great choice for potlucks and family gatherings. Their familiar chocolate hazelnut flavor makes them especially popular with kids and teens, and they’re sturdy enough to pack for picnics and road trips on cool days.
Nutrition and Serving Information
This recipe makes 12 squares at roughly 220 calories per square, though exact calorie content will vary depending on the brands used and how large the squares are cut. Because chocolate hazelnut spread contains hazelnuts and milk, and many crispy rice cereals contain malt from barley, these squares aren’t appropriate for anyone with a tree nut allergy, avoiding dairy, or following a gluten-free diet.
Make-Ahead Tips
These squares are a genuinely good make-ahead treat, since they keep their crunch for up to a week when stored airtight in the refrigerator. Making them a day or two before a party means dessert is ready whenever you need it. You can also freeze individual squares wrapped in parchment and pull them out one at a time for a quick treat.
The Science Behind These Squares
Chocolate hazelnut spread is made from sugar, oil, ground hazelnuts, cocoa, and milk, and its oils stay soft at refrigerator temperature. Blended into milk chocolate, those oils soften the firm network that cocoa butter forms as it cools, giving the squares a tender, fudgy bite. Crispy rice cereal gets its crackle from grains that are cooked, dried, and toasted until they puff full of tiny air pockets, and coating them quickly in chocolate seals in that crispness.
Portioning and Yield
This recipe makes 12 generous squares from a single 8-inch pan, cut 3 rows by 4. Cutting 4 by 4 gives 16 smaller squares, and 5 by 5 makes 25 bite-sized pieces for a party platter. Smaller pieces also set a little faster and are easier to pack into gift bags or lunchboxes.
A Little Bit of History
The pairing of chocolate and hazelnut, known in Italy as gianduja, dates back to the nineteenth century in the Piedmont region, when cocoa was scarce and local hazelnuts were used to stretch it. That flavor later inspired the creamy chocolate hazelnut spreads loved around the world today, and this easy no-bake square brings it together with the classic American crispy rice treat.
Serving Suggestions
Serve these squares slightly cool, stacked on a wooden board lined with parchment and scattered with a few whole hazelnuts and chocolate pieces. Cut into smaller bars and wrapped in parchment tied with twine, they also make charming party favors. For a brunch or coffee table, pair them with fresh berries and orange slices for a pop of color that balances the rich chocolate.
Choosing the Right Chocolate Hazelnut Spread
Any chocolate hazelnut spread works well here, whether it’s a well-known brand or a store version. Stir the spread well before measuring, since some separate slightly in the jar, and use it at room temperature so it blends smoothly into the warm chocolate. If your spread is very thick, a few seconds in the microwave makes it easier to measure and stir in.
Why This Recipe Is So Beginner-Friendly
If you’ve never made a no-bake bar before, this is a genuinely forgiving place to start, since there’s no tempering, no cooking sugar, and no oven. With just three ingredients and a microwave, the only real tricks are melting gently, folding carefully, and pressing firmly. Even if your first batch isn’t perfectly even, the squares will still taste wonderful, which makes this a stress-free recipe to try with family.
Adjusting the Flavor to Your Taste
As written, these squares are sweet, chocolatey, and nutty. For a less sweet version, use dark or semisweet chocolate as the recipe notes suggest; for extra hazelnut flavor, add chopped toasted hazelnuts to the mix or on top. A pinch of flaky salt or a little espresso powder also adds depth. Because the recipe is so simple, small changes go a long way.
Pairing These Squares With Other Treats and Drinks
Because the flavor here is rich and nutty, these squares pair naturally with lighter, fruity desserts like berry bars or lemon cookies on a dessert table. On the drink side, they’re lovely with a cappuccino, a latte, or a cold glass of milk. A mug of hot chocolate with a splash of hazelnut syrup makes an especially cozy match on a chilly evening.
A Note on Ingredient Proportions
Using two cups of milk chocolate chips with half a cup of hazelnut spread and two cups of cereal gives squares that are fully coated and firmly bound while still light and crunchy, and it’s worth understanding why that balance matters before adjusting it. More spread makes the squares too soft to hold together, while more cereal leaves dry, crumbly pockets. This ratio is a tested baseline.
A Quick Note on Serving Temperature
These squares taste best slightly cool, about 5 to 10 minutes out of the refrigerator, when the chocolate is firm but creamy and the cereal is at its crunchiest. At a warm gathering, keep them in a shaded spot or on a chilled plate. If they’ve been in the refrigerator for a while, a few minutes on the counter brings out the creamy hazelnut flavor.
Why This Recipe Is Naturally Kid-Friendly to Make
Because this recipe involves only melting, stirring, and pressing, with no oven or stovetop at any point, it’s a genuinely fun treat to make with kids. With an adult handling the warm bowl, little helpers can measure the cereal, fold everything together, and press it into the pan, which makes this an easy, rewarding weekend project.
A Quick Note on Portion Control
Because these squares are rich with chocolate, a single piece is usually plenty. Cutting the slab into 16 or 25 smaller pieces is an easy way to share with a crowd.

A Note on Presentation
How you finish these squares changes the impression they make almost as much as the flavor itself. Cut plain, they read as a simple homemade treat. Topped with chopped toasted hazelnuts, a drizzle of extra spread, and a pinch of flaky salt, then stacked on a wooden board, the same squares suddenly look like something from an Italian pastry shop, which makes this a recipe worth dressing up for a party or keeping simple for an everyday treat.
A Final Note on Batch Size
This recipe makes 12 squares from one 8-inch pan, with about 10 minutes of hands-on time. For a bigger batch, double everything and press it into a 9×13-inch pan, adding a little extra chilling time.
A Word on Texture
The texture of these squares is a mix of creamy and crunchy: a soft, fudgy chocolate hazelnut base with light, crackly cereal throughout. That contrast is what makes them so satisfying, and it’s why gentle folding and airtight storage matter so much. Adding chopped toasted hazelnuts brings a third layer of crunch that makes each bite even more interesting.
A Note on Working With Milk Chocolate
Milk chocolate is more delicate than dark because of its extra milk solids, so it can scorch or turn thick if heated too quickly. Melt it in 20-second bursts, stir well each time, and stop while a few small lumps remain, letting residual heat finish the job. Keep every utensil completely dry to prevent seizing.
A Note on Gifting This Batch
Because they keep well for a week in the refrigerator, these squares make a lovely homemade gift. Packed in a parchment-lined tin and kept cool, they look polished and travel well. A small tag noting the hazelnuts is a thoughtful touch. Cutting them into narrow bars and wrapping each one in parchment tied with twine makes a simple, charming presentation.
A Note on Scaling Down the Batch
For a smaller batch, halve the recipe with one cup of chocolate chips, a quarter cup of spread, and one cup of cereal, pressed into a loaf pan. A smaller batch also sets a little faster, often in about an hour and a half.
A Note on Choosing Your Pan
An 8-inch square pan gives thick, satisfying squares. A 9-inch pan works too but makes thinner pieces. Whatever pan you use, lining it with parchment makes lifting and cutting easy. Metal pans chill a little faster and more evenly than glass, which helps the squares set within the stated time.
Why Parchment Paper Makes a Difference
Lining the pan with parchment and leaving some overhang lets you lift the whole slab out in one piece and cut it on a board, giving straighter edges and protecting your pan. Wax paper can work in a pinch, but parchment releases the chocolate more cleanly.
Common Questions
Can I use dark chocolate?
Yes, dark or semisweet chips make a less sweet square.
Can I add whole hazelnuts?
Yes, fold in or sprinkle chopped toasted hazelnuts for extra crunch.
Why are my squares crumbling?
The mixture wasn’t pressed firmly enough; pack it tightly into the pan.
Can I use a different cereal?
Yes, cornflakes or chocolate crispy rice cereal also work well.
How do I keep the cereal crunchy?
Fold gently and store the squares airtight in the refrigerator.
How long do they keep?
Up to one week in an airtight container in the refrigerator.
Can I freeze them?
Yes, for up to two months; thaw in the refrigerator.
However you top them and whoever you share them with, these 3-ingredient chocolate hazelnut crunch squares deliver creamy, nutty, crunchy sweetness from just three simple ingredients and a pan. They’re proof that a bakery-worthy treat can be made at home in minutes.