
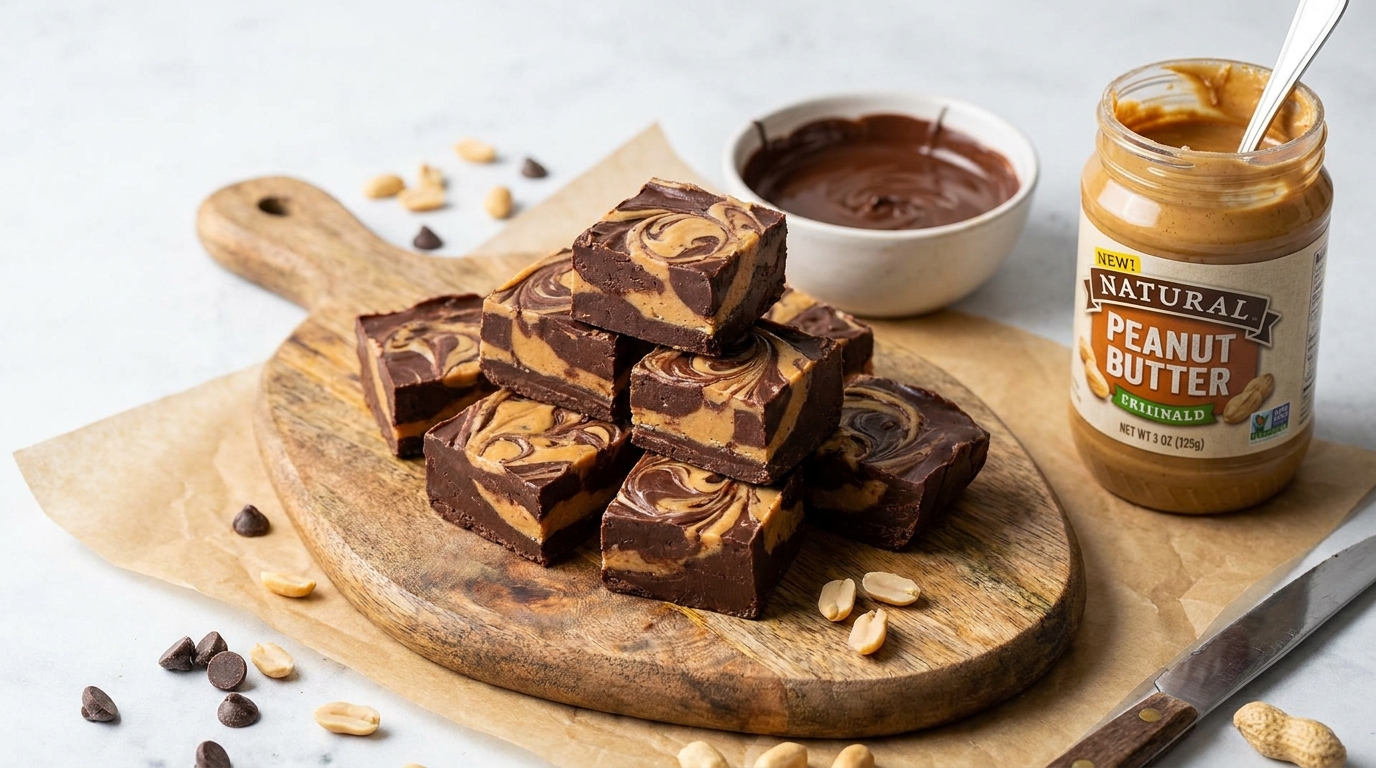
Chocolate Peanut Butter Fudge
Swirled, glossy, finished with flaky salt — a fudge that sets in the fridge and slices like a bakery treat.
Thank you for reading this post, don't forget to subscribe!
Fudge has a reputation for being finicky — candy thermometers, soft-ball stages, the very real risk of grainy, sugary failure if the temperature runs even a little off. This version skips all of that entirely.
Melted chocolate and peanut butter, swirled together and poured into a pan, need nothing more than a bowl, a microwave or double boiler, and a few hours in the fridge to set into something dense, glossy, and genuinely fudge-like. No candy thermometer, no boiling sugar syrup, no risk of crystallizing.
The marbled look — dark chocolate swirled through peanut butter — does most of the visual work on its own. It looks like something from a specialty candy shop, finished with a scatter of flaky sea salt that cuts through the richness in exactly the right way.
For anyone who has been burned by a traditional fudge recipe before — grainy texture, a batch that never quite set, sugar crystals that turned the whole thing gritty — this version offers real peace of mind. There’s no precise temperature window to hit, no stirring in one direction for exactly the right number of minutes. It’s about as forgiving as candy-making gets.
A Little Bit of History
Traditional fudge is a genuinely technical candy, relying on carefully controlled sugar crystallization to achieve its dense, smooth texture. Getting it right by hand has challenged home cooks for well over a century, which is exactly why so many shortcut versions have emerged over the decades — recipes built around melted chocolate, condensed milk, or in this case, natural fats from chocolate and peanut butter, rather than a cooked sugar syrup.
This particular style, sometimes called ‘fudge’ more for its dense, rich texture than its technical method, belongs to a broader family of no-cook confections that gained popularity in home kitchens as more people sought quicker, more reliable alternatives to classic candy-making. Peanut butter fudge specifically has deep roots in American home baking, especially in the South and Midwest, where peanut butter has long been a pantry staple and a natural pairing with chocolate.
The swirled, marbled presentation seen in this version is a relatively modern styling choice, popularized as home bakers began treating simple no-bake treats with the same visual flair as professional confections. It transforms what is, at its core, an extremely simple two-ingredient method into something that looks deliberately crafted — a small technique with an outsized visual payoff.
Swirled, two-tone confections like this one also draw on a longer tradition of marbled desserts — marble cake, swirled cheesecake, tie-dye cookies — where the visual appeal comes specifically from two contrasting colors or flavors kept distinct rather than fully blended. That same principle applies here: the fudge tastes just as good fully mixed, but the swirled presentation elevates it from a simple treat to something that looks intentionally crafted.
Why This One Works
This fudge relies on the natural fat content in both chocolate and peanut butter to set firm once chilled, rather than the sugar-crystal structure that traditional cooked fudge depends on. Because there’s no sugar syrup to bring to a precise temperature, there’s essentially no failure point here — melt gently, swirl, chill, and the fat in both ingredients solidifies into a dense, sliceable texture on its own.
The result sits somewhere between fudge and a firm chocolate bark, rich enough to need only a small square per serving. Chocolate chips are formulated to hold their shape at room temperature and melt smoothly under gentle heat, which is exactly the behavior this recipe needs — melt too aggressively, and the chocolate can seize into a grainy, unworkable texture rather than staying glossy and pourable.
Peanut butter behaves similarly under gentle heat, becoming thin and pourable when warmed, which is what allows it to swirl cleanly through the chocolate rather than sitting in a separate, unmixed layer. Chilling afterward is what locks both textures in place — the fats in each ingredient solidify at a similar enough rate that the fudge sets evenly throughout, rather than one layer firming up faster than the other.
There’s also a reason this recipe specifically calls for melting the two mixtures separately rather than combining them in one bowl from the start. Keeping them separate until the swirling stage is what preserves the visual contrast between the dark chocolate and lighter peanut butter — combine them too early, and you’d end up with a single uniform brown color rather than the marbled look that makes this fudge visually distinctive.
What You’ll Need
- 2 cups semi-sweet chocolate chips
- 1 cup creamy peanut butter
- Flaky sea salt for toppingOptional, but highly recommended
A Closer Look at Each Ingredient
The chocolate chips. Semi-sweet chocolate chips strike the right balance of sweetness against the richness of the peanut butter, though dark or milk chocolate chips can be used depending on preference. Whichever you choose, melt gently and evenly — chocolate that’s overheated or exposed to any moisture can seize into a thick, grainy paste that won’t swirl or set properly.
The peanut butter. A smooth, shelf-stable peanut butter melts most evenly and gives the most reliable swirl. Natural peanut butter can work, but its higher oil content sometimes prevents the fudge from setting quite as firmly, since there’s more liquid fat working against the chilling process.
The sea salt. This is optional in the sense that the fudge will still taste good without it, but it’s genuinely worth including. A light scatter of flaky sea salt over the top cuts through the sweetness of both the chocolate and peanut butter, and the visual contrast of white salt flakes against the dark swirl makes the finished fudge look considerably more polished.
Equipment You’ll Need
This recipe keeps equipment needs to a minimum. You’ll want two separate microwave-safe bowls (or a double boiler setup) for melting the chocolate and peanut butter individually, an 8-inch square pan, and parchment paper to line it for easy removal. A butter knife or wooden skewer is ideal for creating the swirl pattern — anything with a thin, pointed edge works better than a wide spoon, which tends to blend the layers together rather than creating distinct marbling.
How to Make Them
- Line the pan. Line an 8-inch square pan with parchment paper, leaving overhang on the sides.
- Melt the chocolate. Melt the chocolate chips gently in the microwave in short bursts, or over a double boiler, until smooth.
- Melt the peanut butter. In a separate bowl, warm the peanut butter until smooth and pourable.
- Layer and swirl. Pour both mixtures into the prepared pan in alternating spoonfuls, then swirl gently with a knife or skewer to create a marbled pattern.
- Top with salt. Sprinkle flaky sea salt evenly over the surface while it’s still soft.
- Chill. Refrigerate for at least 3 hours, or until fully firm.
- Slice and serve. Lift out using the parchment overhang and cut into small squares while cold.

Troubleshooting Common Issues
My fudge is too soft to slice cleanly. This usually means it hasn’t chilled long enough. Give it the full 3 hours, and consider an extra hour if your kitchen runs warm or if you used a particularly oily natural peanut butter.
My chocolate seized while melting. This happens when chocolate is overheated or comes into contact with even a small amount of water. If this happens, it’s usually best to start over with fresh chocolate rather than trying to rescue a seized batch, since the texture won’t smooth back out.
My swirl pattern disappeared and it just looks like one solid color. This means the two mixtures were stirred together too thoroughly rather than gently swirled. Next time, use a light touch with a knife or skewer, dragging through the mixtures just a few times rather than fully combining them.
My fudge tastes greasy rather than rich. This can happen with a very oily natural peanut butter, since the extra liquid fat doesn’t fully bind into the set fudge structure. A standard, shelf-stable peanut butter tends to give a cleaner, less greasy result.
My peanut butter sank to the bottom instead of swirling through evenly. This can happen if the peanut butter was thinner and more liquid than the chocolate when poured in. Warm both mixtures to a similar consistency before layering them into the pan for a more even swirl.
My fudge has small white or grey spots on the surface. This is chocolate bloom, caused by fat separating out during uneven cooling. It’s cosmetic only and doesn’t affect the taste — storing the fudge at a consistent, cool temperature helps prevent it.
Serving Suggestions
This fudge is rich enough to serve in small squares straight from the fridge, and honestly benefits from staying chilled right up until serving, since the texture is at its cleanest, most sliceable best when cold. A few pieces arranged on a small plate alongside coffee or espresso makes for an easy, elegant after-dinner offering.
Because it’s dense and rich, this fudge also works well cut into smaller bite-sized pieces than a standard candy bar portion — think half-inch squares rather than full two-inch squares — especially if you’re serving it alongside other desserts on a holiday or party spread. It holds its shape and flavor well at room temperature for a couple of hours, making it a reliable addition to a dessert table or homemade gift box.
For gifting, these squares pack beautifully into small paper candy cups or a lined tin, and the marbled pattern means no two pieces look quite identical — a nice touch for a homemade holiday gift that doesn’t require any fancy decorating skill to look intentional and polished.
This fudge also holds up surprisingly well as an ice cream topping — let a few pieces sit at room temperature until just soft enough to chop into small chunks, then scatter over vanilla or chocolate ice cream for an easy upgrade to a simple dessert.
It’s also worth taking a moment to talk about temperature control, since it’s the one variable in this recipe that genuinely matters. Both chocolate and peanut butter are sensitive to overheating in different ways — chocolate can seize into a thick, unworkable paste if it gets too hot too quickly or comes into contact with even a small amount of water, while overheated peanut butter can separate, with the oil rising to the surface and leaving a greasy texture once cooled. Melting both gently, in short bursts with frequent stirring, gives you the smoothest, most reliable result every time, and it’s a technique that carries over directly to any other melted-chocolate recipe you might make in the future.
A Few Ways to Make Them Yours
Nutty Crunch
Fold chopped roasted peanuts into the peanut butter layer before swirling for extra texture.
White Chocolate Swirl
Add a third layer of melted white chocolate for a three-tone marbled effect.
Almond Butter Swap
Substitute almond butter for the peanut butter for a milder, slightly different nutty flavor.
Espresso Boost
Stir a teaspoon of instant espresso powder into the melted chocolate for a mocha-leaning depth.
Make-Ahead Tips
This fudge is an excellent make-ahead option, since it needs a solid chilling period regardless of when you plan to serve it. It can be made up to a week in advance and kept covered in the fridge, which makes it a convenient choice for holidays and gatherings where kitchen time on the day of the event is already stretched thin.
If you’re making this for gifting, consider slicing it into squares and storing them in a single layer between sheets of parchment paper, rather than stacking pieces directly on top of each other, to keep the edges and swirl pattern looking clean until you’re ready to package and give them away.
This fudge also holds up well as a make-ahead addition to a larger holiday dessert spread, since its rich, dense texture means it doesn’t dry out or lose quality nearly as quickly as more delicate baked goods might over the same storage period.
A Note on Dietary Adjustments
This recipe can be adapted for a few common dietary needs with minimal adjustment. For a dairy-free version, use dairy-free chocolate chips, which are widely available and melt in essentially the same way as standard chocolate chips. For a lower-sugar version, a sugar-free or reduced-sugar chocolate chip alternative can be substituted, though the setting behavior may vary slightly by brand.
This recipe is not naturally suited to a nut-free adaptation, since peanut butter is central to both the flavor and the structure of the fudge — a seed butter alternative like sunflower seed butter can sometimes be substituted with a similar texture, though the flavor will be noticeably different.
For those tracking portion sizes, it’s worth noting that this fudge is quite dense and rich, meaning a smaller square than you might expect goes a long way — cutting the pan into 20 or 24 smaller pieces rather than the standard 16 can help with portion control without sacrificing any of the flavor experience.
Storage
Keep the fudge in an airtight container in the fridge for up to 2 weeks — the texture holds up well since there’s no cooked sugar to crystallize or dry out over time. It also freezes well for up to 3 months; thaw in the fridge before serving.
Common Questions
Why is my fudge too soft to slice cleanly?
This usually means it hasn’t chilled long enough. Give it the full 3 hours, and consider an extra hour if your kitchen runs warm.
Can I use milk chocolate instead of semi-sweet?
Yes — milk chocolate works fine and produces a sweeter, creamier finished fudge. Just be mindful it may set slightly softer than semi-sweet chocolate.
Why did my chocolate look dull instead of glossy after chilling?
This is called chocolate bloom, caused by melting or cooling too quickly. It’s purely cosmetic and doesn’t affect flavor — melting slowly and evenly helps prevent it next time.
Can I double this recipe for a bigger batch?
Yes — simply double all the ingredients and use a 9×13-inch pan instead of an 8-inch square pan, keeping the chilling time the same.
Do I have to use a double boiler to melt the chocolate?
No — a microwave works just as well. Melt in 20–30 second bursts, stirring between each, to avoid overheating the chocolate.
Can I skip the sea salt topping?
Yes, the fudge will still taste great without it, though the salt does add a nice contrast against the sweetness of the chocolate and peanut butter.
Can I add a layer of caramel to this fudge?
Yes — a thin layer of soft caramel between the chocolate and peanut butter swirl can be added, though it will require slightly longer chilling time to fully set all three components together.
Is this fudge very sweet, or is it more bittersweet?
Using semi-sweet chocolate chips keeps the overall sweetness fairly balanced against the peanut butter, but if you prefer a less sweet result, dark chocolate chips can be substituted for a more bittersweet finish.
One last thing worth mentioning: this fudge is a genuinely reliable recipe to lean on for last-minute gifting or entertaining, since it requires no specialized candy-making skill and comes together with ingredients most people already have on hand. A quick trip to the pantry for chocolate chips and peanut butter is often all it takes to have a finished, impressive treat within a few hours.