
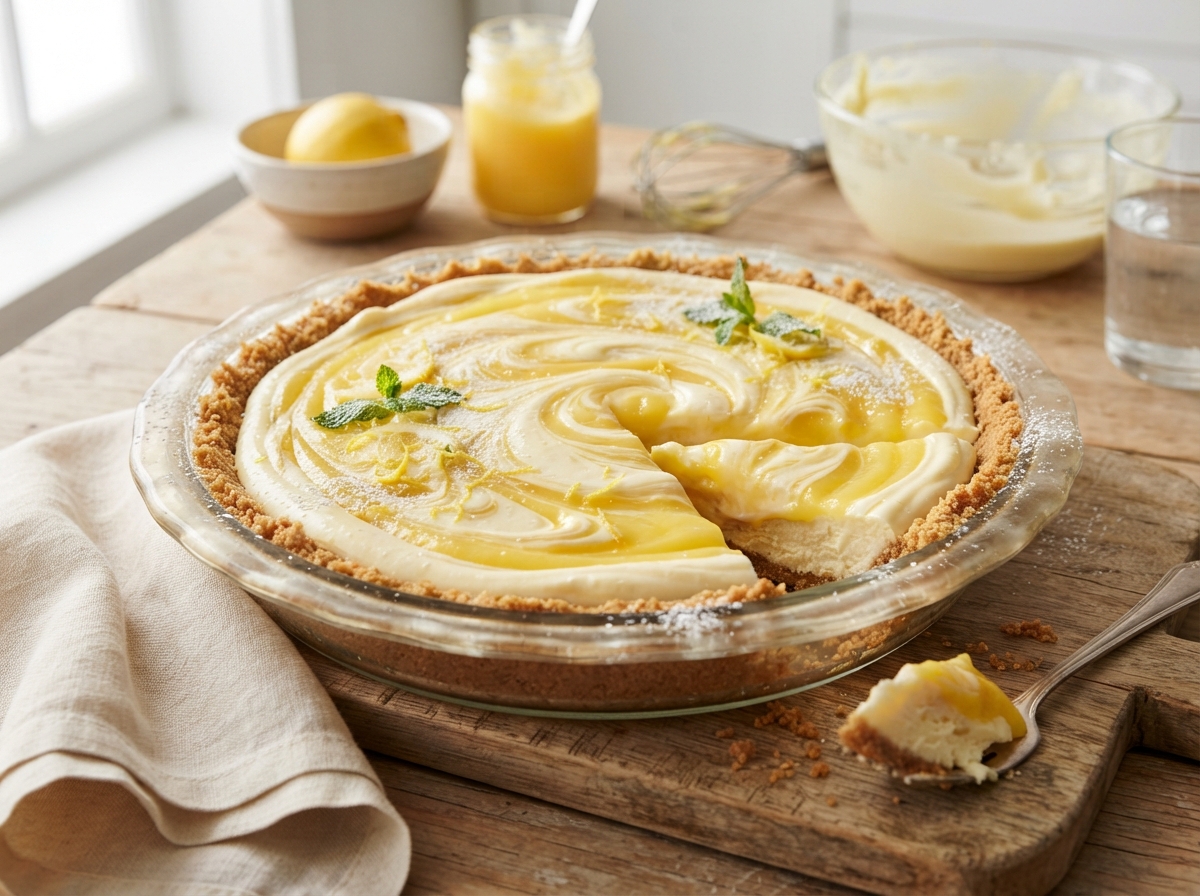
2-Ingredient No-Bake Lemon Cheesecake Swirl Pie
Lemon pie filling swirled into a graham cracker crust sets into a bright, pretty no-bake pie in just a couple hours.
Thank you for reading this post, don't forget to subscribe!
Bright, pretty, and wonderfully simple, this no-bake lemon cheesecake swirl pie needs only two ingredients and a few minutes of hands-on time. There’s no oven, no mixing bowl to wash, and no complicated technique, just a can of lemon pie filling swirled into a ready-made crust.
Spooning most of the lemon filling into a graham cracker crust, then adding the rest in small dollops and swirling it with a knife creates a beautiful marbled pattern on top. A couple of hours in the refrigerator is all it takes to turn that swirled filling into a sliceable, bright-tasting pie.
It’s an easy make-ahead dessert for a spring gathering, a potluck, or any time you want something that looks far more impressive than the two minutes of actual effort it takes.
Why This Recipe Works
Canned lemon pie filling is already thickened and ready to set on its own once chilled, which means this pie needs no eggs, no baking, and no additional thickener of any kind. Swirling a portion of the filling into small dollops on top of the rest, rather than mixing everything together smoothly, is what creates that signature marbled look.
Because the lemon pie filling and the prepared crust together provide everything this pie needs, there’s no cream cheese, no gelatin, and no cooking involved at all.
Why the Swirl Works So Well
Spooning small dollops of filling on top of an already-spread layer, rather than pouring everything in at once, gives a knife or skewer distinct pockets of color to swirl through. A few gentle figure-eight motions are usually all it takes to create a pretty, marbled pattern without overmixing it into one flat color.
What You’ll Need
- 1 (9-inch) prepared graham cracker crust
- 1 (21 oz) can lemon pie filling
You’ll also need a spoon and a knife or skewer for swirling. This recipe makes 8 slices.
A Note on Ingredient Choices
A standard prepared graham cracker crust from the baking aisle works perfectly here, though a homemade one can be used if you prefer. Canned lemon pie filling, found near the other baking and pie supplies, gives this pie its bright color and tangy-sweet flavor in one simple step.
Equipment You’ll Need
A spoon and a knife or skewer for swirling are all you need; no oven, mixer, or stovetop required.
How to Make It
- Fill most of the crust. Spoon about two-thirds of the lemon pie filling into the graham cracker crust and spread evenly.
- Add the rest. Add the remaining lemon filling in small spoonfuls over the top.
- Swirl. Use a knife or skewer to gently swirl the filling into a pretty pattern.
- Chill. Refrigerate for at least 2 hours, or until well chilled and set.
- Serve. Slice and serve cold.
Getting a Pretty Swirl Pattern
Using a light touch and just a few passes with the knife or skewer, rather than stirring vigorously, keeps the swirl looking intentional and pretty rather than muddled. It helps to picture drawing a loose figure eight across the surface rather than mixing everything together.

Getting an Even Fill
Spreading the first layer of filling evenly across the crust before adding the swirled dollops on top gives you a pie with a level, attractive base. Working slowly here avoids disturbing the crust underneath.
Knowing When It’s Done
This pie is ready once the filling feels fully chilled and holds a clean edge when sliced. If it still feels soft in the center after 2 hours, give it another hour or let it chill longer before serving.
Tips for Perfect Lemon Cheesecake Swirl Pie
Use a light hand when swirling, since a few gentle passes create a prettier pattern than a lot of vigorous stirring. Chill the pie the full amount of time, since a slightly underset filling won’t slice as cleanly.
Troubleshooting Common Issues
My swirl pattern disappeared. The filling was likely overmixed; use a lighter hand with fewer passes next time. My pie won’t firm up. It likely needs more chilling time; give it a few more hours or let it chill overnight. My pie is too soft to slice cleanly. Chill it longer, and use a warm, dry knife wiped between cuts. My filling tastes too tart or too sweet. This will vary slightly by brand of pie filling, so trying a different brand next time can help if the balance isn’t to your taste.
A Few Ways to Make It Yours
Cream Cheese Swirl
Swirl in a few spoonfuls of softened, sweetened cream cheese along with the lemon filling for a cheesecake-style flavor.
Berry Topping
Top the chilled pie with fresh berries for a bright, colorful garnish.
Toasted Coconut Crust
Press toasted coconut into the crust before filling for a tropical twist.
Graham Crumb Topping
Sprinkle a few extra graham cracker crumbs over the top before serving for added texture.
The classic version is worth trying first so you know the baseline flavor before adding any extras.
How to Store Lemon Cheesecake Swirl Pie
Keep the pie refrigerated in an airtight container or wrapped tightly for up to 5 days. Because the filling is a prepared pie filling, refrigeration keeps it holding its shape and staying food-safe.
When to Serve This Pie
This pie works well for spring gatherings, potlucks, or any time a quick, pretty dessert is needed with almost no advance planning. It also makes a refreshing addition to a brunch spread alongside fresh fruit.
Nutrition and Serving Information
This pie makes 8 slices, and exact calorie content will vary depending on the specific brands of crust and lemon pie filling used. Because this recipe contains gluten and the crust typically contains dairy, it isn’t appropriate for anyone avoiding those ingredients.
Make-Ahead Tips
This pie is a genuinely good make-ahead dessert, since it needs to chill for a couple of hours and actually tastes better once fully set. Making it the morning of or the night before a gathering removes any last-minute pressure entirely.
The Science Behind a No-Bake Swirl Pie
Canned pie filling is already thickened with a starch base during manufacturing, which is what allows it to hold its shape and swirl pattern once it’s spooned into a crust and chilled. Because that thickening has already happened before the can is even opened, there’s no need for eggs, gelatin, or any baking at all; the filling simply needs time in the cold to firm up fully.
Portioning and Yield
This recipe makes 8 slices from a single 9-inch pie, a good amount for a small gathering or a few days of light dessert snacking. Doubling the filling and using two crusts works well for a larger crowd, though it’s easiest to fill and swirl each pie separately for the prettiest pattern.
A Little Bit of History
Swirled fruit pies have long been a way to make a simple filling look far more elaborate than it actually is, a trick borrowed from marbled cheesecakes and swirled brownies alike. This lemon version leans into that same visual trick while keeping the ingredient list and the process about as simple as a pie can get.
Serving Suggestions
Serve this pie chilled straight from the refrigerator for the cleanest cut and most refreshing bite. A slice alongside fresh berries or a light iced tea makes for an easy, bright spring or summer dessert.
Choosing the Right Lemon Pie Filling
A good-quality canned lemon pie filling, the kind sold specifically for pies rather than a thinner lemon curd, gives the best texture for swirling and slicing. Checking that the filling looks thick and glossy right out of the can, rather than runny, is a good sign it will set up nicely.
Why This Recipe Is So Beginner-Friendly
If you’ve never made a no-bake pie before, this is about as forgiving a place to start as you’ll find. There’s no oven temperature to worry about, no water bath, and no delicate technique required beyond spooning filling into a crust and swirling it with a knife. With only two ingredients and a handful of simple steps, there’s very little room for the kind of mistakes that can derail a more involved baked pie. This makes it a genuinely approachable recipe for a first-time baker, since the process is simple, safe, and produces a real, visible result after just a couple hours of chilling.
Adjusting the Flavor to Your Taste
As written, this pie gets its flavor almost entirely from the canned lemon pie filling, giving a bright, tangy-sweet taste that varies slightly depending on the brand used. If you’d like an even brighter flavor, stirring a little fresh lemon zest into the filling before swirling adds real citrus punch. If you’d prefer something milder, choosing a brand of filling labeled as less tart shifts the balance the other way. Because this recipe has so few ingredients to begin with, small changes tend to have a noticeable effect on the final flavor, so it’s worth trying the classic version first before deciding what, if anything, you’d like to change.
Pairing This Pie With Other Desserts and Drinks
Because the flavor here is bright, tangy, and light, this pie pairs naturally with richer options if you’re serving more than one dessert, since the contrast keeps a spread feeling balanced. A dense chocolate treat or a nutty fudge pairs nicely against the brightness of this pie, while another fruit-based dessert leans further into the same refreshing direction. On the drink side, this pie pairs well with iced tea, lemonade, or a light sparkling drink.
A Note on Ingredient Proportions
Using one full can of lemon pie filling for one 9-inch crust gives a pie with a generous, well-filled slice every time, and it’s worth understanding why that balance matters before adjusting it. Enough filling needs to be present to fill the crust completely and still leave enough for the swirled top layer, while too little can leave the crust looking sparse once sliced. This particular ratio is what gives the finished pie its classic full, sliceable look, so it’s worth treating the stated amount as a tested baseline.
A Quick Note on Serving Temperature
This pie tastes best served cold, straight from the refrigerator, since the filling can soften and lose its clean-cut shape at room temperature. If serving at an outdoor gathering, keeping the pie in a cool spot or on ice until just before serving helps it stay firm.
Why This Recipe Is Naturally Kid-Friendly to Make
Because this recipe involves spooning filling into a crust and swirling it with a knife, it’s a genuinely simple treat to make with kids, with very little risk involved at any step. Spooning the filling and swirling the pattern on top are satisfying, hands-on tasks that give a real sense of accomplishment once the finished pie comes out of the refrigerator set and ready to slice.
A Quick Note on Portion Control
Because this pie is sweet and rich despite its light appearance, one slice goes a long way here compared to a lighter snack. Cutting the pie into smaller wedges is an easy way to stretch it further and keep portions naturally smaller for a party.
A Note on Presentation
How you serve this pie changes the impression it makes almost as much as the flavor itself. Sliced plainly and served on a plate, it reads as a simple, quick dessert. Garnished with fresh mint leaves and a few lemon slices before serving, the same pie suddenly looks like something from a bakery display case, which makes this a surprisingly versatile recipe to keep in rotation for both casual snacking and spring entertaining.
Why This Recipe Is So Reliable
Part of what makes this pie such a good recipe to keep on hand is how little can actually go wrong with it, as long as the filling is swirled gently and the pie is given enough time to chill. There’s no oven temperature to manage and no delicate baking chemistry to worry about, the pre-thickened filling sets predictably every time, and swirling it into the crust doesn’t introduce any tricky steps of its own. As long as the filling is handled gently and given enough time to firm up, the result is consistent nearly every time, which is exactly the kind of dependability worth having in a go-to spring and summer treat.
A Final Thought on This Recipe
Recipes built around just a couple of convenient staples tend to earn their place in a regular rotation not because they’re flashy, but because they solve a real problem: a gathering needs a quick, pretty dessert, or a craving for something bright and citrusy hits, and a full baking session isn’t always realistic. 2-Ingredient No-Bake Lemon Cheesecake Swirl Pie answers that need reliably, using ingredients that are easy to find any time of year, and turning them into something that looks like it came from a bakery case with almost no actual effort. That combination of simplicity and payoff is exactly why this recipe is worth keeping close at hand.
A Word on Texture
The texture of this pie sits somewhere between a light pudding and a classic dense cheesecake, and that in-between quality is part of what makes it feel special despite how few ingredients go into it. Because the filling is thickened entirely in the can before it even reaches the crust, the pie stays soft and smooth, with a bright tang running through every bite. A pie that’s chilled the full amount of time holds its shape cleanly when cut, while still feeling genuinely light.
A Note on Cutting Clean Slices
Using a warm, dry knife wiped clean between cuts gives the neatest, most even slices once the filling is fully set. Letting the pie sit in the refrigerator the full amount of time before slicing also helps, since a filling that hasn’t fully firmed up can smear rather than cut cleanly.

A Final Note on Batch Size
This recipe is sized for a single 9-inch pie, which keeps the whole process quick and manageable in just a few minutes of active prep plus chilling time. For a bigger batch to serve a larger crowd, fill and swirl each additional pie separately rather than trying to combine several cans of filling into one larger crust at once, since a bigger batch swirled together can lose its distinct marbled pattern. Working through it pie by pie keeps the swirl looking its prettiest, and it’s a small extra step that makes a real difference once each pie is chilled and ready to serve.
A Note on Working With Canned Pie Filling
Giving the can a gentle stir before spooning out the filling helps even out its texture, since some settling can happen during storage and the bottom can occasionally be slightly thicker than the top. A rubber spatula does a better job than a spoon of scraping every bit of filling cleanly out of the can, which matters here since the recipe is built around using the entire amount rather than measuring out a portion. Letting the can sit at room temperature for a few minutes before opening it also makes the filling a touch easier to spoon and spread evenly.
Common Questions
Can I use a homemade crust instead of a prepared one?
Yes, any 9-inch graham cracker crust, homemade or store-bought, works well.
Why did my swirl pattern disappear?
The filling was likely overmixed; use a lighter hand and fewer passes to keep the pattern visible.
Can I add cream cheese to this recipe?
Yes, swirling in a few spoonfuls of softened, sweetened cream cheese works well for a cheesecake-style flavor.
How do I know when the pie is fully set?
It should feel fully chilled and hold a clean edge when sliced.
Can I double this recipe?
Yes, but fill and swirl each pie separately for the prettiest pattern.
How should I store leftovers?
Keep the pie refrigerated, covered tightly, for up to 5 days.
Can I freeze this pie?
Freezing isn’t recommended, since the filling can separate and become watery once thawed.
2-Ingredient No-Bake Lemon Cheesecake Swirl Pie turns a prepared crust and a can of lemon filling into a bright, pretty dessert with almost no effort at all. Spoon, swirl, and chill, that’s the entire process, and the result tastes like a refreshing citrus treat straight from a bakery case.