
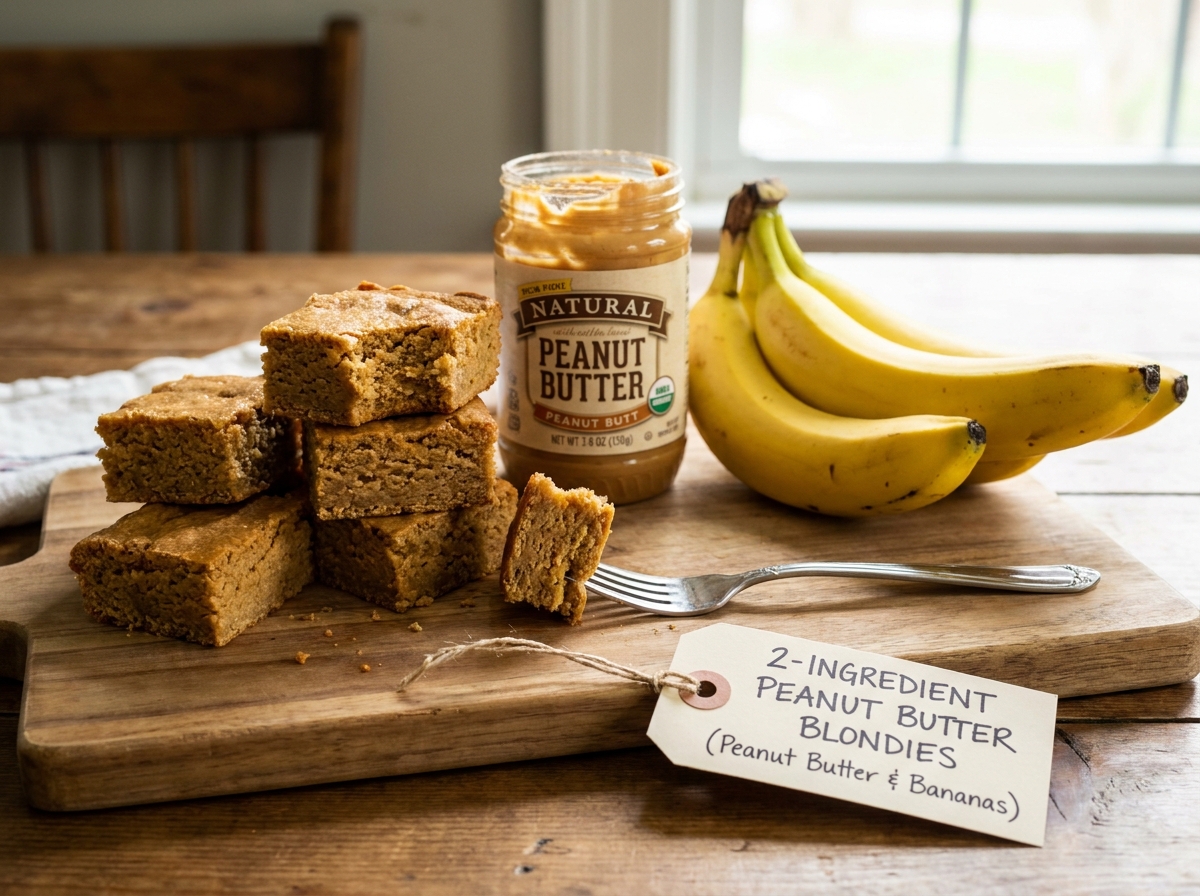
2-Ingredient Peanut Butter Blondies
Creamy peanut butter and packed brown sugar, mixed and spread into a pan, baked into dense, chewy bars with caramelized edges — no flour, eggs, or butter.
Thank you for reading this post, don't forget to subscribe!
Sometimes the best dessert ideas are hiding behind the simplest ingredient lists. 2-Ingredient Peanut Butter Blondies prove that you do not need flour, eggs, butter, baking powder, or a long collection of pantry staples to make a rich and satisfying baked treat.
All you need is creamy peanut butter and packed light brown sugar, plus a few minutes of preparation and some time in the oven. The finished blondies are dense, chewy, sweet, and packed with the familiar roasted-peanut flavor that makes peanut butter such a beloved dessert ingredient. They are especially useful when you want homemade treats without committing to a complicated baking project.
This recipe is also a great example of how understanding ingredients can be more valuable than simply following a long list of steps. Peanut butter supplies fat and structure, while brown sugar contributes sweetness and moisture. Once combined and baked, they transform into a soft, chewy bar with lightly golden edges and a tender center. The recipe makes nine blondies in an 8-inch square pan, making it a convenient batch for a family dessert, afternoon snack, or small gathering. If you have ever opened the pantry and thought you had “nothing to bake,” this is the kind of recipe that can change your mind.
2-Ingredient Peanut Butter Blondies are simple baked dessert bars made entirely from creamy peanut butter and packed light brown sugar. Unlike traditional blondies, which commonly contain flour, eggs, butter, and vanilla, this minimalist version removes those ingredients and focuses on the rich combination of peanut butter and brown sugar. The batter is thick rather than pourable, so you spread it into the prepared pan before baking. During baking, the sugar caramelizes and the peanut butter develops a deeper roasted flavor, producing edges that become lightly golden while the center remains soft.
The texture is one of the most appealing aspects of this recipe. Properly baked blondies should be chewy rather than dry, with enough structure to hold their shape when sliced. Letting them cool completely in the pan is particularly important, because the interior continues to set as it cools. If you cut them immediately from the oven, the center may appear softer than expected. Once cooled, the blondies become easier to slice and develop the dense, chewy texture associated with a good dessert bar — though you can also enjoy them slightly warm if you prefer an especially soft center.
Why Two Ingredients Can Make Delicious Blondies
It might seem surprising that only two ingredients can produce something resembling a blondie, but each ingredient brings an important quality to the recipe. Peanut butter provides richness, fat, protein, and intense nutty flavor, while brown sugar provides sweetness and contributes moisture and caramel-like depth during baking.
The packed brown sugar is particularly useful because it contains molasses, which gives the blondies their characteristic deeper sweetness. As the mixture heats in the oven, the sugar becomes more fluid and contributes to browning around the edges, while the peanut butter gives the finished bars their dense, rich texture. There is no need to complicate the process — the recipe works because the two ingredients are each doing several jobs at once, instead of relying on a dozen components to create structure and flavor.
Why You’ll Love This Easy Blondie Recipe
The biggest attraction is obvious: only two ingredients. That means fewer things to measure, fewer dishes to wash, and fewer opportunities for a recipe to go wrong. If you’re new to baking, this is a particularly approachable place to start, because the preparation involves simply mixing the ingredients and spreading the thick batter into a pan.
The recipe also takes only about five minutes to prepare. Once the batter is ready, it goes directly into a 350°F oven for approximately 18 to 22 minutes, making the total time around 25 minutes, excluding any additional cooling time you choose to allow before serving.
These blondies are also naturally suited to customization. You can enjoy them plain, serve them warm, add chocolate after baking, or pair them with ice cream. The basic recipe is simple enough to stand alone but neutral enough to accommodate your favorite dessert toppings.
A Beginner-Friendly Dessert
Baking can sometimes feel intimidating because many recipes require precise techniques. This one is remarkably forgiving in the preparation stage — there is no need to cream butter and sugar, sift flour, separate eggs, or prepare a complicated frosting. The most important skills are simply measuring accurately, mixing thoroughly, spreading the batter evenly, and watching the baking time, which makes these blondies a good choice for beginner bakers who want a homemade dessert without a lengthy process.
They are also useful for experienced bakers who want a quick recipe. Even if you regularly make elaborate cakes and pastries, there are days when a simple peanut butter dessert is exactly what you want.
What You’ll Need
- 1 cup creamy peanut butterConventional and well-stirred works best
- 1 cup packed light brown sugarFirmly packed when measured
That’s the entire list. Each blondie comes out to roughly 190 calories, and the recipe makes 9 squares.
Choosing the Right Peanut Butter
Creamy peanut butter is the easiest choice because it creates a smooth, cohesive batter. Conventional creamy peanut butter generally works well because its texture is consistent from jar to jar. Natural peanut butter can behave differently because its oil may separate; if you use it, stir it extremely well before measuring so the peanut solids and oils are thoroughly combined, otherwise the batter may become oily or inconsistent. Crunchy peanut butter can technically provide a different texture, but the peanut pieces may make the blondies less uniform — for classic smooth peanut butter blondies, creamy peanut butter is the better option.
Equipment You’ll Need
An 8-inch square baking pan gives you nine squares with a good balance of chew and thickness. Parchment paper, cut with a little overhang on two sides, makes lifting the finished slab out of the pan effortless once it’s cooled. A sturdy mixing bowl and a stiff spatula or wooden spoon are worth having on hand too, since this batter is considerably thicker than a typical cake batter and takes a bit more muscle to bring together. A wire cooling rack helps the pan cool evenly before you slice, and a sharp knife gives you the cleanest squares.
How to Make It
- Preheat the oven. Preheat your oven to 350°F (175°C).
- Prepare the pan. Line an 8-inch square baking pan with parchment paper, leaving a little overhang on two sides, and lightly grease it.
- Mix the batter. Add the peanut butter and packed light brown sugar to a mixing bowl and stir until thick, smooth, and completely combined.
- Spread it in the pan. Transfer the batter to the prepared pan and spread it into an even layer, paying attention to the corners.
- Bake. Bake for 18 to 22 minutes, or until the edges are lightly golden and the center looks set.
- Cool completely. Allow the blondies to cool fully in the pan before slicing — the interior keeps setting as it cools.
- Cut and serve. Lift the slab out using the parchment overhang and cut into 9 squares.
Mixing the Peanut Butter and Brown Sugar
The batter will be considerably thicker than traditional cake batter, and that’s completely normal. Use a sturdy spatula and press the peanut butter and brown sugar together until no obvious dry patches of sugar remain. Don’t stop mixing too early — because brown sugar can form small clumps, you want those clumps distributed throughout the peanut butter so the batter bakes evenly.

How to Get Soft and Chewy Blondies
The secret to soft, chewy blondies is not overbaking them. The recipe calls for approximately 18 to 22 minutes, but ovens vary, so start checking toward the lower end of the range. Look at the edges first — they should appear lightly golden and more firmly set than the center, while the middle should no longer look like raw batter but can retain a slight softness.
Remember that the blondies continue to firm as they cool. This is why pulling them from the oven when the center is just set can produce a softer finished texture than waiting until the entire surface looks very firm. If you prefer firmer blondies, baking toward the upper end of the recommended range may be appropriate; if chewy, soft centers are your priority, watch carefully around the 18-minute mark.
How to Know When the Blondies Are Done
Visual cues are the most helpful here. The edges should be lightly golden, and the center should appear set rather than wet. Because these blondies are dense, you shouldn’t expect them to look like a fluffy cake. You can also gently touch the center — it should feel set with some softness rather than remaining completely liquid or excessively jiggly. Avoid repeatedly opening the oven during the early part of baking, since this can affect the oven temperature.
If you test with a toothpick, remember that a very moist crumb doesn’t necessarily mean the blondies are raw. The goal here is a chewy dessert bar, not a dry cake, and the cooling period is part of the setting process.
Troubleshooting Common Issues
My blondies came out crumbly instead of chewy. This usually means the brown sugar wasn’t packed firmly enough when measured, or the blondies were overbaked or sliced before they had time to cool and set. Pack the sugar firmly, and let the pan cool completely before cutting.
My batter looked oily or inconsistent. This typically happens with natural peanut butter that wasn’t stirred well before measuring. Make sure the oil and peanut solids are fully combined before you measure, or stick with a conventional creamy peanut butter.
My blondies stuck to the pan. This almost always traces back to skipping the parchment paper or greasing it too lightly. Line the pan fully, with a bit of overhang on two sides, and grease the parchment before adding the batter.
My blondies seem underbaked in the center even after 22 minutes. Ovens vary, so it’s fine to bake a few minutes past the range if the center still looks wet rather than just soft. Just don’t judge doneness by a toothpick alone, since a moist crumb is normal for this dense, chewy style of bar.
My squares fell apart when I cut them. This is almost always a sign the blondies were sliced too soon. Let them cool completely in the pan first; the interior needs that time to firm up enough to hold a clean edge.
How to Cut Clean Blondie Squares
For neat squares, let the blondies cool completely before cutting, then use the parchment overhang to lift the entire slab from the pan and place it on a cutting board. A sharp knife works best; for nine equal pieces, divide the 8-inch square into three rows and three columns. If the knife becomes sticky, wipe it clean between cuts — a small step that makes the edges look much cleaner. For an especially polished presentation, chill the blondies briefly before slicing, since the firmer texture can make cutting easier, particularly in a warm kitchen.

Serving Suggestions
These blondies are delicious straight from the cutting board, but a few simple serving ideas can make them feel more special. Serve them slightly warm with ice cream for a comforting dessert, or let them cool completely for a portable snack. A dusting of powdered sugar can add visual appeal, although it’s completely optional, and a chocolate drizzle, chopped peanuts, or a small pinch of flaky salt can make the squares look more polished.
For parties, cut the nine large squares into smaller bite-size pieces, giving guests an easy-to-handle dessert while stretching the batch further. They also pair nicely with coffee, tea, or a cold glass of milk — the richness of peanut butter makes these blondies satisfying enough that a small square goes a long way.
A Few Ways to Make It Yours
Chocolate Drizzle
After the blondies have cooled, drizzle melted milk, dark, or white chocolate over the top and let it set for a classic finish.
Peanut Butter Cup
Scatter chopped peanut butter cups over the warm blondies right out of the oven so they soften slightly into the surface.
Salted Blondies
Finish the cooled squares with a light sprinkle of flaky sea salt to play up the sweet-and-salty contrast.
Blondie à la Mode
Serve a warm square with a small scoop of vanilla ice cream for a cozy, contrasting dessert without changing the recipe.
Remember that these additions are optional. The original recipe is designed specifically to remain a two-ingredient dessert, and there’s something satisfying about keeping it that simple.
Make-Ahead and Storage Tips
These blondies are convenient to make ahead because they can be baked, cooled, sliced, and stored until you’re ready to serve them. Allow the bars to cool completely before placing them into an airtight container. If stacking the blondies, separate layers with parchment paper to reduce sticking, and keep the container tightly closed to help preserve the chewy texture. For the best eating quality, avoid leaving the container open for long periods, since exposure to air can gradually change the texture and make the edges firmer. If you’re preparing these for a party, making them earlier in the day is an easy way to reduce last-minute kitchen work, and the blondies can simply be sliced shortly before serving.
Can You Freeze Peanut Butter Blondies?
Yes, you can freeze the baked blondies. Once completely cooled, wrap individual squares or place parchment between layers in a freezer-safe airtight container. Freezing individual portions is especially convenient because you can remove only the number of blondies you need, and you should allow them to thaw while still covered to minimize condensation on the surface. The texture may be slightly different after freezing and thawing, but properly packaged blondies remain enjoyable. If you want the freshest possible texture, however, making them shortly before serving is ideal, since the recipe itself is so quick.
Why These Blondies Are Perfect for Busy Days
Few desserts offer this combination of speed and simplicity. You can have the batter mixed in minutes, and the oven handles the rest — there’s no frosting to prepare, no dough to chill, and no complicated decoration required. The recipe also uses ingredients that many households already have available, which makes it a useful option for unexpected guests, family snacks, weekend baking, and last-minute dessert cravings. It’s also a smart choice when you want homemade food without committing to a major baking project.
The simplicity doesn’t make the result boring, either. Peanut butter and brown sugar have enough flavor on their own to create a satisfying dessert with a rich, caramel-like sweetness and nutty depth that needs very little help to feel like a proper treat.
A Note on Occasions
Because this recipe comes together so quickly and uses ingredients most kitchens already have on hand, it tends to earn a spot in the rotation for reasons that have nothing to do with a special occasion. A sudden after-school sugar craving, a last-minute request to bring something to a potluck, or simply wanting a slightly indulgent snack with your coffee are all reasonable excuses to make a batch. The nine-square yield is also a convenient size — large enough to share, small enough that you’re not stuck with an overwhelming amount of dessert sitting on the counter for days.
They also travel well once fully cooled, since the dense, chewy texture holds up better in a lunchbox or a container than a more delicate baked good would. Wrapped individually, they make a nice addition to a care package or a homemade gift, especially for anyone who already loves peanut butter desserts. There’s a certain appeal, too, in telling someone the treat they’re enjoying only required two ingredients — it tends to be the kind of detail people ask about.
Common Questions
Can I use dark brown sugar instead of light brown sugar?
Yes, dark brown sugar can be used, although it contains more molasses and will give the blondies a deeper, richer flavor, along with a darker color.
Can I use natural peanut butter?
You can, but consistency is important. Stir the natural peanut butter extremely well before measuring so the oil and peanut solids are thoroughly combined.
Why are my blondies crumbly?
Crumbly blondies may have been overbaked or sliced before they had enough time to cool and set. Try reducing the baking time slightly and allowing the finished blondies to cool completely before cutting.
Can I double this recipe?
Yes, you can make a larger batch, but use an appropriately sized baking pan so the batter maintains a similar thickness. A substantially thicker layer may require a longer baking time.
Can I add chocolate chips?
Yes. Chocolate chips make a delicious addition, although the recipe would then contain more than two ingredients. For a true two-ingredient version, keep the blondies plain.
Can I freeze these blondies?
Yes — wrap individual cooled squares or layer them with parchment in an airtight, freezer-safe container. Thaw them while still covered to avoid condensation on the surface.
Can I skip the parchment paper?
It isn’t recommended. This batter is sticky once baked, and parchment is what makes lifting and slicing the slab manageable. A well-greased pan alone can still leave the corners stuck.
The toothpick still looks a little moist — are they done?
Likely yes. These are meant to be dense and chewy rather than dry, so a moist crumb on the toothpick isn’t a sign of underbaking the way it might be for a cake. Go by the golden edges and a set-looking center instead.
2-Ingredient Peanut Butter Blondies are a perfect example of how a dessert can be incredibly simple without sacrificing flavor. With just creamy peanut butter and packed light brown sugar, you can create soft, chewy dessert bars with golden edges and a rich nutty flavor, with no flour to measure, no eggs to crack, no butter to soften, and no complicated preparation. Enjoy them plain for the full two-ingredient experience, or dress them up with chocolate, ice cream, chopped peanuts, or a sprinkle of salt — however you serve them, these prove that sometimes less really is more when it comes to homemade desserts.