
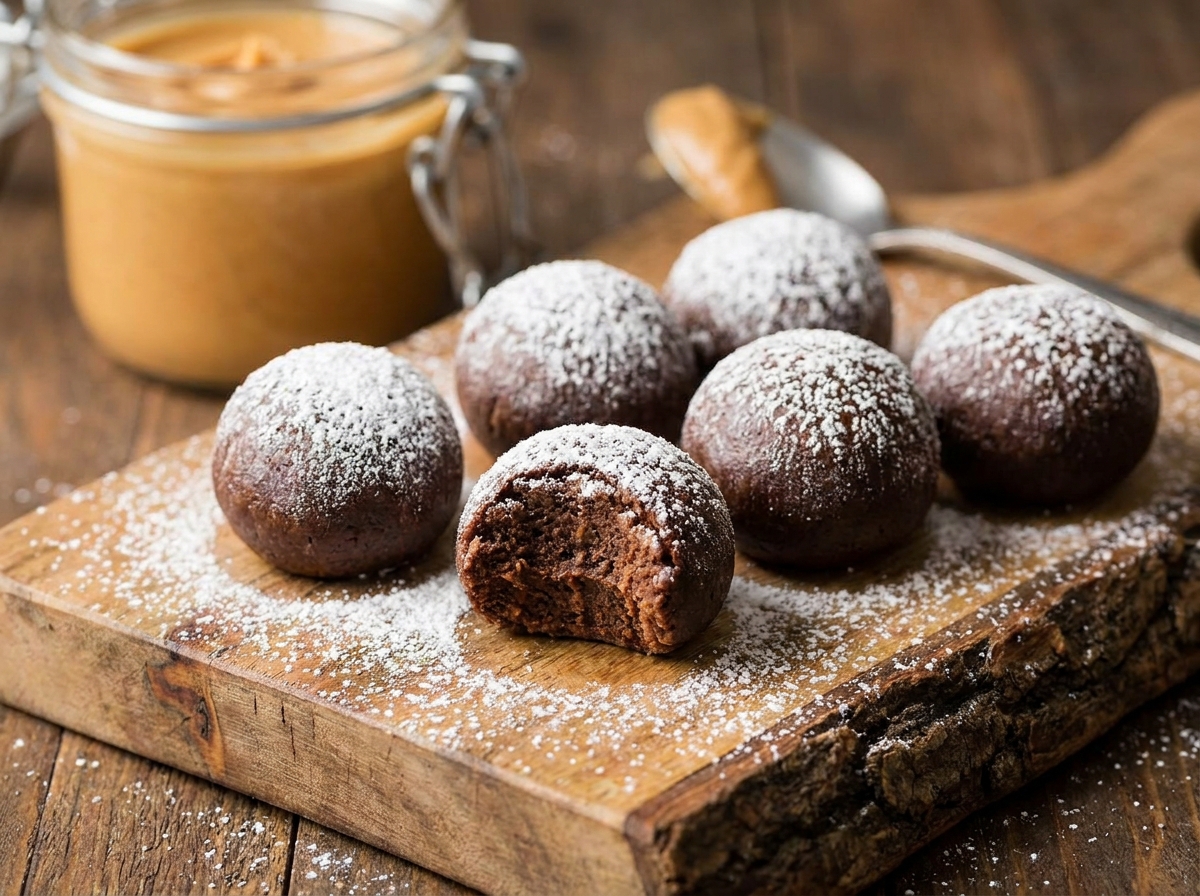
2-Ingredient Peanut Butter Chocolate Chip Bars
Melted peanut butter and chocolate chips baked into a dense, blondie-style bar — no flour, no butter, no sugar measured separately.
Thank you for reading this post, don't forget to subscribe!
These 2-Ingredient Peanut Butter Chocolate Chip Bars prove that a genuinely satisfying baked bar doesn’t need flour, butter, or a long ingredient list. Peanut butter, gently melted, and chocolate chips, stirred straight in, bake together into a dense, chewy, blondie-style bar with a rich peanut butter flavor and pockets of melted chocolate throughout.
There’s no creaming butter and sugar, no dry ingredients to sift or measure, and no separate mixing bowls to clean. The peanut butter itself provides the fat, the sugar, and the binding structure all at once, which is why this recipe works with just two ingredients where a traditional blondie recipe would need six or seven.
Because the batter comes together in one bowl in a matter of minutes, this is a genuinely fast bar to have in the oven, and the short bake time means you’re not waiting long before they’re cooling on the counter, ready to slice.
Why This Recipe Works
Peanut butter already contains fat, natural sugars, and enough structure-building protein to hold a bar together once baked, which is exactly what flour, butter, and sugar would normally provide in combination. Gently melting the peanut butter first makes it easier to stir the chocolate chips through evenly, and it also helps the mixture spread into the pan more smoothly than a thick, cold peanut butter would. Once baked, the peanut butter sets into a dense, fudgy texture rather than a light, cakey one, since there’s no leavening agent or flour to lighten the crumb.
Chocolate chips stirred through the melted peanut butter melt slightly at the edges as the bars bake, creating little pockets of gooey chocolate throughout rather than staying as distinct, separate chips the way they might in a flour-based cookie dough.
Why Melting the Peanut Butter Matters
Melting the peanut butter in short microwave intervals before stirring in the chocolate chips loosens it just enough to fold in the chips evenly and spread the mixture into the corners of the pan without a lot of effort. Peanut butter straight from the jar at room temperature can be stiff enough to make even distribution difficult, especially with a thicker, more natural-style peanut butter. A few short bursts in the microwave, stirred between each, brings it to a pourable, spreadable consistency without actually cooking it.
What You’ll Need
- 1 cup creamy peanut butter
- 1 cup chocolate chips
That’s the entire list. Each bar comes out to roughly 290 calories, and the recipe makes 9 bars.
Choosing the Right Peanut Butter
Standard creamy peanut butter, the kind with a smooth, consistent texture, works best for this recipe, since it melts evenly and gives the bars a uniform crumb. Natural peanut butters that separate in the jar can work too, but stir them thoroughly before measuring, since the extra oil that rises to the top can otherwise make the batter greasier than intended. Chunky peanut butter is an option if you’d like extra texture, though it will make the bars a little less uniform when sliced, since the peanut pieces create small pockets that behave a bit differently as the bars cool and firm up.
Equipment You’ll Need
An 8-inch square baking pan lined with parchment paper is all you need to bake these, with the parchment overhang making it easy to lift the finished bars out cleanly. A microwave-safe bowl and a spoon or spatula handle the mixing, and a sharp knife gives you clean slices once the bars have cooled.
How to Make It
- Preheat and prep. Preheat the oven to 350°F (175°C). Line an 8-inch square baking pan with parchment paper.
- Melt the peanut butter. Melt the peanut butter gently in the microwave in 20-second intervals, stirring between each interval.
- Stir in the chips. Stir in the chocolate chips until evenly distributed.
- Spread it out. Spread the mixture evenly into the prepared pan.
- Bake. Bake for 12–15 minutes, or until the edges are lightly golden and the center is set.
- Cool and slice. Cool completely before slicing into bars.
Getting an Even Spread
Once the chocolate chips are stirred in, the mixture will be thick but still spreadable. Use a spatula to push it into the corners of the pan first, then smooth the center, since an evenly spread layer bakes more consistently than one with thick and thin spots. If the mixture starts firming up before you’ve finished spreading, a very brief extra 10 seconds in the microwave loosens it back up enough to finish the job.

Knowing When They’re Done
The edges should look lightly golden and slightly set away from the sides of the pan, while the center should look set rather than wet or glossy, though it may still have a very slight softness similar to a traditional blondie. Because there’s no flour to test with a toothpick, relying on the visual cues at the edges and center is the most reliable way to judge doneness here. If the center still looks quite wet at 12 minutes, give it the remaining few minutes, checking every minute or so until it looks set rather than glossy.
Why the Full Cool-Down Matters
These bars firm up considerably as they cool, since the peanut butter’s fat re-solidifies at room temperature after baking loosened it. Cutting into a warm pan will give you bars that are soft, a little gooey, and prone to falling apart at the edges. Letting the pan cool completely, ideally to room temperature, before slicing gives you clean, sliceable bars that hold their shape from the first cut to the last.
Tips for Perfect Peanut Butter Chocolate Chip Bars
Melt the peanut butter gently and in short intervals so it doesn’t scorch, and stir the chocolate chips in while the mixture is still warm and easy to work with. Spread the batter evenly into the pan so it bakes consistently, and don’t rush the cooling time before slicing. A sharp knife wiped clean between cuts gives the neatest bars every time.
Troubleshooting Common Issues
My bars are too greasy. This can happen with a natural peanut butter that wasn’t stirred thoroughly before measuring. Stir the jar well so the oil is evenly distributed before using it.
My bars fell apart when I sliced them. They likely needed more cooling time. Let the pan come to full room temperature before cutting.
The center seemed underbaked. Give it a few more minutes in the oven, checking every minute, since the exact bake time can vary by oven.
My chocolate chips sank to the bottom. This can happen if the peanut butter mixture was too thin when the chips were added. Let it cool for a minute after microwaving before stirring in the chips next time, which gives them just enough time to stay suspended.

A Few Ways to Make It Yours
Sea Salt Finish
Sprinkle a little flaky sea salt over the top before baking for a sweet-salty contrast.
Swirled Topping
Reserve a few tablespoons of melted chocolate to swirl over the top of the batter before baking for a marbled look.
Chopped Peanuts
Stir in a handful of chopped roasted peanuts along with the chocolate chips for extra crunch.
Dark Chocolate Swap
Use dark chocolate chips instead of milk or semisweet for a less sweet, more intensely chocolatey bar.
The classic two-ingredient version is worth baking first so you know the baseline texture and sweetness before adding any extras.
How to Store Peanut Butter Chocolate Chip Bars
Store the bars in an airtight container at room temperature for up to 4 days, or in the refrigerator for up to a week if you prefer a firmer texture. They also freeze well; wrap individual bars tightly and thaw at room temperature or in the refrigerator before serving.
When to Serve These Bars
These bars work well as an easy lunchbox treat, an after-school snack, or a quick dessert whenever a peanut butter and chocolate craving strikes. Because the ingredient list is so short and the bake time so quick, they’re also a good option for a last-minute bake sale contribution or a simple homemade gift.
Nutrition and Serving Information
The recipe estimates approximately 290 calories per bar when the batch is divided into 9 pieces, based on standard peanut butter and chocolate chip measurements. This is only an estimate, since exact calorie and fat content will vary depending on the specific brands used. Because this recipe is built around peanut butter, it contains peanuts, and both peanut butter and chocolate chips are often processed in facilities that handle tree nuts, so check labels carefully if you’re serving guests with peanut, tree nut, or other food allergies.
Make-Ahead Tips
These bars keep well for several days, making them an easy make-ahead treat. Bake the full pan a day or two ahead, store it covered, and slice just before serving so the cut edges look their cleanest. If you’re transporting them somewhere, keeping the uncut slab intact until you arrive helps keep the presentation neat and the edges looking freshly cut.
The Science Behind a Flourless Bar
Peanut butter is roughly half fat by weight, along with a meaningful amount of protein and natural sugar, which together give it much of what flour, butter, and sugar would normally contribute to a baked bar. As the peanut butter heats in the oven, its proteins firm up slightly while its natural oils stay distributed throughout, producing a dense, fudgy texture rather than the light, aerated crumb you’d get from a flour-based batter with baking soda or baking powder. Because there’s no gluten network being developed the way there would be with flour, these bars have a more crumbly, tender bite than a traditional blondie, closer in texture to a rich peanut butter fudge that happens to have been baked rather than simply chilled.
Portioning and Yield
This recipe fills an 8-inch square pan and is typically cut into 9 bars, a good size given how rich the peanut butter base is. For a bigger gathering, cutting the pan into 12 or 16 smaller squares stretches the batch further. To double the recipe, use a 9×13-inch pan and double both ingredients, keeping an eye on the bake time since a larger, thinner pan may finish a few minutes sooner than the standard 8-inch square version.
A Little Bit of History
Flourless, peanut-butter-based bars and cookies have a long history in home baking, with flourless peanut butter cookies in particular showing up in cookbooks for generations as a simple way to stretch a jar of peanut butter into a baked treat with almost no other ingredients. That tradition leans on the same basic principle at work here: peanut butter is dense enough in fat and protein to hold its own structure once baked, without needing the scaffolding that flour and butter usually provide. Adding chocolate chips is a more modern touch, borrowed from the endless peanut-butter-and-chocolate pairings that have become a fixture of American baking, from peanut butter cups to chocolate chip peanut butter cookies. This recipe strips both traditions down to their simplest possible form, keeping only what’s essential to get a genuinely good bar with real peanut butter flavor and pockets of melted chocolate in every bite.
Serving Suggestions
These bars are rich enough to serve on their own, but a glass of cold milk alongside is the classic pairing that cuts through the density of the peanut butter base. For a slightly more indulgent presentation, warm a bar for 10 seconds in the microwave and top it with a small scoop of vanilla ice cream, letting the warmth soften the chocolate chips further. Arranging the sliced bars on a small platter with a few extra chocolate chips scattered around gives them a simple, put-together look for a bake sale or potluck table without any real extra effort. Because they’re rich and a little dense, cutting them smaller than a standard bar also works well when they’re one of several treats on a dessert spread, letting guests sample a little of everything without feeling overly full from just one dessert, especially if the rest of the table leans just as sweet and rich.
Choosing the Right Chocolate Chips
Standard semisweet chocolate chips give the most balanced result, letting the peanut butter flavor come through clearly while still delivering real chocolate flavor in every bite. Milk chocolate chips push the bars sweeter and creamier, which pairs especially well if you’re using a natural, less-sweetened peanut butter. Dark chocolate chips do the opposite, pulling the overall flavor toward something richer and less sweet, which some people prefer alongside the already-rich peanut butter base. Whichever you choose, regular-sized chips hold their shape a little better through baking than mini chips, which can melt almost entirely into the batter and leave less visible texture in the finished bars, so save mini chips for a batch where a more uniform, marbled look is what you’re after instead.
Adjusting for a Thicker or Thinner Peanut Butter
Not all jars of peanut butter behave exactly the same way once melted, and it’s worth paying attention to consistency as you go. A standard commercial creamy peanut butter, the kind that stays smooth and pourable straight out of the jar, melts down into an easy, spreadable mixture almost immediately. A thicker, more natural-style peanut butter, especially one that’s been in the pantry for a while and has some separation, can stay stiffer even after melting, which may mean a few extra seconds in the microwave or a bit more stirring to loosen it enough to spread evenly. If your batter still seems noticeably too stiff to spread evenly into the corners of the pan after melting, a scant tablespoon of neutral oil stirred in can loosen it without noticeably changing the flavor or the final texture of the baked bars once they’ve cooled and set.
Why Fewer Ingredients Doesn’t Mean Less Flavor
It’s easy to assume a two-ingredient recipe must be compromising on flavor somewhere, but peanut butter already carries so much going for it that the finished bars taste far more developed than the short ingredient list might suggest. Roasted peanuts bring natural nuttiness and a slight bitterness that balances sweetness, salt is typically already blended in from the peanut butter itself, and the fat content gives the finished bar a richness that a leaner batter would need extra butter to achieve, which is really what makes each bite feel indulgent rather than plain. Chocolate chips add their own concentrated sweetness and cocoa flavor without needing to be melted into a separate ganache or frosting layer on top. The result is a bar that reads as considerably more involved than its two-ingredient method would suggest, which is really the whole appeal of a recipe like this one: maximum flavor with minimum effort, minimal cleanup, and only two items to pick up at the store if you’re starting from scratch.
Scaling Up or Down
Because this recipe is built on a simple 1-to-1 ratio of peanut butter to chocolate chips, it scales up or down with almost no math involved. Halving it works well in a smaller 6-inch pan or a loaf pan for a smaller batch, though you’ll want to watch the bake time closely since a smaller, thicker portion may need a couple of extra minutes. Doubling into a 9×13-inch pan is just as simple, and since the ratio never changes, the texture of the finished bars stays consistent no matter which size batch you make. This kind of scalability is one of the underrated benefits of a two-ingredient recipe: there’s no third or fourth ingredient measured in odd fractions to recalculate, just two ingredients moving up or down together in lockstep, which makes this an easy recipe to adapt on the fly depending on how many people you’re feeding.
Common Questions
Can I use natural peanut butter?
Yes, just stir it thoroughly before measuring so the oil is evenly distributed, since separated natural peanut butter can make the bars greasier.
Can I use a different type of chocolate chip?
Yes, milk, dark, or white chocolate chips all work in place of semisweet, each giving a slightly different sweetness level.
Why are my bars greasy?
This usually happens with natural peanut butter that wasn’t stirred well before measuring. Make sure the oil is fully incorporated first.
Can I freeze these bars?
Yes, wrap individual bars tightly and freeze. Thaw at room temperature or in the refrigerator before serving.
Do I have to use a microwave to melt the peanut butter?
No, a small saucepan over low heat works too; just stir frequently to avoid scorching.
Can I double this recipe?
Yes, use a 9×13-inch pan and double both ingredients, watching the bake time since a larger pan may finish sooner.
Why did my center stay soft?
These bars are meant to be dense and fudgy, so a soft center after cooling is normal. If it seems undercooked while still warm, let it cool completely before judging the texture.
2-Ingredient Peanut Butter Chocolate Chip Bars show just how much flavor and texture two pantry staples can deliver together. Melt, stir, spread, bake, and cool — that’s the entire process, and the result is a dense, chewy bar that’s ready in under half an hour from start to finish, no special equipment or grocery run required.