
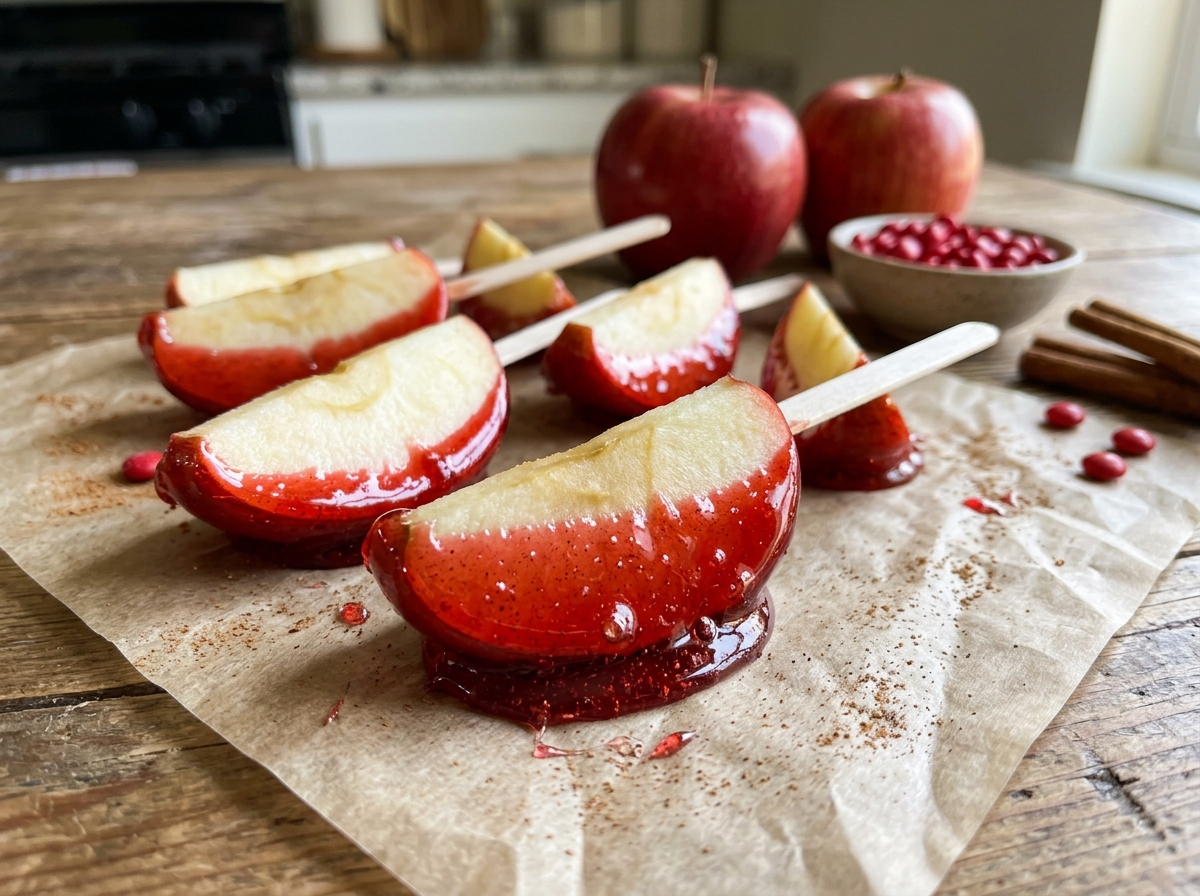
Spiced Candy Apple Slices
Crisp apple wedges dipped in melted cinnamon candy for a sweet, crunchy, spiced candy shell, no candy thermometer required.
Thank you for reading this post, don't forget to subscribe!
Just two ingredients turn crisp apple wedges into a sweet, crunchy fall treat with a warm, spiced candy shell, no candy thermometer and no deep-frying required. There’s a quick melt of cinnamon-flavored hard candies on the stovetop that turns into a glossy, crackly coating once it hardens around each apple slice.
Crushing cinnamon candies, melting them gently in a saucepan, and dipping apple wedges into the melted candy is the entire process here. Letting the coating harden on a parchment-lined tray is all that’s left before these slices are ready to eat.
Sweet, crunchy, and full of warm cinnamon flavor, these candy apple slices are a fun fall treat that’s easier to make and easier to eat than a traditional whole candy apple.
Why This Recipe Works
Melting crushed cinnamon hard candies on the stovetop turns them back into a liquid candy coating without needing a candy thermometer, since hard candies are already cooked to the right sugar stage and just need gentle reheating to become workable again. Dipping apple wedges rather than whole apples into that melted candy means a thinner, more manageable coating and a treat that’s much easier to bite into.
Because the apples are cut into wedges first, there’s no stick to push through a whole apple and no need to balance a heavy, fully coated apple while it hardens.
Why Working Quickly Matters
Dipping the apple slices into the melted candy as soon as it’s smooth, rather than letting it sit, is important because the candy coating starts to firm up again within just a few minutes once it’s off the heat. Working efficiently through all the apple slices keeps the coating thin and even on every piece.
What You’ll Need
- 2 medium firm apples, sliced into thick wedges
- 1 cup (200g) cinnamon-flavored hard candies
You’ll also need a parchment-lined tray. This recipe makes about 4 servings.
A Note on Ingredient Choices
Firm, crisp apples like Granny Smith or Honeycrisp hold their shape and crunch best under the candy coating, since a softer apple can turn mealy once sliced and left to sit. Classic red cinnamon hard candies, the kind often found in a bag near the checkout aisle, melt down smoothly and give these slices their signature red color and warm spice.
Equipment You’ll Need
A small saucepan, a cutting board and knife, and a parchment-lined tray are all you need; no candy thermometer required.
How to Make It
- Prep the apples. Wash and thoroughly dry the apples. Cut them into thick slices or wedges and remove the seeds.
- Crush the candy. Crush the cinnamon candies into small pieces.
- Melt. Melt the crushed candies in a small saucepan over low heat, stirring carefully until smooth. If needed, add 1–2 teaspoons of water to help the candies melt evenly.
- Dip. Working quickly, dip each apple slice into the melted candy, coating it lightly.
- Set. Place the coated slices on a parchment-lined tray, leaving space between them.
- Harden. Let the candy coating harden completely before serving. For the best crunch, enjoy shortly after preparing.
Getting an Even, Thin Coating
Dipping each apple wedge just partway, rather than trying to submerge the whole piece, gives a thinner, more even coating that hardens into a crisp shell rather than a thick, overly sweet layer. Letting a little excess candy drip back into the saucepan before setting the slice down also helps avoid a sticky puddle forming at the base.

Getting the Melt Just Right
Melting the crushed candies over low heat, rather than rushing it with high heat, is what keeps the sugar from scorching or turning bitter. Adding a teaspoon or two of water if the candy seems too thick or grainy helps it melt into a smoother, more dippable consistency.
Knowing When It’s Done
The melted candy is ready to dip into once it looks completely smooth and glossy, with no remaining grainy or lumpy bits. The finished slices are ready to eat once the coating feels completely hard and no longer tacky to the touch, which usually takes just a few minutes at room temperature.
Tips for Perfect Candy Apple Slices
Working with a helper to dip while someone else sets slices onto the tray speeds up the process and helps beat the clock before the melted candy starts to firm up. Patting the apple slices fully dry before dipping also helps the candy coating stick evenly rather than sliding off.
Troubleshooting Common Issues
My candy coating is too thick and clumpy. Add a little more water, a half teaspoon at a time, and keep stirring over low heat until it smooths out. My candy is hardening before I finish dipping. Return the saucepan to low heat briefly to loosen it back up, then continue dipping quickly. My coating is sliding off the apple slices. The apples likely weren’t dried thoroughly enough before dipping; any leftover moisture keeps the candy from sticking. My candy coating tastes burnt. The heat was likely too high; next time, melt the candies more slowly over the lowest heat setting.
A Few Ways to Make It Yours
Different Candy Flavors
Swap the cinnamon candies for a different hard candy flavor, like butterscotch or apple-flavored.
Nut Coating
Roll the dipped slices in chopped nuts while the candy is still wet for extra crunch.
Skewered Version
Thread the wedges onto small skewers or sticks before dipping for an easier, mess-free way to eat them.
Cinnamon Sugar Dusting
Dust the coated slices with a little extra cinnamon sugar right after dipping for added warmth.
The classic version is worth trying first so you know the baseline flavor before adding any extras.
How to Store Candy Apple Slices
These slices are best enjoyed shortly after making them, since the apple will start to release moisture over time and can soften the candy shell. If needed, store them in the refrigerator for up to a day, though the coating will lose some of its crispness the longer it sits.
When to Serve These Apple Slices
These slices make a fun fall treat for a Halloween party, a harvest gathering, or any afternoon that calls for a quick, candy-coated snack without the commitment of a whole candy apple. They’re also an easy project to make with kids under close supervision during the melting and dipping steps.
Nutrition and Serving Information
This recipe makes about 4 servings at roughly 100 calories per serving, though exact calorie content will vary depending on the size of the apples and how much candy coating ends up on each slice. Because the only ingredients are apples and hard candy, this recipe is naturally free of dairy, eggs, and gluten, though it’s worth double-checking the specific candy brand’s label.
Make-Ahead Tips
These slices are best made close to when they’ll be eaten, since the candy coating is at its crispest shortly after hardening. If you need to prepare ahead, slicing the apples and crushing the candy in advance saves a few minutes of active time without affecting the final texture.
The Science Behind This Candy Coating
Hard candies are essentially sugar that’s already been cooked to a specific temperature and allowed to harden, which means gently reheating them melts that same sugar back into a liquid state without needing to cook it from scratch again. As the melted candy cools back down on the apple slices, the sugar re-solidifies into the same hard, glassy texture the original candy had, which is why these slices end up with that signature crisp, crackly shell.
Portioning and Yield
Two medium apples typically yield enough wedges for about 4 servings, depending on how many wedges each apple is cut into. Doubling the apples and candy works well for a bigger batch, though working in smaller rounds keeps the melted candy from hardening before you can dip everything.
A Little Bit of History
Candy apples, made by dipping whole apples in a cooked sugar syrup, have been a fairground and Halloween staple for generations, prized for their shiny, hard shell and the surprise of biting through to the crisp fruit underneath. This sliced version keeps that same appeal while skipping the cooked syrup stage entirely, relying on already-made cinnamon candies for a quicker, more approachable take on the classic treat.
Serving Suggestions
Serve these slices on skewers or sticks for easy, mess-free eating, arranged on a wood board alongside whole apples and a few cinnamon sticks for a simple fall presentation. A small dish of extra cinnamon nearby is a nice touch for dusting over the slices right before serving.
Choosing the Right Candy
Classic red cinnamon hard candies, sold in bags specifically for snacking or baking, give the most reliable melt and the brightest red color. Other cinnamon candy shapes, like cinnamon discs or drops, work just as well as long as they’re crushed into small enough pieces to melt evenly.
Why This Recipe Is So Beginner-Friendly
If you’ve never made a candy-coated treat before, this is a genuinely approachable place to start, since there’s no cooked sugar syrup to manage and no candy thermometer needed. With just two ingredients and a short stovetop melt, there’s very little room for the kind of mistakes that can derail a more involved candy apple recipe, which makes this a great project for a first-time cook, though the hot candy step itself should always be handled by an adult.
Adjusting the Flavor to Your Taste
As written, these slices get their flavor almost entirely from the crisp apple and the warm cinnamon candy coating, giving a classic, spiced fall taste. If you’d like a different flavor profile, swapping in a different hard candy flavor, like butterscotch or watermelon, shifts the whole treat in a new direction while keeping the same simple method. Because this recipe has so few ingredients to begin with, small changes tend to have a noticeable effect on the final flavor, so it’s worth trying the classic version first before deciding what, if anything, you’d like to change.
Pairing These Apple Slices With Other Treats and Drinks
Because the flavor here is sweet and spiced rather than rich or chocolatey, these slices pair naturally with richer, more indulgent treats if you’re serving more than one dessert, since the contrast keeps a spread feeling balanced. A rich chocolate fudge or a creamy caramel treat rounds out a dessert table nicely alongside these, while another apple or cinnamon-based treat leans further into the same direction. On the drink side, these slices pair beautifully with hot apple cider, chai, or a warm cup of tea.
A Note on Ingredient Proportions
Using about 1 cup of crushed candy for two whole apples gives enough melted coating to dip every wedge without running short partway through, and it’s worth understanding why that amount matters before adjusting it. Too little candy relative to the number of apple wedges means some slices end up with a thin, patchy coating, while a larger batch of apples may need a second batch of melted candy to finish dipping everything. This particular ratio is what gives a full batch of wedges an even, generous coating, so it’s worth treating the stated amount as a tested baseline.
A Quick Note on Serving Temperature
These slices taste best served at room temperature, shortly after the candy coating has fully hardened, since that’s when the shell is at its crispest. Refrigerating them for too long can cause the coating to soften slightly as moisture from the apple works its way toward the surface.
A Note on Supervising This Recipe With Kids
While crushing the candies and arranging the finished slices on a tray are both easy, safe tasks for kids to help with, the melting and dipping steps involve candy hot enough to cause serious burns and should always be handled by an adult. Keeping kids at a safe distance during the stovetop melting and dipping steps, and letting them help again once the coating has fully cooled and hardened, is the safest way to include them in this recipe.
A Quick Note on Portion Control
Because these slices combine a lower-calorie fruit with a modest amount of candy coating, they’re a relatively light treat compared to a dense fudge or candy bar. Cutting the apples into slightly smaller wedges is an easy way to stretch a batch of candy further across more servings.

A Note on Fall Presentation Ideas
How you serve these slices changes the impression they make almost as much as the flavor itself. Left plain on a plate, they read as a simple fall snack. Threaded onto skewers and arranged around whole apples, cinnamon sticks, and a dusting of extra cinnamon, the same slices suddenly look like a proper harvest table centerpiece, which makes this a recipe worth dressing up for a Halloween or fall gathering.
A Final Note on Batch Size
This recipe is sized to make about 4 servings from two apples, which keeps the whole process quick and manageable within about 15 minutes. For a bigger batch to serve a crowd, melt the candy in smaller rounds rather than trying to melt a huge batch all at once, since a large volume of melted candy can start to harden before you’ve had a chance to dip every slice.
A Word on Texture
The texture of these slices comes from the contrast between the crisp, juicy apple underneath and the thin, glassy-hard candy shell on top. That contrast is part of what makes a candy apple so satisfying to bite into, and it’s why a thinner, more even coating actually works better here than a thick one, since a thin shell cracks cleanly without pulling the apple slice apart.
A Note on Working With Melted Candy
Melted hard candy behaves very differently from melted chocolate, since it reaches a much higher temperature and stays liquid at a heat that could cause real burns if handled carelessly. Stirring constantly over low heat, using a long-handled spoon, and working over a surface that can handle some heat and the occasional drip are all simple ways to keep this step both safe and successful.
A Note on Gifting This Batch
Because these slices are best enjoyed fresh, they’re not an ideal make-ahead gift, but preparing a batch right before a gathering and handing them out shortly after they’ve hardened works well as a fun, homemade party favor. Wrapping a few slices individually in small cellophane bags, tied with a ribbon, makes a quick and charming presentation for a Halloween party.
A Note on Scaling Down the Batch
If a full batch of 4 servings is more than you need, this recipe halves easily using a single apple and about half the candy, since the ratio stays simple to work out either way. A smaller batch is a good option for a quick craving without committing to melting a full cup of candy at once.
A Note on Why Wedges Beat Whole Apples Here
A traditional candy apple requires balancing a heavy, fully dipped apple on a stick while the coating hardens, which can be fussy and sometimes ends with a lopsided or cracked shell. Cutting the apples into wedges first sidesteps that problem entirely, since each piece is small, light, and easy to set down flat on a tray without worrying about it tipping over or the stick pulling loose before the candy sets.
Common Questions
Can I use a different candy flavor instead of cinnamon?
Yes, butterscotch, apple, or even watermelon hard candies all work well using the same method.
Why is my melted candy too thick to dip into?
Add a little more water, a half teaspoon at a time, and stir over low heat until it smooths out.
Can I use a whole apple instead of wedges?
You can, though wedges are easier to coat evenly and much easier to eat afterward.
How do I know when the coating is fully hardened?
It should feel completely firm and no longer tacky to the touch.
Can I double this recipe?
Yes, though it’s best to melt the candy in smaller rounds so it doesn’t harden before you finish dipping.
How should I store leftovers?
These are best eaten the same day; if needed, refrigerate for up to a day, though the coating will soften slightly.
Is it safe for kids to help with this recipe?
Kids can help with crushing the candy and arranging slices, but the melting and dipping steps should always be handled by an adult.
However you serve them and whoever you share them with, these spiced candy apple slices deliver all the crisp, sweet satisfaction of a classic candy apple with none of the sticky mess. It’s proof that two simple ingredients and a quick stovetop melt can turn into a genuinely fun fall treat.