
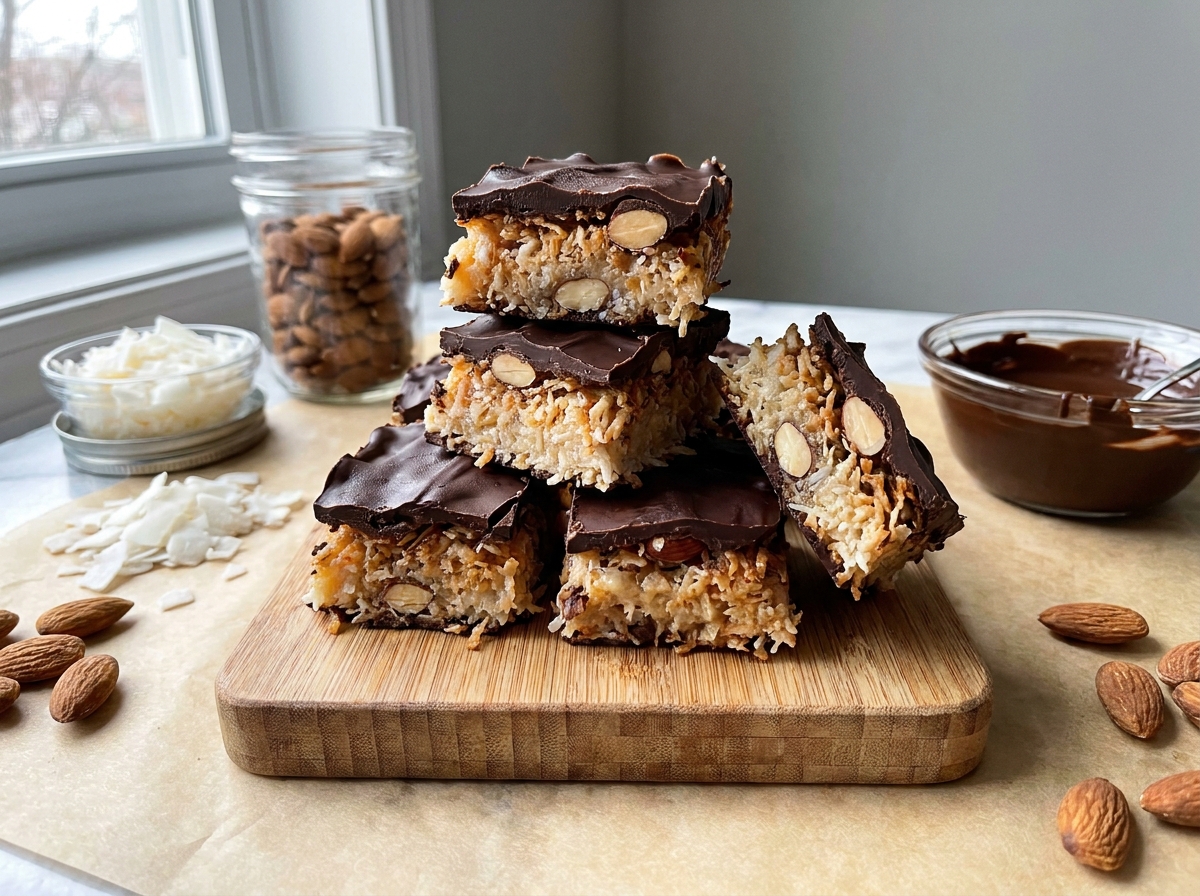
3-Ingredient Almond Joy Coconut Bars
Sweetened coconut baked with condensed milk, topped with melted chocolate and whole almonds — the flavor of the classic candy bar in an easy pan of bars.
Thank you for reading this post, don't forget to subscribe!
Coconut, chocolate, and almonds are the exact combination that made a certain candy bar famous, and these 3-Ingredient Almond Joy Coconut Bars bring all three together in one easy pan. Sweetened shredded coconut gets pressed together with condensed milk and baked until the edges turn golden, then the whole thing is topped with melted chocolate and a scattering of whole almonds.
There’s no candy thermometer, no dipping individual pieces, and no complicated multi-step process — you mix two ingredients, press them into a pan, bake, top with chocolate and almonds, and chill. What comes out is a chewy, coconut-forward bar with a crisp, chocolate-coated top, tasting remarkably close to the candy bar that inspired it.
Because condensed milk does the work that egg whites and sugar syrup would in a more involved coconut candy recipe, the coconut layer bakes up soft and chewy rather than dry, and it holds together well once cooled and sliced. These bars are an easy homemade version of a candy shop favorite, perfect for a holiday tray or whenever a coconut-and-chocolate craving strikes.
Why These Coconut Bars Are So Easy
The whole method here comes down to mixing coconut with condensed milk, pressing it into a pan, and baking it until the edges turn golden. Condensed milk is already thick, sweet, and sticky enough to bind the shredded coconut into a cohesive layer without any additional sugar, eggs, or butter, which means there’s very little to measure and almost no risk of the mixture turning out too dry or too wet. Once that base layer bakes and cools, topping it with melted chocolate and almonds is just as simple — spread, press, chill, and slice.
Because the recipe leans on only coconut, condensed milk, and chocolate, each ingredient does a clear, specific job. The coconut and condensed milk combine into a chewy, cohesive base once baked. The chocolate on top sets into a firm layer that mirrors the chocolate coating on the original candy bar. The almonds, while optional, add the final piece of the classic flavor combination and a bit of crunch against the chewy coconut underneath.
A Baked Bar With Classic Candy Bar Flavor
Coconut and chocolate is a pairing most people recognize immediately from candy bars built around exactly that combination, and adding almonds on top completes the reference further. Baking the coconut and condensed milk together, rather than simply pressing raw coconut into a pan, gives the base a toasted, slightly caramelized flavor at the edges that a no-bake version wouldn’t have, while the interior stays soft and chewy. That contrast between a lightly toasted edge and a soft, chewy center is part of what makes these bars taste more like a candy bar filling than a simple coconut macaroon.
Why Coconut, Condensed Milk, and Chocolate Work So Well Together
Sweetened condensed milk is essentially milk and sugar cooked down into a thick, sticky syrup, which makes it an ideal binder for shredded coconut — it coats every strand, holds the mixture together as it bakes, and caramelizes slightly at the edges of the pan for extra flavor. Coconut itself brings natural sweetness and a distinctive chew that holds up well against a firm chocolate topping. Almonds, meanwhile, contribute a subtle bitterness and crunch that keeps the overall bar from tasting one-dimensionally sweet, rounding out the flavor in the same way they do in the candy bar this recipe is inspired by.
What You’ll Need
- 3 cups sweetened shredded coconut
- 1 can (14 oz) sweetened condensed milk
- 2 cups milk or semisweet chocolate chips
- 1 cup whole almonds, optionalfor topping
The recipe makes 16 bars, each around 280 calories.
Choosing the Best Coconut and Chocolate
Sweetened shredded coconut is what gives this recipe its classic candy bar sweetness and chewy texture; unsweetened coconut will work, but the bars will be noticeably less sweet and may not bind together quite as well, since sweetened coconut tends to be slightly moister. For the chocolate topping, milk chocolate chips give you a flavor closest to the original candy bar, while semisweet or dark chocolate chips create a richer, less sweet bar that balances the sweetened coconut underneath. Whole almonds are traditional here, but roughly chopped almonds work too if you’d prefer more even coverage across each bar rather than one whole almond per piece.
Equipment You’ll Need
An 8-inch square baking pan gives these bars the right thickness for both the coconut layer and the chocolate topping. Line it with parchment paper, leaving some overhang on two sides, for the easiest removal once everything has cooled and set. A large mixing bowl is enough for stirring together the coconut and condensed milk, and a spatula or the back of a spoon helps press the mixture evenly into the pan. A microwave-safe bowl for melting the chocolate and a sharp knife for the final slicing round out what you’ll need.
How to Make It
- Preheat and prep. Preheat the oven to 350°F and line an 8-inch square baking pan with parchment paper, leaving some overhang for easy removal.
- Combine. In a large bowl, stir together the shredded coconut and sweetened condensed milk until thoroughly combined.
- Press into the pan. Press the coconut mixture firmly and evenly into the prepared pan.
- Bake. Bake for 20 to 25 minutes, or until the edges are lightly golden.
- Cool. Allow the coconut layer to cool completely.
- Melt the chocolate. Melt the chocolate chips in the microwave in 20-second intervals, stirring after each interval, until smooth.
- Add the chocolate layer. Spread the melted chocolate evenly over the cooled coconut layer.
- Top with almonds. If desired, gently press whole almonds into the chocolate before it sets.
- Chill. Refrigerate for about 1 hour, or until firm.
- Slice. Lift the bars from the pan using the parchment paper and cut into squares.
Press the Coconut Layer Firmly
Getting a firm, even coconut layer matters more here than it might seem, since a loosely packed layer can crumble apart once baked and sliced. Use the back of a spatula or a flat-bottomed measuring cup to press the mixture down firmly, working from the center outward and checking the corners and edges for consistent thickness. A well-packed layer bakes more evenly and holds together far better once it’s topped with chocolate and cut into bars.

Bake Until the Edges Turn Golden
The visual cue to watch for here is the edges of the pan, which should turn a light golden color once the coconut has baked long enough, while the center may still look slightly pale. Ovens vary, so start checking at the 20-minute mark rather than waiting for the full 25 minutes to pass. If the edges are browning faster than you’d like while the center still needs more time, loosely tenting the pan with foil for the remaining bake time slows further browning without stopping the bake.
Cool Completely Before Topping With Chocolate
Letting the coconut layer cool completely before adding the melted chocolate is an important step, since warm coconut will melt the chocolate unevenly or cause the two layers to blend together instead of setting as distinct layers. Give the pan enough time to reach room temperature, which usually takes about 30 minutes to an hour depending on your kitchen. Once cooled, spread the melted chocolate in an even layer using an offset spatula or the back of a spoon, working out to the edges of the pan before pressing in the almonds while the chocolate is still soft enough for them to stick.
Chill Until Firm, Then Slice
Refrigerating the pan for about an hour after the chocolate layer is added gives it time to set into a firm, snappable shell rather than staying soft and smudgy. Once firm, use the parchment overhang to lift the whole slab out of the pan and onto a cutting board before slicing. A sharp knife warmed under running water and wiped dry between cuts glides through the chocolate layer more cleanly than a cold, dry blade, giving you neater squares with less cracking.
Tips for Perfect Almond Joy Coconut Bars
Press the coconut mixture into a firm, even layer before baking so the bars hold together well once sliced. Watch the edges closely near the end of baking, since coconut toasts quickly and can go from golden to overly dark in just a couple of minutes. Let the coconut layer cool completely before adding the chocolate, and press the almonds in while the chocolate is still soft so they stay anchored once it sets. Give the finished pan the full chilling time before slicing, and use a warm, clean knife for the neatest cuts.
Troubleshooting Common Issues
My coconut layer fell apart when I sliced it. It likely wasn’t pressed firmly enough into the pan before baking. Use real, even pressure next time, working from the center outward.
My coconut burned before the center finished baking. Tent the pan loosely with foil partway through baking, and start checking a few minutes earlier than the suggested time.
My chocolate and coconut layers blended together. The coconut base was likely still warm when the chocolate was added. Let it cool completely to room temperature before spreading on the chocolate.
My almonds fell off after chilling. Press them into the chocolate while it’s still soft, right after spreading it, rather than waiting until it has begun to set.
My chocolate cracked when I cut the bars. The bars were likely too cold. Let them sit at room temperature for a few minutes before slicing, and use a knife warmed under running water.

A Few Ways to Make It Yours
Toasted Coconut Garnish
Toast a little extra shredded coconut separately and sprinkle it over the chocolate before it sets for more toasted flavor and texture.
Chopped Almonds
Use chopped almonds instead of whole ones for more even almond coverage in every bite of each bar.
Dark Chocolate Topping
Swap the milk or semisweet chocolate for dark chocolate chips for a richer, less sweet bar that balances the sweetened coconut base.
Flaky Salt Finish
A light sprinkle of flaky sea salt over the chocolate before it sets adds a subtle contrast to the sweetness of the coconut and chocolate.
Try the classic version first so you have a baseline for texture and sweetness, then decide whether any of these additions are worth making part of your regular routine.
How to Store Almond Joy Coconut Bars
Store the bars in an airtight container at room temperature for up to about 5 days, or in the refrigerator for up to 2 weeks if you’d like them to last longer. Refrigeration also keeps the chocolate topping firmer, which some people prefer for a cleaner bite. Layer parchment or wax paper between stacked bars to keep the chocolate from sticking together. These bars also freeze well — wrap individual pieces tightly and thaw at room temperature or in the refrigerator before serving.
When to Serve These Easy Bars
These bars are especially well suited to holiday cookie trays and candy platters, where their resemblance to a classic candy bar makes them an easy crowd-pleaser. They also work well for bake sales, potlucks, and casual gatherings where a chewy, chocolate-coconut treat would be a welcome addition. Because they need time to cool and then chill, they’re naturally suited to being made a day ahead of an event, and a short stay in the refrigerator before serving makes them easier to transport and slice cleanly once you arrive.
Nutrition and Serving Information
The recipe estimates approximately 280 calories per bar when the pan is divided into 16 pieces. Treat this as an estimate rather than an exact figure, since the specific brands of coconut, condensed milk, and chocolate chips used will affect the exact sugar and calorie content. Cutting the bars into smaller or larger pieces changes the calories per serving accordingly. Because the recipe leans on sweetened coconut, condensed milk, and chocolate, it’s a fairly indulgent treat best enjoyed in moderation. Check ingredient labels for tree nut allergens, since the recipe includes almonds and coconut, both of which are relevant for anyone with tree nut sensitivities.
Make-Ahead Tips
Because these bars need a full cooling period after baking and a chill after the chocolate is added, they’re naturally suited to being made a day or two ahead of when you plan to serve them. Bake and cool the coconut layer, add the chocolate and almonds, and chill the pan completely, then keep it covered until you’re ready to slice and serve. If you’re bringing the bars somewhere, transporting the uncut, chilled slab and slicing on arrival keeps the presentation neat.
A Little Bit of History
The candy bar that inspired these bars dates back to the 1940s, when it was introduced as a coconut-and-chocolate variation on an earlier all-chocolate-covered coconut bar, with whole almonds added underneath the chocolate coating to round out the flavor and texture. That combination of sweetened coconut, milk chocolate, and almonds became popular enough to remain a candy aisle staple for decades, and it’s exactly the flavor profile home bakers have tried to recreate in bar and cookie form ever since. Using condensed milk instead of egg whites or a cooked sugar syrup, as many older coconut candy recipes call for, is what makes this particular version so approachable: it binds the coconut just as effectively while skipping the more finicky steps that come with cooking a sugar syrup to a specific temperature. The result is a homemade version that captures the essential flavor of the original candy bar without requiring any candy-making experience.
Portioning and Yield
This recipe fills an 8-inch square pan and is typically cut into 16 bars, which is a reasonably sized bite given how rich the chocolate and coconut combination is. If you’re serving a crowd or setting these out on a holiday tray with other treats, cutting the pan into 20 or 25 smaller squares stretches the batch further while still giving everyone a proper taste of the coconut, chocolate, and almond combination. For a more substantial bar meant to be enjoyed on its own, cutting the pan into just 9 larger pieces gives you a heartier portion, closer to the size of the original candy bar. To double the recipe for a bigger batch, use a 9×13-inch pan and double all the ingredients, keeping an eye on the coconut layer since it may toast slightly faster in a wider pan.
Serving Suggestions
These bars are rich enough to serve on their own, but a few simple touches can dress them up for a holiday spread. A drizzle of extra melted chocolate over the top after slicing gives each bar a more finished, bakery-style look. Arranging them on a platter alongside other coconut or chocolate treats plays up the candy-bar association even further, especially around the holidays when coconut and almond flavors tend to show up across a whole dessert table. For a coffee or tea table, cutting the bars smaller makes them easy to enjoy in a bite or two alongside a hot drink without committing to a full-sized portion.
Common Questions
Can I use unsweetened coconut instead of sweetened?
Yes, though the bars will be noticeably less sweet, and the mixture may not bind together quite as easily, since sweetened coconut tends to be moister. If you use unsweetened coconut, make sure it’s still pressed firmly into the pan for the best texture.
Do I have to add the almonds?
No, they’re optional, though they complete the classic flavor combination this recipe is based on. The bars will still taste great with just coconut and chocolate if you’d prefer to leave them out or have a nut allergy to work around.
Can I freeze these bars?
Yes. Wrap individual bars tightly in plastic wrap and store them in an airtight, freezer-safe container, then thaw at room temperature or in the refrigerator before serving.
Why did my coconut layer taste dry?
This can happen if the coconut and condensed milk weren’t mixed thoroughly enough, or if the bars were baked slightly too long. Make sure the mixture looks evenly moistened before pressing it into the pan, and check for doneness at the lower end of the baking time.
Can I use almond slices instead of whole almonds?
Yes, sliced or chopped almonds work well and give you more even almond coverage across each bar compared to one whole almond per piece.
Can I double this recipe?
Yes, using a 9×13-inch pan and doubling all the ingredients. Check the coconut a few minutes earlier than you would for the smaller pan, since it can toast slightly faster in a wider dish.
3-Ingredient Almond Joy Coconut Bars turn a favorite candy bar into an easy pan of homemade bars with very little active effort. Bake a coconut and condensed milk base until the edges turn golden, top it with melted chocolate and almonds, and let the refrigerator finish the job. The result is a chewy, chocolate-coated bar that captures the classic coconut-chocolate-almond combination in a form that’s even easier to share than the candy aisle version.