
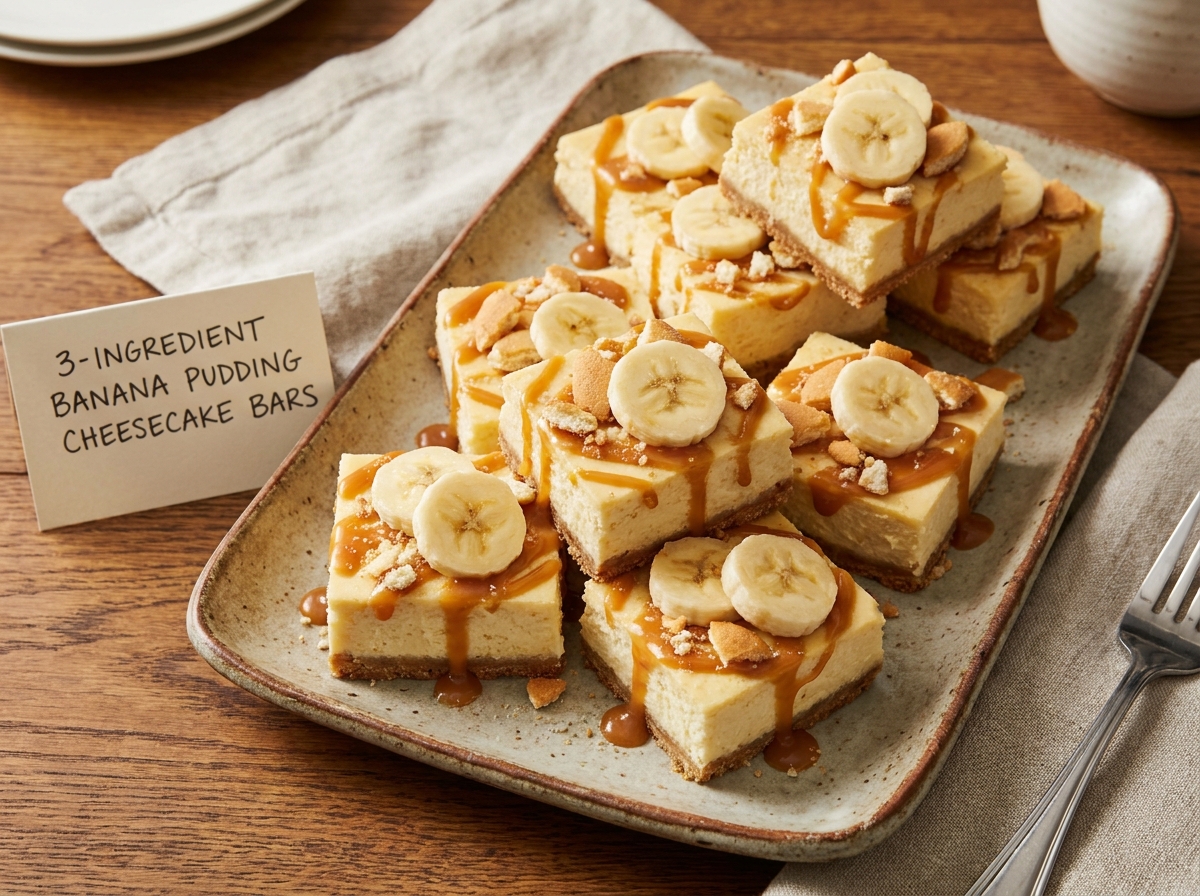
3-Ingredient Banana Pudding Cheesecake Bars
A sugar cookie base topped with a creamy banana pudding cheesecake layer, baked until set and chilled until sliceable — all from just three ingredients.
Thank you for reading this post, don't forget to subscribe!
These 3-Ingredient Banana Pudding Cheesecake Bars turn two beloved desserts into one easy pan. A tub of refrigerated sugar cookie dough presses into place as the base, a quick cream cheese and instant banana pudding mixture spreads over the top, and the oven does the rest, setting the cheesecake layer while the cookie base bakes underneath it.
There’s no crust to pre-bake separately and no water bath to fuss over. The cookie dough goes straight into the pan, the cheesecake layer goes straight on top of that, and the whole thing bakes together in one straightforward step. Once it’s cooled and chilled, you’re left with a bar that has a soft, slightly chewy cookie base under a creamy, banana-pudding-flavored cheesecake top.
Because it leans on convenience ingredients for both the base and the filling, this is a genuinely fast dessert to put together, with the refrigerator doing the final work of firming everything up into clean, sliceable bars. It’s an easy way to get banana pudding flavor into a portable, potluck-friendly bar instead of a spoon-and-bowl dessert.
Why This Recipe Works
Refrigerated sugar cookie dough does double duty here, baking up into a base that’s sturdy enough to hold the cheesecake layer while staying soft and a little chewy underneath it, closer to a blondie than a crisp cookie. Instant banana pudding mix is the second time-saver, delivering real banana pudding flavor and that familiar pale yellow color without any actual cooking of pudding on the stovetop. Beaten into softened cream cheese, the dry pudding mix thickens the mixture slightly and flavors it completely, so what goes into the oven is already a fully flavored banana cheesecake batter rather than something that needs extra vanilla or banana to taste finished.
Baking the two layers together, rather than baking the crust first, is what keeps this recipe to just three ingredients and one pan. The cookie dough firms up from the oven’s heat while the cheesecake layer above it sets at roughly the same rate, and chilling afterward finishes the job, giving both layers a clean, sliceable edge once the bars are cut.
What Instant Pudding Mix Brings to a Cheesecake Bar
Instant pudding mix contains its own thickeners and flavoring, which means it does more in this recipe than plain sugar or vanilla could on their own. Beaten into softened cream cheese, it not only adds banana flavor but also helps the mixture set up firmer as it bakes and chills, since the same starches that thicken pudding when mixed with milk are still active here. That’s part of why this cheesecake layer holds its shape well in a bar format without needing eggs or a water bath the way a traditional baked cheesecake would.
What You’ll Need
- 1 package refrigerated sugar cookie dough
- 1 (8-ounce) package cream cheese, softened
- 1 (3.4-ounce) package instant banana pudding mix
That’s the entire list. Each bar comes out to roughly 250 calories, and the recipe makes 12 bars.
A Note on Softened Cream Cheese
Fully softened cream cheese is essential for a smooth cheesecake layer with no lumps. Leave it out at room temperature for about an hour before starting, or, if you’re short on time, cut it into smaller pieces to speed up the softening. Beating cold cream cheese straight from the refrigerator is the most common cause of a lumpy filling, since the pudding mix won’t fully dissolve into cream cheese that’s still firm and cold.
Equipment You’ll Need
An 8-inch square baking pan is the right size for this recipe, giving the bars a good thickness once baked. Line it with parchment paper, leaving overhang on two sides, so the finished pan lifts out cleanly. You’ll need a hand mixer or stand mixer for beating the cream cheese smooth, a rubber spatula for spreading the cheesecake layer evenly, and a sharp knife for cutting clean bars once everything has chilled.
How to Make It
- Preheat. Preheat the oven to 350°F.
- Prep the pan. Line an 8-inch square baking pan with parchment paper.
- Press the base. Press the sugar cookie dough evenly into the bottom of the pan.
- Beat the cream cheese. In a bowl, beat the softened cream cheese until smooth.
- Add the pudding mix. Add the banana pudding mix and beat until creamy and fully combined.
- Spread the topping. Spread the cheesecake mixture evenly over the cookie dough.
- Bake. Bake for 25–30 minutes, or until the center is set and the edges are lightly golden.
- Cool and chill. Allow the bars to cool completely before refrigerating for at least 1 hour.
- Slice. Cut into squares and serve chilled.
Pressing the Cookie Dough Evenly
An even base layer bakes more consistently than one with thick and thin spots. Use lightly dampened or floured fingers to press the sugar cookie dough into the corners and edges of the pan first, then work toward the center, checking the thickness by eye as you go. A small offset spatula or the flat bottom of a measuring cup can help smooth out the surface once the dough is roughly in place, giving the cheesecake layer an even foundation to sit on.

Knowing When the Center Is Set
The center of the cheesecake layer should look set rather than glossy or liquid when the bars come out of the oven, though it may still have a very slight jiggle, similar to a traditional baked cheesecake. The edges should be visibly lighter golden than the deeper brown of a fully baked cookie, since this layer is meant to stay pale and creamy rather than developing a deep color. If the center still looks wet and shiny after 30 minutes, give it a few more minutes, checking every 2 to 3 minutes to avoid overbaking the top.
Why the Chill Time Matters
Refrigerating the baked bars for at least an hour does more than just cool them down — it firms up both the cookie base and the cheesecake layer enough to slice cleanly. A bar cut too soon after baking will have a softer, less defined cheesecake layer that can smear rather than hold a clean edge. If you have the time, chilling for a full 2 hours or even overnight gives the cleanest slices and the best texture contrast between the chewy base and the creamy top.
Getting a Clean Slice
A sharp knife wiped clean between cuts, or run under warm water and dried, gives the neatest slices through both the cheesecake layer and the cookie base underneath. Cutting straight down in one motion rather than sawing back and forth helps keep the cheesecake layer from dragging or smearing across the top. If you’re topping the bars with fresh banana slices, add those just before serving rather than before slicing, since the banana will brown and the topping can shift during the cutting process.
Tips for Perfect Banana Pudding Cheesecake Bars
Make sure the cream cheese is fully softened before you start, since this is the step most likely to cause a lumpy filling if skipped. Press the cookie dough into an even layer so it bakes consistently, and watch the bake time closely toward the end so the cheesecake layer sets without overbaking the cookie base underneath. Let the bars cool completely before refrigerating, and give them the full chilling time before slicing for the cleanest bars.
Troubleshooting Common Issues
My cheesecake layer came out lumpy. This usually happens when the cream cheese wasn’t fully softened before mixing. Let it sit at room temperature longer next time, or beat it alone until completely smooth before adding the pudding mix.
The cookie base seems underbaked. If the cheesecake layer looks done but the cookie base underneath still seems soft, tent the pan loosely with foil and bake a few more minutes so the base can finish without the top browning further.
My bars fell apart when I sliced them. They likely needed more chilling time. Give the pan the full hour in the refrigerator, or longer, before cutting.
The cheesecake layer cracked on top. Minor cracking can happen from overbaking. Pull the pan as soon as the center is set with just a slight jiggle, rather than waiting for it to look completely firm.

A Few Ways to Make It Yours
Fresh Banana Topping
Top the chilled bars with fresh banana slices just before serving for extra banana flavor and a classic banana pudding look.
Vanilla Wafer Crumble
Sprinkle crushed vanilla wafer cookies over the top for the crunch and flavor found in classic banana pudding.
Whipped Cream Finish
Add a dollop of whipped topping to each bar right before serving for a lighter, more dessert-plate presentation.
Vanilla Pudding Swap
Use instant vanilla pudding mix instead of banana for a plain vanilla cheesecake bar with the same easy method.
The classic version with just the three core ingredients is worth trying first, then layer on toppings once you know how the base recipe turns out in your own oven.
How to Store Banana Pudding Cheesecake Bars
Store the bars in an airtight container in the refrigerator for up to 4 days, since the cheesecake layer needs to stay cold. If you’ve topped them with fresh banana slices, those are best added just before serving, as they’ll brown and soften if stored on the bars for more than a few hours. These bars can also be frozen unfrosted and untopped; wrap individual bars tightly and thaw them in the refrigerator overnight before adding any fresh toppings.
When to Serve These Bars
These bars are a natural fit for potlucks, picnics, and family gatherings where banana pudding is already a favorite, since they bring that same flavor in a neat, portable bar instead of a bowl that needs a spoon. They also work well as a make-ahead dessert for a weeknight, since the chilling time means they’re ready and waiting in the refrigerator whenever you want one. Cut them smaller for a dessert table with other treats, or keep them at full bar size for a more substantial serving.
Nutrition and Serving Information
The recipe estimates approximately 250 calories per bar when the batch is divided into 12 pieces, based on standard sugar cookie dough, cream cheese, and instant pudding mix. This is only an estimate, since exact calorie and fat content will vary depending on the specific brands used and how thick the bars are cut. Because the recipe relies on refrigerated cookie dough and a packaged pudding mix, check the labels for wheat, egg, and dairy allergens, and note that some instant pudding mixes are processed on shared lines with tree nuts.
Make-Ahead Tips
These bars are naturally make-ahead, since they need to cool and chill before slicing anyway. Bake them up to 2 days ahead and keep the whole pan covered in the refrigerator, slicing just before you plan to serve so the edges look their cleanest. If you’re bringing them somewhere, transporting the uncut slab and slicing on arrival keeps the presentation neat, and it also protects the cheesecake layer from getting bumped or smudged along the way.
The Science Behind the Bake
Baking a cream-cheese-and-pudding-mix layer directly over raw cookie dough works because both layers reach a similar set point at a similar rate in a 350°F oven. The starches in the instant pudding mix begin to firm up as they heat, much the way they would if whisked into warm milk, while the proteins in the cream cheese denature slightly under heat, together transforming the mixture from a soft batter into a set, sliceable layer. Underneath, the cookie dough bakes through more slowly, protected somewhat from direct oven heat by the layer sitting on top of it, which is part of why this base bakes up softer and more blondie-like than a cookie baked on its own with nothing covering it. The refrigeration step afterward isn’t just for temperature — as the fats in both the cream cheese and the cookie dough re-solidify while chilled, the whole bar firms up structurally in a way that a warm or room-temperature bar simply can’t replicate.
Portioning and Yield
This recipe fills an 8-inch square pan and is typically cut into 12 bars, a good size for a dessert table serving where the bars sit alongside other treats. For a bigger gathering, cutting the pan into 16 smaller squares stretches the batch further while still giving everyone a proper taste of both layers. If you’d like a more substantial, plated dessert portion, cutting the pan into 9 larger pieces works well too. To scale up for a crowd, use a 9×13-inch pan and roughly double all three ingredients, keeping a close eye on the bake time since a larger, thinner pan may set a few minutes faster than the standard 8-inch square version.
A Little Bit of History
Banana pudding has deep roots in Southern American cooking, traditionally built from layers of vanilla wafers, sliced bananas, and a cooked custard-style pudding, often finished with a meringue or a cloud of whipped topping. It’s the kind of dessert that shows up at potlucks, church suppers, and family reunions across the South, valued as much for how easy it is to make in bulk as for its flavor. This recipe takes that same beloved banana-and-vanilla-wafer flavor profile and reworks it into a bar format, borrowing the instant pudding shortcut that many modern banana pudding recipes already lean on, and pairing it with a baked cheesecake layer instead of the traditional cooked custard. The result keeps the nostalgic banana flavor at the center while trading the spoon-and-bowl presentation for something you can stack on a dessert table and pick up with your hands.
Serving Suggestions
For a presentation that leans into the banana pudding theme, top each chilled bar with a few fresh banana slices, a small dollop of whipped topping, and a scatter of crushed vanilla wafers right before serving. Arranging the bars on a platter lined with a few whole vanilla wafers around the edges gives the whole tray a cohesive, banana-pudding-inspired look without much extra work. These bars also pair nicely with a simple cup of coffee or a glass of cold milk, since the richness of the cheesecake layer benefits from something to balance it. For a warm-weather gathering, keep the tray in the refrigerator until just before serving, since the cheesecake layer will soften noticeably if it sits out too long in the heat, and a softened bar is much harder to serve neatly on a plate.
Choosing the Right Cookie Dough
Plain sugar cookie dough is what gives this recipe its neutral, slightly sweet base that doesn’t compete with the banana pudding flavor above it. Most grocery store refrigerated sugar cookie dough works well pressed flat into a pan rather than scooped into individual cookies, though thicker, more scoopable doughs may need a few extra minutes of pressing and smoothing to spread evenly into the corners. If you only have a thicker or stiffer log-style dough on hand, letting it sit at room temperature for 10 to 15 minutes before pressing makes it considerably easier to work with. Avoid pre-mixed doughs that already contain chunks like chocolate chips unless you’re intentionally going for a flavor twist, since the goal here is a clean, classic base that lets the banana pudding layer be the star. A plain, simple base is really what makes the banana flavor on top stand out clearly in every bite, rather than competing with it.
Common Questions
Can I use homemade cookie dough instead of refrigerated?
Yes, though the texture of the baked base may vary slightly depending on your recipe. Refrigerated dough is used here for convenience and consistency.
Can I use a different pudding flavor?
Yes, vanilla or even butterscotch instant pudding mix will work with the same method, giving you a different flavor cheesecake bar using the same technique.
Do I need to add fresh bananas?
No, the banana flavor comes entirely from the instant pudding mix. Fresh banana slices are an optional topping added just before serving.
Can I freeze these bars?
Yes, wrap individual bars tightly and freeze without fresh toppings. Thaw in the refrigerator overnight and add any fresh garnishes just before serving.
Why is my cheesecake layer runny?
This usually means the bars need more baking or chilling time. Make sure the center is set with just a slight jiggle before removing from the oven, and give the full hour of chilling before slicing.
Can I double this recipe?
Yes, use a 9×13-inch pan and double all three ingredients, watching the bake time closely since a wider pan may finish a few minutes sooner.
Do these need to stay refrigerated?
Yes, because of the cream cheese, these bars should be stored in the refrigerator rather than at room temperature.
3-Ingredient Banana Pudding Cheesecake Bars turn a beloved layered dessert into a simple, sliceable bar with almost no effort. Press, beat, spread, bake, and chill — that’s the entire process, and the result is a creamy, banana-flavored cheesecake bar with a soft cookie base that’s easy to make again and again, whether it’s for a weeknight treat or the next potluck on your calendar.