
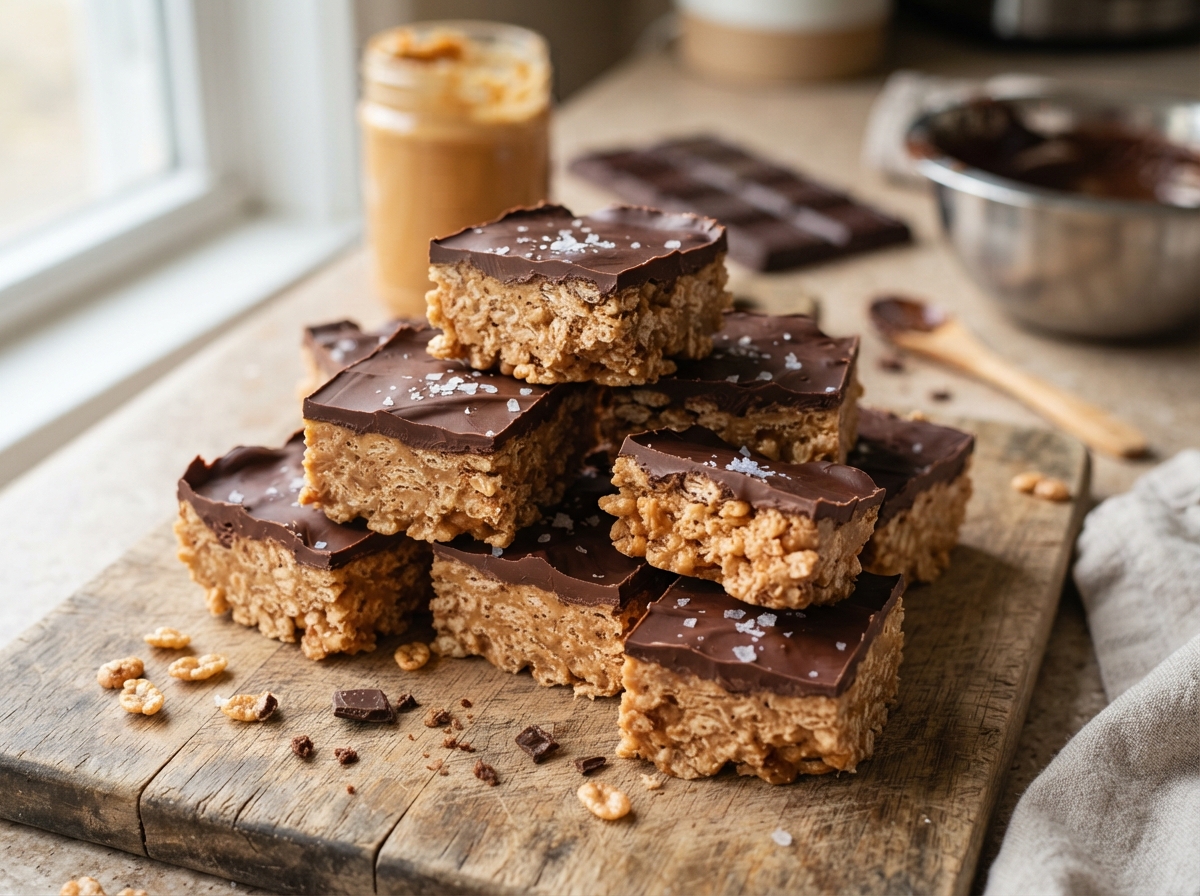
3-Ingredient Chocolate Peanut Butter Crunch Bars
Melted chocolate and peanut butter fold around crispy rice cereal for a bar with real crunch in every bite, no oven required.
Thank you for reading this post, don't forget to subscribe!
These 3-Ingredient Chocolate Peanut Butter Crunch Bars turn melted chocolate chips, peanut butter, and crispy rice cereal into a bar with real texture in every bite, no oven required. The chocolate and peanut butter melt together into a smooth, glossy base, and the cereal folds in to add a light, satisfying crunch that keeps every bite from feeling too dense.
There’s no baking involved here at all, just melting, folding, pressing, and a stretch of time in the refrigerator to firm everything back up. The result tastes like a homemade version of a crispy chocolate peanut butter candy bar.
It’s an easy make-ahead treat for a lunchbox, a bake sale, or anytime a chocolate and peanut butter craving needs answering without turning on the oven.
Why This Recipe Works
Melting chocolate chips and peanut butter together creates a smooth, glossy base that coats crispy rice cereal evenly once folded in, binding the loose cereal pieces into a bar that holds together once chilled. The peanut butter also thins the chocolate slightly as it melts, making the mixture easier to fold through the cereal without clumping.
Chilling the pressed mixture afterward is what gives the bars their final, sliceable structure, allowing the chocolate to firm back up around the cereal so each bar holds its shape when cut.
Why Melting Slowly Matters
Melting the chocolate and peanut butter together slowly, whether over a double boiler or in short bursts in the microwave, keeps the chocolate from scorching or seizing into a grainy, unworkable texture. A gentle, gradual melt keeps the mixture smooth and glossy, which makes it much easier to fold evenly through the cereal.
What You’ll Need
- 2 cups chocolate chips
- 1 cup creamy peanut butter
- 2 cups crispy rice cereal
That’s the entire list. This recipe makes 16 bars from an 8×8-inch pan.
A Note on Ingredient Choices
Standard semisweet chocolate chips give a classic, balanced sweetness, though dark chocolate chips work well for a less sweet, richer bar. A standard creamy peanut butter blends most smoothly into the melted chocolate; a plain crispy rice cereal, rather than a sweetened or flavored variety, keeps the flavor focused on chocolate and peanut butter.
Equipment You’ll Need
An 8×8-inch pan lined with parchment paper, a microwave-safe bowl or a small saucepan for melting, and a spatula for folding are all you need; no oven or mixer required.
How to Make It
- Line the pan. Line an 8×8-inch pan with parchment paper.
- Melt. Melt the chocolate chips and peanut butter together until smooth.
- Fold. Fold in the crispy rice cereal until evenly coated.
- Press. Press the mixture firmly into the prepared pan.
- Chill. Refrigerate for 1–2 hours, or until firm.
- Slice. Cut into bars and serve.
Getting an Even Press
Pressing the cereal mixture firmly and evenly into every corner of the pan, rather than just smoothing the center, gives the finished bars a uniform thickness and helps them hold together once sliced. The back of a measuring cup or a piece of parchment paper pressed on top both work well for an even, firm press.

Getting an Even Melt
Melting the chocolate and peanut butter in short 20 to 30 second bursts in the microwave, stirring between each one, helps keep the mixture from overheating and scorching. A double boiler on the stovetop works just as well and offers a bit more control for anyone who prefers not to use a microwave.
Knowing When It’s Done
These bars are ready to slice once they feel firm and cool to the touch straight from the refrigerator, with no give when pressed gently in the center. If the center still feels soft after 2 hours, give the pan another 30 minutes of chilling.
Tips for Perfect Crunch Bars
Fold the cereal in gently once the chocolate mixture is ready, rather than stirring vigorously, to keep the cereal pieces from crushing and losing their crunch. Press the mixture into the pan while it’s still warm and workable, since it firms up quickly once it starts to cool.
Troubleshooting Common Issues
My bars are crumbly when sliced. The mixture likely wasn’t pressed firmly enough into the pan before chilling. My chocolate seized while melting. This usually happens from overheating; melt more slowly in shorter bursts next time. My cereal lost its crunch. It may have been folded in too early, while the chocolate was still very hot, softening the cereal. My bars are too soft to hold together. They likely need more time in the refrigerator, or a touch more chocolate relative to peanut butter.

A Few Ways to Make It Yours
Sea Salt Finish
A light sprinkle of flaky sea salt over the top before chilling adds a nice contrast to the sweetness.
Chopped Peanuts
Fold in a handful of chopped peanuts along with the cereal for extra crunch and reinforced peanut flavor.
White Chocolate Drizzle
A drizzle of melted white chocolate over the top before chilling adds a decorative touch and extra sweetness.
Mini Marshmallows
Fold in a handful of mini marshmallows along with the cereal for a s’mores-like variation.
The plain version is worth trying first so you know the baseline flavor before adding any extras.
How to Store Crunch Bars
Store the bars covered in the refrigerator for up to a week, or at room temperature for up to 3 days if your kitchen isn’t too warm. Keeping them chilled helps preserve the crunch of the cereal longest.
When to Serve These Bars
These bars work well as a lunchbox treat, a bake sale contribution, or a make-ahead dessert to keep on hand for whenever a chocolate and peanut butter craving hits. Their sturdy, portable shape also makes them an easy option for a picnic or a road trip snack.
Nutrition and Serving Information
The recipe estimates approximately 210 calories per bar when the pan is cut into 16 bars, based on standard measurements for chocolate chips, peanut butter, and crispy rice cereal. This is only an estimate, since exact calorie and fat content will vary depending on the specific brands used. Because this recipe is built around peanut butter, chocolate, and a wheat- or rice-based cereal, it isn’t appropriate for anyone with peanut, tree nut, or gluten sensitivities depending on the cereal used.
Make-Ahead Tips
These bars can be made a day or two ahead and stored covered in the refrigerator, making them a convenient make-ahead treat for a lunchbox or a gathering. Because they need to chill fully before slicing anyway, they’re naturally suited to being made in advance.
The Science Behind a Three-Ingredient Crunch Bar
Chocolate sets through the crystallization of cocoa butter as it cools, and mixing in peanut butter’s own fat slightly slows and softens that crystallization, which is part of why these bars stay a touch softer and easier to bite through than a plain chocolate bar. The crispy rice cereal, meanwhile, keeps its own crunchy structure intact even after being coated, since the chocolate mixture surrounds rather than saturates each piece, preserving that light, airy crunch throughout.
Portioning and Yield
This recipe makes 16 bars from a single 8×8-inch pan, a good size for a lunchbox rotation or a small gathering. Doubling all three ingredients into a 9×13-inch pan works well for a larger batch, though the chill time may need to extend slightly given the greater volume.
A Little Bit of History
No-bake bars built around melted chocolate and crispy cereal have long been a home-kitchen shortcut for getting a candy-bar-like treat without turning on the oven, tracing back to the same basic idea behind classic cereal treats. Adding peanut butter to the mix layers in a familiar, beloved flavor pairing that turns a simple cereal bar into something closer to a homemade candy bar.
Serving Suggestions
Serve these bars straight from the refrigerator for the firmest, cleanest slices, or let them sit at room temperature for a few minutes first for a slightly softer bite. A glass of cold milk alongside is the classic pairing for anything chocolate and peanut butter.
Choosing the Right Cereal
A plain crispy rice cereal gives the lightest, crispest texture and keeps the flavor focused on chocolate and peanut butter. A puffed corn or wheat cereal can be substituted for a slightly different crunch, though crispy rice remains the most classic choice for this style of bar.
Why This Recipe Is So Beginner-Friendly
If you’ve never made a no-bake cereal bar before, this is an especially forgiving place to start. There’s no oven temperature to manage, no risk of overbaking, and no delicate technique required beyond melting two ingredients together and folding in a third. With only three ingredients and a handful of simple steps, there’s very little room for the kind of mistakes that can derail a more involved dessert. This makes it a genuinely approachable recipe for a first-time cook or a child who wants to help with the folding and pressing steps, since the process is simple, safe, and produces a real, visible result within a couple of hours.
Adjusting the Flavor to Your Taste
As written, these bars get their flavor from chocolate and peanut butter in balance, with the cereal adding texture rather than flavor. If you’d like a more pronounced peanut butter flavor, stirring in an extra spoonful of peanut butter before folding in the cereal shifts the balance nicely. A pinch of flaky salt over the top before chilling can also sharpen the flavor and cut some of the sweetness. Because this recipe has so few ingredients to begin with, small additions tend to have a noticeable effect on the final flavor, so it’s worth trying the plain version first before deciding what, if anything, you’d like to add.
Pairing These Bars With Other Desserts and Drinks
Because the flavor here is rich, chocolatey, and distinctly peanut buttery, these bars pair naturally with lighter, brighter options if you’re serving more than one dessert. A simple fruit salad or a citrus-based dessert cuts through the richness nicely, while another chocolate treat leans further into the same indulgent direction if that’s the mood you’re after. On the drink side, these bars are a natural match for a cold glass of milk, while coffee works well for an afternoon treat.
A Note on Ingredient Proportions
The two cups of chocolate chips to one cup of peanut butter to two cups of cereal ratio in this recipe was chosen carefully, and it’s worth understanding why before making adjustments. This balance gives enough chocolate and peanut butter to fully coat and bind the cereal, while the cereal still provides enough volume to give every bite real crunch rather than a dense, fudgy texture. Using significantly more cereal relative to the chocolate mixture can leave the bars too loose to hold together when sliced, while using less cereal can make them closer to a plain fudge than a crunch bar. This particular ratio is what gives the bars their signature texture, so it’s worth treating the stated proportions as a tested baseline.
A Quick Note on Serving Temperature
These bars are good served chilled straight from the refrigerator or at room temperature after sitting out for a few minutes, which is part of what makes them such a flexible treat to have on hand. Chilled, the bars are at their firmest and cleanest to slice; at room temperature, they soften slightly for an easier bite, though the cereal keeps its crunch either way.
Why This Recipe Is Naturally Kid-Friendly to Make
Because this recipe involves melting two ingredients together and folding in a third, it’s a genuinely simple treat to make with kids, provided an adult handles the melting step on the stovetop or microwave. Folding the cereal into the melted chocolate mixture and pressing it into the pan are satisfying, hands-on tasks that give a real sense of accomplishment once the finished bars come out of the refrigerator firm and ready to slice.
A Quick Note on Portion Control
Because these bars are rich with chocolate and peanut butter, a modest square goes further here than it would with a lighter dessert. Cutting the pan into 20 smaller bars rather than 16 standard-sized ones is an easy way to stretch the batch a bit further for a larger gathering, while still giving everyone a satisfying, full-flavored taste.
A Note on Presentation
How you finish these bars changes the impression they make almost as much as the flavor itself. Left plain, straight from the pan, they read as a simple, homey snack for a lunchbox or an afternoon treat. Drizzled with a little melted white chocolate and finished with a sprinkle of flaky salt, the same batch suddenly looks like something from a bakery case, which makes this a surprisingly versatile recipe to keep in rotation for both everyday snacking and occasions where presentation matters a little more.
Why This Recipe Is So Reliable
Part of what makes these bars such a good recipe to keep on hand is how little can actually go wrong with it. There’s no leavening to measure precisely, no eggs to worry about, and no delicate baking chemistry that can go sideways in a hot oven. Melting chocolate and peanut butter together and folding in cereal is a simple, predictable process, and as long as the mixture is pressed firmly and given enough time to chill, the result is consistent nearly every time, which is exactly the kind of dependability worth having in a go-to snack recipe.
A Final Thought on This Recipe
Recipes built around just three pantry staples tend to earn their place in a regular rotation not because they’re flashy, but because they solve a real problem: something needs to go in a lunchbox, a bake sale is coming up, or a chocolate and peanut butter craving needs answering right now, and there’s no time or patience for a long ingredient list. 3-Ingredient Chocolate Peanut Butter Crunch Bars answer that need reliably, using ingredients that are already sitting in most kitchens, and turning them into something that looks and tastes like real effort went into it. That combination of simplicity and payoff is exactly why this recipe is worth keeping close at hand.
A Word on Texture
The texture of these bars is really the whole point, since it’s the contrast between the smooth, fudgy chocolate coating and the light, crisp cereal running through it that makes every bite interesting. A bar with too little cereal starts to taste more like plain chocolate peanut butter fudge, while one that’s been pressed and chilled correctly keeps that satisfying crackle in every bite, even after a few days in the refrigerator. Getting that balance right is mostly a matter of folding gently, so the cereal pieces stay whole, and pressing firmly enough that the bars hold together once sliced.
A Note on Cutting Clean Bars
Because these bars contain crispy cereal, they can crumble at the edges if cut with a cold, dull knife straight from the refrigerator. Running a sharp knife under warm water and wiping it dry between cuts helps it glide through the chocolate coating without dragging or crushing the cereal underneath, giving cleaner, more even squares for serving or packing into a lunchbox.
Common Questions
Can I use a different type of chocolate?
Yes, dark or milk chocolate chips both work well and simply shift the sweetness level slightly.
Why did my cereal lose its crunch?
This usually happens when it’s folded into chocolate that’s still very hot; let the mixture cool slightly first.
Can I use natural peanut butter instead of regular?
Yes, though the finished bars may be a touch softer than with a standard creamy peanut butter.
How do I know when these are ready to slice?
Look for a firm, cool feel with no give when pressed gently in the center.
Can I double this recipe?
Yes, use a 9×13-inch pan and double all three ingredients, allowing extra chilling time.
How should I store leftovers?
Keep the bars covered in the refrigerator for up to a week, or at room temperature for up to 3 days.
Can I freeze these bars?
Yes, wrap tightly and freeze for up to 2 months; thaw at room temperature before serving.
3-Ingredient Chocolate Peanut Butter Crunch Bars turn melted chocolate, peanut butter, and crispy rice cereal into a bar with real texture and almost no effort at all. Melt, fold, press, and chill, that’s the entire process, and the result tastes just like a homemade candy bar.