
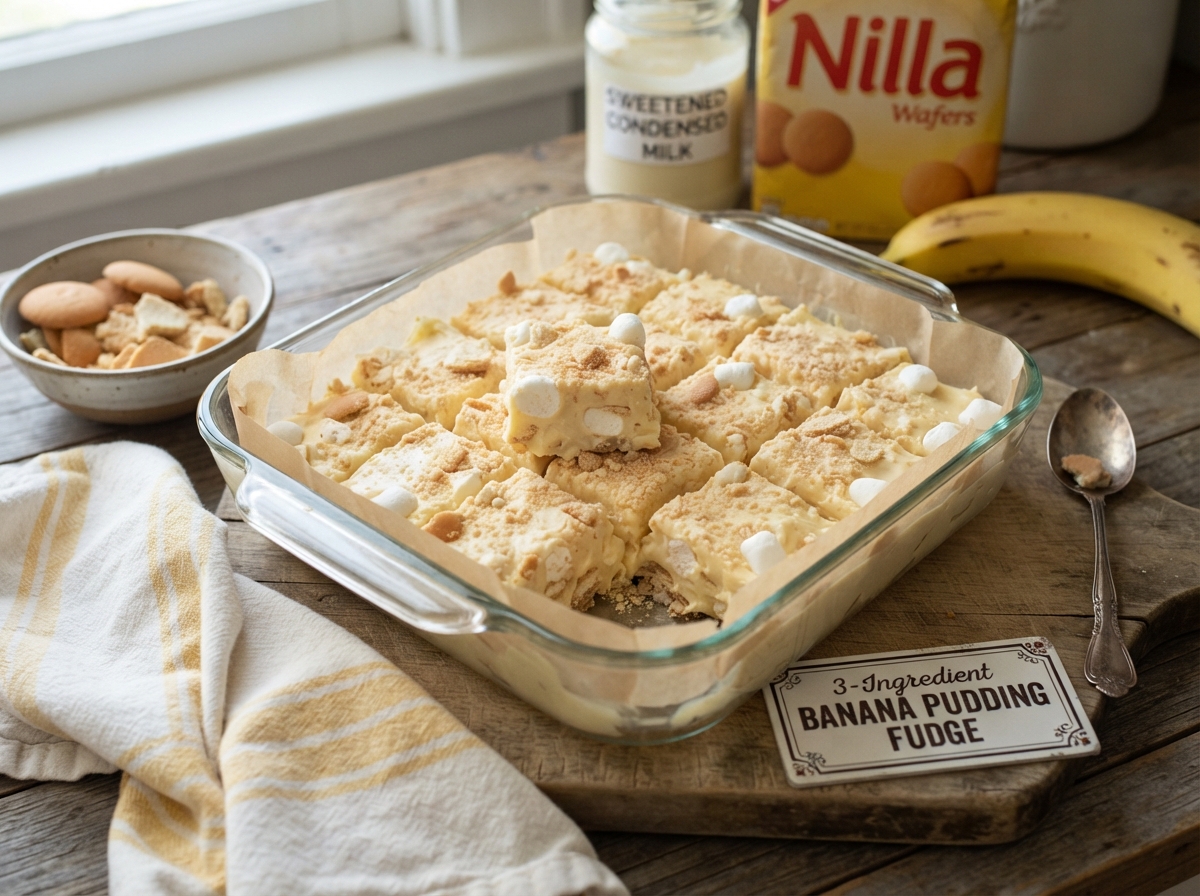
3-Ingredient Creamy Banana Pudding Fudge
Melted white chocolate and sweetened condensed milk whisked with banana pudding mix into a soft, creamy fudge that tastes just like the classic dessert.
Thank you for reading this post, don't forget to subscribe!
Soft, creamy, and unmistakably banana pudding in flavor, this easy fudge comes together with just three ingredients and a saucepan. There’s no candy thermometer and no fussy technique, just melted white chocolate and condensed milk whisked with banana pudding mix.
Melting sweetened condensed milk and white chocolate chips together over low heat, then whisking in instant banana pudding mix, is the entire process. Poured into a pan and chilled for a couple of hours, the mixture sets into soft, pale yellow squares that taste remarkably like the banana pudding dessert they’re named for.
It’s an easy treat for a potluck, a picnic, or any time a craving for something sweet and nostalgic calls for a no-bake dessert.
Why This Recipe Works
Melting white chocolate together with sweetened condensed milk creates a rich, glossy base that sets into a smooth, soft fudge once it’s chilled, giving this treat real structure without a candy thermometer. Whisking in the instant pudding mix right after taking the pan off the heat is what gives this fudge its distinctive banana flavor and faint hint of cook-and-serve pudding texture, since the starch in the mix thickens slightly as the mixture cools.
Because the melted white chocolate and condensed milk together provide all the fat, sugar, and structure this fudge needs, there’s no butter and no cooked sugar stage required.
Why Whisking Quickly Matters
Whisking the pudding mix in quickly and thoroughly right after the pan comes off the heat keeps lumps from forming, since the instant mix can clump if it sits on the surface of the warm mixture for too long before being stirred in. A few brisk strokes with a whisk, rather than a spoon, smooths it out fastest.
What You’ll Need
- 1 (14 oz) can sweetened condensed milk
- 3 cups white chocolate chips
- 1 box (3.4 oz) instant banana pudding mix
You’ll also need an 8×8-inch pan lined with parchment paper. This recipe makes 16 squares.
A Note on Ingredient Choices
Good-quality white chocolate chips melt more smoothly and give a cleaner flavor than chips padded with extra fillers, so it’s worth reaching for a trusted brand here. Instant pudding mix, rather than the cook-and-serve kind, is what the recipe calls for, since it sets properly without any additional cooking.
Equipment You’ll Need
A saucepan, a whisk, and a parchment-lined 8×8-inch pan are all you need; no candy thermometer or stand mixer required.
How to Make It
- Line the pan. Line an 8×8-inch baking pan with parchment paper.
- Melt. In a saucepan over low heat, combine the sweetened condensed milk and white chocolate chips.
- Stir. Stir constantly until the chocolate is completely melted and the mixture is smooth.
- Whisk in pudding mix. Remove from the heat and quickly whisk in the banana pudding mix until fully combined.
- Pour. Pour into the prepared pan and smooth the top.
- Chill. Refrigerate for 2–3 hours, or until firm.
- Serve. Cut into small squares and serve.
Getting the Mixture Smooth
Stirring constantly over low heat, rather than letting the mixture sit, keeps the white chocolate from scorching on the bottom of the saucepan. Low heat is especially important with white chocolate, since it scorches more easily than milk or dark chocolate and can turn grainy if the heat climbs too high.

Getting an Even Pour
Pouring the mixture into the pan and smoothing it with the back of a spoon or an offset spatula right away, before it has a chance to start setting, gives the most level top and the neatest finished squares. Working quickly here matters more than with a thicker fudge, since this mixture is softer right after it’s poured.
Knowing When It’s Done
This fudge is ready once it feels firm to the touch across the whole pan and no longer looks glossy or wet on top. If it still feels soft after 3 hours, give it another 30 minutes to an hour in the refrigerator before slicing.
Tips for Perfect Banana Pudding Fudge
Use low heat and have patience during the melting step, since white chocolate scorches more easily than other chocolates and rushing this step is the most common way the recipe goes wrong. Whisk in the pudding mix as soon as the pan comes off the heat, since waiting too long lets the mixture start to firm up before the pudding mix is fully incorporated.
Troubleshooting Common Issues
My white chocolate turned grainy or seized. It was likely overheated; keep the heat low next time and stir constantly. My fudge has lumps of pudding mix. Whisk more vigorously and immediately after removing the pan from the heat, before the mixture starts to cool. My fudge is too soft to cut cleanly. Give it more time in the refrigerator; a full 3 hours is sometimes needed depending on how cold your refrigerator runs. My fudge tastes too sweet. Try a brand of white chocolate chips with a less sugary profile next time.
A Few Ways to Make It Yours
Vanilla Wafer Mix-In
Fold in crushed vanilla wafers right before pouring for extra texture throughout.
Fresh Banana Swirl
Swirl a thin layer of mashed fresh banana through the top before chilling.
Caramel Drizzle
Drizzle caramel sauce over the top once set for a banana-caramel twist.
Toasted Coconut Topping
Press toasted coconut flakes into the surface before chilling for added crunch.
The classic version is worth trying first so you know the baseline flavor before adding any extras.
How to Store Banana Pudding Fudge
Keep the fudge in an airtight container in the refrigerator for up to a week, since the condensed milk base is softer and more perishable than a traditional cooked fudge. Let squares sit at room temperature for a few minutes before serving for the best texture.
When to Serve This Fudge
This fudge works well for potlucks, picnics, or any time a banana pudding craving strikes and a full trifle isn’t realistic. It also makes an easy, nostalgic treat to pack for a summer gathering or a backyard cookout.
Nutrition and Serving Information
This recipe makes 16 squares, and exact calorie content will vary depending on the specific brands of condensed milk, white chocolate, and pudding mix used. Because this recipe contains dairy and gluten, it isn’t appropriate for anyone avoiding those ingredients.
Make-Ahead Tips
This fudge is a genuinely good make-ahead treat, since it needs to chill before it can be sliced and holds its texture well for days afterward in the refrigerator. Making a batch a day or two before you need it removes any last-minute pressure entirely.
The Science Behind a No-Bake Pudding Fudge
Melted white chocolate and condensed milk form a smooth, fat-and-sugar base that firms up predictably once chilled, while the starch in the instant pudding mix thickens slightly as it cools, giving the fudge a faintly different, softer texture than a traditional cooked fudge. Because that combination sets reliably at cold temperatures, there’s no additional cooking or candy thermometer required at all.
Portioning and Yield
This recipe makes 16 squares from a single batch, a good amount for a potluck tray or a family treat. Doubling the ingredients works well for a larger batch in a 9×13-inch pan, though it’s easiest to melt the condensed milk and white chocolate in two separate rounds so the saucepan step stays manageable.
A Little Bit of History
Banana pudding has long been a beloved Southern dessert, layering custard, vanilla wafers, and fresh banana into something comforting and nostalgic. This fudge borrows that same flavor profile and condenses it into a simple, no-bake candy that captures the dessert’s signature taste without any of the layering or chilling time a full trifle requires.
Serving Suggestions
Serve this fudge chilled or just slightly below refrigerator temperature for the best balance of firmness and creaminess. A few squares alongside a handful of vanilla wafers and a glass of cold milk makes for an easy, satisfying treat that nods right back to the classic dessert.
Choosing the Right Pudding Mix
Instant banana pudding mix is essential here, since it sets on its own without any cooking, unlike the cook-and-serve variety. A name-brand or store-brand instant mix both work fine, since the main job of the mix is flavor and a light thickening effect rather than any complex chemistry.
Why This Recipe Is So Beginner-Friendly
If you’ve never made a no-bake fudge before, this is about as forgiving a place to start as you’ll find. There’s no oven temperature to manage, no risk of overbaking, and no delicate technique required beyond melting two ingredients together over low heat and whisking in a pudding mix. With only three ingredients and a handful of simple steps, there’s very little room for the kind of mistakes that can derail a more involved baked treat. This makes it a genuinely approachable recipe for a first-time cook, since the process is simple, safe, and produces a real, visible result within just over two hours.
Adjusting the Flavor to Your Taste
As written, this fudge gets its signature flavor almost entirely from the instant banana pudding mix whisked into the melted white chocolate and condensed milk base. If you’d like a bolder banana flavor, folding in a little extra mashed ripe banana along with the pudding mix leans further in that direction, though it will soften the texture slightly. Because this recipe has so few ingredients to begin with, small changes tend to have a noticeable effect on the final flavor, so it’s worth trying the classic version first before deciding what, if anything, you’d like to change.
Pairing This Fudge With Other Desserts and Drinks
Because the flavor here is sweet, creamy, and distinctly banana, this fudge pairs naturally with lighter options if you’re serving more than one dessert, since the contrast keeps a spread from feeling too heavy. A crisp, light cookie or a bright citrus treat balances the richness of this fudge nicely, while another banana or vanilla-based dessert leans further into the same nostalgic direction. On the drink side, this fudge pairs well with cold milk, sweet tea, or coffee.
A Note on Ingredient Proportions
Using a full can of condensed milk against three cups of white chocolate gives a fudge where the base is rich and creamy without being overly dense, and it’s worth understanding why that balance matters before adjusting it. The single box of instant pudding mix is calibrated to flavor and lightly thicken that exact amount of base, so doubling the pudding mix without doubling everything else can make the fudge taste overly starchy rather than balanced. This particular ratio is what gives the finished batch its classic banana pudding flavor and texture, so it’s worth treating the stated amounts as a tested baseline.
A Quick Note on Serving Temperature
This fudge tastes best served chilled or just slightly below refrigerator temperature, since its softer, creamier texture doesn’t hold up as well at room temperature as a firmer, cooked fudge would. If serving at a warm-weather gathering, keeping the tray in a cooler or returning leftovers to the refrigerator promptly helps it hold its shape.
Why This Recipe Is Naturally Kid-Friendly to Make
Because this recipe involves melting ingredients over the stove and whisking in a pudding mix, it’s a genuinely simple treat to make with kids, provided an adult handles the saucepan step. Whisking in the pudding mix and smoothing the top are satisfying, hands-on tasks that give a real sense of accomplishment once the finished fudge comes out of the refrigerator set and ready to slice.
A Quick Note on Portion Control
Because this fudge is rich with both condensed milk and white chocolate, one square goes a long way here compared to a lighter snack. Cutting the pan into smaller pieces is an easy way to stretch the batch further and keep portions naturally smaller for a potluck or party platter.
A Note on Presentation
How you serve this fudge changes the impression it makes almost as much as the flavor itself. Cut into plain squares on a plate, it reads as a simple, homemade snack. Arranged on a platter with crushed vanilla wafers scattered around and a few fresh banana slices tucked in, the same fudge suddenly looks like a dessert pulled straight from a Southern potluck table, which makes this a surprisingly versatile recipe to keep in rotation for both casual snacking and gatherings.
A Note on Working With White Chocolate
White chocolate behaves differently on the stove than milk or dark chocolate, since it contains no cocoa solids and scorches far more easily under direct or high heat. Keeping the burner on low the entire time, rather than starting higher and turning it down, is the simplest way to avoid a grainy, seized mixture. If the chocolate does seize despite careful heat control, there’s usually no saving that batch, so it’s worth erring on the side of patience over speed here.

A Note on Cutting Clean Squares
Because this fudge has a softer, creamier base than a traditional cooked fudge, cutting clean squares takes a slightly gentler approach than you might expect. Using a thin, sharp knife wiped clean and warmed slightly under hot water between cuts gives the neatest results, since a cold, dry blade can drag through the softer texture rather than slicing through it cleanly. Chilling the fully set fudge for a few extra minutes in the freezer right before cutting also firms it up just enough to make slicing easier without changing the final texture once it comes back to refrigerator temperature.
A Note on Texture Expectations
It’s worth knowing going in that this fudge sets up noticeably softer than a classic cooked sugar fudge, closer in feel to a very dense, sliceable pudding than a firm candy. That softness isn’t a sign anything went wrong; it’s simply the nature of a condensed-milk-and-pudding-mix base compared to one built on a cooked sugar syrup. Giving the fudge the full chilling time, and ideally an extra hour beyond the minimum if your kitchen or refrigerator runs on the warmer side, makes the biggest difference in how cleanly it holds together once sliced. Squares served straight from the refrigerator will always be firmer than ones left out for a while, so timing when you slice relative to serving is worth planning around if neat squares matter for presentation.
A Final Note on Batch Size
This recipe is sized for a single 8×8-inch pan, which keeps the whole process quick and manageable in just over two hours including chilling time. For a bigger batch to fill out a longer dessert table or a larger gathering, melt the condensed milk and white chocolate in two separate saucepans rather than trying to scale up one pot, since a larger volume of white chocolate takes noticeably longer to melt evenly and raises the risk of scorching on the bottom before the top is fully melted. Whisking the pudding mix into each batch separately right after it comes off the heat, rather than combining everything first and whisking once, also helps avoid lumps when working at a larger scale.
Common Questions
Can I use a different pudding flavor?
Yes, vanilla or butterscotch instant pudding mix both work well if you’d like a different flavor.
Why did my fudge turn out lumpy?
The pudding mix likely wasn’t whisked in quickly or thoroughly enough; whisk vigorously right after removing the pan from heat.
Can I use milk or dark chocolate instead of white chocolate?
Yes, though the banana flavor will be less pronounced and the color will be darker.
How do I know when the fudge is fully set?
It should feel firm to the touch across the whole pan and no longer look wet or glossy on top.
Can I double this recipe?
Yes, use a 9×13-inch pan and melt the condensed milk and white chocolate in two rounds so the saucepan step stays manageable.
How should I store leftovers?
Keep the fudge in an airtight container in the refrigerator for up to a week.
Can I freeze this fudge?
Yes, it freezes well in an airtight container for up to 2 months; thaw in the refrigerator before serving.
However you slice it and whoever you share it with, this banana pudding fudge delivers all the comfort of the classic dessert in a fraction of the time, with no layering, no custard to cook, and no trifle dish required. It’s proof that a nostalgic flavor doesn’t need a complicated process behind it, just the right three ingredients and a little patience with the heat.