
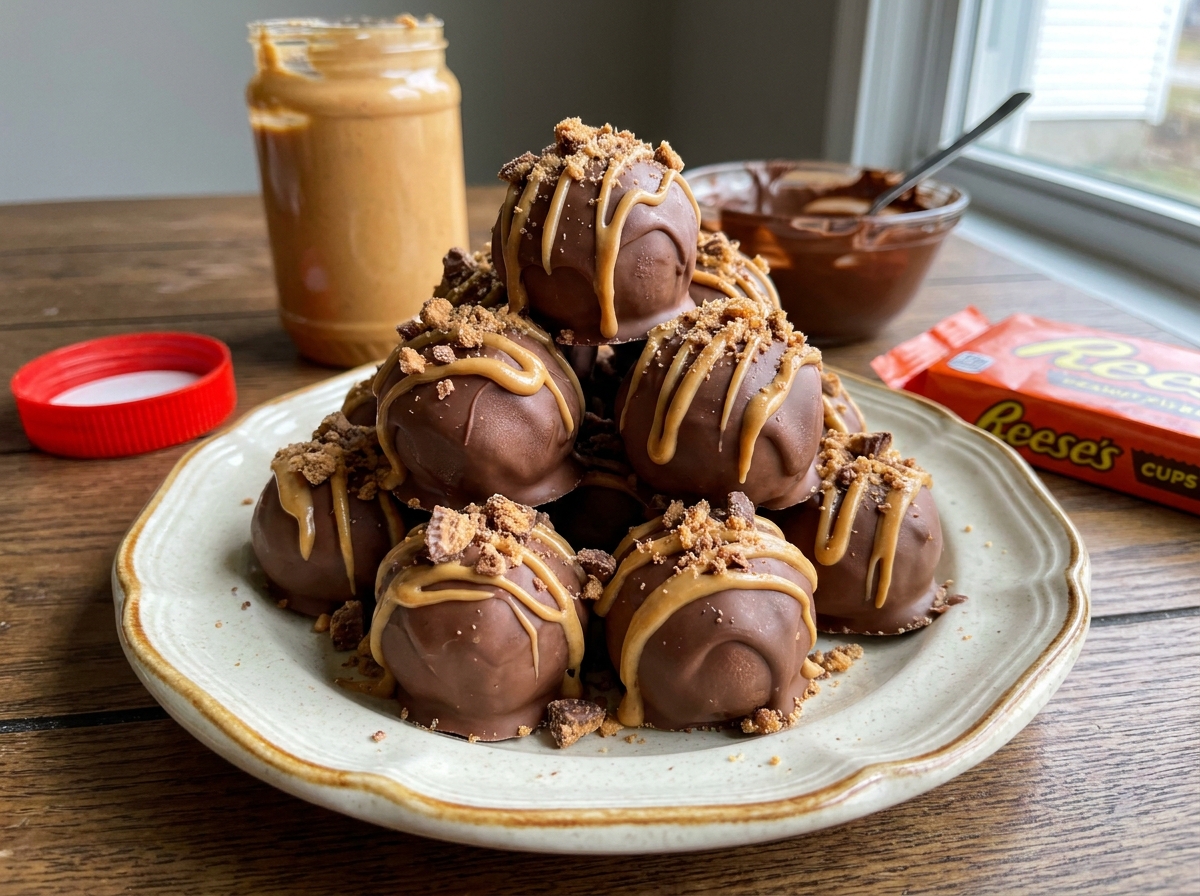
3-Ingredient No-Bake Peanut Butter Chocolate Truffles
Creamy peanut butter and powdered sugar rolled into a rich candy center, dipped in melted milk chocolate — no oven, no candy thermometer, no complicated candy-making.
Thank you for reading this post, don't forget to subscribe!
These 3-Ingredient No-Bake Peanut Butter Chocolate Truffles are an incredibly easy homemade candy for anyone who loves the classic combination of chocolate and peanut butter.
The creamy peanut butter and powdered sugar create a rich, sweet center, while the smooth milk chocolate coating adds a delicious candy-shell finish. With only three ingredients and no oven required, these truffles are perfect for holidays, parties, dessert trays, gifting, or satisfying a sudden sweet craving. They have the familiar flavor of a peanut butter cup but in an elegant bite-sized truffle, and once you make a batch, it’s easy to see why simple no-bake candy recipes are so handy to keep in your dessert collection.
What makes this recipe so appealing is how little it asks of you. There is no candy thermometer to watch, no cooked sugar syrup to worry about scorching, and no baking time to plan around. The peanut butter and powdered sugar simply get stirred together into a workable dough, rolled into balls, chilled until firm, and dipped in melted chocolate. The refrigerator does most of the real work, which makes this a genuinely low-stress candy to make even if you’ve never attempted homemade candy before.
A Little Bit of History
Peanut butter and chocolate have been paired in American candy-making for well over a century, but the specific format of a chilled peanut butter center dipped in chocolate has its own long tradition outside of any single brand. Buckeye candies, named for the nut of Ohio’s state tree that they resemble, have been a home-kitchen staple in the Midwest for generations — a peanut butter and powdered sugar filling rolled into balls and dipped in chocolate, leaving just a small circle of peanut butter exposed at the top. This recipe follows that same basic method almost exactly, just with the peanut butter center fully coated rather than left partially bare.
The appeal of that format has never really faded, in part because it doesn’t require the specialized equipment or precise temperatures that other candies demand. Long before commercial peanut butter cups became a grocery-store staple, home cooks were already achieving a similar flavor with nothing more than a mixing bowl, a saucepan or microwave for the chocolate, and a refrigerator to set everything firm. That’s really the throughline connecting this recipe to that older tradition: a rich, no-cook peanut butter filling and a chocolate shell, made accessible to anyone with a well-stocked pantry rather than a candy-making background.
Why You’ll Love This No-Bake Candy
The first reason is the shortest ingredient list you’ll find for a candy this satisfying: peanut butter, powdered sugar, and chocolate chips. There’s no corn syrup, no butter, no eggs, and no cooking stage where timing matters down to the second. That makes this recipe considerably more forgiving than most traditional candy-making, where a few extra degrees on a thermometer can mean the difference between success and a grainy mess.
The second reason is how well these truffles travel and hold up. Once the chocolate shell sets, the truffles are sturdy enough to pack into a gift box, stack on a dessert tray, or carry to a potluck without much worry about them losing their shape. The third reason is simply how close the flavor lands to a peanut butter cup, which makes these an easy sell at any gathering — there’s rarely a dessert table where chocolate and peanut butter together doesn’t disappear quickly.
A Beginner-Friendly Candy Recipe
If you’ve never made candy at home before, this is one of the easiest possible places to start. There’s no oven temperature to monitor, no risk of a scorched sugar syrup, and no piping or decorating skill required. The most important techniques are simply mixing the dough until it holds together, rolling it into evenly sized balls, and dipping them in chocolate that’s been melted gently rather than overheated. Even the dipping step is forgiving — a slightly uneven chocolate coating still tastes exactly the same, and a light dusting of crushed peanut butter cups or a drizzle on top covers most minor imperfections.
What You’ll Need
- 1 1/2 cups creamy peanut butter
- 2 cups powdered sugar
- 2 cups milk chocolate chipsFor dipping
That’s the whole list. Each truffle comes out to roughly 175 calories, and the recipe makes about 20 truffles.
Choosing the Right Peanut Butter
Creamy, conventional peanut butter is the easiest choice for this recipe because it blends smoothly with the powdered sugar and creates a dough that’s simple to roll. Natural peanut butter can work, but its oil tends to separate in the jar, and that inconsistency can make the dough noticeably softer or oilier depending on how thoroughly you stir it before measuring. If you do use natural peanut butter, stir it very well first, and be prepared to add a little extra powdered sugar if the dough feels too soft to roll into firm balls. Crunchy peanut butter is an option too, though the little peanut pieces will show through the smooth chocolate shell once the truffles are dipped.
Why This Candy Works Without Baking
Powdered sugar is what makes this recipe possible without any cooking at all. Unlike granulated sugar, powdered sugar is ground fine enough that it dissolves and binds into the peanut butter almost immediately, without needing heat to help it along. That’s a very different mechanism from traditional fudge or caramel, where sugar has to be cooked to a specific temperature before it will set properly. Here, stirring alone is enough to turn two soft, spreadable ingredients into a dough firm enough to roll and hold its shape.
The chocolate shell works on a similarly simple principle. Melted chocolate is fluid enough to coat the cold peanut butter center evenly, and because cocoa butter re-solidifies at a temperature just below room temperature, a quick trip back to the refrigerator is all it takes to set the coating firm again. There’s no tempering process required the way there would be for chocolate that needs to hold a glossy snap at room temperature for days — keeping the finished truffles refrigerated does that work for you instead.
Equipment You’ll Need
A large mixing bowl gives you room to stir the peanut butter and powdered sugar together without them spilling over the sides as the dough thickens. A small cookie scoop helps keep the truffles close to the same size, though a regular tablespoon works fine too. A parchment-lined baking sheet gives you a surface the rolled balls won’t stick to, both before and after dipping. For the chocolate, a microwave-safe bowl is the easiest option, and a fork or a dedicated dipping tool makes lifting each truffle out of the melted chocolate much cleaner than trying to use your fingers.
How to Make It
- Mix the dough. In a large mixing bowl, combine the creamy peanut butter and powdered sugar. Stir until the ingredients come together into a thick, smooth dough.
- Roll into balls. Scoop out approximately 1 tablespoon of the mixture at a time and roll it between your palms to form 1-inch balls. Place each ball on a parchment-lined baking sheet.
- Chill. Refrigerate the peanut butter balls for 20 to 30 minutes, or until firm enough to dip easily.
- Melt the chocolate. Place the milk chocolate chips in a microwave-safe bowl. Microwave in 30-second intervals, stirring well after each interval, until the chocolate is completely melted and smooth.
- Dip. Using a fork or dipping tool, carefully dip each chilled peanut butter ball into the melted chocolate, coating it completely. Allow excess chocolate to drip back into the bowl.
- Set. Return each chocolate-covered truffle to the parchment-lined baking sheet and refrigerate until the chocolate is completely firm and set.
Getting the Dough the Right Consistency
The dough should be thick enough to hold a ball shape without slumping, but soft enough to roll smoothly between your palms. If it feels too soft or sticky to work with, a little extra powdered sugar, added a tablespoon at a time, will firm it up. If it feels crumbly and won’t hold together at all, a small amount of extra peanut butter usually solves the problem. Rolling the balls between clean, slightly cool hands also helps, since warm hands can start to soften the dough as you work.

How to Melt Chocolate for Dipping
Melting chocolate in short intervals is the key to a smooth, glossy coating. Microwave the chocolate chips in 30-second bursts, stirring thoroughly after each one, rather than heating it continuously. Chocolate can look mostly solid right up until the moment it scorches, so frequent stirring is what lets you catch the exact point where it’s fully melted and smooth without overheating it. If you’d rather avoid the microwave, a double boiler works just as well — melt the chocolate over gently simmering water, stirring often, and remove it from the heat the moment it’s smooth.
How to Get a Clean Chocolate Coating
For the neatest finish, drop each chilled peanut butter ball into the melted chocolate and use a fork to turn it until fully coated. Lift it out, tap the fork gently against the side of the bowl a few times, and let the excess chocolate drip back in before setting the truffle down on the parchment. Working quickly matters here, since the peanut butter center is cold and the chocolate is warm, and the contrast can cause the chocolate to firm up slightly on the fork if you take too long. If the chocolate starts to thicken while you’re still working through the batch, a quick 15-second reheat and a stir will loosen it back up.
Troubleshooting Common Issues
My peanut butter balls fell apart in the chocolate. They likely weren’t chilled long enough before dipping. Give them the full 30 minutes, and if your kitchen is warm, a few extra minutes in the fridge won’t hurt.
My chocolate coating looks streaky or dull instead of glossy. This usually means the chocolate was overheated at some point. Stick to short 30-second intervals and stir thoroughly between each one rather than microwaving in one long stretch.
My dough was too soft to roll into balls. Add more powdered sugar, a tablespoon at a time, until the dough firms up enough to hold its shape. Natural peanut butter is especially prone to this, since its oil content varies.
My chocolate started to thicken before I finished dipping. This is normal once you’re partway through a batch. Give it a quick 15-second reheat in the microwave and stir until smooth again before continuing.
My truffles have a thick pool of chocolate at the base. Tap the dipped truffle gently against the side of the bowl before setting it down, letting the excess chocolate drip off rather than pool underneath.

Best Ways to Decorate and Serve
A simple drizzle of extra melted peanut butter over the set chocolate shell is one of the easiest ways to dress these up, and it reinforces the peanut butter flavor right on the outside of the truffle. Crushed peanut butter cups sprinkled on top while the chocolate is still soft add crunch and make the truffles look like something from a candy counter. A light sprinkle of flaky sea salt is another easy option if you want to play up the sweet-and-salty contrast. For a party or dessert board, arrange the truffles in mini paper candy cups so they’re easy for guests to grab without touching the chocolate shell directly.
Serving Suggestions
These truffles are rich enough to serve entirely on their own, straight from the fridge, but they also pair naturally with a few simple accompaniments. A glass of cold milk is the classic match for anything peanut-butter-and-chocolate, cutting through the richness the same way it does with a peanut butter cup. Coffee or espresso works well after a meal, since the bitterness balances the sweetness of the powdered sugar and chocolate. For a dessert platter, arrange the truffles alongside a few whole peanut butter cups or a small bowl of extra melted chocolate for dipping, so the theme carries through the whole spread rather than stopping at the truffles themselves.
They also make an easy contribution to a mixed cookie or candy tray, since their round shape and glossy chocolate shell stand out visually next to flatter baked goods. If you’re packaging them as a gift, a small paper candy cup for each truffle keeps them from sticking to each other or to the inside of a tin, and it gives the whole box a more finished, candy-shop presentation.
A Few Ways to Make It Yours
Peanut Butter Cup Center
Press a mini peanut butter cup into the center of each ball before rolling for a candy-within-a-candy surprise.
Dark Chocolate Shell
Swap the milk chocolate chips for dark or semisweet chocolate for a richer, less sweet coating.
Crushed Peanuts
Roll the dipped, still-soft truffles in finely chopped peanuts for extra crunch and a more rustic look.
Sea Salt Finish
Sprinkle a pinch of flaky sea salt over each truffle right after dipping, before the chocolate sets.
Make-Ahead Tips
These truffles are genuinely convenient to make ahead, since both the rolling and dipping stages can happen well before you need to serve them. Roll the peanut butter balls and keep them chilled for up to a day before dipping if you want to split the work across two sessions. Once dipped and fully set, the finished truffles hold well in the refrigerator for several days, which makes this an easy recipe to prepare a day or two ahead of a holiday, party, or gift-giving occasion.
Storage Tips
Store the finished truffles in an airtight container in the refrigerator, ideally with a piece of parchment between layers if you’re stacking them, to keep the chocolate shells from sticking together. They’ll keep well for about a week refrigerated. If you’d like to serve them at room temperature, let them sit out for just a few minutes beforehand, since the peanut butter center softens quickly once it warms up. These truffles also freeze nicely — place them in a freezer-safe airtight container, and thaw them in the refrigerator rather than at room temperature for the best texture.
A Note on Occasions
Because these come together with no baking and very little active time, they’re a natural choice whenever you need something homemade on short notice — a last-minute holiday cookie tray, a teacher or neighbor gift, a bake sale, or just a batch to keep on hand in the fridge for whenever a chocolate-peanut-butter craving strikes. They also package beautifully, since the finished truffles are sturdy enough to sit in a decorative tin or box without much risk of them sticking together or losing their shape, which makes them a good candidate for homemade gifts around the holidays.
Portioning and Yield
The 20-truffle yield assumes roughly 1-inch balls made from a tablespoon of dough each, but this recipe scales easily in either direction. Rolling smaller, half-tablespoon balls gives you a larger number of bite-sized pieces, which works nicely for a big party platter where guests are likely to want to sample several different things. Rolling larger balls gives you a smaller number of more substantial truffles, closer to a standalone candy than a bite-sized treat. Either way, the ratio of peanut butter center to chocolate shell stays about the same, so feel free to adjust the size to fit the occasion without needing to change the ingredient amounts.
Common Questions
Can I use crunchy peanut butter instead of creamy?
Yes, though the little peanut pieces will show through the smooth chocolate shell. Creamy peanut butter gives the most polished, candy-shop-style finish.
Can I use dark or white chocolate instead of milk chocolate?
Absolutely. Dark chocolate creates a richer, less sweet shell, while white chocolate gives a sweeter, more decorative finish. The dipping method stays exactly the same.
Why is my dough too dry and crumbly to roll?
This usually means there’s too much powdered sugar relative to peanut butter. Add a little extra peanut butter, a tablespoon at a time, until the dough holds together smoothly.
Do I need to chill the balls before dipping?
Yes. A firm, cold center holds up much better in warm melted chocolate and is far less likely to fall apart on the fork or slide off during dipping.
Can I freeze these truffles?
Yes. Store them in a freezer-safe airtight container and thaw them in the refrigerator rather than at room temperature for the best texture.
Can I make these ahead for a party?
Yes — they’re a great make-ahead candy. Roll and chill the balls a day ahead if needed, and the finished, dipped truffles keep well in the fridge for about a week.
What’s the easiest way to melt the chocolate without a microwave?
A double boiler works well. Melt the chocolate over gently simmering water, stirring often, and remove it from the heat as soon as it’s smooth.
Can I add mix-ins to the peanut butter center?
Yes. Finely chopped peanuts or mini chocolate chips can be folded into the dough before rolling, as long as the mixture still holds together well enough to shape into balls.
With only three simple ingredients and no oven required, these peanut butter chocolate truffles are perfect for holidays, parties, dessert trays, gifting, or satisfying a sudden sweet craving. They have the familiar flavor of a peanut butter cup but in an elegant bite-sized truffle, and once you make them, it’s easy to see why simple no-bake candy recipes are so handy to keep in your dessert collection.