
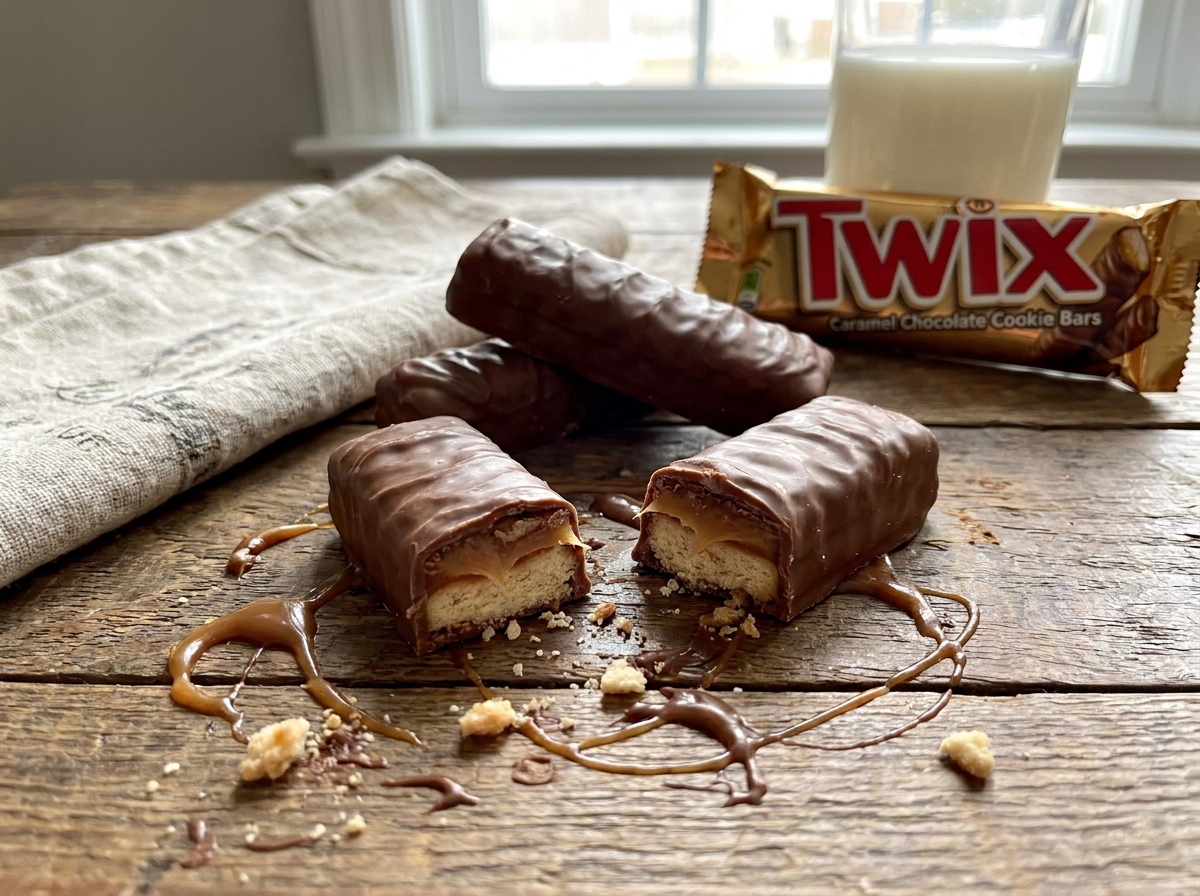
Twix Caramel Chocolate Cookie Bars
A buttery shortbread base, chewy caramel center, and smooth milk chocolate topping, baked and chilled in one pan — a homemade take on the classic candy bar.
Thank you for reading this post, don't forget to subscribe!
Twix Caramel Chocolate Cookie Bars are a homemade dessert inspired by the irresistible combination of crisp buttery cookie, chewy caramel, and smooth milk chocolate found in classic caramel-cookie candy bars.
Instead of making individual cookies or dipping separate pieces in chocolate, this recipe builds everything in one 9×13-inch pan. A tender shortbread-style cookie base is baked first, followed by a rich caramel layer and a glossy chocolate topping. Once chilled, the entire slab can be lifted from the pan and cut into neat squares or rectangles.
What makes these bars so appealing is the contrast between the layers. The cookie provides a buttery foundation with a delicate crumb, the caramel adds sticky sweetness and chewiness, and the chocolate creates a creamy finish that melts into the other components. Every bite gives you all three textures at once — the satisfying snap of chocolate, the soft pull of caramel, and the tender crumble of the cookie underneath. If you love candy-bar-inspired desserts, this is one of those recipes that feels special enough for holidays while still being simple enough for an ordinary weekend.
Why You’ll Love These Caramel Chocolate Cookie Bars
There is a reason layered desserts are so popular: they turn a few familiar ingredients into something that looks much more impressive. These bars are a perfect example. The ingredient list is straightforward, the cookie layer requires only a handful of ingredients, and both the caramel and chocolate layers come together quickly.
The recipe is also easier than making homemade candy bars individually. Everything is assembled in one baking pan, so you do not have to shape dozens of separate pieces. Once the layers are chilled, you simply lift the entire dessert out using the parchment overhang and cut it into portions.
These bars are especially useful for entertaining because they can be prepared ahead of time. The finished dessert keeps its layered appearance when sliced, making it a natural addition to holiday dessert trays, bake sales, potlucks, birthday celebrations, and cookie exchanges.
What You’ll Need
Cookie Base
- 1 cup unsalted butter, softened
- 1/2 cup granulated sugar
- 1 tsp vanilla extract
- 2 cups all-purpose flour
Caramel Layer
- 1 package (11 oz) soft caramels, unwrapped
- 2 tbsp heavy cream
Chocolate Topping
- 2 cups milk chocolate chips
- 1 tbsp vegetable shorteningOptional, for smoother spreading
Each bar comes out to roughly 285 calories, and the recipe makes about 24 bars.
Choosing the Right Chocolate
Milk chocolate works particularly well here because its sweetness complements the buttery cookie and caramel, echoing the flavor of the classic candy bar this recipe is inspired by. If you prefer a less sweet result, semisweet chocolate can be substituted, although the flavor will be noticeably different and less candy-bar-like. The small amount of vegetable shortening is optional, but it can make the melted chocolate smoother and easier to spread evenly across the chilled caramel without dragging it around.
Equipment You’ll Need
A 9×13-inch baking pan is the right size for this recipe’s proportions, and parchment paper with a bit of overhang on two sides turns into a built-in handle for lifting the finished slab out later. A hand or stand mixer makes creaming the butter and sugar for the cookie base much easier, and a couple of microwave-safe bowls are useful for melting the caramel and chocolate separately. A offset spatula or the back of a spoon helps spread each layer evenly, and a sharp knife, ideally wiped clean between cuts, gives you the neatest squares once everything is chilled and firm.
How to Make It
- Preheat and prep the pan. Preheat your oven to 350°F (175°C). Line a 9×13-inch baking pan with parchment paper, leaving some parchment extending over the sides.
- Make the cookie dough. Beat the softened butter, granulated sugar, and vanilla extract together until light and creamy, then gradually add the flour and mix until a soft dough forms.
- Press into the pan. Press the dough evenly into the prepared pan, edge to edge.
- Bake. Bake for 18 to 22 minutes, or until the edges are lightly golden.
- Cool completely. Remove the pan from the oven and allow the cookie base to cool completely before adding the caramel.
- Melt the caramel. Melt the soft caramels with the heavy cream in a microwave-safe bowl, heating in short intervals and stirring thoroughly between each one.
- Spread the caramel. Pour the smooth caramel over the cookie layer and spread it evenly. Refrigerate for 20 to 30 minutes, or until set.
- Melt the chocolate. Melt the milk chocolate chips with the optional shortening, stirring between short intervals until smooth.
- Spread the chocolate. Spread the chocolate over the caramel and refrigerate for 1 to 2 hours, or until firm.
- Slice. Lift the slab from the pan using the parchment overhang and cut into squares or rectangles.
How to Make the Buttery Cookie Base
The cookie base is essentially the foundation that holds the entire dessert together, and because there are only four ingredients, technique matters. Make sure the butter is softened rather than melted — soft butter blends smoothly with the sugar while still helping the dough maintain enough structure for a tender baked layer. Beat the butter, sugar, and vanilla until creamy, then add the flour gradually and stop mixing once the dough comes together, since overmixing can make this shortbread-style layer tougher than it should be.

Baking the Cookie Layer
Bake the base until the edges become lightly golden, with the center looking set rather than wet or doughy. Avoid waiting for the entire surface to become deeply brown — the cookie layer will continue to firm as it cools, and excessive browning can produce a harder base than you want. Once the pan comes out of the oven, place it on a cooling rack and let the cookie layer cool completely; this step matters more than it might seem, because pouring hot caramel over a warm cookie base can make the caramel difficult to control and may soften the cookie layer underneath.
Creating the Smooth Caramel Layer
The caramel layer is what gives these bars their signature chewy center. Soft caramels are melted together with a small amount of heavy cream to create a smooth consistency. Place the unwrapped caramels and cream in a microwave-safe bowl, microwave in 20-second intervals, and stir thoroughly after each one. Short heating intervals are useful because caramel can become extremely hot when overheated, and stirring between intervals distributes the heat and helps the caramels melt evenly. Continue until the mixture is completely smooth, then immediately pour it over the cooled cookie base and spread it into an even layer.
Why Heavy Cream Helps
Heavy cream helps loosen the melted caramels so they become easier to pour and spread. Without enough liquid, melted caramel can be extremely thick and difficult to distribute across the cookie layer. The amount in this recipe is deliberately small, since you want the caramel to remain thick and chewy after chilling rather than turning into a loose sauce. Once spread, refrigerate the bars for 20 to 30 minutes — the caramel should be firm enough that the chocolate can be spread over it without disturbing the layer underneath.
How to Make the Chocolate Topping
The final layer is made with milk chocolate chips. If you want the chocolate to spread more easily, add the optional tablespoon of vegetable shortening. Place the chocolate chips and shortening in a microwave-safe bowl and heat in short 20-second intervals, stirring between each one, until the chocolate is smooth and glossy. Don’t rush this step, since chocolate can scorch if overheated. Pour the melted chocolate over the chilled caramel and use a spatula to spread it gently from edge to edge, then return the pan to the refrigerator and chill for 1 to 2 hours, or until the chocolate is firm.
Why the Chocolate Layer Matters
The chocolate topping is more than decoration — it completes the flavor combination and provides a firm contrast to the softer caramel. The chocolate should be spread relatively evenly, though a few small ripples or swirls are perfectly fine and can make the bars look homemade. Avoid spreading aggressively, since pressing too hard can disturb the caramel underneath.
How to Get Clean, Professional-Looking Layers
The secret to attractive layered bars is patience. Each layer needs enough time to cool or set before the next one is added: the cookie base must be completely cool before the caramel goes on top, and the caramel should be chilled enough to hold its shape before you spread the chocolate. Once the chocolate has completely set, lift the entire dessert from the pan using the parchment paper overhang and place it on a cutting board. For cleaner cuts, use a sharp knife, and if the chocolate is very firm, letting the bars sit at room temperature for a few minutes can make slicing easier. Wipe the knife between cuts if you want particularly clean edges.
How to Cut Twix-Style Cookie Bars
You can cut the dessert into squares or rectangles depending on how you want to serve it. The recipe makes approximately 24 bars, so cutting six rows by four rows is an easy approach. For smaller dessert-table portions, cut the slab into narrower rectangles, which can make the bars look more like miniature candy bars — a good option if you’re serving them at a party, since the caramel and chocolate make the dessert quite rich. A sharp knife works best; use firm, controlled pressure rather than repeatedly sawing through the layers.
Troubleshooting Common Issues
My caramel poured unevenly or pooled in one spot. This usually means the cookie base wasn’t perfectly level, or the caramel was poured too quickly. Pour it in a slow, steady stream across the center and let it spread naturally before nudging it into the corners with a spatula.
My caramel layer softened the cookie base underneath. The cookie base likely wasn’t fully cooled before the caramel went on. Let it cool completely on a rack — even a few minutes of residual warmth can be enough to soften the caramel too much.
My chocolate cracked when I cut the bars. This is common with a fully chilled chocolate layer straight from the fridge. Let the bars sit at room temperature for a few minutes before slicing, and use a sharp knife with steady, even pressure.
My caramel or chocolate seized or turned grainy. This usually happens from overheating. Stick to short 20-second microwave intervals and stir thoroughly between each one rather than microwaving in one long burst.
My bars were hard to lift out of the pan. Make sure the parchment paper has enough overhang on at least two sides before you start, and let the bars chill fully — a slab that hasn’t fully set is much more likely to tear or stick as you lift it.
A Few Ways to Make It Yours
Semisweet Chocolate
Swap the milk chocolate for semisweet for a deeper, less sweet cocoa flavor and more contrast against the caramel.
Flaky Salt Finish
Sprinkle a small amount of flaky salt over the chocolate while it’s still soft to make the caramel taste even richer.
Toasted Pecans
Scatter chopped toasted pecans over the chocolate before it sets for a caramel-nut variation with extra crunch.
Holiday Sprinkles
Add colorful sprinkles to the chocolate while it’s still melted for a festive dessert-tray finish.
Make-Ahead Tips
These bars are excellent for make-ahead preparation. You can prepare them several hours before serving and let them chill undisturbed, or make them the day before — overnight refrigeration gives the layers plenty of time to become firm and makes the bars easier to slice. If you’re making them for a holiday gathering, prepare the entire pan ahead of time and cut the bars shortly before serving, since keeping the slab whole until the last moment can help maintain freshness. Store the finished bars in an airtight container or keep the covered pan refrigerated until you’re ready to cut and serve.
Storage Tips
Because the dessert contains butter, caramel, chocolate, and cream, storage conditions can affect its texture. Keep the bars covered to prevent them from absorbing odors from other foods. If you prefer a softer caramel texture, allow individual bars to sit at room temperature briefly before serving; if you like a firmer candy-bar texture, serve them chilled. Avoid exposing them to excessive heat, since the chocolate topping can soften and the caramel can become sticky. For the neatest presentation, store the bars in a single layer or separate layers with parchment paper. They also freeze well — wrap the bars securely and store them in a freezer-safe container, then thaw them gradually before serving for the best texture.
Serving Suggestions
These bars are rich enough to serve entirely on their own, straight from the fridge or after a few minutes at room temperature. A scoop of vanilla ice cream alongside a bar makes an easy, more indulgent dessert if you’re serving them after dinner rather than off a party tray. For a coffee or dessert table, arrange the cut bars on a platter with a few whole caramels or a small bowl of extra chocolate for dipping, echoing the layers inside.
Because the flavor is already rich and quite sweet, a simple hot beverage pairs especially well — coffee, espresso, or even a plain black tea can help balance the caramel and chocolate. If you’re building a larger holiday dessert spread, these bars sit comfortably alongside other cookie-based treats without competing for attention, since their candy-bar shape and layered look already set them apart from a plate of round cookies.
Portioning and Yield
The 24-bar yield assumes a fairly standard six-by-four cutting grid, but this recipe is flexible about final size. Cutting the pan into narrower strips gives you more, smaller pieces closer to miniature candy bars, which works well for a dessert table where guests are likely to want to try several different things. Cutting fewer, larger squares gives you a smaller number of more substantial bars, better suited to serving as a standalone dessert with a fork. Either way, the ratio of cookie to caramel to chocolate stays the same, since it’s determined by the layers in the pan rather than how you slice them — so feel free to adjust the cut size to match the occasion without worrying about changing the recipe itself.
A Note on Occasions
Because the finished slab keeps so well covered in the fridge, this is a good recipe to make a day or two ahead of whatever you’re actually planning for — a holiday dessert table, a bake sale, a cookie exchange, or just a stocked freezer for whenever a chocolate-caramel craving shows up. The bars also travel reasonably well once fully chilled, which makes them a practical choice for potlucks and gatherings where the dessert needs to survive some time out of the fridge before it’s served. Cutting them into smaller pieces than a standard 24-bar grid is an easy way to stretch one pan across a larger crowd, since the rich, three-layer combination means most people are satisfied with a smaller piece.
Common Questions
Can I use homemade caramel instead of soft caramels?
Yes. A homemade caramel sauce can be used, but it needs to be thick enough to create a stable layer. A sauce that is too thin may make the bars difficult to cut.
Can I use semisweet chocolate instead of milk chocolate?
Absolutely. Semisweet chocolate will create a darker, less sweet chocolate layer and provide more contrast against the caramel.
Why is my caramel layer too hard?
The caramel may have been heated too long, or the bars may have been chilled for an extended period. Allowing the bars to sit at room temperature for several minutes before serving can soften the caramel.
Can I freeze these bars?
Yes. Wrap the bars securely and store them in a freezer-safe container. Thaw them gradually before serving for the best texture.
How do I prevent the chocolate from cracking when cutting?
Allow the chilled bars to sit at room temperature briefly before cutting. Use a sharp knife and apply steady pressure rather than forcing the blade through the chocolate.
Do I need to use parchment paper?
It’s strongly recommended. This dessert has three sticky, chilled layers, and the parchment overhang is what lets you lift the entire slab out cleanly rather than fighting with a pan.
Can I use a different size pan?
Yes, though the layers will end up thicker or thinner depending on the pan size, which changes both the baking time for the cookie base and the yield. A 9×13-inch pan gives the proportions this recipe is written for.
Can I make these without a microwave?
Yes. Melt the caramel-cream mixture and the chocolate separately in small saucepans over low heat, stirring constantly, and remove each from the heat as soon as it becomes smooth.
Twix Caramel Chocolate Cookie Bars bring together three dessert favorites in one irresistible layered treat: a buttery cookie base, chewy caramel center, and smooth milk chocolate topping. The process is straightforward, but the finished result looks impressive — bake the cookie layer, melt the caramel, spread on the chocolate, chill, and slice. If you love the combination of chocolate, caramel, and buttery cookies, these bars are an easy recipe to keep in your dessert rotation, whether it’s for a holiday tray, a bake sale, or an indulgent weekend treat.