
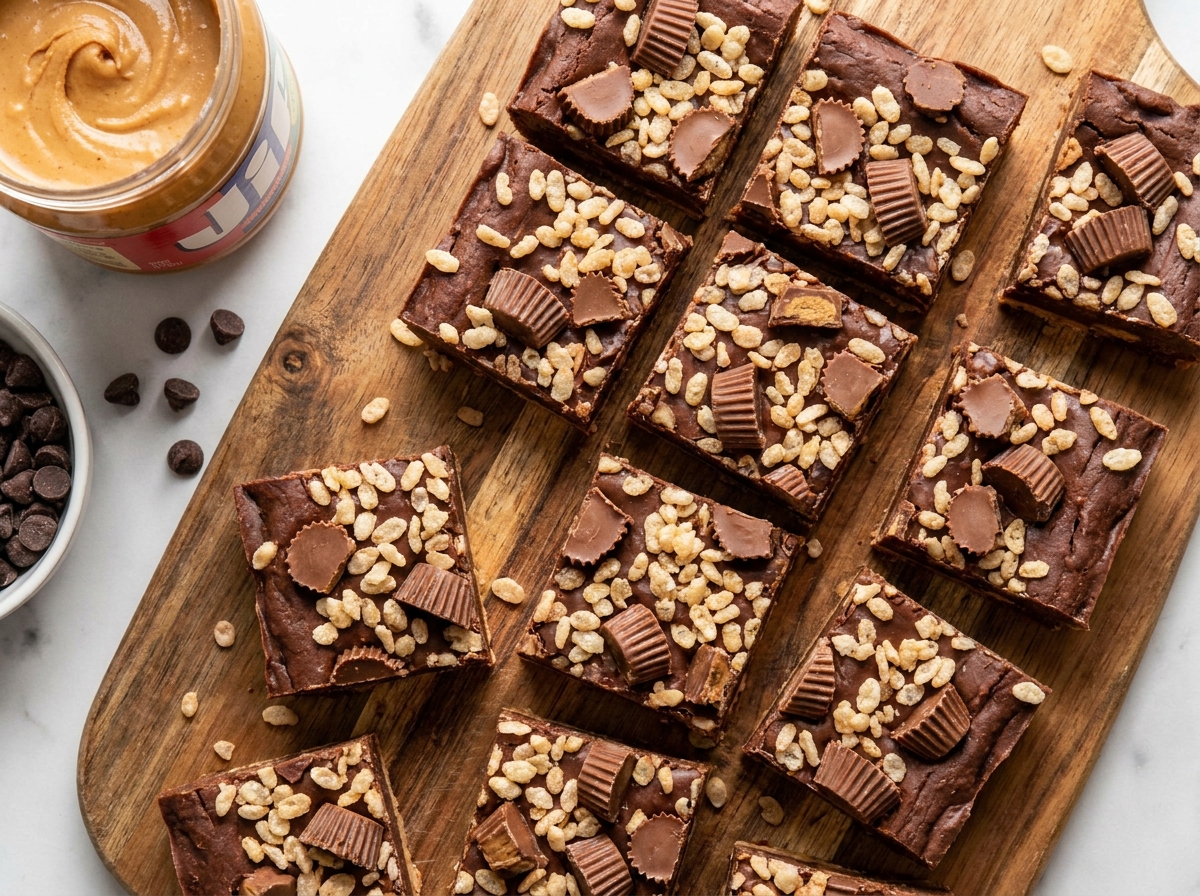
3-Ingredient Reese’s Peanut Butter Chocolate Crunch Bars
Crispy rice cereal pressed with peanut butter and topped with a thick layer of melted milk chocolate — a Reese’s-inspired treat with no oven required.
Thank you for reading this post, don't forget to subscribe!
If you’ve ever wished a peanut butter cup came in bar form with a satisfying crunch running through it, these 3-Ingredient Reese’s Peanut Butter Chocolate Crunch Bars are exactly that idea brought to life. Crispy rice cereal is bound together with peanut butter and topped with a thick, fudgy layer of melted milk chocolate.
There’s no oven, no candy thermometer, and no long ingredient list — just crispy rice cereal, creamy peanut butter, and milk chocolate chips, all melted and pressed together in one pan. The peanut butter and cereal form a dense, crunchy base, while the melted chocolate sets into a smooth, fudge-like top layer that snaps cleanly when you bite into a bar.
The whole thing comes together in about ten minutes of active work, most of it spent stirring a bowl on the stove or in the microwave. After that, the pan goes into the refrigerator to firm up while the peanut butter and chocolate set completely. The flavor is instantly familiar — it’s the same combination that makes peanut butter cups so popular — but the added crunch from the rice cereal gives it a completely different texture from anything you’d get out of a candy wrapper.
Why These Three-Ingredient Bars Are So Easy
The method here is refreshingly simple: warm the peanut butter until it’s smooth and pourable, mix it with crispy rice cereal, press the mixture into a pan, then melt chocolate chips separately and pour that over the top as a distinct layer. You end up with two layers instead of one uniform mixture — a crunchy peanut butter and cereal base topped by a thick, glossy chocolate cap. That layered structure is part of what gives these bars their satisfying bite: crunch first, then a smooth, rich chocolate finish.
Because the recipe is built from just crispy rice cereal, peanut butter, and chocolate chips, there’s very little room for anything to go wrong. The peanut butter needs to be warm enough to coat the cereal evenly, and the chocolate needs to be melted smoothly enough to spread into an even top layer. Beyond that, the recipe mostly runs on patience while the refrigerator does the actual work of setting everything into sliceable bars.
A No-Bake Treat Inspired by a Classic Candy
The flavor profile here borrows directly from the peanut butter cup: a dense, salty-sweet peanut butter base under a layer of milk chocolate. Building that same pairing into a crunchy cereal bar gives you more volume and more texture per bite than a standard candy would, which makes these bars feel like more of a snack than a small piece of candy. The crispy rice cereal keeps its crunch even after the peanut butter binds it together, so every bite has that same crackle you’d get from biting into a crisped rice treat, just layered underneath a proper chocolate shell instead of coated all the way through.
Why a Layered Chocolate Top Works So Well Here
Pouring the melted chocolate over the pressed cereal-and-peanut-butter base, rather than mixing everything together, gives you a much thicker, more deliberate chocolate layer — closer to a candy bar shell than a thin coating. As the chocolate cools and firms in the refrigerator, it sets into a layer with a clean snap, similar to the shell on a peanut butter cup, while the base underneath stays soft and crunchy. That contrast between a firm chocolate top and a chewy, crisp base is a big part of what makes this version feel different from a bar where everything is stirred together into one texture.
What You’ll Need
- 4 cups crispy rice cereal
- 1 cup creamy peanut butter
- 2 cups milk chocolate chipsReese’s chocolate chips work especially well here
That’s the whole ingredient list. Each bar comes out to roughly 285 calories, and the recipe makes 12 bars.
Choosing the Best Peanut Butter and Chocolate Chips
Creamy peanut butter is the most reliable choice here, since it melts down smoothly and coats the crispy rice cereal evenly without any chunky bits interrupting the texture. If you only have natural peanut butter on hand, stir it thoroughly before measuring, since separated oil can make the base greasy instead of evenly bound. For the chocolate, milk chocolate chips give you the classic sweet, mellow flavor that pairs so well with peanut butter, and Reese’s-branded chocolate chips are a nice touch if you want the flavor to lean even further into peanut-butter-cup territory. Semisweet chips will work as a substitute if you’d prefer a slightly less sweet, more chocolate-forward top layer.
Equipment You’ll Need
An 8×8-inch baking pan gives these bars the right thickness for both the base and the chocolate layer. Line it with parchment paper, leaving some overhang on two sides, so the whole slab lifts out cleanly once it’s set. You’ll want a microwave-safe bowl for melting the peanut butter, a separate bowl for melting the chocolate chips, and a sturdy spatula both for pressing the cereal base into the pan and for spreading the melted chocolate evenly over the top. A sharp knife, wiped clean between cuts, makes for the neatest bars.
How to Make It
- Prep the pan. Line an 8×8-inch baking pan with parchment paper, leaving some overhang on the sides for easy removal.
- Warm the peanut butter. Microwave the peanut butter in a microwave-safe bowl in 30-second intervals, stirring after each, until smooth and pourable.
- Combine with cereal. Pour the warmed peanut butter over the crispy rice cereal and stir gently until every piece is evenly coated.
- Press into the pan. Transfer the mixture to the prepared pan and press it down firmly and evenly with the back of a spatula.
- Melt the chocolate. Melt the chocolate chips in a separate microwave-safe bowl in 30-second intervals, stirring after each interval, until smooth.
- Top and chill. Pour the melted chocolate over the pressed cereal base and spread it into an even layer. Refrigerate for 1 to 2 hours, or until completely firm.
- Slice. Lift the slab out using the parchment paper and cut into 12 bars.
Press the Base Firmly
How firmly you press the peanut butter and cereal mixture into the pan matters just as much here as in any other no-bake cereal bar. Press with even, deliberate pressure across the entire pan rather than lightly patting the surface, working from the center outward so the layer is uniform from edge to edge. If the mixture sticks to your spatula, lightly greasing it, or pressing through a sheet of parchment laid on top, makes the job much easier. A firmly packed base will hold together cleanly once the chocolate layer is added and the bars are sliced; a loosely packed one is more likely to crumble at the edges when you cut into it.

Melt and Pour the Chocolate Layer
Melt the chocolate chips the same careful way you melted the peanut butter: in short microwave bursts, stirring frequently, so the chocolate doesn’t scorch or seize into a grainy texture. Once it’s smooth and glossy, pour it over the pressed cereal base right away and use an offset spatula or the back of a spoon to spread it into an even layer, working out to the edges of the pan. A level chocolate layer not only looks neater once sliced, it also sets more evenly, so every bar gets roughly the same thickness of chocolate on top.
Chill Until Completely Set
Refrigeration is what turns two soft layers into a bar with a clean bite. As the peanut butter base and chocolate top both cool, they firm up, and the chocolate in particular needs the cold to set into that signature snap. Give the pan the full 1 to 2 hours in the refrigerator, and avoid slicing early — a chocolate layer that hasn’t fully set will smear rather than break cleanly, and the base underneath needs the same time to firm up enough to hold its shape when cut.
Slice and Serve
For the cleanest bars, use a sharp knife warmed slightly under running water and wiped dry before each cut; a warm blade glides through the set chocolate layer instead of cracking it unevenly. Wipe the knife clean between slices, especially once it picks up chocolate, so each subsequent cut stays neat. Serve straight from the refrigerator for the firmest bite and the cleanest chocolate snap, or let the bars sit at room temperature for 10 minutes beforehand if you prefer the peanut butter base a little softer.
Tips for Perfect Peanut Butter Chocolate Crunch Bars
Warm the peanut butter just enough to make it pourable and easy to mix with the cereal — there’s no need to fully liquefy it. Press the base into the pan with real, even pressure so it holds together once sliced. Let the base cool slightly before adding the melted chocolate so the two layers set distinctly rather than blending together. Spread the chocolate into an even layer for consistent bars, and give the whole pan the full chilling time before cutting, since a partially set chocolate layer will smear instead of snap.
Troubleshooting Common Issues
My chocolate layer cracked instead of slicing cleanly. This usually means the bars were too cold when sliced. Let them sit at room temperature for a few minutes before cutting, and use a warm knife.
My two layers blended into each other. The peanut butter base was probably still warm when you poured on the chocolate. Let the pressed base cool for a few minutes first next time.
My chocolate looks grainy instead of smooth. This is a sign of overheating. Melt the chips in shorter intervals, stirring often, and stop as soon as most of the chips have softened — residual heat will finish melting them.
My base fell apart when I sliced it. It likely wasn’t pressed firmly enough into the pan. Use real, even pressure, working from the center outward, so the cereal and peanut butter bind together tightly.
My bars are sticking to the knife. Wipe the blade clean between cuts and warm it under running water first — a warm blade moves through the chocolate layer more cleanly.

A Few Ways to Make It Yours
Chopped Peanut Butter Cups
Press chopped peanut butter cups into the warm chocolate layer before it sets for extra bursts of peanut butter and chocolate.
Flaky Salt Finish
A light sprinkle of flaky sea salt over the warm chocolate before it sets plays up the sweet-and-salty contrast in every bite.
Dark Chocolate Top
Swap the milk chocolate chips for dark chocolate for a richer, less sweet top layer that leans into deeper chocolate flavor.
Extra Peanut Butter Drizzle
Warm a spoonful of extra peanut butter and drizzle it over the set chocolate in thin lines for a decorative, extra-peanut-buttery finish.
Make the classic three-ingredient version first to get a feel for the texture and sweetness, then decide whether any of these additions are worth working into your regular batch.
How to Store Peanut Butter Chocolate Crunch Bars
Store the bars in an airtight container in the refrigerator, where they’ll keep well for up to a week. They can also sit at cool room temperature for a day or so if your kitchen isn’t too warm, though the chocolate top will stay firmest when chilled. If you’re stacking bars in a container, layer parchment or wax paper between them so the chocolate tops don’t stick together. For longer storage, these bars freeze nicely — wrap them individually or layer them with parchment in a freezer-safe container, and let them thaw in the refrigerator or at room temperature before serving.
When to Serve These Easy Bars
These bars are a great fit anywhere a portable, no-bake chocolate-peanut-butter treat is welcome: lunchboxes, bake sales, potlucks, and casual gatherings all suit them well. Because they need to chill regardless, they’re also convenient to make ahead of a busy week or an event, since a finished batch keeps well in the refrigerator and can be sliced as needed. Cut them into smaller squares for a dessert spread alongside other treats, or keep the full bar size for a more substantial snack. They hold their shape well at room temperature for a few hours, which makes them a practical choice for packed lunches or a treat to bring along on a trip.
Nutrition and Serving Information
The recipe estimates approximately 285 calories per bar when the batch is divided into 12 pieces. Treat this as an estimate rather than an exact figure, since the calorie, sugar, and fat content will vary depending on the specific brands of peanut butter, chocolate chips, and cereal used. Cutting the bars into smaller or larger pieces will change the calories per serving accordingly. Because the recipe leans on peanut butter and milk chocolate, it’s an indulgent snack best enjoyed in moderation, and smaller portions make it easier to fit into a broader eating pattern. As with any packaged ingredient, check labels for peanut and tree nut allergens, since both peanut butter and chocolate products are often processed in facilities that handle a variety of nuts.
Make-Ahead Tips
Since these bars need real chilling time no matter what, they’re naturally suited to being made a day or two ahead. Prepare the full pan in advance, keep it covered in the refrigerator, and slice it close to serving time so the cut edges look their freshest. If you’re bringing them somewhere, transporting the uncut slab and slicing on arrival keeps the presentation clean, since a freshly cut edge always looks neater than one that’s had time to sit exposed.
Why a Layered Bar Sets Up Differently Than a Mixed One
Layering the chocolate on top rather than stirring it through the cereal changes more than just the look of the finished bar. When chocolate is mixed evenly into a peanut-butter-coated cereal, it ends up distributed thinly around each piece, and the fat from the peanut butter keeps that thin coating from ever fully hardening into a hard shell. Pouring a full quantity of melted chocolate on top as its own layer, on the other hand, gives it enough mass to cool and set the way a candy bar shell does, with a clean, glossy surface and a satisfying snap when you bite into it. The peanut butter base underneath, meanwhile, stays soft and dense because it never has to share its structure with the chocolate. That’s the trade-off worth understanding here: a mixed bar gives you chocolate flavor in every bite but a softer overall texture, while a layered bar like this one gives you a more dramatic contrast between a firm chocolate top and a chewy, crunchy base.
Portioning and Yield
This recipe fills an 8×8-inch pan and is typically cut into 12 bars, which is a satisfying size given how rich the chocolate top layer is. If you’re serving a crowd or setting these out on a dessert table with other treats, cutting the pan into 16 smaller squares stretches the batch further while still giving everyone a proper taste of both layers. For a more substantial snack bar meant to be eaten on its own, cutting the pan into just 9 larger pieces gives you a heartier portion. To double the recipe for a bigger group, use a 9×13-inch pan, keep the ratio of cereal, peanut butter, and chocolate the same, and make sure the chocolate layer is spread evenly so it sets to a consistent thickness across the larger pan.
Common Questions
Do these bars taste like peanut butter cups?
They share a similar flavor profile — peanut butter under a layer of milk chocolate — but the crispy rice cereal in the base gives these bars a completely different, crunchier texture than a smooth peanut butter cup filling.
Can I use a different cereal?
Yes, other crisped or puffed rice cereals will work similarly, though texture and flavor can vary slightly by brand. The classic crispy rice texture is what this recipe is built around.
Can I freeze these bars?
Yes. Wrap individual bars or layer them with parchment in an airtight, freezer-safe container, then thaw in the refrigerator or at room temperature before serving.
Why did my chocolate layer crack when I cut it?
The bars were likely too cold. Let them sit at room temperature for several minutes before slicing, and use a knife warmed under running water for the cleanest cuts.
Can I mix the chocolate into the cereal instead of layering it on top?
Yes, if you’d prefer a texture closer to a classic rice krispie treat. Simply melt the chocolate and peanut butter together and stir both into the cereal before pressing into the pan, rather than pouring the chocolate on top as a separate layer.
Can I add peanut butter cups or other mix-ins?
Yes, chopped peanut butter cups pressed into the warm chocolate layer, or a sprinkle of flaky salt, are both popular additions. Just note that the recipe will no longer be strictly three ingredients once you start adding extras.
3-Ingredient Reese’s Peanut Butter Chocolate Crunch Bars take the flavor of a favorite candy and turn it into a crunchy, shareable pan of bars with almost no active effort. Press a peanut butter and cereal base into a pan, top it with a thick layer of melted chocolate, and let the refrigerator handle the rest. The combination of a crisp, chewy base and a clean, snapping chocolate top makes these bars feel like more than the sum of their three ingredients, which is exactly what makes them worth keeping in regular rotation.