
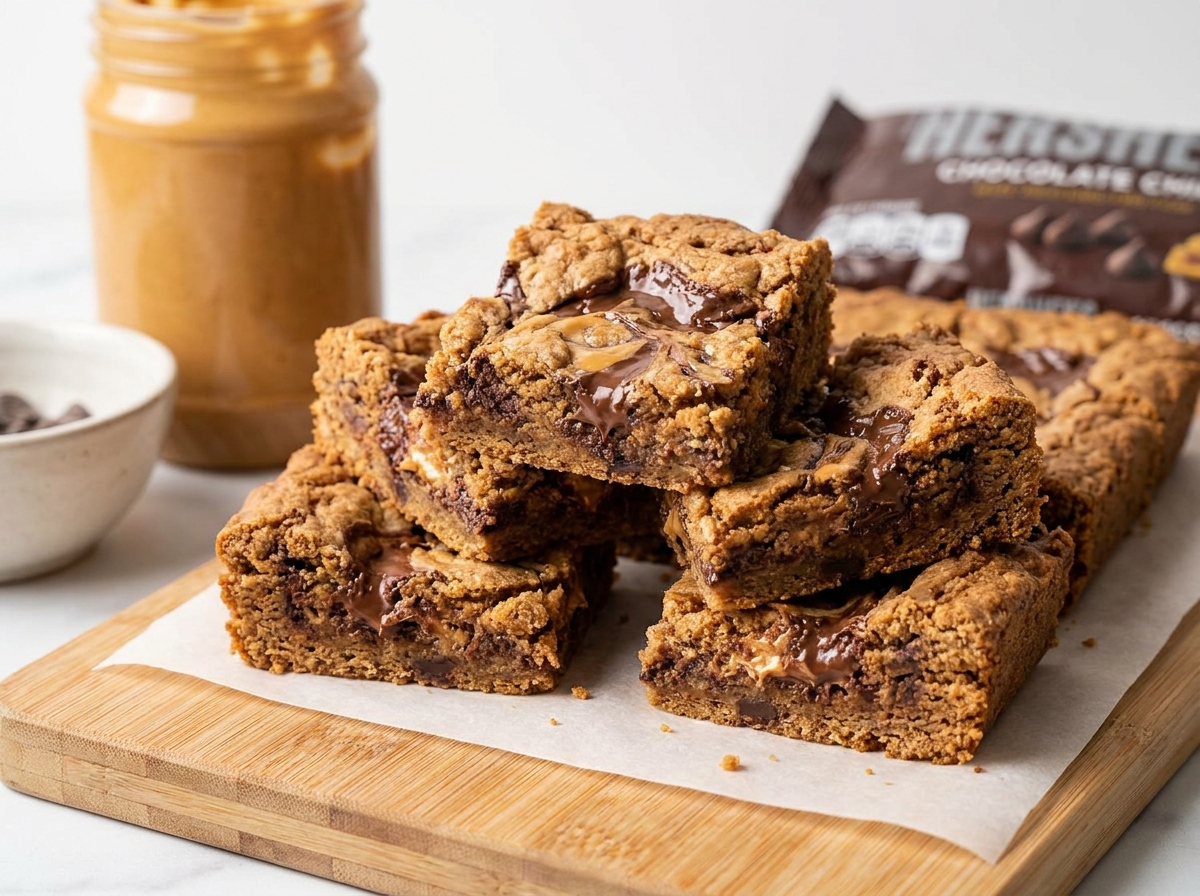
2-Ingredient Chocolate Peanut Butter Cookie Bars
Refrigerated peanut butter cookie dough pressed into a pan and topped with melty chocolate chips — a chewy, bar-shaped cookie with almost no prep.
Thank you for reading this post, don't forget to subscribe!
Some days call for a homemade cookie without the actual work of making cookie dough from scratch. These 2-Ingredient Chocolate Peanut Butter Cookie Bars solve that problem by starting with a package of refrigerated peanut butter cookie dough and turning it into a full pan of chewy, chocolate-studded bars.
Instead of scooping and baking individual cookies, you press the entire log of dough into a baking pan, scatter chocolate chips over the top, and bake it as one slab. What comes out of the oven is essentially a giant, chewy peanut butter cookie with pockets of melted chocolate throughout, ready to be cut into neat squares. There’s no creaming butter and sugar, no measuring flour, and no waiting for dough to chill — the work has already been done by the cookie dough itself.
This is the kind of recipe that’s perfect for a night when you want a warm, homemade dessert but don’t have the time or energy for a full baking project. Five minutes of prep and about twenty minutes in the oven is all that stands between you and a pan of chocolate peanut butter cookie bars, still warm enough to melt a scoop of ice cream if you’re in the mood for something extra.
Why These Two-Ingredient Bars Are So Easy
The entire concept behind this recipe is letting store-bought cookie dough do the heavy lifting. Refrigerated peanut butter cookie dough already contains all the components of a proper cookie — flour, butter, sugar, peanut butter, and leavening — pre-measured and pre-mixed. All you have to do is press it into a pan instead of shaping it into individual rounds, which turns a batch of a dozen or more separate cookies into one unified pan of bars. Adding chocolate chips over the top brings in the chocolate-and-peanut-butter flavor combination that makes this treat feel like more than a simple slab of cookie.
Baking the dough as one flat layer rather than individual mounds also changes the texture slightly. A bar cut from a pan tends to have a chewier, denser center than an individual cookie, since the dough is thicker and insulated by more dough around it as it bakes. That chewiness is part of what makes cookie bars feel like a distinct treat from a plate of regular cookies, even when the base dough is identical.
A Baked Treat With Minimal Hands-On Time
Because the dough arrives ready to use, there’s very little active work involved beyond pressing it into the pan and scattering on the chocolate chips. That makes this recipe a good option when you want something homemade without much planning — there’s no dough to make ahead, no butter to soften, and no bowls to wash beyond whatever you use to press the dough down. The oven does essentially all of the real work here, turning a log of raw dough into a warm, chewy pan of cookie bars in under half an hour.
Why Peanut Butter Cookie Dough and Chocolate Chips Work So Well Together
Peanut butter cookie dough already carries a rich, slightly salty, roasted flavor from the peanut butter baked into it, which pairs naturally with the sweetness of melted chocolate chips. As the bars bake, the chocolate chips soften and partially melt into the surface of the dough, creating pockets of gooey chocolate throughout the top layer while the peanut butter flavor comes through in every bite of the base. It’s the same pairing that makes a peanut butter cookie with chocolate chips a classic in the first place, just scaled up into a pan instead of portioned into individual cookies.
What You’ll Need
- 1 package (16 oz) refrigerated peanut butter cookie dough
- 1 cup chocolate chips
That’s the entire list. Each bar comes out to roughly 260 calories, and the recipe makes 12 bars.
Choosing the Best Cookie Dough and Chocolate Chips
Any standard 16-ounce package of refrigerated peanut butter cookie dough works well for this recipe; look for one meant to be sliced and baked, since that texture presses into a pan more easily than a very soft, scoopable dough. If your store doesn’t carry a dedicated peanut butter variety, a peanut butter and chocolate chip cookie dough works too, though you may want to reduce the added chocolate chips slightly since some are already mixed in. For the chocolate chips on top, semisweet is a reliable, balanced choice, while milk chocolate chips will make the bars noticeably sweeter and dark chocolate chips will pull the flavor in a richer, less sweet direction.
Equipment You’ll Need
An 8×8-inch baking pan gives these bars the right thickness. Line it with parchment paper, leaving a little overhang on two sides, so the finished slab lifts out cleanly once it’s cooled. You’ll need your hands or a flat-bottomed measuring cup to press the dough evenly into the pan, and a sharp knife, wiped clean between cuts, for slicing the cooled bars into neat squares.
How to Make It
- Preheat and prep. Preheat the oven to 350°F (175°C) and line an 8×8-inch baking pan with parchment paper.
- Press the dough. Press the peanut butter cookie dough evenly into the bottom of the prepared pan, working it into the corners.
- Add the chocolate. Sprinkle the chocolate chips evenly over the dough and gently press them in so they stay put during baking.
- Bake. Bake for 18 to 22 minutes, or until the edges are lightly golden and the center is set.
- Cool completely. Let the bars cool completely in the pan before slicing; they’ll firm up as they cool.
- Slice. Lift the slab out using the parchment paper and cut into 12 bars.
Press the Dough Evenly
Getting an even layer of dough across the pan matters more than it might seem. Start by breaking the dough into several smaller pieces and distributing them across the bottom of the pan before pressing, rather than trying to spread one large block from the center outward — this makes it much easier to reach an even thickness all the way to the corners. Press firmly with your fingertips or the flat bottom of a measuring cup, checking that the corners and edges are just as thick as the center. A pan with thin spots will bake unevenly, leaving some areas overdone while the thicker portions are still soft.

Bake Until the Edges Turn Golden
The goal with these bars, as with most cookie bars, is to avoid overbaking. Start checking at the lower end of the suggested time range, since ovens vary, and look at the edges rather than the center — the edges should be lightly golden while the center still looks slightly soft and underdone. That soft center is exactly what you want, because the bars continue to cook slightly from residual heat once they’re out of the oven, and they firm up further as they cool in the pan. Pulling them the moment the center looks fully set and dry almost always results in a drier, less chewy bar than pulling them a minute or two earlier.
Cool and Slice
Resist the urge to slice the bars while they’re still warm, even though the smell coming from the oven makes that difficult. The bars need time to cool and firm up in the pan; cutting into them too soon will give you a gooey, falling-apart square instead of a clean bar. Once fully cooled, use the parchment overhang to lift the entire slab out of the pan and onto a cutting board, then slice into 12 even bars with a sharp knife, wiping the blade clean between cuts as needed. If you prefer your bars slightly warm, a brief 10-second reheat in the microwave after slicing brings back some of that fresh-from-the-oven gooeyness without needing to slice them hot.
Tips for Perfect Chocolate Peanut Butter Cookie Bars
Press the dough into an even layer from edge to edge so the bars bake uniformly rather than leaving some sections under- or overdone. Watch the edges, not the center, to judge doneness, and pull the pan while the middle still looks a little soft. Let the bars cool completely before slicing for the cleanest cuts, and use a sharp knife wiped clean between slices. If you like extra texture, press a few additional chocolate chips into the top right after the bars come out of the oven, while they’re still warm enough for the chips to sink in slightly.
Troubleshooting Common Issues
My bars turned out dry instead of chewy. This is almost always overbaking. Pull the pan when the edges are just golden and the center still looks a little underdone — it will continue to set as it cools.
My dough was hard to press into the corners. Break the dough into smaller pieces and distribute them across the pan before pressing, rather than trying to spread one large piece from the center.
My chocolate chips slid off during baking. Press them gently into the surface of the dough before baking so they stay anchored rather than resting loosely on top.
My bars fell apart when I sliced them. They likely weren’t fully cooled. Let the pan cool completely to room temperature before cutting; a warm bar doesn’t yet have the structure to hold a clean slice.
My bars baked unevenly. This usually traces back to an uneven layer of dough. Take the extra minute to press the dough into a consistent thickness, checking the corners and edges as carefully as the center.

A Few Ways to Make It Yours
Extra Peanut Butter Swirl
Warm a few spoonfuls of peanut butter and swirl them over the top of the dough before baking for a marbled look and extra peanut butter flavor.
Chopped Peanuts
Scatter chopped roasted peanuts over the top along with the chocolate chips for extra crunch and a stronger peanut flavor.
Flaky Salt Finish
A light sprinkle of flaky salt over the top after baking plays up the sweet-and-salty contrast between the chocolate and peanut butter.
Bar à la Mode
Serve a slightly warm bar with a scoop of vanilla ice cream for a simple, more indulgent plated dessert.
Try the classic version first so you have a baseline for texture and sweetness, then decide whether any of these additions are worth making part of your regular routine.
How to Store Chocolate Peanut Butter Cookie Bars
Once the bars have cooled and been sliced, store them in an airtight container at room temperature for up to about 4 days. Keeping the container sealed helps them stay soft and chewy rather than drying out. If you’d like them to last longer, they can be refrigerated for up to a week, though they’ll firm up slightly in the cold — let a piece sit at room temperature for a few minutes before serving if you prefer a softer bite. Layer parchment or wax paper between stacked bars to keep them from sticking together.
When to Serve These Easy Bars
These bars are a good fit for almost any occasion that calls for a quick, homemade-tasting dessert: after-school snacks, lunchbox treats, potlucks, bake sales, and casual get-togethers. Because the prep work is so minimal, they’re also a convenient last-minute dessert when unexpected guests arrive, since the actual hands-on time is closer to five minutes than a typical from-scratch cookie recipe. Cut them into smaller squares for a dessert table alongside other treats, or keep the full bar size for a more substantial snack. Served slightly warm with a scoop of ice cream, they also make a simple but satisfying end to a weeknight dinner.
Nutrition and Serving Information
The recipe estimates approximately 260 calories per bar when the pan is divided into 12 pieces. This is only an estimate, since the exact nutritional content depends on the specific brand of refrigerated cookie dough and chocolate chips used, both of which can vary in sugar and fat content. Cutting the bars into smaller or larger pieces will change the calories per serving accordingly. Because the recipe relies on store-bought cookie dough and chocolate, it’s best treated as an occasional indulgence, and smaller portions can help with portion control at a gathering. Always check the cookie dough package for allergen information, since it typically contains peanuts, wheat, egg, and dairy.
Make-Ahead Tips
Because the bars need to cool fully before slicing anyway, they’re easy to make a day ahead. Bake and cool the full pan, keep it covered at room temperature, and slice it close to serving time so the cut edges look fresh. If you’re transporting the bars somewhere, carrying the uncut slab and slicing on arrival keeps the presentation neat, since a freshly cut edge always looks cleaner than one that’s had time to sit exposed to air.
Why Bar Form Bakes Differently Than Individual Cookies
Baking cookie dough as one thick, unbroken layer changes how heat moves through it compared to baking individual scooped cookies. A single cookie is small and surrounded on all sides by oven air, so it loses moisture relatively quickly and can turn crisp at the edges within a few minutes. A pan of dough, on the other hand, only has exposed surface on top; the sides and bottom are insulated by the pan itself, and the bulk of the dough beneath the surface is protected by the layer above it. That’s part of why cookie bars come out chewier and more uniform in texture than a batch of individual cookies made from the same dough — there’s simply more mass retaining moisture in the center, and the parts most likely to overbake are the thin edges touching the hot pan.
This is also why watching the edges rather than the center is the more reliable way to judge doneness here. By the time the center of a thick pan of dough looks fully set, the edges have often already baked past the ideal chewy stage. Pulling the pan based on the edges turning golden, while trusting that the center will finish setting as it cools, consistently produces a chewier result than waiting for the whole surface to look uniformly baked.
Portioning and Yield
This recipe fills an 8×8-inch pan and is typically cut into 12 bars, which makes for a solid but not overly large portion given how rich the chocolate and peanut butter combination is. If you’re serving a crowd or adding these to a dessert table alongside other treats, cutting the pan into 16 smaller squares stretches the batch further while still giving everyone a proper taste. For a more substantial snack meant to be eaten on its own, cutting the pan into 9 larger squares gives you a heartier portion instead. If you want to make a bigger batch for a larger gathering, use two packages of dough in a 9×13-inch pan, keeping the ratio of dough to chocolate chips the same, and check the edges a few minutes earlier than you would for the smaller pan, since a wider pan can bake slightly faster around the perimeter.
Common Questions
Can I use a different flavor of cookie dough?
Yes, though the peanut butter flavor is what gives these bars their signature taste alongside the chocolate. A chocolate chip cookie dough would work as a substitute, but the overall flavor will be closer to a standard chocolate chip cookie bar rather than a peanut butter one.
Can I use homemade cookie dough instead of refrigerated dough?
Yes, any peanut butter cookie dough recipe that yields enough for a dozen or so cookies can be pressed into an 8×8-inch pan the same way. Baking time may vary slightly depending on the recipe, so watch the edges for doneness rather than relying strictly on the clock.
Can I double this recipe?
Yes, using two packages of dough and a 9×13-inch pan to keep the thickness roughly the same. A thicker layer in the same-size pan will need extra time in the oven, so watch the edges rather than the original timing.
Can I freeze these bars?
Yes. Wrap individual bars or layer them with parchment in an airtight, freezer-safe container, then thaw at room temperature or in the refrigerator before serving.
How do I know when the bars are done?
The edges should look lightly golden while the center still looks a little soft. Don’t wait for the whole surface to look completely set and dry — it will continue to firm up as the bars cool.
Why did my bars turn out too dry?
Overbaking is the most likely cause. Check the edges rather than the center, start checking near the lower end of the baking range, and let the bars cool before judging their final texture.
Can I add nuts or other mix-ins?
Yes, chopped peanuts, extra chocolate chips, or a sprinkle of flaky salt can all be added on top before baking. Just keep in mind the recipe will no longer be strictly two ingredients once you start adding extras.
2-Ingredient Chocolate Peanut Butter Cookie Bars prove that a homemade-tasting dessert doesn’t have to start from scratch. With a package of refrigerated peanut butter cookie dough and a handful of chocolate chips, you can have a warm pan of chewy, chocolate-studded bars in about 25 minutes with almost no active effort. Sometimes the smartest dessert is the one that lets a good shortcut do most of the work, and these bars make a convincing case for exactly that.