
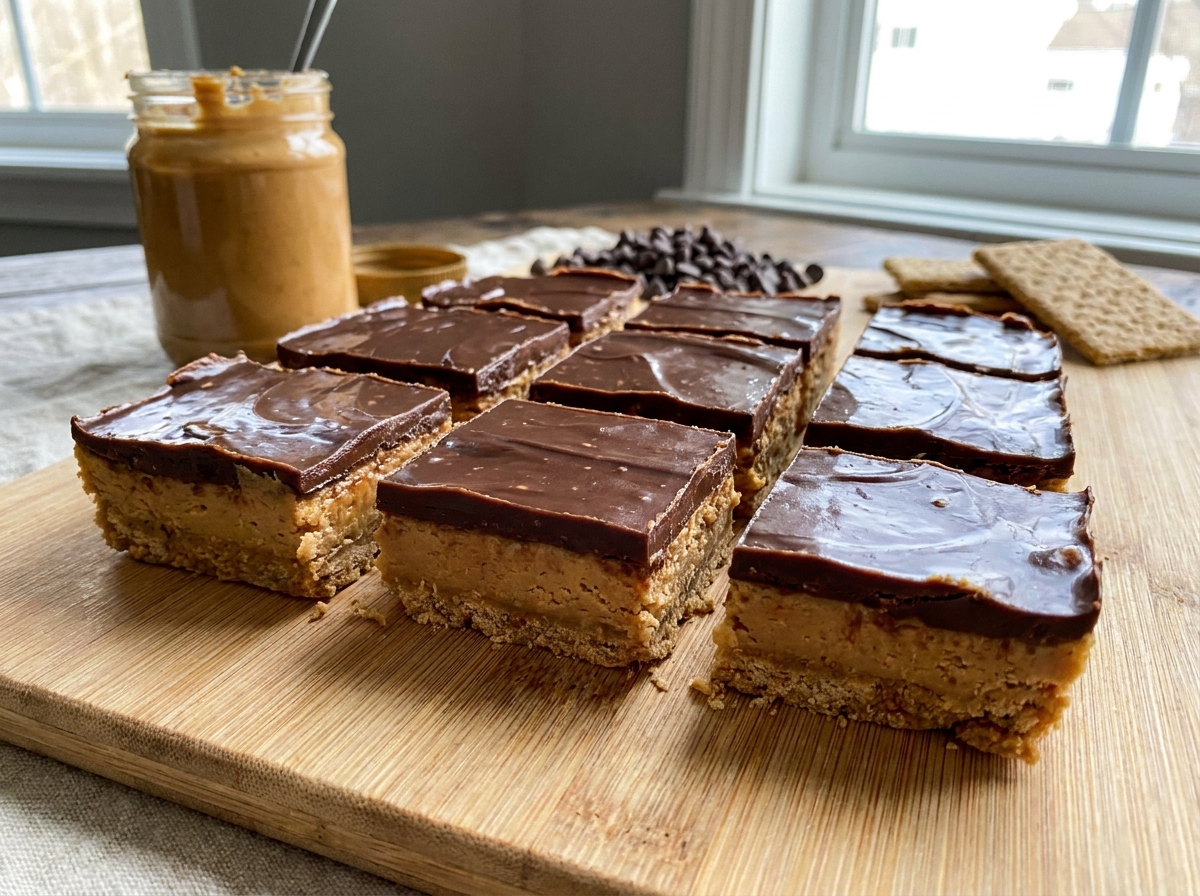
3-Ingredient Chocolate Peanut Butter Bars
Melted chocolate and peanut butter folded through crispy rice cereal, pressed into a pan, and chilled until firm — simple, crunchy, and gone fast.
Thank you for reading this post, don't forget to subscribe!
Some of the best no-bake treats are also the simplest, and these 3-Ingredient Chocolate Peanut Butter Bars are a perfect example. Melted chocolate and peanut butter combine into one smooth mixture, crispy rice cereal gets folded straight in, and the whole thing is pressed into a pan and chilled until firm.
There’s no separate layering step, no dipping, and no candy thermometer to watch — everything happens in one bowl before it goes into the pan. Melting the chocolate first and stirring in the peanut butter creates a single, unified coating that clings to every piece of cereal, rather than keeping the chocolate and peanut butter as distinct components. The result is a bar that’s evenly flavored throughout, with a satisfying crunch running through a rich chocolate-peanut-butter base.
Because the method is so streamlined, these bars come together in about ten minutes of hands-on work, with the refrigerator doing the rest. They’re an easy go-to whenever you want a chocolate-peanut-butter treat without much cleanup or fuss, and they hold up well enough to make ahead for a lunchbox, a bake sale, or just a stocked treat drawer.
Why These Bars Are So Easy
The entire method comes down to melting one ingredient, stirring in a second, and folding in a third. Chocolate chips melt down into a smooth, glossy base, peanut butter stirs in easily once the chocolate is fully melted, and crispy rice cereal folds through the combined mixture to pick up an even coating. There’s no separate step for building layers and no need to melt chocolate and peanut butter in two different bowls, which keeps cleanup to a minimum and the whole process moving quickly from stovetop, or microwave, to pan.
Because the chocolate and peanut butter are combined into one mixture before the cereal goes in, every piece of cereal ends up coated in the same blended chocolate-peanut-butter mixture rather than getting chocolate in some bites and peanut butter in others. That even distribution is part of what makes these bars taste so consistent from the first bite to the last.
A No-Bake Bar With Crunch in Every Bite
Crispy rice cereal is the ingredient doing the most textural work here, staying light and crunchy even once it’s fully coated in the chocolate-peanut-butter mixture and chilled. That crunch is what separates these bars from a denser peanut butter fudge or a solid chocolate bark — there’s real texture running through every piece, which makes for a more interesting bite than a smooth, uniform candy would offer. Because the cereal is folded in gently rather than stirred vigorously, it holds onto its lightness even after being pressed into a pan and chilled solid.
Why Chocolate, Peanut Butter, and Crispy Rice Work So Well Together
Chocolate and peanut butter are already one of the most dependable pairings in candy and dessert making, and melting them together rather than keeping them as separate layers lets their flavors blend fully into one another rather than staying distinct. Crispy rice cereal adds the crunch and lightness that neither chocolate nor peanut butter can provide on their own, and because the cereal doesn’t carry a strong flavor of its own, it doesn’t compete with the chocolate-peanut-butter base — it simply gives the whole bar structure and bite. Together, the three ingredients create something that eats lighter than a dense fudge while still delivering all the richness of a classic chocolate-peanut-butter treat.
What You’ll Need
- 1 cup creamy peanut butter
- 1 cup semisweet chocolate chips
- 2 cups crispy rice cereal
That’s the entire list. Each bar comes out to roughly 190 calories, and the recipe makes 16 bars.
Choosing the Best Peanut Butter and Chocolate
Creamy peanut butter stirs into melted chocolate far more smoothly than a very thick or separated natural peanut butter, giving you an evenly blended base to coat the cereal. If natural peanut butter is what you have on hand, stir it thoroughly before measuring so the oil is well distributed, and expect the mixture to be a little looser than it would be with a conventional creamy peanut butter. For the chocolate, semisweet chocolate chips give a balanced sweetness that lets the peanut butter flavor come through clearly, while milk chocolate chips will make the bars noticeably sweeter and dark chocolate chips will pull the flavor toward a richer, less sweet direction.
Equipment You’ll Need
An 8-inch square baking pan gives these bars a satisfying thickness. Line it with parchment paper, leaving some overhang on two sides, so the finished slab lifts out cleanly once chilled. You’ll need one microwave-safe bowl for melting the chocolate and stirring in the peanut butter, and a sturdy spatula both for folding in the cereal and for pressing the mixture firmly into the pan. A sharp knife, wiped clean between cuts, gives you the neatest bars once everything has set.
How to Make It
- Prep the pan. Line an 8-inch square baking pan with parchment paper.
- Melt the chocolate. Melt the chocolate chips in a microwave-safe bowl in 20 to 30 second intervals, stirring between each interval, until smooth.
- Stir in the peanut butter. Stir the peanut butter into the melted chocolate until completely combined.
- Fold in the cereal. Fold in the crispy rice cereal, gently stirring until evenly coated.
- Press into the pan. Press the mixture firmly into the prepared pan and smooth the top.
- Chill. Refrigerate for 1 to 2 hours, or until firm.
- Slice. Lift the bars from the pan, cut into squares, and serve.
Melt the Chocolate Gently
Microwaving the chocolate chips in short 20 to 30 second bursts, stirring in between each, is the key to melting them without scorching or seizing. Chocolate can go from perfectly melted to grainy and stiff very quickly if it’s overheated, so it’s worth being patient here rather than trying to speed things along with longer intervals. Once the chocolate looks mostly smooth with just a few unmelted flecks remaining, a final stir using the bowl’s residual heat is often enough to finish the job without another round in the microwave.

Stir the Peanut Butter In Completely
Once the chocolate is fully melted, add the peanut butter and stir until the two are completely combined into one smooth, glossy mixture with no separate streaks of either ingredient. This step usually goes quickly since both the melted chocolate and the peanut butter are already soft and easy to stir together. If the peanut butter is cold straight from the pantry, it may take a few extra stirs to fully incorporate; a peanut butter that’s been sitting at room temperature will blend in more easily.
Press Firmly for the Best Texture
How firmly you press the mixture into the pan has a real effect on how well the bars hold together once sliced. Press with even, deliberate pressure across the entire pan, working from the center toward the edges, rather than lightly patting the surface. If the mixture sticks to your spatula, lightly greasing it, or pressing through a sheet of parchment paper laid on top, makes the job easier. A firmly packed pan produces bars that hold their shape well when sliced; a loosely packed one is more likely to crumble at the edges.
Chill Until Completely Firm
Refrigeration is what turns this soft, coated cereal mixture into a bar you can pick up and eat cleanly. As the chocolate and peanut butter cool, they firm up around each piece of cereal, locking the whole structure together. Give the pan the full 1 to 2 hours in the refrigerator, and resist the temptation to slice early — a bar that hasn’t fully set will fall apart rather than hold a clean edge. If your kitchen runs warm, lean toward the longer end of the chilling window.
Timing the Fold-In Correctly
The window for folding in the cereal is a little more forgiving than it might seem, but it’s still worth working at a reasonable pace once the chocolate and peanut butter are combined. As the mixture sits, it gradually cools and thickens, which can make it harder to coat every piece of cereal evenly if you wait too long. Have the cereal measured out and ready to go before you finish stirring in the peanut butter, so you can fold it in while the base is still warm and fluid enough to spread easily. If the mixture does start to firm up before you’ve finished folding, a very brief 10 to 15 seconds back in the microwave, stirred well, will loosen it back up without needing to start over.
Tips for Perfect Peanut Butter Chocolate Bars
Melt the chocolate slowly, in short microwave intervals, to avoid scorching it. Stir in the peanut butter completely before adding the cereal, and fold the cereal in gently to preserve its crunch. Press the mixture into the pan with real, even pressure so the bars hold together once sliced, and give the pan the full chilling time before cutting. If you’d like a firmer bar for easier snacking on the go, an extra 20 to 30 minutes in the freezer after the initial chill firms things up further.
Troubleshooting Common Issues
My chocolate looked grainy instead of smooth. This usually happens from overheating. Microwave in shorter intervals, stirring frequently, and stop as soon as the mixture looks mostly smooth.
My bars fell apart when I sliced them. They likely weren’t pressed firmly enough into the pan, or didn’t get the full chilling time. Press with real pressure, and let the pan chill until completely firm before cutting.
The cereal got crushed and mushy instead of staying crisp. Fold gently once you combine the chocolate-peanut-butter mixture with the cereal; vigorous stirring crushes the crisped rice.
My peanut butter and chocolate didn’t combine smoothly. Make sure the chocolate is fully melted before adding the peanut butter, and stir until no streaks of either ingredient remain.
My bars are sticking to the knife. Wipe the blade clean between cuts, and consider running it under warm water first for a cleaner slice through the chilled chocolate.

A Few Ways to Make It Yours
Flaky Salt Finish
A light sprinkle of flaky sea salt over the top before chilling plays up the contrast between the sweet chocolate and the salty peanut butter.
Extra Drizzle
Melt a little extra chocolate to drizzle over the finished bars for a bakery-style finish.
Chopped Peanuts
Fold in a handful of chopped roasted peanuts along with the cereal for extra crunch and a stronger peanut flavor.
Dark Chocolate Swap
Use dark chocolate chips instead of semisweet for a richer, less sweet bar that leans further into chocolate flavor.
Try the classic three-ingredient version first so you have a baseline for texture and sweetness, then decide whether any of these additions are worth making part of your regular routine.
How to Store Chocolate Peanut Butter Bars
Store the bars in an airtight container in the refrigerator, where they’ll keep well for up to a week. They can also be kept at cool room temperature for a day or two if your kitchen isn’t too warm. Layer parchment or wax paper between stacked bars, since the chocolate coating can stick to itself in a warm container. For longer storage, these bars freeze well — wrap them individually or layer them with parchment in a freezer-safe container, and thaw at room temperature or in the refrigerator before serving.
When to Serve These Easy Bars
These bars work well anywhere a portable, no-bake chocolate-peanut-butter treat is welcome: lunchboxes, after-school snacks, bake sales, potlucks, and casual get-togethers. Because there’s no oven involved, they’re also a convenient option to make ahead for a busy week, since a finished batch keeps well in the refrigerator and can be portioned out as needed. Cut them into smaller squares for a dessert table alongside other treats, or keep them at the full bar size for a more substantial snack.
Nutrition and Serving Information
The recipe estimates approximately 190 calories per bar when the batch is divided into 16 pieces. This is only an estimate, since the exact calorie, sugar, and fat content will vary depending on the specific brands of peanut butter, chocolate chips, and cereal used. Cutting the bars into smaller or larger pieces will change the calories per serving accordingly. Because the recipe is built around peanut butter and chocolate, it’s an indulgent snack best enjoyed in moderation. Check ingredient labels for peanut and tree nut allergens, since both peanut butter and many chocolate products are processed in facilities that handle a variety of nuts, and confirm the specific cereal you use is labeled gluten-free if that matters for anyone you’re serving.
Make-Ahead Tips
Because the bars need time in the refrigerator regardless, this is a naturally make-ahead recipe. Prepare the full pan a day or two before you need it, keep it covered in the refrigerator, and slice just before serving so the cut edges look their freshest. If you’re transporting them somewhere, carrying the uncut slab and slicing on arrival keeps the bars looking neat, since a freshly cut edge always looks cleaner than one that’s had time to sit out.
The Science Behind a One-Bowl Coating
Melting the chocolate first and stirring the peanut butter directly into it, rather than melting the two separately or layering them, changes how the fat in each ingredient behaves once it cools. Chocolate on its own sets into a hard, glossy shell as its cocoa butter solidifies. Peanut butter’s fat, mostly from peanut oil, stays softer at room temperature and doesn’t harden the same way. Blending the two together before it cools produces a coating that splits the difference: firmer than peanut butter alone, but not as hard or brittle as pure chocolate once chilled. That’s part of why these bars have a slightly softer bite than a bar coated in straight chocolate, even though the coating still firms up enough in the refrigerator to hold a clean slice. Folding in the crispy rice cereal while the mixture is still warm and pliable lets it coat evenly, and because the cereal itself contributes almost no moisture, the coating sets up around it without any risk of sogginess, which is part of why these bars keep their crunch for days in storage rather than softening the way a fresh baked good might.
Portioning and Yield
This recipe fills an 8-inch square pan and is typically cut into 16 bars, a reasonable size given how rich the chocolate-peanut-butter coating is. If you’re serving a crowd or adding these to a table with other treats, cutting the pan into 20 smaller squares stretches the batch further while still giving everyone a proper taste. For a heartier snack bar meant to be eaten on its own, cutting the pan into 9 or 12 larger pieces gives you a more substantial portion. To double the recipe for a bigger batch, use a 9×13-inch pan and double all three ingredients, keeping an eye on how evenly the mixture presses into the wider pan.
Serving Suggestions
These bars are rich enough to serve on their own straight from the refrigerator, but a few small touches make them feel a bit more special for a gathering. A sprinkle of flaky sea salt right after pressing the mixture into the pan, as pictured, adds a bit of visual interest along with the sweet-salty contrast. Arranging the sliced bars on a wooden board with a jar of peanut butter and a bowl of chocolate chips nearby gives them a simple, rustic presentation for a dessert table. Because they hold their shape well at cool room temperature for an hour or two, they also travel easily to a potluck or a bake sale without much special handling.
Common Questions
Can I use a different cereal?
Yes, other crisped or puffed rice cereals will work similarly, though texture and flavor can vary slightly by brand. The classic crispy rice texture is what this recipe is built around.
Can I freeze these bars?
Yes. Wrap individual bars or layer them with parchment in an airtight, freezer-safe container, then thaw them in the refrigerator or at room temperature before serving.
Can I use natural peanut butter?
Yes, but stir it thoroughly before measuring, since the oil in natural peanut butter can separate during storage and affect how smoothly it combines with the melted chocolate.
Why did my mixture turn out grainy?
This is usually caused by overheating the chocolate. Melt in short microwave intervals, stirring frequently, and stop as soon as the mixture looks mostly smooth.
How do I get clean slices?
Make sure the bars are completely chilled and firm before cutting, and use a sharp knife wiped clean, or warmed under running water, between each cut.
Can I add nuts or other mix-ins?
Yes, chopped peanuts, a flaky salt finish, or a chocolate drizzle can all be added. Just keep in mind that the recipe will no longer be strictly three ingredients once you start adding extras.
Do I need to melt the chocolate and peanut butter separately?
No, this recipe melts the chocolate first and stirs the peanut butter directly into it, which creates one unified coating for the cereal rather than keeping the two flavors distinct.
3-Ingredient Chocolate Peanut Butter Bars show just how far three simple ingredients can go with the right method. Melt, stir, fold, press, and chill — that’s the entire process, and the result is a crunchy, evenly flavored bar that comes together almost entirely hands-off. It’s an easy one to keep in regular rotation whenever a chocolate-peanut-butter craving strikes.