
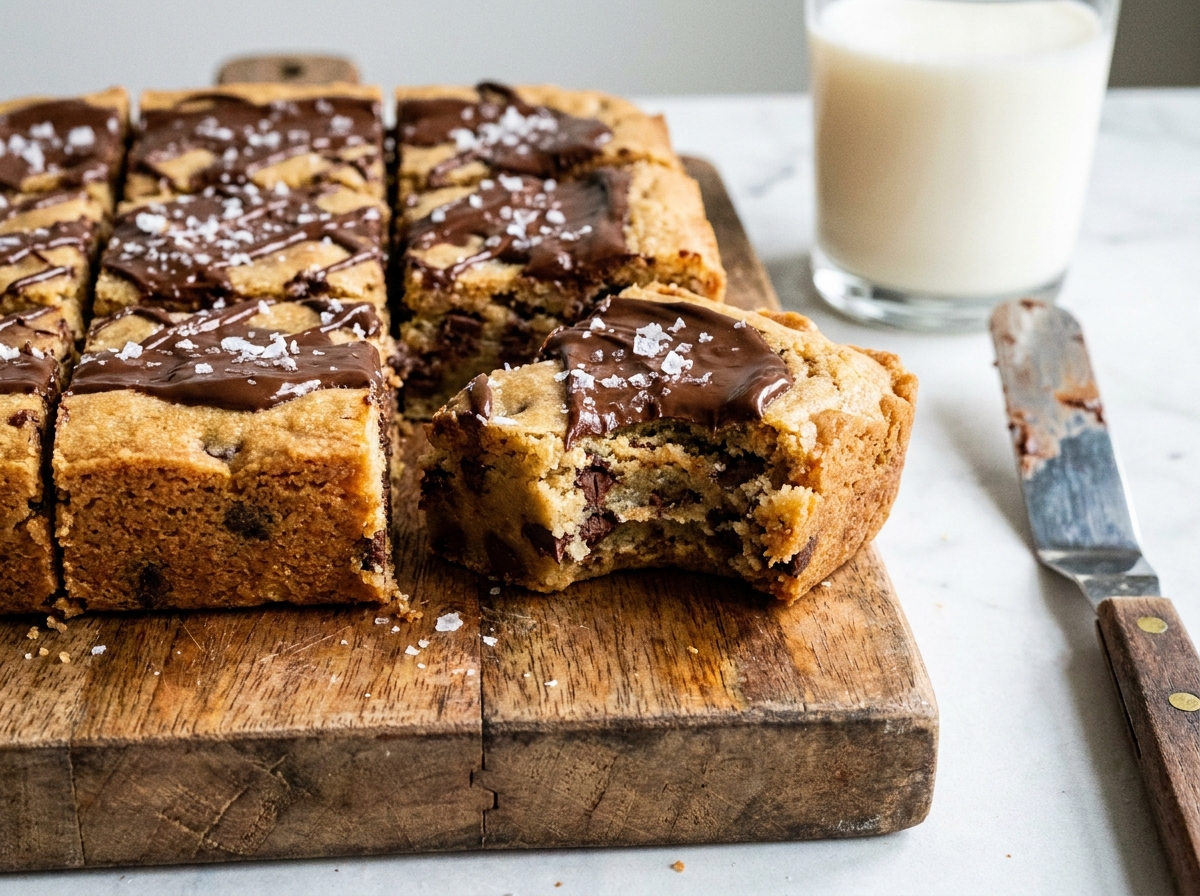
Chocolate Chip Cookie Dough Bars
Real chocolate chip cookie dough, made safe to eat without baking, pressed into a pan and chilled until firm — the bowl-scraping favorite, turned into a proper bar.
Thank you for reading this post, don't forget to subscribe!
There’s a reason so many people sneak a bite of cookie dough straight from the mixing bowl before it ever sees the oven — that raw dough flavor and soft texture is genuinely its own thing, distinct from the finished baked cookie. These Chocolate Chip Cookie Dough Bars take that instinct and build an entire dessert around it, turning a proper batch of egg-free, heat-treated cookie dough into a pan of chilled bars meant to be eaten exactly as they are.
Butter, brown sugar, and granulated sugar are creamed together the same way they would be for a batch of cookies headed for the oven, but this dough skips the eggs entirely and uses flour that’s been heat-treated first to make it safe to eat without baking. Mini chocolate chips get folded throughout, with a few more pressed into the top for good measure, and the whole thing gets pressed into a pan and chilled until firm enough to slice into clean bars.
What you end up with is the flavor and texture of the best bite of cookie dough you’ve ever had, in a form that’s actually meant to be eaten that way, sliced into neat squares instead of scooped guiltily from a bowl. It’s a genuinely different treat from a baked cookie, and one that’s earned a dedicated following of its own for exactly that reason.
Why These Cookie Dough Bars Are So Popular
Cookie dough has a particular appeal that a fully baked cookie doesn’t quite replicate: a soft, dense, slightly chewy texture and a flavor that’s a little different from what heat and baking soda do to the same ingredients in the oven. This recipe leans fully into that appeal by treating the dough as the finished product rather than a stepping stone to a batch of cookies. Because the dough is made specifically to be eaten without baking — using no eggs and heat-treated flour — there’s no need to feel like you’re taking a food safety risk to enjoy it, which is part of what makes bars like these so satisfying for people who have always preferred the raw dough to the baked result.
Pressing the dough into a pan rather than portioning it into individual scoops also changes the eating experience in a good way: it turns cookie dough from something eaten by the spoonful into something with a defined, sliceable shape, similar to a fudge or a blondie, which makes it easier to serve at a gathering or portion out for a treat later in the week.
An Edible Dough Bar Built for Slicing
Unlike a batch of dough meant to be scooped into individual cookies, this dough is built to be pressed flat into a pan and sliced once chilled. Because it never goes into the oven, there’s no concern about spread or rise the way there would be with a baked cookie — the dough simply needs to be pressed evenly and chilled long enough to firm up into a texture that holds a clean slice. That firmness comes entirely from chilling the fat in the butter, rather than from any baking process, which is why the full hour in the refrigerator matters so much here.
Why Skipping the Oven Changes the Texture
A baked cookie develops its texture through a combination of butter melting, sugar caramelizing, and flour proteins setting under heat, all of which create structure, spread, and a range of textures from crisp edges to a chewy center. Skip the oven entirely, and none of that happens: the dough stays soft and dense throughout, more like a thick, chilled fudge than a cookie. That’s precisely the point here. These bars aren’t trying to be an unbaked version of a baked cookie; they’re a distinct treat built around the specific texture and flavor of raw cookie dough, chilled just enough to slice cleanly.
What You’ll Need
- 1 cup unsalted butter, softened
- 3/4 cup brown sugar
- 1/2 cup granulated sugar
- 2 teaspoons vanilla extract
- 2 cups all-purpose flour, heat-treatedsee note below on making flour safe to eat raw
- 1/2 teaspoon salt
- 1 cup mini chocolate chipsfolded into the dough
- 1/2 cup mini chocolate chipsfor topping
The recipe makes one 8-inch pan, cut into 16 bars, each around 260 calories.
A Note on Making Flour Safe to Eat Raw
Raw flour can carry bacteria, since it hasn’t gone through any heating process the way baked flour has. To make it safe to eat here, spread the flour on a baking sheet and bake it at 350°F for 5 to 7 minutes, then let it cool completely before using. This quick step is what makes it reasonable to eat the finished dough without baking it, and it’s worth doing every time rather than skipping it, even though it adds a few extra minutes to the process.
Choosing the Best Butter and Chocolate Chips
Make sure the butter is properly softened at room temperature before creaming it with the sugars; butter that’s too cold won’t cream properly, leaving a lumpy, uneven dough, while butter that’s too warm or melted will make the dough greasy and difficult to press into a firm layer. For the chocolate chips, mini chips distribute more evenly throughout the dough than standard-sized chips, giving you chocolate in every bite rather than large, sparse pockets. Semisweet mini chips are the classic choice, though milk chocolate mini chips will give you a sweeter bar, and dark chocolate mini chips will pull the flavor in a richer, less sweet direction.
Equipment You’ll Need
An 8-inch square baking pan lined with parchment paper, leaving some overhang on two sides, makes it easy to lift the finished slab out once it’s chilled. A hand mixer or stand mixer makes quick work of creaming the butter and sugars together until light and fluffy, though a sturdy spoon and some elbow grease will get you there too. A rubber spatula is useful for folding in the chocolate chips and for pressing the finished dough evenly into the pan, and a sharp knife gives you the cleanest bars once everything has chilled.
How to Make It
- Heat-treat the flour. Spread the flour on a baking sheet and bake at 350°F for 5 to 7 minutes. Let it cool completely.
- Cream the butter and sugars. In a large bowl, beat the softened butter, brown sugar, and granulated sugar until creamy.
- Add vanilla. Mix in the vanilla extract.
- Add the flour and salt. Add the cooled flour and salt, mixing until a soft dough forms.
- Fold in chocolate chips. Fold in 1 cup of mini chocolate chips.
- Press into the pan. Press the cookie dough evenly into a parchment-lined 8-inch square pan.
- Top with more chips. Sprinkle the remaining chocolate chips over the top and gently press them into the dough.
- Chill. Refrigerate for at least 1 hour, or until firm.
- Slice. Cut into bars and serve chilled.
Cream the Butter and Sugars Properly
Creaming softened butter with brown and granulated sugar until the mixture turns pale and fluffy, rather than just combined, matters even in a dough that will never be baked. Well-creamed butter and sugar create a smoother, more cohesive dough that presses evenly into the pan and holds together well once sliced. Beat the two together for a good two to three minutes, scraping down the sides of the bowl partway through, until the mixture looks noticeably lighter in color and texture than when you started.

Press Firmly and Evenly Into the Pan
Getting an even layer of dough across the pan makes a real difference in how the bars look and slice once chilled. Press the dough down firmly with a rubber spatula or your fingertips, working from the center outward and paying particular attention to the corners, which are easy to leave thinner than the rest of the pan if you’re not deliberate about it. A well-packed, even layer bakes down — or in this case, chills down — into consistent bars, while an uneven layer can leave some pieces thicker and softer than others.
Chill Until Firm
Refrigeration is what gives this dough its sliceable structure, since there’s no oven involved to set it any other way. As the butter in the dough cools and firms, the whole mixture becomes considerably easier to cut into clean squares. Give the pan the full hour in the refrigerator, and don’t rush this step — a dough that’s still soft will smear under the knife rather than holding a defined edge. If your kitchen runs warm, an extra 15 to 20 minutes in the refrigerator won’t hurt and will only make slicing easier.
Slice and Serve
For the cleanest bars, use a sharp knife warmed under running water and wiped dry before each cut; a warm blade glides through the chilled dough more cleanly than a cold one. Wipe the knife between cuts, since the dough and chocolate chips can build up on the blade. Serve the bars chilled, straight from the refrigerator, for the firmest texture, or let them sit at room temperature for a few minutes if you prefer the dough a little softer.
Tips for Perfect Cookie Dough Bars
Always heat-treat the flour before using it, since this is what makes the finished dough safe to eat without baking. Cream the butter and sugars thoroughly until light and fluffy for the smoothest, most cohesive dough. Press the dough firmly and evenly into the pan, checking the corners for consistent thickness. Give the pan the full hour of chilling time before slicing, and use a sharp, clean knife for the neatest cuts. If you want extra texture on top, press a few additional chocolate chips or a sprinkle of flaky salt into the surface right before chilling.
Troubleshooting Common Issues
My dough felt greasy instead of smooth. The butter was likely too warm or partially melted when it was creamed with the sugars. Let butter soften at room temperature rather than microwaving it, and start over with cooler butter if this happens.
My bars didn’t slice cleanly. They probably needed more time in the refrigerator. Chill until the dough feels firm to the touch, and use a warm, clean knife for cutting.
My dough was crumbly and hard to press into the pan. This can happen if too much flour was added, or if the butter wasn’t creamed enough with the sugars first. Make sure the butter and sugar mixture looks light and fluffy before adding the flour.
I’m concerned about eating raw flour. Make sure to heat-treat the flour fully, either in the oven or the microwave, until it reaches at least 165°F, and let it cool before mixing it into the dough. This step addresses the main food safety concern with eating cookie dough unbaked.
My chocolate chips sank to the bottom instead of staying distributed. Fold them in gently rather than beating them into the dough, and work quickly once they’re added so the dough doesn’t have time to soften and let the chips settle.

A Few Ways to Make It Yours
Chocolate Ganache Top
Spread a thin layer of melted chocolate over the pressed dough before chilling for a firm chocolate shell on top of every bar.
Flaky Salt Finish
A light sprinkle of flaky sea salt over the top plays up the contrast between the sweet dough and the chocolate chips.
Chopped Nuts
Fold in a handful of chopped walnuts or pecans along with the chocolate chips for extra texture and a toasted, nutty flavor.
Colorful Sprinkles
Swap some of the mini chocolate chips for rainbow sprinkles for a birthday-cake-inspired take on the classic bar.
The classic version with just chocolate chips is plenty satisfying on its own, so treat these additions as ways to dress up the recipe for a special occasion rather than a requirement.
How to Store Chocolate Chip Cookie Dough Bars
Store the bars in an airtight container in the refrigerator, where they’ll keep well for up to about a week. Refrigeration is important here since this is an unbaked dough, and keeping the bars cold helps maintain both food safety and the firm texture that makes for clean slices. Layer parchment or wax paper between stacked bars to keep them from sticking together. These bars also freeze well — wrap individual pieces tightly and thaw them in the refrigerator before serving.
When to Serve These Bars
These bars are an easy crowd-pleaser for birthday parties, potlucks, bake sales, and any gathering where a nostalgic, cookie-dough-flavored treat would be welcome. Because they need to chill regardless, they’re a convenient make-ahead option for an event — make the dough a day ahead, and the bars will be ready and chilled by the time guests arrive. Cut into smaller squares for a dessert table with other treats, or keep the full bar size for a more substantial, plated dessert.
Nutrition and Serving Information
The recipe estimates approximately 260 calories per bar when the pan is divided into 16 pieces. Treat this as an estimate rather than an exact figure, since the specific brands of butter and chocolate chips used will affect the final calorie and sugar content. Cutting the bars into smaller or larger pieces will change the calories per serving accordingly. Because this is a rich, sugar-and-butter-based treat, it’s best enjoyed in modest portions, and smaller squares can make it easier to include alongside other desserts at a larger gathering. Check labels for allergen information, since the recipe contains wheat, dairy, and typically soy or milk from the chocolate chips.
Make-Ahead Tips
Because this dough needs to chill regardless of when you plan to serve it, it’s naturally suited to being made a day or two ahead. Prepare and press the dough into the pan, then keep it covered in the refrigerator until you’re ready to slice and serve. The finished, sliced bars also keep well for several days, so the whole batch can be made well in advance of an event without any loss of quality.
A Little Bit of History
Edible, egg-free cookie dough recipes have grown into their own category of dessert over the years, largely because so many people have always preferred the flavor and texture of raw cookie dough to the finished baked cookie. Specialty shops built entirely around scoopable, safe-to-eat cookie dough have popped up in cities around the country, proving that there’s real demand for a dessert that skips the oven step most cookie recipes treat as essential. Pressing that same dough into a pan and slicing it into bars, rather than scooping it into individual portions, borrows from the format of a blondie or a fudge bar, giving the dough a defined shape and a cleaner way to portion and serve it at a gathering. The heat-treating step for the flour is really what made recipes like this one possible for home bakers to make with confidence, since it addresses the food safety concern that used to make eating raw dough a genuine, if often ignored, risk.
Portioning and Yield
This recipe fills an 8-inch square pan and is typically cut into 16 bars, which is a reasonably rich portion given how dense the dough is. If you’re serving a crowd or adding these to a dessert table with other treats, cutting the pan into 20 or 24 smaller squares stretches the batch further while still giving everyone a proper taste. For a more substantial bar meant to be enjoyed as a standalone treat, cutting the pan into 9 or 12 larger pieces gives you a heartier portion, closer to what you might find at a specialty cookie dough shop. To make a bigger batch for a party, doubling all the ingredients and using a 9×13-inch pan keeps the method exactly the same, just with more creaming, pressing, and chilling to get through.
Common Questions
Is it safe to eat this cookie dough without baking it?
Yes, as long as the flour has been heat-treated to kill any bacteria and the recipe doesn’t include raw eggs, both of which are addressed in this recipe. Always heat-treat the flour fully before using it in a no-bake cookie dough recipe.
Why do I need to heat-treat the flour?
Raw flour hasn’t gone through a heating process and can carry bacteria. Heating it to at least 165°F, either in the oven or the microwave, addresses this food safety concern before the flour goes into a dough that won’t be baked.
Can I freeze these bars?
Yes. Wrap individual bars tightly in plastic wrap and store them in an airtight, freezer-safe container, then thaw in the refrigerator before serving.
Can I use regular-sized chocolate chips instead of mini chips?
Yes, though mini chips distribute more evenly throughout the dense dough, giving you chocolate in more bites. Regular-sized chips will still taste great, just with slightly less even distribution.
Can I add nuts or other mix-ins?
Yes, chopped nuts, sprinkles, or a swap to a different type of chocolate chip can all be folded in along with, or instead of, the mini chocolate chips called for here.
How long do these need to chill?
At least 1 hour in the refrigerator, though a bit longer won’t hurt if your kitchen runs warm or you’d like an especially firm slice.
Chocolate Chip Cookie Dough Bars take the appeal of the bowl-scraping favorite and turn it into an intentional, sliceable dessert built to be eaten exactly as it is. Cream, mix, press, and chill — that’s the entire process, and the result is a rich, dense, chocolate-studded bar that captures everything people love about raw cookie dough, without needing to sneak a single bite from the mixing bowl.