
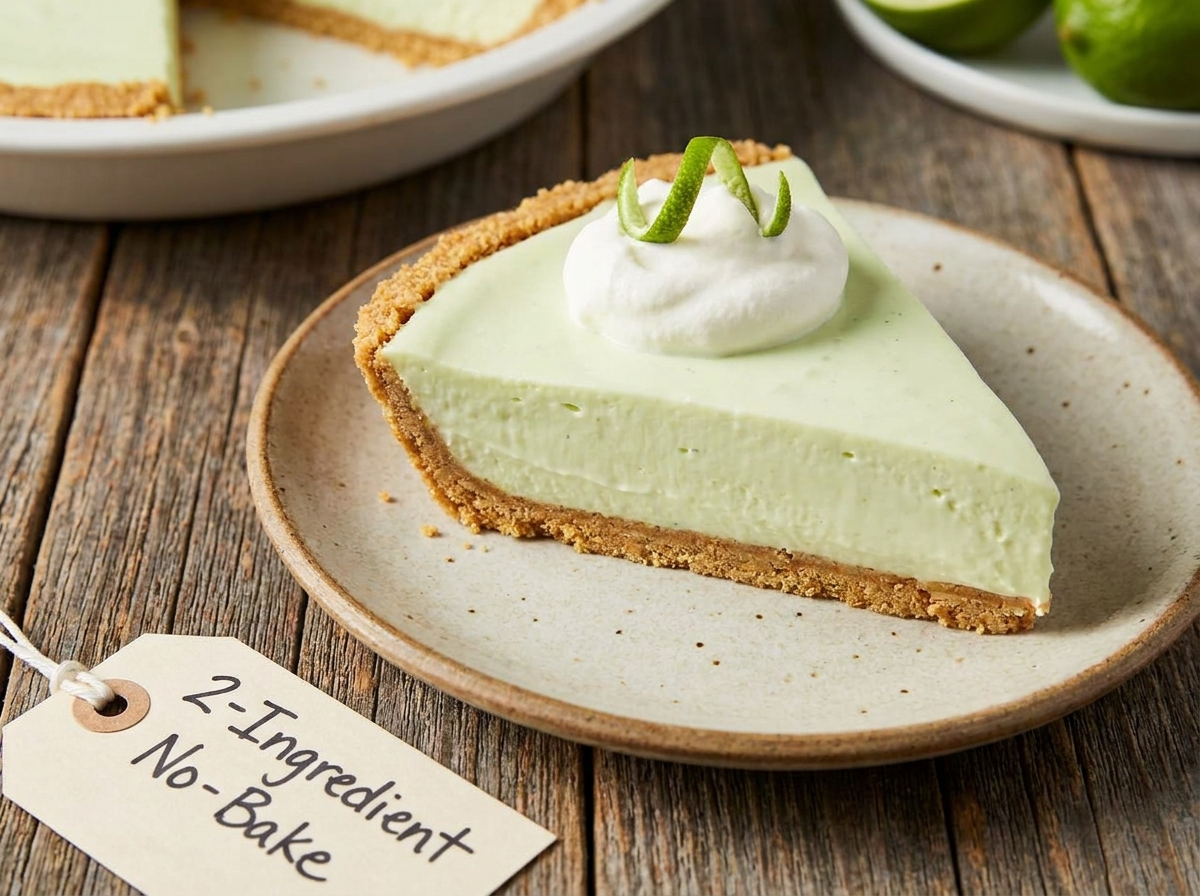
2-Ingredient No-Bake Key Lime Cheesecake Pie
Whipped topping and instant key lime pudding mix folded together and spooned into a graham cracker crust — no oven, no gelatin, just a few hours in the refrigerator.
Thank you for reading this post, don't forget to subscribe!
This 2-Ingredient No-Bake Key Lime Cheesecake Pie proves that a genuinely good pie doesn’t need an oven, a water bath, or a long ingredient list. Whipped topping and instant key lime pudding mix fold together into a smooth, creamy filling, spoon straight into a store-bought graham cracker crust, and firm up completely in the refrigerator over a few hours.
There’s no cooking involved at any stage, no eggs to worry about setting properly, and no risk of a cracked cheesecake top from an uneven bake. The filling comes together in one bowl with a spoon or spatula, and the crust does the rest of the work of holding everything together once it’s had time to chill. What you’re left with is a pale green, tangy-sweet pie with the bright, tart flavor of key lime and a texture somewhere between a mousse and a classic cheesecake.
Because it’s built around two convenience ingredients, this is about as low-effort as a homemade pie gets, and the short active time makes it realistic to put together even on a busy day, as long as you plan ahead for the chilling time.
Why This Recipe Works
Instant pudding mix is doing the heavy lifting in this recipe, since it contains the thickeners needed to set the filling without any cooking, baking, or gelatin. Folded into thawed whipped topping, the dry pudding mix dissolves and begins thickening the mixture almost immediately, and that thickening continues as the pie chills in the refrigerator. Because whipped topping is already light and airy, the finished filling has a soft, mousse-like texture rather than the dense, heavy texture of a baked cheesecake, while still holding a clean slice once it’s fully set.
Spooning the mixture into a prepared graham cracker crust means there’s no crust to make from scratch and no need to pre-bake anything. The crust firms up the sides and bottom of each slice while the filling firms up on its own inside it, and after a few hours in the refrigerator, the whole pie is ready to slice.
Why Instant Key Lime Pudding Mix Is the Star Here
Instant key lime pudding mix delivers the tart, citrusy flavor and pale green color that makes this pie instantly recognizable, without needing fresh key limes, key lime juice, or any zesting at all. Because the mix already contains sugar and flavoring in the right proportions, there’s no need to balance sweetness or tartness separately — it’s built into the two-ingredient formula from the start. This is what allows the recipe to stay at just two ingredients while still tasting distinctly like a key lime pie rather than a generic vanilla filling.
What You’ll Need
- 1 (8-ounce) container whipped topping, thawed
- 1 (3.4-ounce) package instant key lime pudding mix
- 1 prepared 9-inch graham cracker crust
Each slice comes out to roughly 220 calories, and the recipe makes 8 slices.
A Note on Thawed Whipped Topping
Make sure the whipped topping is fully thawed, not just softened, before folding in the pudding mix. Whipped topping that’s still partially frozen won’t blend evenly with the dry mix, leaving streaks or clumps of unmixed pudding powder in the finished filling. Thawing it in the refrigerator overnight, or at room temperature for about 20 to 30 minutes, gives you a soft, spreadable texture that’s easy to work with.
Equipment You’ll Need
All you need is a large mixing bowl and a spatula or spoon for combining the whipped topping and pudding mix. A prepared graham cracker crust means there’s no rolling pin, food processor, or pie pan needed for the base. A rubber spatula works well for spreading the filling evenly and smoothing the top once it’s in the crust.
How to Make It
- Combine. Add the thawed whipped topping and key lime pudding mix to a large bowl.
- Mix. Gently mix until smooth, creamy, and evenly combined.
- Fill the crust. Spoon the mixture into the prepared graham cracker crust.
- Smooth the top. Smooth the top with a spatula.
- Chill. Refrigerate for at least 4 hours, or until firmly set.
- Serve. Slice and serve chilled.
Mixing Gently for the Best Texture
“Gently mix” really does mean gently here. Folding the pudding mix into the whipped topping with broad, sweeping motions, rather than stirring vigorously, helps preserve the air that’s already whipped into the topping. Overmixing can deflate that airiness, leading to a denser, heavier filling than the light, mousse-like texture this pie is meant to have. Continue folding just until you no longer see any dry pudding powder and the mixture looks uniformly pale and smooth.

Getting the Filling Smooth
A smooth, lump-free filling comes down to two things: fully thawed whipped topping and a patient folding motion. If you notice small clumps of pudding mix that won’t break down, press them gently against the side of the bowl with your spatula rather than stirring harder, which can start to deflate the mixture. Taking an extra minute to fold thoroughly at this stage pays off in a filling that looks and slices cleanly once chilled.
Why the Full Chill Time Matters
Refrigerating the pie for the full 4 hours gives the pudding mix time to fully activate and thicken the whipped topping into a sliceable filling. A pie that’s only chilled for an hour or two will still taste good but will be noticeably softer and more likely to slump when sliced, since the pudding hasn’t finished setting. If you have the time, chilling overnight gives the cleanest, firmest slices and lets the key lime flavor settle in a little further, which many people find makes the finished pie taste even better than it does after the minimum chill.
Slicing Cleanly
A sharp knife dipped in warm water and wiped dry between cuts gives the cleanest slices through both the filling and the graham cracker crust. Cut straight down in one motion instead of sawing back and forth, which can drag the soft filling and blur the edge of each slice. If the crust is a little crumbly, running the knife through the crust portion slowly and steadily helps keep it from crumbling apart.
Tips for the Best Key Lime Pie
Make sure your whipped topping is completely thawed before you start, and fold rather than stir when combining it with the pudding mix to keep the filling light. Smooth the top evenly once it’s in the crust so the pie slices neatly, and don’t skip any of the chilling time, since that’s what turns the soft filling into a sliceable pie. If you want an extra pop of lime flavor, a little fresh lime zest folded in at the end is a nice touch.
Troubleshooting Common Issues
My filling has lumps of pudding mix in it. This usually means the whipped topping wasn’t fully thawed, or the mixing wasn’t thorough enough. Make sure the topping is completely thawed and fold patiently until no dry powder remains.
My pie won’t hold a clean slice. It likely needs more chilling time. Give it the full 4 hours, or longer if your refrigerator runs warm, before cutting.
The filling looks deflated and dense instead of light. Overmixing can knock the air out of the whipped topping. Fold gently with broad strokes rather than stirring vigorously.
My crust is soggy. This can happen if the pie sits uncovered in a very humid refrigerator for several days. Keep it covered, and enjoy within the first few days for the best crust texture.

A Few Ways to Make It Yours
Fresh Lime Zest
Fold a little fresh lime zest into the filling, or sprinkle it over the top, for a brighter, more aromatic lime flavor.
Whipped Cream Topping
Top each slice with a dollop of fresh whipped cream and a thin lime slice for a more finished presentation.
Graham Crumb Garnish
Sprinkle a little extra crushed graham cracker over the top before chilling for added texture and visual contrast.
Vanilla Wafer Crust
Swap the graham cracker crust for a vanilla wafer crust for a slightly sweeter, more delicate base.
The classic two-ingredient filling is worth trying on its own first, then use these ideas to dress it up for a particular occasion.
How to Store Key Lime Cheesecake Pie
Store the pie covered in the refrigerator for up to 4 days, since the whipped-topping-based filling needs to stay cold to hold its texture. This pie doesn’t freeze particularly well due to the whipped topping, which can separate and become watery once thawed, so it’s best enjoyed fresh within a few days of making it. Keep it covered with plastic wrap or a pie dome to prevent the surface from drying out or picking up odors from the refrigerator.
When to Serve This Pie
This pie is an easy make-ahead dessert for a summer barbecue, a potluck, or a family dinner, since it needs to chill anyway and can be made a day in advance. The bright, tart lime flavor makes it a refreshing option after a heavier meal, and because it’s already sliced and served cold, there’s no last-minute plating to worry about. It also travels reasonably well for a short trip if kept cold in a cooler, making it a good option for a gathering away from home.
Nutrition and Serving Information
The recipe estimates approximately 220 calories per slice when the pie is divided into 8 slices, based on a standard whipped topping, instant pudding mix, and graham cracker crust. This is only an estimate, since exact calorie and fat content will vary depending on the specific brands used. Graham cracker crusts typically contain wheat, and both whipped topping and instant pudding mixes may contain dairy or be processed on shared lines with tree nuts, so check labels carefully if you’re serving guests with dietary restrictions or food allergies.
Make-Ahead Tips
This is a naturally make-ahead dessert, since the pie needs at least 4 hours in the refrigerator regardless. Make it the night before you need it so it has plenty of time to set, and keep it covered until you’re ready to serve so the surface stays smooth. Because the pie is already sliced cold, it holds up well sitting out for short stretches during a party without losing its shape the way a warmer dessert might.
The Science Behind the No-Bake Set
Instant pudding mix contains modified food starch that’s specifically designed to thicken when it comes into contact with liquid at room temperature, unlike traditional cook-and-serve pudding, which needs heat to activate its thickening properties. When the dry mix is folded into whipped topping, that starch begins absorbing moisture from the topping almost immediately, gradually building a thicker, more structured texture over the following hours. Refrigeration slows this process down just enough to let it happen evenly throughout the mixture rather than setting unevenly near the outside first, which is part of why the full 4-hour chill produces a much more consistent texture than a shorter chill would. Because there’s no egg protein involved the way there would be in a baked cheesecake, this filling never firms up quite as densely — it stays soft and a little airy even at its fully set point, which is exactly the mousse-like texture this style of no-bake pie is known for.
Portioning and Yield
This recipe fills a standard 9-inch graham cracker crust and is typically cut into 8 slices, a good size for a dessert following a meal. If you’re serving a bigger crowd or want smaller portions, cutting the pie into 10 slices stretches it further while still giving everyone a proper taste of the tart lime filling. For a more substantial dessert portion, cutting it into 6 larger slices works well for a smaller gathering. This recipe isn’t easily doubled into a single pie, since a standard 9-inch crust has a fixed capacity, but making two pies with two separate crusts is simple if you need to serve a larger group, and it also gives you the option to try a second flavor variation alongside the classic.
A Little Bit of History
Key lime pie traces its roots to the Florida Keys, where key limes, a smaller and more aromatic relative of the common Persian lime, grow abundantly and were traditionally combined with sweetened condensed milk long before reliable refrigeration made fresh dairy easy to keep on hand in that climate. The classic version relies on the acid in the lime juice to set the filling through a chemical reaction with the condensed milk, no baking required, which already made it one of the more convenient pies in American cooking. This recipe takes that legacy of ease even further, swapping fresh key limes and condensed milk for an instant pudding mix that delivers the same tart, distinctive flavor without any juicing, zesting, or waiting on a chemical set. It’s less a strict recreation of the traditional Keys recipe and more a tribute to what made the original so beloved in the first place: bright, tart flavor in an easy, no-fuss pie.
Serving Suggestions
A dollop of fresh whipped cream and a thin slice of lime on each piece dresses this pie up nicely for company, and a light dusting of extra lime zest adds both color and aroma right before serving. Because the flavor is bright and a little tart, this pie works well as a lighter finish after a rich or heavy meal, such as a barbecue or a seafood dinner, where a dense chocolate dessert might feel like too much. Serving it straight from the refrigerator, rather than letting it sit out, keeps the texture at its best, since the whipped-topping-based filling softens noticeably at room temperature. For a party, pre-slicing the pie and keeping it chilled until serving time makes for an easy, grab-and-go dessert table addition.
Choosing the Right Crust
A standard store-bought graham cracker crust is what keeps this recipe at just two active ingredients, and most grocery store brands work interchangeably here. Look for a crust that feels sturdy rather than one with a very thin, crumbly base, since it needs to hold up under a soft, chilled filling without cracking when sliced. If you’d rather bake your own, a simple mixture of crushed graham crackers, melted butter, and a little sugar pressed into a pie pan and baked for about 8 minutes works well; just make sure it’s completely cooled before adding the filling, since a warm crust can begin to soften the whipped-topping mixture before it has a chance to chill and set properly into clean, sliceable wedges.
Understanding Key Lime Flavor
True key limes are noticeably smaller, more yellow when ripe, and more tart and floral than the common Persian limes found in most grocery produce sections, which is why instant key lime pudding mix is formulated to taste distinct from a plain lime or lemon pudding. The flavor tends to read as a little sharper and more perfumed than standard lime, which is part of why key lime desserts have such a devoted following even among people who don’t seek out other citrus flavors. If you’ve never tasted key lime pie before, this two-ingredient version is a genuinely good introduction, since the pudding mix is formulated to capture that signature tartness without requiring you to track down actual key limes, which can be harder to find fresh in many grocery stores outside of Florida.
Common Questions
Can I use a homemade graham cracker crust instead of store-bought?
Yes, a homemade crust works just as well. Make sure it’s fully cooled if baked, or fully set if it’s a no-bake crust, before adding the filling.
Can I use fresh whipped cream instead of whipped topping?
Whipped topping is recommended here because it’s more stable and holds its structure longer than fresh whipped cream, which can weep liquid over time. Fresh whipped cream can work but may result in a softer, less stable pie.
Can I make this with a different pudding flavor?
Yes, this same two-ingredient method works with other instant pudding flavors like lemon or vanilla for a different flavored pie using the identical technique.
Why is my filling too soft?
This usually means the pie hasn’t chilled long enough. Give it the full 4 hours, or longer, in the refrigerator before slicing.
Can I freeze this pie?
Freezing isn’t recommended, since the whipped topping in the filling can separate and turn watery once thawed. This pie is best enjoyed fresh within a few days.
Do I need fresh key limes for this recipe?
No, the key lime flavor comes entirely from the instant pudding mix, so no fresh limes, juice, or zest are required, though a little fresh zest makes a nice optional garnish.
How far in advance can I make this pie?
You can make it up to 2 days ahead and keep it covered in the refrigerator, which also gives the flavors time to settle in fully.
2-Ingredient No-Bake Key Lime Cheesecake Pie shows how far just two convenience ingredients can go when the method is this simple. Fold, spoon, smooth, and chill — that’s the entire process, and the result is a tart, creamy, refreshing pie that’s ready whenever a craving for something bright and citrusy strikes, no oven or fresh limes required.