
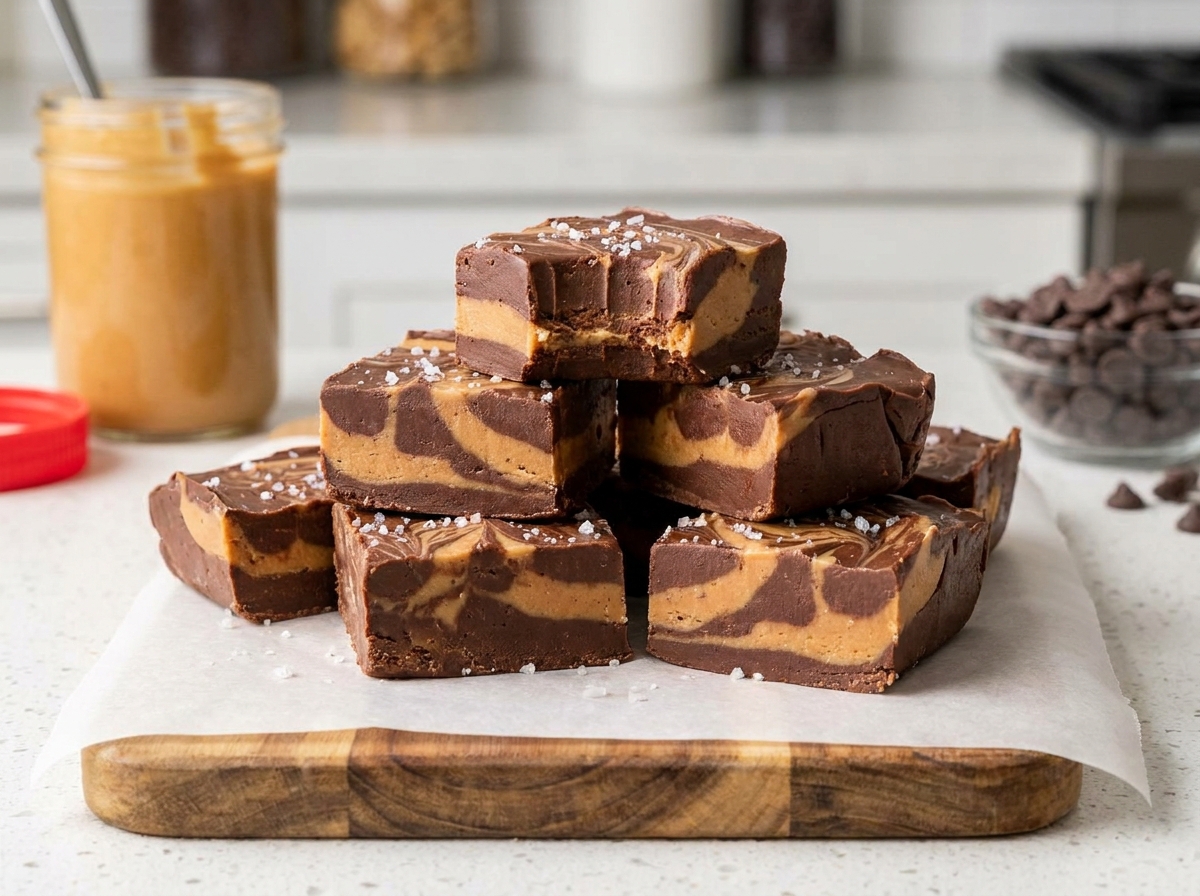
2-Ingredient Chocolate PB Fudge Slices
A rich, creamy chocolate and peanut butter fudge made with just two ingredients, perfect for an easy no-bake treat.
Thank you for reading this post, don't forget to subscribe!
A rich, creamy chocolate and peanut butter fudge made with just two ingredients, perfect for an easy no-bake treat. Melted chocolate chips and creamy peanut butter stir together into a smooth, glossy mixture that chills into a dense, sliceable fudge.
There’s no candy thermometer, no double boiler, and no complicated technique standing between you and a batch of genuinely rich fudge. Melt, stir, pour, and chill, that’s the entire process, and the payoff is a dense, swirled slice that tastes like it came from a candy shop.
It’s the kind of treat that looks impressive sliced onto a plate but takes only a few minutes of actual hands-on effort to pull together.
Why This Recipe Works
Melting chocolate chips gently in the microwave gives you a smooth, pourable base that peanut butter can be stirred into without any risk of the two ingredients separating. Because chocolate chips already contain a stable balance of cocoa solids, sugar, and fat, they melt down into a glossy, workable mixture that firms right back up once chilled, without needing to be cooked to a precise stage the way a traditional sugar-based fudge would.
Peanut butter, stirred in right after the chocolate melts, brings both flavor and a softer, creamier texture that keeps the finished fudge from turning too hard or brittle. Because it’s added off the heat, there’s no risk of the peanut butter scorching or separating, it simply blends in smoothly while the chocolate is still warm and fluid.
Why the Microwave Method Works So Well Here
Melting the chocolate in short bursts, rather than over direct stovetop heat, keeps the temperature rising gradually and evenly, which is exactly what prevents the chocolate from scorching or turning grainy. Stirring thoroughly after each interval distributes the heat evenly through the bowl, so every chip melts at roughly the same rate.
What You’ll Need
- 1 cup creamy peanut butter
- 1 cup chocolate chips
That’s the entire list. This recipe makes 12 slices.
A Note on Ingredient Choices
Standard semi-sweet chocolate chips give a balanced, classic fudge flavor, while dark chocolate chips lean into a richer, less sweet direction if that’s more your style. A standard creamy peanut butter blends in most smoothly; a natural, oilier peanut butter can work too, though the finished fudge may be a touch softer.
Equipment You’ll Need
A small square baking dish lined with parchment paper is essential for easy removal once the fudge is set. A microwave-safe bowl and a sturdy spatula for stirring round out everything you need; there’s no mixer, saucepan, or thermometer required for this recipe at all.
How to Make It
- Line the dish. Line a small square baking dish with parchment paper.
- Melt the chocolate. Melt the chocolate chips in the microwave in 20–30 second intervals, stirring until smooth.
- Stir in the peanut butter. Stir in the peanut butter until creamy and fully combined.
- Pour. Pour into the prepared dish and smooth the top.
- Chill. Refrigerate for 1–2 hours, until firm.
- Slice. Slice and serve.
Getting a Smooth, Even Fudge
Stirring the peanut butter in while the melted chocolate is still warm is what lets the two ingredients combine into one smooth, glossy mixture rather than separating into streaks. Working quickly once the chocolate is melted, before it has a chance to start firming up, makes this step much easier.

Getting the Right Set
This fudge needs a full 1 to 2 hours in the refrigerator to firm up enough to slice cleanly, and rushing that chill time is the most common reason a batch turns out too soft. Pressing gently in the center of the pan is a good way to check; it should feel firm all the way through before you attempt to slice it.
Knowing When It’s Done Melting
The chocolate is ready to combine with the peanut butter once it looks completely smooth and glossy, with no unmelted chip pieces remaining. If small lumps persist after a couple of intervals, give the bowl one more short burst in the microwave rather than assuming they’ll melt into the peanut butter on their own.
Tips for Perfect Chocolate PB Fudge
Use the full amount of chocolate chips and peanut butter as written; this even one-to-one ratio is what gives the fudge its dense, balanced flavor between chocolate and peanut butter. Let the fudge sit at room temperature for a few minutes before slicing if you’d like a softer bite, since it firms up quite a bit straight from the refrigerator.
Troubleshooting Common Issues
My fudge is grainy. This usually means the chocolate overheated; stick to short microwave intervals and stir thoroughly between each one next time.
My fudge won’t set. Give it more time in the refrigerator; a full 2 hours is sometimes needed depending on how deep the dish is.
My fudge stuck to the dish. Be sure to line the dish with parchment paper and leave enough overhang on the sides to lift it out in one piece.
My fudge is crumbling apart. The fudge likely needs more chill time; a fully set fudge should hold together cleanly when sliced with a clean, warm knife.

A Few Ways to Make It Yours
Chopped Peanuts
A scatter of chopped roasted peanuts over the top before chilling adds crunch and reinforces the peanut butter flavor.
Flaky Sea Salt
A light sprinkle of flaky sea salt over the top before chilling adds a nice contrast to the sweetness.
Swirled Marble Look
Stir the peanut butter in only partway for a marbled, swirled appearance in every slice.
White Chocolate Drizzle
A thin drizzle of melted white chocolate over the top adds a pretty finish and a different flavor note.
The plain version is worth trying first so you know the baseline flavor before adding any extras.
How to Store Chocolate PB Fudge Slices
Store the slices in an airtight container in the refrigerator for up to 1 week, keeping them in a single layer or separated with parchment paper so they don’t stick together. They also hold up well at a cool room temperature for a few hours if serving at a gathering.
When to Serve These Slices
This fudge works well as a simple homemade gift, a quick contribution to a holiday dessert tray, or a make-ahead sweet to keep on hand for whenever a chocolate-peanut-butter craving hits. Its small, dense slices also make it an easy option for a bake sale or a potluck.
Nutrition and Serving Information
Because this recipe uses just chocolate chips and peanut butter, it’s a rich, energy-dense treat best enjoyed in modest portions; the 12 slices given here are a reasonable guide for portioning a standard small baking dish. Because this recipe is built around peanut butter and chocolate, it isn’t appropriate for anyone with peanut or tree nut allergies.
Make-Ahead Tips
This fudge can be made several days ahead and stored covered in the refrigerator, making it a convenient make-ahead treat for a holiday or a gathering. Because it needs a chill time to set anyway, it’s naturally suited to being prepared well before you plan to serve it.
The Science Behind a Two-Ingredient Fudge
Chocolate chips are engineered with a stable balance of cocoa solids, sugar, and fat that lets them melt smoothly and re-solidify into a firm, glossy texture once cooled, without the more involved tempering process a professional chocolatier would use. Stirring in peanut butter while the chocolate is still warm blends its fat and protein evenly throughout the mixture, softening the final texture just enough to give it a fudgy, sliceable bite rather than a hard, snapping chocolate bar.
Portioning and Yield
This recipe makes 12 slices from a single small baking dish, a good size for a gathering or a week or two of an occasional treat. If you’d like a larger batch, doubling both ingredients into a bigger pan works well, though the chill time may need to extend slightly given the greater depth of the fudge.
A Little Bit of History
Chocolate and peanut butter as a flavor pairing has a long history in American candy making, most famously in the peanut butter cup, and simple fudge recipes built around just these two ingredients have become a popular home-kitchen shortcut in recent years. This version strips the concept down to its simplest possible form, needing nothing more than a microwave and a few minutes of stirring.
Serving Suggestions
Serve the fudge chilled, straight from the refrigerator, for the firmest, most sliceable texture, or let it sit out for a few minutes beforehand if you prefer a softer bite. A few slices arranged on a small plate alongside other holiday treats makes for an easy, low-effort dessert spread.
Choosing the Right Chocolate
Semi-sweet chocolate chips give the most balanced, classic fudge flavor, while dark chocolate chips create a richer, less sweet result that pairs nicely with the natural sweetness of the peanut butter. Whichever you choose, a chip specifically labeled for baking or melting tends to give the smoothest, glossiest finish.
Why This Recipe Is So Beginner-Friendly
If you’ve never made fudge before, this is about as forgiving a place to start as you’ll find. There’s no candy thermometer to read precisely, no risk of overcooking a sugar syrup, and no need to time anything down to the second. With only two ingredients and one simple technique, melting the chocolate and stirring in the peanut butter, there’s very little room for the kind of small mistakes that can ruin a more complicated fudge recipe. This makes it a genuinely approachable treat for a first-time cook or a child who wants to help stir, since the process is simple, safe, and has real, visible results within a couple of hours.
Adjusting the Flavor to Your Taste
As written, this fudge gets its entire flavor from the chocolate and the peanut butter in equal measure, giving a result that’s rich and balanced between the two. If you’d like a more pronounced peanut butter flavor, stirring in an extra spoonful of peanut butter after the chocolate melts shifts the balance nicely. A pinch of salt folded into the warm mixture before pouring can also sharpen the flavor and cut some of the sweetness. Because this fudge has so few ingredients to begin with, small additions tend to have an outsized effect on the final flavor, so it’s worth trying the plain version first before deciding what, if anything, you’d like to add.
Pairing This Fudge With Other Desserts and Drinks
Because the flavor here is rich, dense, and distinctly chocolate-and-peanut-butter, this fudge pairs naturally with lighter, brighter options if you’re serving more than one dessert. A simple fruit salad or a citrus-based dessert cuts through the richness nicely, while something equally indulgent like a chocolate cake leans further into the same direction if that’s the mood you’re after. On the drink side, this fudge is a natural match for a cold glass of milk, while coffee works well for an afternoon treat. If you’re building out a larger dessert spread, this fudge reads as one of the richer, more filling options, so balancing it with something lighter helps the whole table feel varied rather than one-note.
A Note on Ingredient Proportions
The equal one-to-one ratio of chocolate chips to peanut butter in this recipe was chosen carefully, and it’s worth understanding why before making adjustments. Using the same amount of each ingredient gives a fudge with a true balance between chocolate and peanut butter flavor, while still leaving enough structure from the chocolate to hold the fudge together once chilled. If you use more peanut butter relative to the chocolate, the fudge may not set firmly enough to slice cleanly; if you use more chocolate without enough peanut butter, the result can taste more like a plain chocolate bark than a true peanut butter fudge. This particular ratio is what gives the fudge its dense, sliceable texture and balanced flavor, so it’s worth treating the stated proportions as a tested baseline.
A Quick Note on Serving Temperature
This fudge is good served cold, at room temperature, or slightly softened, which is part of what makes it such a flexible treat to have on hand. Served straight from the refrigerator, the fudge is at its firmest and cleanest to slice. Left out at room temperature for a few minutes, the texture softens noticeably and the peanut butter flavor becomes more pronounced, so it’s worth trying both ways to see which you prefer.
Why This Recipe Is Naturally Kid-Friendly to Make
Because this recipe involves no stovetop cooking and no hot sugar syrup to manage, it’s a genuinely safe fudge recipe to make with kids, provided an adult handles taking the bowl in and out of the microwave. Stirring the peanut butter into the melted chocolate and pouring the mixture into the dish are simple, hands-on tasks that give a real sense of accomplishment once the finished fudge comes out of the refrigerator looking like something from a candy shop.
A Quick Note on Portion Control
Because this fudge is dense and rich, a small slice goes further here than it would with a lighter, airier dessert. Cutting the dish into 16 smaller pieces rather than 12 standard slices is an easy way to stretch the batch a bit further for a larger gathering, while still giving everyone a satisfying, full-flavored taste of the chocolate and peanut butter.
A Note on Presentation
How you slice and arrange this fudge changes the impression it makes almost as much as the flavor itself. Cut into small, neat squares and stacked in a pyramid, it reads as something from a candy shop display case. Sliced into a few generous bars and set on a rustic wooden board, the same batch feels more like a homestyle treat fresh from the kitchen, which makes this a surprisingly versatile recipe to keep in rotation for both casual snacking and gifting.
A Quick Word on Texture Contrast
Part of what makes this fudge so satisfying is the way the dense, cool chocolate plays against the slightly softer, oilier richness of the peanut butter running through it. Topping the slices with something crunchy, chopped peanuts, a sprinkle of flaky salt, or even crushed pretzels, adds a textural contrast that a plain slice doesn’t have on its own, which is worth trying if you want to dress this up for a crowd.
A Final Note on Batch Size
Because this recipe scales so cleanly with an even one-to-one ratio, it’s worth thinking ahead about how much you actually want on hand before you start melting chocolate. A single batch tends to disappear quickly once people know it’s in the refrigerator, so doubling the ingredients from the start is often easier than finding yourself making a second batch a day later. This is also a good recipe to keep in mind around the holidays, when a few extra batches can be portioned into small gift bags or tins for neighbors and coworkers without much added effort beyond the initial doubling of ingredients.
Common Questions
Can I use a different type of chocolate?
Yes, semi-sweet, dark, or even milk chocolate chips all work well; the choice mostly comes down to how sweet you’d like the finished fudge.
Can I use natural peanut butter instead of regular?
Yes, though the finished fudge may be a touch softer than with a standard creamy peanut butter.
Why is my fudge grainy?
This usually means the chocolate overheated; use short microwave intervals and stir thoroughly between each one.
How long does this fudge need to chill?
Plan on 1 to 2 hours in the refrigerator, or until the fudge feels firm all the way through when pressed in the center.
Can I double this recipe?
Yes, use a larger pan and double both ingredients, allowing a bit more chill time for the deeper batch.
How should I store leftovers?
Keep the fudge in an airtight container in the refrigerator for up to 1 week.
Can I freeze this fudge?
Yes, wrap the slices tightly and freeze for up to 2 months; thaw in the refrigerator before serving.
2-Ingredient Chocolate PB Fudge Slices turn a bag of chocolate chips and a jar of peanut butter into a rich, dense treat with almost no effort at all. Melt, stir, pour, and chill, that’s the entire process, and the result tastes just as indulgent as it looks. Once you’ve made a batch, it’s easy to see why this particular pairing has stayed a favorite for so long, and why keeping the ingredients on hand for a last-minute treat is always a good idea.