
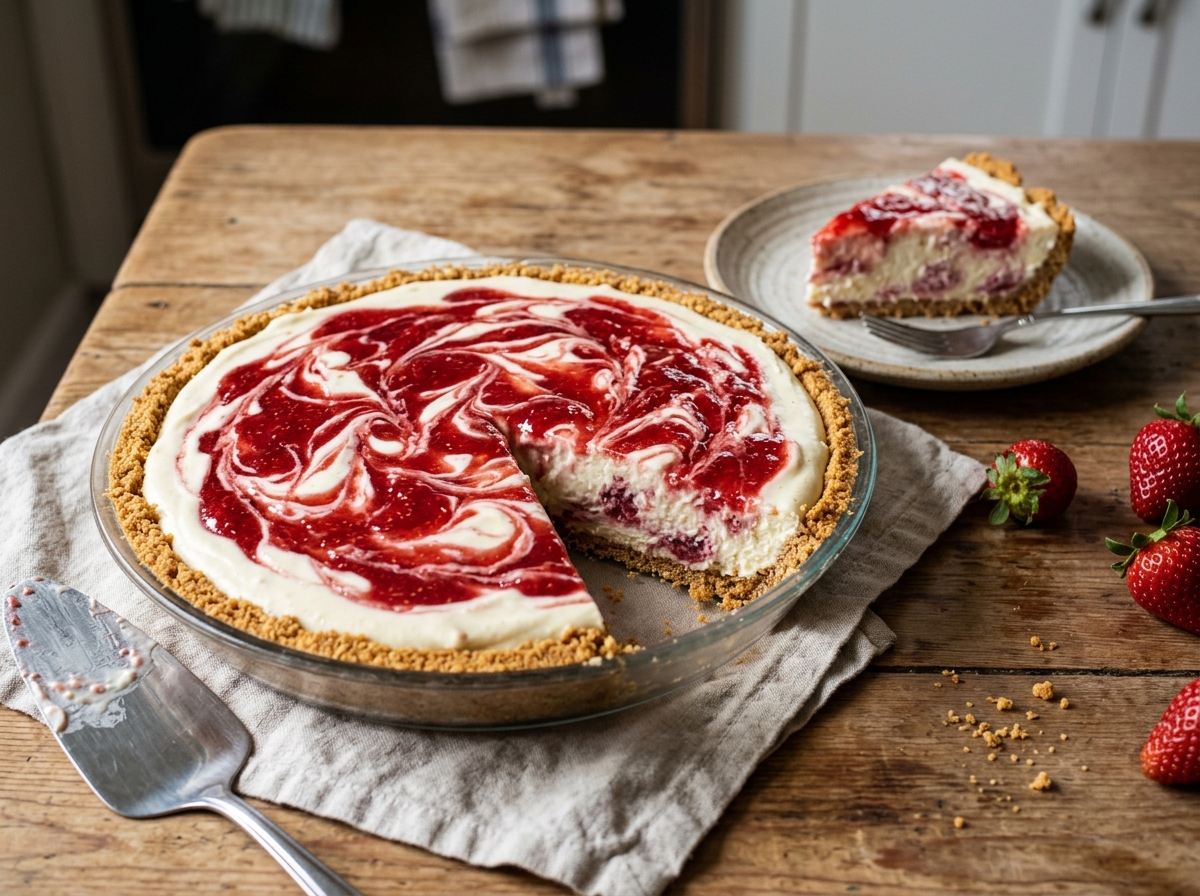
2-Ingredient No-Bake Strawberry Cheesecake Swirl Pie
A graham cracker crust filled with swirled strawberry cheesecake filling, chilled until set and ready to slice.
Thank you for reading this post, don't forget to subscribe!
Creamy, swirled with bright strawberry, and completely no-bake, this easy pie comes together with just two ingredients and a few minutes of swirling. There’s no oven and no fussy technique, just a prepared crust filled with strawberry cheesecake pie filling and swirled into a pretty pattern.
Spooning strawberry cheesecake filling into a graham cracker crust, then swirling it with a knife, is the entire process. Chilled for a few hours, the filling sets into a sliceable, creamy pie with a marbled strawberry top that looks like it took far more effort than it actually did.
It’s an easy dessert for a potluck, a spring gathering, or any time a cheesecake craving calls for something quick and no-bake.
Why This Recipe Works
Strawberry cheesecake pie filling already contains everything needed for a creamy, tangy-sweet filling, so there’s no mixing bowl, no beater, and no baking required to get a genuinely cheesecake-like result. Swirling about two-thirds of the filling into the crust first, then adding the rest in dollops on top, is what creates that marbled, bakery-style pattern without any special tools or piping skill.
Because the filling is already thickened and stabilized straight from the can, chilling alone is enough to set it into clean, sliceable pieces.
Why Swirling in Two Steps Matters
Spooning most of the filling in first and reserving a portion to dollop on top, rather than pouring it all in at once, is what gives this pie its signature marbled look once swirled. A single pour tends to settle flat and even, while the two-step approach leaves visible ribbons of filling once a knife passes through.
What You’ll Need
- 1 prepared graham cracker pie crust
- 1 (21 oz) can strawberry cheesecake pie filling
No additional equipment is needed beyond a spoon and a knife or skewer for swirling. This recipe makes 8 slices.
A Note on Ingredient Choices
A standard store-bought graham cracker crust works perfectly here and keeps the whole recipe genuinely two ingredients, though a homemade crust is a fine substitute if you prefer to make one from scratch. Strawberry cheesecake pie filling, found in the baking aisle near other canned pie fillings, is specifically formulated to taste creamy and tangy rather than like a plain fruit topping.
Equipment You’ll Need
A spoon and a knife or skewer for swirling are all you need; no oven, mixer, or baking equipment required.
How to Make It
- Add the base layer. Spoon about two-thirds of the strawberry cheesecake filling into the graham cracker crust and spread evenly.
- Dollop the rest. Add small spoonfuls of the remaining filling over the top.
- Swirl. Use a knife or toothpick to gently swirl the filling into a cheesecake-style pattern.
- Chill. Refrigerate for at least 3 hours, or until completely set.
- Serve. Slice and serve chilled.
Getting a Pretty Swirl
Dragging the tip of a knife or skewer through the dollops in a loose figure-eight pattern, rather than stirring in circles, gives the most natural, marbled look. It’s easy to overdo this step, so a few gentle passes are usually enough before the filling starts to blend together too much.

Getting an Even Swirl
Working in small sections across the top of the pie, rather than dragging the knife from edge to edge in one long stroke, helps distribute the swirl pattern evenly rather than concentrating it in the center. A few short figure-eight motions in each area of the pie give the most consistent, bakery-style result.
Knowing When It’s Done
This pie is ready once the filling feels completely firm to the touch and a slice holds its shape cleanly when lifted. If it still feels soft after 3 hours, give it another hour in the refrigerator before slicing.
Tips for a Perfect Strawberry Cheesecake Swirl Pie
Chill the pie for the full amount of time, even if it looks set sooner, since the center of the filling takes the longest to firm up completely. Use a warm, dry knife for the cleanest slices once the pie has fully set.
Troubleshooting Common Issues
My pie won’t slice cleanly. It likely needs more chilling time; a full 3 hours is sometimes needed depending on how cold your refrigerator runs. My swirl pattern disappeared. The filling was likely over-swirled; a few gentle passes of the knife give the best marbled look. My crust feels soggy. This is normal after a few hours of chilling, since the filling sits directly on the crust; slicing and serving within a day or two keeps the texture best. My filling looks uneven on top. Smoothing the base layer before adding the dollops on top helps the swirl sit more evenly across the surface.
A Few Ways to Make It Yours
Fresh Strawberry Topping
Add a ring of fresh strawberry slices around the edge after chilling.
Whipped Topping Border
Pipe whipped topping around the edge for a bakery-style finish.
Graham Crumb Garnish
Sprinkle a few extra graham cracker crumbs over the top before serving.
White Chocolate Drizzle
Drizzle melted white chocolate over the top once set for extra richness.
The classic version is worth trying first so you know the baseline flavor before adding any extras.
How to Store This Pie
Keep the pie covered in the refrigerator for up to 4 days, since the filling is a dairy-based mixture that needs to stay cold. Cover it loosely with plastic wrap or foil to keep the surface from drying out.
When to Serve This Pie
This pie works well for potlucks, spring and summer gatherings, or any time a cheesecake craving strikes and a full baking session isn’t realistic. It also makes an easy, pretty dessert to bring to a holiday table when something lighter than a heavier baked pie is welcome.
Nutrition and Serving Information
This recipe makes 8 slices at roughly 280 calories per slice, though exact calorie content will vary depending on the specific brands of crust and filling used. Because this recipe contains dairy and gluten, it isn’t appropriate for anyone avoiding those ingredients.
Make-Ahead Tips
This pie is a genuinely good make-ahead dessert, since it needs to chill before it can be sliced and holds its texture well for days afterward in the refrigerator. Making it a day ahead of a gathering removes any last-minute pressure entirely and actually gives the filling more time to set firmly.
The Science Behind a No-Bake Filling
Canned pie fillings like this one are already cooked and thickened during manufacturing, using starch to give them body and hold their shape once chilled. Because that thickening has already happened, no additional cooking, gelatin, or baking is needed; cold temperature alone is enough to firm the filling into sliceable pie.
Portioning and Yield
This recipe makes 8 generous slices from a single 9-inch pie, a good amount for a small gathering or a family dessert. Doubling the recipe into two separate pies works well for a larger crowd, since the filling doesn’t scale up neatly into one oversized crust.
A Little Bit of History
Icebox pies, chilled rather than baked, have long been a Southern and American classic, prized for how well they hold up in warm weather when turning on an oven feels like the last thing anyone wants to do. This strawberry cheesecake version leans on that same no-bake tradition while adding a cheesecake-style filling for a creamier, more indulgent twist.
Serving Suggestions
Serve this pie well chilled, straight from the refrigerator, for the cleanest slices and the best texture. A dollop of whipped topping and a few fresh strawberry slices alongside each piece dress it up nicely for a dinner party or a holiday table.
Choosing the Right Pie Filling
Strawberry cheesecake pie filling, rather than plain strawberry pie filling, is what gives this pie its creamy, tangy flavor and pale pink-and-cream swirl. Plain strawberry filling will still taste good but will swirl into a more straightforwardly fruity pie rather than one that tastes like cheesecake.
Why This Recipe Is So Beginner-Friendly
If you’ve never made a no-bake pie before, this is about as forgiving a place to start as you’ll find. There’s no oven temperature to manage, no risk of overbaking, and no delicate technique required beyond spooning filling into a crust and swirling it with a knife. With only two ingredients and a handful of simple steps, there’s very little room for the kind of mistakes that can derail a more involved baked dessert. This makes it a genuinely approachable recipe for a first-time cook or a child who wants to help in the kitchen, since the process is simple, safe, and produces a real, visible result within a few hours.
Adjusting the Flavor to Your Taste
As written, this pie gets its flavor almost entirely from the strawberry cheesecake filling spooned into the crust, giving a sweet, tangy, classic cheesecake taste. If you’d like a brighter, more pronounced strawberry flavor, folding in a few finely diced fresh strawberries along with the filling leans further in that direction. Because this recipe has so few ingredients to begin with, small changes tend to have a noticeable effect on the final flavor, so it’s worth trying the classic version first before deciding what, if anything, you’d like to change.
Pairing This Pie With Other Desserts and Drinks
Because the flavor here is creamy, tangy, and fruity, this pie pairs naturally with lighter options if you’re serving more than one dessert, since the contrast keeps a spread feeling balanced rather than overly rich. A crisp, light cookie or a citrus-based treat balances the creaminess of this pie nicely, while another berry or cheesecake dessert leans further into the same indulgent direction. On the drink side, this pie pairs well with iced tea, lemonade, or coffee.
A Note on Ingredient Proportions
Using about two-thirds of the can for the base layer and reserving the rest for the swirled topping is what gives this pie its signature marbled look, and it’s worth understanding why that split matters before changing it. Spreading the full can as the base alone, rather than saving a portion for dollops, flattens the surface and leaves nothing to swirl into a pattern. This particular approach is what gives the finished pie its bakery-style marbled top, so it’s worth treating the stated method as a tested baseline.
A Quick Note on Serving Temperature
This pie tastes best served well chilled, straight from the refrigerator, since its creamy filling softens quickly at room temperature and can lose its clean slice shape. If serving at a warm-weather gathering, keeping the pie in a cooler until just before serving helps it hold its shape on the table.
Why This Recipe Is Naturally Kid-Friendly to Make
Because this recipe involves spooning filling into a crust and swirling it with a knife, it’s a genuinely simple dessert to make with kids, with no hot stove or oven involved at any point. Dolloping the filling on top and dragging the knife through to create the swirl are satisfying, hands-on tasks that give a real sense of accomplishment once the finished pie comes out of the refrigerator set and ready to slice.
A Quick Note on Portion Control
Because this pie is rich with cream cheese filling, a smaller slice goes a long way here compared to a lighter dessert. Cutting the pie into 10 slices instead of 8 is an easy way to stretch the dessert further and keep portions naturally smaller for a larger gathering.
A Note on Presentation
How you serve this pie changes the impression it makes almost as much as the flavor itself. Sliced plainly on a plate, it reads as a simple, homemade dessert. Arranged on a cake stand with a dollop of whipped topping and a few fresh strawberries tucked alongside each slice, the same pie suddenly looks like something from a bakery display case, which makes this a surprisingly versatile recipe to keep in rotation for both casual dinners and special gatherings.

A Final Note on Batch Size
This recipe is sized for a single 9-inch pie, which keeps the whole process quick and manageable with only a few minutes of active prep plus chilling time. For a larger gathering, making two separate pies rather than trying to stretch one crust with extra filling keeps the proportions and swirl pattern looking their best, since overfilling a single crust can make it difficult to transport and slice neatly.
A Note on Cutting Clean Slices
Using a thin, sharp knife wiped clean and warmed slightly under hot water between cuts gives the neatest slices once the pie is fully set, since a cold, dry blade can drag through the creamy filling and smear the swirl pattern rather than slicing through it cleanly. Letting the pie sit for just a few minutes after coming out of the refrigerator, rather than slicing it the instant it’s done chilling, also helps each piece hold together as it’s lifted onto a plate.
A Note on Working With Canned Pie Filling
Canned cheesecake-style pie fillings are thicker and more stable than plain fruit fillings, which is exactly what makes them work so well in a no-bake setting like this one. Giving the can a good stir before spooning it into the crust helps distribute any settled liquid evenly, so the filling spreads smoothly rather than looking patchy once it’s in the crust. It’s also worth using the filling at room temperature rather than straight from a cold refrigerator, since a slightly softer filling spreads and swirls more easily than one that’s been chilled beforehand.
A Note on Working With a Pre-Made Crust
A store-bought graham cracker crust is what makes this recipe genuinely two ingredients, but a few small habits help it hold up best under a creamy filling. Letting the crust come to room temperature before filling it, rather than filling it cold from the package, helps it hold its shape and avoid cracking as it’s cut later. If the crust feels especially thin or fragile, setting it on a sturdy plate or tray before filling makes it much easier to transport once the pie is assembled and ready to chill.
A Note on Gifting or Transporting This Pie
Because this pie needs to stay cold to hold its shape, transporting it takes a little more planning than a baked dessert that can sit at room temperature. Keeping the pie in its original pie-crust container, with the lid or a layer of plastic wrap in place, makes it far easier to carry without disturbing the swirled top. A cooler bag with an ice pack underneath keeps it at a safe, firm temperature on the way to a potluck or a gathering, and refrigerating it again as soon as possible after arriving helps it hold its sliced shape for serving.
A Note on Serving a Crowd
If you’re serving more people than a single pie can comfortably cover, making two pies at once is far simpler than trying to stretch one crust with extra filling, and it means everyone gets a properly sized, well-proportioned slice. Two pies also give you the option to try a second flavor of cheesecake filling side by side, which makes for a nice little dessert spread without any extra effort beyond buying a second crust and can.
Common Questions
Can I use a homemade graham cracker crust?
Yes, a homemade crust works just as well as a store-bought one; just make sure it’s fully set before filling.
Why is my pie not setting firmly?
It likely needs more chilling time; a full 3 hours, and sometimes longer, is needed for the filling to firm up completely.
Can I use a different flavor of pie filling?
Yes, cherry or blueberry cheesecake filling both work well as substitutes using the same method.
How do I know when the pie is fully set?
It should feel firm to the touch and hold a clean slice shape when cut.
Can I make this ahead of time?
Yes, this pie can be made up to a day in advance and keeps well covered in the refrigerator.
How should I store leftovers?
Keep the pie covered in the refrigerator for up to 4 days.
Can I freeze this pie?
Freezing isn’t recommended, since the cheesecake-style filling can separate and become watery once thawed.
However you slice it and whoever you share it with, this strawberry cheesecake swirl pie delivers all the creamy, tangy appeal of a classic cheesecake in a fraction of the time, with no oven, no water bath, and no complicated process required. It’s proof that a beautiful, bakery-style dessert can come from just two ingredients and a few minutes of swirling.