
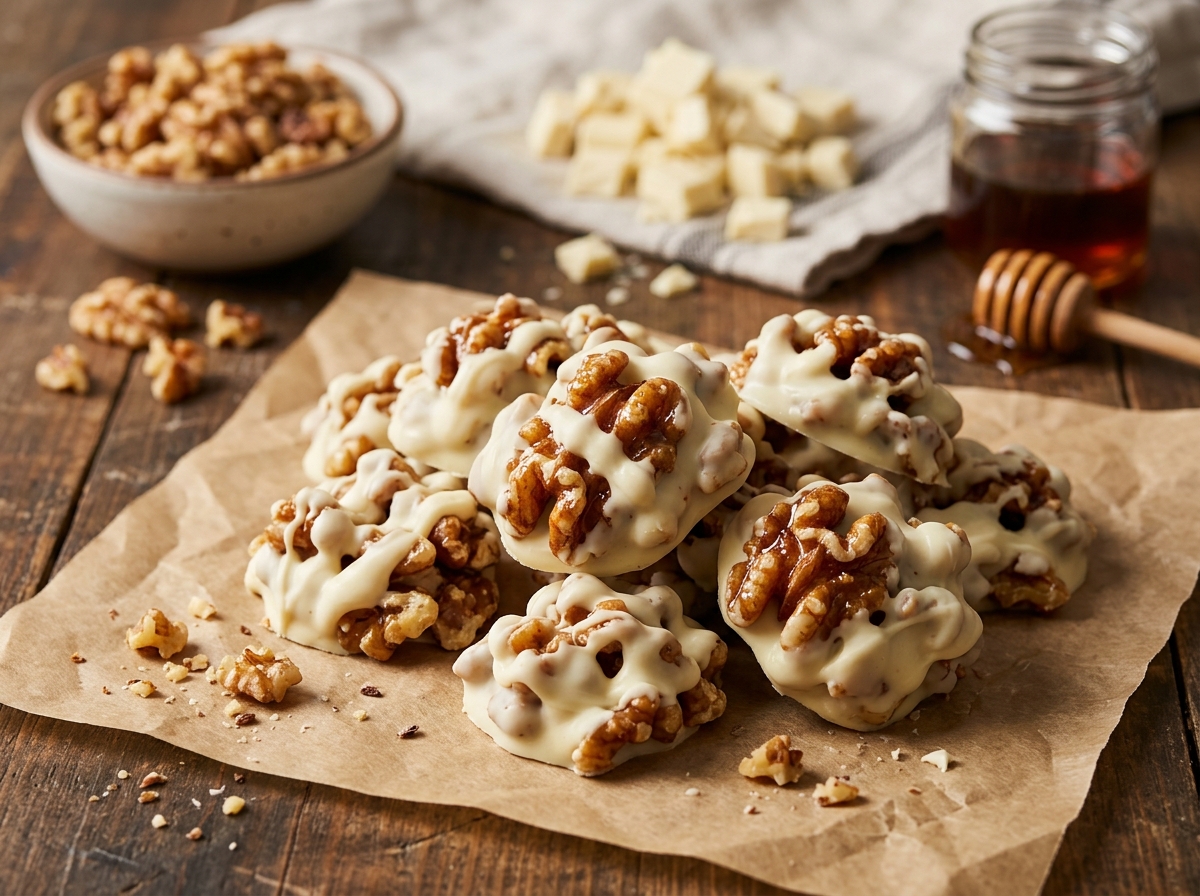
2-Ingredient Maple Walnut White Chocolate Clusters
Melted white chocolate stirred with chopped walnuts, dropped into easy clusters and chilled until snappy and firm.
Thank you for reading this post, don't forget to subscribe!
Crunchy, buttery, and full of toasty walnut flavor, these clusters come together with just two ingredients and a microwave. There’s no candy thermometer and no fussy technique, just melted white chocolate stirred with chopped walnuts.
Melting white chocolate until smooth, then stirring in chopped walnuts until every piece is coated, is the entire process. Dropped onto a parchment-lined sheet and chilled for half an hour, the mixture sets into dense, crunchy clusters with a rich, buttery walnut flavor in every bite.
It’s an easy treat for a holiday cookie tray, a fall gathering, or any time a sweet-and-nutty craving calls for something quick.
Why This Recipe Works
Melting white chocolate on its own creates a smooth, glossy coating that firms up predictably once chilled, giving these clusters real structure without a candy thermometer or any cooked sugar stage. Stirring in a generous amount of chopped walnuts, rather than just a sprinkle, is what gives every bite that satisfying crunch and rich, toasty flavor that pairs so naturally with white chocolate’s sweetness.
Because the melted white chocolate alone provides all the structure these clusters need, there’s no butter, no corn syrup, and no cooking beyond a few short bursts in the microwave.
Why the Right Chocolate Matters
White chocolate melting wafers are formulated to melt smoothly and set with a clean snap, which makes them especially reliable here, though good-quality white chocolate chips work well too. Either way, melting gently and stirring often is what keeps the chocolate glossy rather than dull or streaky once it sets.
What You’ll Need
- 2 cups white chocolate melting wafers or white chocolate chips
- 1 cup chopped walnuts
You’ll also need a baking sheet lined with parchment paper. This recipe makes 18 clusters.
A Note on Ingredient Choices
Raw or lightly toasted walnuts both work well here, though toasting them briefly in a dry skillet before chopping deepens their flavor and gives these clusters an even richer, more maple-like depth. Chopping the walnuts into medium pieces, rather than leaving them whole or chopping them too fine, gives the best balance of crunch in every cluster.
Equipment You’ll Need
A microwave-safe bowl, a spoon, and a parchment-lined baking sheet are all you need; no stovetop or oven required.
How to Make It
- Line the sheet. Line a baking sheet with parchment paper.
- Melt. Melt the white chocolate in the microwave in 20–30 second intervals, stirring until smooth.
- Stir in walnuts. Stir in the chopped walnuts until evenly coated.
- Drop. Drop spoonfuls of the mixture onto the parchment-lined baking sheet.
- Chill. Refrigerate for 20–30 minutes, or until completely firm.
- Store. Store in an airtight container.
Getting the Chocolate Smooth
Stirring thoroughly after every interval in the microwave, even before everything looks fully melted, helps distribute heat evenly and prevents the white chocolate from overheating. White chocolate is especially prone to scorching, so shorter intervals and frequent stirring matter even more here than with milk or dark chocolate.

Getting Clusters an Even Shape
Using a spoon or a small cookie scoop to drop roughly equal portions gives clusters that are uniform in size and chill at the same rate. Working quickly once the chocolate and walnuts are combined matters here, since the mixture firms up faster than you might expect once it’s off the heat.
Knowing When It’s Done
These clusters are ready once they feel completely firm to the touch and the white chocolate has lost any tackiness. If they still feel soft after 30 minutes, give them another 10 minutes in the refrigerator before serving.
Tips for Perfect Maple Walnut Clusters
Work quickly once the white chocolate is melted, since it firms up faster than you might expect once it’s off the heat and away from the microwave’s warmth. Toasting the walnuts briefly before chopping, rather than using them raw, gives these clusters a noticeably deeper, more maple-like flavor without adding any actual maple syrup to the mixture.
Troubleshooting Common Issues
My white chocolate turned grainy or seized. It was likely overheated; melt in shorter intervals next time and stir constantly. My clusters are falling apart. There may not be enough melted chocolate relative to walnuts; stir in a bit more chocolate if the mixture feels too dry. My clusters have a dull, streaky finish. This is usually a sign the chocolate was overheated or cooled too quickly; gentle, gradual melting gives the glossiest result. My walnuts taste bitter. This can happen with walnuts that have gone slightly stale; fresh walnuts from a recently opened bag give the best flavor.
A Few Ways to Make It Yours
Toasted Walnut Version
Toast the walnuts in a dry skillet for a few minutes before chopping for deeper flavor.
Sea Salt Finish
Sprinkle flaky sea salt over the top for a sweet-and-salty contrast.
Pecan Swap
Swap in chopped pecans for a slightly sweeter, softer nut flavor.
Maple Syrup Drizzle
Drizzle a little warmed maple syrup over the top right after dropping for extra flavor.
The classic version is worth trying first so you know the baseline flavor before adding any extras.
How to Store These Clusters
Keep the clusters in an airtight container at room temperature for up to two weeks, or refrigerate them for a firmer bite that lasts even longer. Because they’re made without any perishable dairy filling, they hold their texture well either way.
When to Serve These Clusters
These clusters work well for holiday cookie trays, fall gatherings, or any time a sweet-and-nutty craving strikes and a full baking session isn’t realistic. They also make an easy homemade gift to pack into a tin or cellophane bag during the cooler months.
Nutrition and Serving Information
This recipe makes 18 clusters at roughly 160 calories per cluster, though exact calorie content will vary depending on the specific brands of white chocolate and walnuts used. Because this recipe contains tree nuts, it isn’t appropriate for anyone avoiding that ingredient.
Make-Ahead Tips
These clusters are a genuinely good make-ahead treat, since they need to chill before they’re ready and hold their texture well for weeks afterward. Making a batch a few days before a holiday gathering removes any last-minute pressure entirely.
The Science Behind a No-Bake Cluster
Melted white chocolate forms a smooth, fat-based coating that hardens predictably once chilled, giving these clusters their structure without any need for corn syrup or a cooked sugar stage. Because that coating firms up reliably at cold temperatures, there’s no additional binder required at all; the melted white chocolate alone holds everything together.
Portioning and Yield
This recipe makes 18 clusters from a single batch, a good amount for a holiday tray or a gift tin. Doubling the ingredients works well for a larger batch, though it’s easiest to melt the white chocolate in two separate rounds so the microwave step stays manageable.
A Little Bit of History
Candied and chocolate-dipped walnuts have long been a holiday and fall staple, prized for the way their rich, toasty flavor pairs so naturally with sweet coatings. This version leans on that same beloved pairing while keeping the ingredient list as short as possible for an easy at-home version.
Serving Suggestions
Serve these clusters at room temperature for the best balance of crunch and chew, or chilled if you prefer a firmer, more snappable bite. A few clusters alongside a cup of coffee or hot cider makes for an easy, cozy treat during the cooler months.
Choosing the Right Walnuts
Fresh walnuts, rather than ones that have been sitting in the pantry for a long while, give these clusters their best flavor, since walnuts can turn slightly bitter or rancid as they age. A quick taste of a raw walnut before chopping is an easy way to check freshness before committing a whole batch to the mixture.
Why This Recipe Is So Beginner-Friendly
If you’ve never made a no-bake candy before, this is about as forgiving a place to start as you’ll find. There’s no oven temperature to manage, no risk of overbaking, and no delicate technique required beyond melting white chocolate and stirring in walnuts. With only two ingredients and a handful of simple steps, there’s very little room for the kind of mistakes that can derail a more involved baked treat. This makes it a genuinely approachable recipe for a first-time cook or a child who wants to help in the kitchen, since the process is simple, safe, and produces a real, visible result within just over half an hour.
Adjusting the Flavor to Your Taste
As written, these clusters get their flavor almost entirely from the white chocolate and walnuts melted and stirred together, giving a sweet, buttery, nutty taste. If you’d like a bolder, more maple-forward flavor, toasting the walnuts first and drizzling a touch of warmed maple syrup over the finished clusters leans further in that direction. Because this recipe has so few ingredients to begin with, small changes tend to have a noticeable effect on the final flavor, so it’s worth trying the classic version first before deciding what, if anything, you’d like to change.
Pairing These Clusters With Other Desserts and Drinks
Because the flavor here is rich, sweet, and nutty, these clusters pair naturally with lighter options if you’re serving more than one dessert, since the contrast keeps a spread from feeling too heavy. A crisp, light cookie or a fruit-based treat balances the richness of these clusters nicely, while another nut or white chocolate dessert leans further into the same indulgent direction. On the drink side, these clusters pair well with coffee, hot cider, or hot cocoa.
A Note on Ingredient Proportions
Using two cups of white chocolate against one cup of walnuts gives a cluster where the walnuts are generously coated without drowning in chocolate, and it’s worth understanding why that balance matters before adjusting it. Enough melted chocolate needs to be present to bind every walnut piece together into a cohesive cluster, while too little relative to the walnuts can leave the mixture crumbly and hard to shape. This particular ratio is what gives the finished batch its classic crunchy-cluster texture, so it’s worth treating the stated amounts as a tested baseline.
A Quick Note on Serving Temperature
These clusters taste good at any temperature, but they hold their shape best served at room temperature or slightly chilled, since a very cold cluster can turn firm enough to be difficult to bite through cleanly. If serving at a warm-weather gathering, keeping the tray in a cooler or shaded spot helps it hold its shape.
Why This Recipe Is Naturally Kid-Friendly to Make
Because this recipe involves melting white chocolate in the microwave and stirring in walnuts, it’s a genuinely simple treat to make with kids, provided an adult handles the microwave step. Stirring in the walnuts and dropping spoonfuls onto the sheet are satisfying, hands-on tasks that give a real sense of accomplishment once the finished clusters come out of the refrigerator set and ready to enjoy.
A Quick Note on Portion Control
Because these clusters are rich with white chocolate and walnuts, one or two go a long way here compared to a lighter snack. Dropping slightly smaller spoonfuls is an easy way to stretch the batch further and keep portions naturally smaller for a holiday tray or gift tin.
A Note on Presentation
How you serve these clusters changes the impression they make almost as much as the flavor itself. Piled plainly in a bowl, they read as a simple, homemade snack. Arranged on a tiered tray with a small pitcher of maple syrup nearby and a few whole walnuts scattered around, the same clusters suddenly look like something from a specialty candy shop, which makes this a surprisingly versatile recipe to keep in rotation for both casual snacking and holiday gatherings.

A Final Note on Batch Size
This recipe is sized to make 18 clusters, which keeps the whole process quick and manageable in well under an hour including chilling time. For a bigger batch to fill out a longer dessert table or a holiday platter, melt the white chocolate in two or three separate rounds rather than overloading the microwave bowl at once, since too much melted together at one time can overheat unevenly and turn grainy before it’s fully smooth. Working through it in smaller batches keeps the texture consistent across every cluster, and it’s a small extra step that makes a real difference once they’re chilled and ready to serve.
A Note on Toasting Walnuts Safely
Toasting walnuts deepens their flavor considerably, but they can go from perfectly golden to burnt in a matter of seconds once they get going in a hot skillet. Keeping the heat on medium-low and stirring or shaking the pan frequently, rather than walking away even briefly, is the simplest way to catch them at the right moment. Walnuts are ready once they smell noticeably toasty and have darkened just slightly; pulling them off the heat right at that point and letting them cool completely before chopping keeps their flavor at its best.
A Word on Texture
The texture of these clusters sits somewhere between a classic bark and a dense candy bar, and that in-between quality is part of what makes them feel special despite how few ingredients go into them. Because the walnuts are coated in a rich, unbroken layer of melted white chocolate rather than a light drizzle, every cluster stays dense and satisfying, with a real crunch running through each bite. A batch that’s chilled the full amount of time holds its shape cleanly when picked up, while still giving easily to a bite.
A Note on Working With White Chocolate
White chocolate behaves differently in the microwave than milk or dark chocolate, since it contains no cocoa solids and scorches far more easily under too much heat. Using shorter 20-second intervals rather than longer ones, and stirring thoroughly after each, is the simplest way to avoid a grainy, seized mixture. If the chocolate does seize despite careful heat control, there’s usually no saving that batch, so it’s worth erring on the side of patience over speed here.
A Note on Gifting This Batch
Because these clusters hold their shape well at room temperature and don’t need refrigeration to stay firm, they travel nicely as a homemade gift. Stacked into a small tin or a cellophane bag tied with ribbon, a handful of clusters makes a simple, thoughtful treat for a teacher, a neighbor, or a holiday cookie exchange. A small jar of maple syrup tucked alongside the tin is a nice touch that hints at the flavor inside without adding any extra ingredients to the clusters themselves.
A Note on Scaling Down the Batch
If a full batch of 18 clusters is more than you need, this recipe halves just as easily as it doubles, since the ratio between white chocolate and walnuts stays simple to work out either way. A smaller batch is a good option for a quick craving or a single-serving treat without committing to a full tray, and it still only takes the same handful of minutes to melt, stir, and drop before the batch goes into the refrigerator to set.
Common Questions
Can I use milk or dark chocolate instead of white chocolate?
Yes, though the maple-like flavor pairing works especially well with white chocolate’s sweetness.
Why did my clusters turn out crumbly?
There likely wasn’t enough melted chocolate to bind the walnuts; stir in a little more chocolate next time.
Do I need to toast the walnuts first?
No, raw walnuts work fine, though toasting them briefly deepens their flavor noticeably.
How do I know when the clusters are fully set?
They should feel completely firm to the touch and the chocolate should have lost any tackiness.
Can I double this recipe?
Yes, simply double both ingredients and melt the chocolate in two rounds so the microwave step stays manageable.
How should I store leftovers?
Keep the clusters in an airtight container at room temperature for up to two weeks, or refrigerate for longer freshness.
Can I freeze these clusters?
Yes, they freeze well in an airtight container for up to 3 months; thaw at room temperature before serving.
However you slice it and whoever you share it with, these maple walnut white chocolate clusters deliver all the toasty, buttery flavor of a holiday favorite in a fraction of the time, with no oven, no candy thermometer, and no complicated process required. It’s proof that two simple ingredients, handled with a little care, can turn into something genuinely worth making again.