
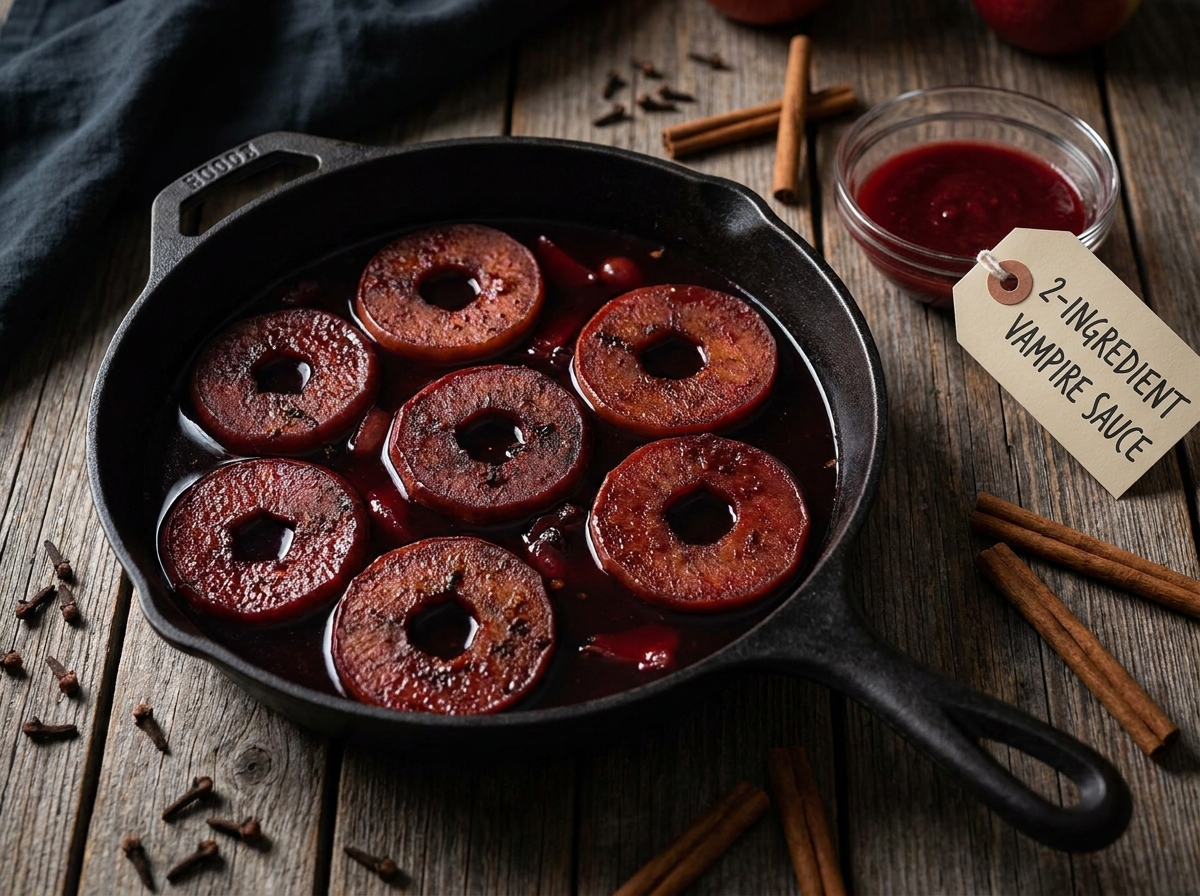
Vampire Spiced Apple Rings
Thin apple rings dusted with pumpkin pie spice and slow-dried in a low oven until chewy, dark, and ready for a spooky platter.
Thank you for reading this post, don't forget to subscribe!
Just two ingredients turn ordinary apples into a chewy, spiced Halloween snack that needs nothing more than a slow oven and a little patience. There’s no candy thermometer, no stovetop, and no fancy equipment, just thin apple rings dusted with pumpkin pie spice and dried low and slow until they’re leathery, fragrant, and deeply flavorful.
Slicing apples into rings, removing the cores to leave a hole in the center, and dusting both sides with pumpkin pie spice is most of the hands-on work here. The oven does the rest, patiently drawing moisture out of the apple slices over a couple of hours until they shrink down into chewy, deeply spiced rings.
Arranged on a dark platter, these rings look like something plucked from a haunted bakery, and a dusting of cinnamon on top only adds to the effect. It’s a naturally better-for-you Halloween treat for anyone who wants something a little different from the usual sugar-heavy candy table.
Why This Recipe Works
Slicing apples into thin, even rings and removing the cores creates a shape that dries evenly all the way through, since no part of the slice is thicker than any other. Dusting both sides with pumpkin pie spice before drying means the spice bakes directly into the surface of each ring rather than sitting on top as a loose coating.
Because the oven is set low and the apples are given a long, slow drying time, the natural sugars in the fruit have time to concentrate without burning, which is what gives these rings their deep, almost candy-like sweetness despite having no added sugar in the ingredient list.
Why Low and Slow Matters Here
Drying apples at a low oven temperature over a long stretch of time, rather than baking them quickly at a higher heat, is what keeps them from scorching before the moisture has a chance to leave the fruit. A hotter oven might brown the edges before the center of each ring has dried to the right texture.
What You’ll Need
- 2 large apples, sliced into rings
- 2 tsp pumpkin pie spice
You’ll also need a parchment-lined baking sheet. This recipe makes about 4 servings.
A Note on Choosing Apples
Firm, slightly tart apples like Granny Smith or Honeycrisp hold their shape well through a long, slow dry and offer a nice contrast to the warm pumpkin pie spice, though any apple variety you have on hand will work here. Choosing apples of a similar size helps the rings dry at roughly the same rate, so none finish too early or too late.
Equipment You’ll Need
A sharp knife or mandoline for slicing, an apple corer or small round cutter for removing the centers, a parchment-lined baking sheet, and an oven are all you need here.
How to Make It
- Wash and dry. Wash and dry the apples thoroughly.
- Slice. Slice the apples crosswise into ¼-inch (6mm) rings.
- Core. Remove the cores from the center of each slice to create ring shapes.
- Arrange. Arrange the apple rings on a parchment-lined baking sheet in a single layer.
- Spice. Sprinkle pumpkin pie spice evenly over both sides of each ring.
- Dry. For chewy rings, bake at 200°F (95°C) for 2–3 hours, flipping the rings halfway through, until dried to your preferred texture.
- Cool. Let the rings cool completely on the baking sheet before handling.
- Finish. For a spooky presentation, arrange the rings like vampire bite marks on a dark platter and serve with cinnamon yogurt dip, if desired.
Getting the Spice Coating Even
Patting the apple slices dry with a paper towel before sprinkling on the pumpkin pie spice helps the spice cling to the surface rather than sliding off into a damp puddle. A light, even dusting over both sides of each ring, rather than a heavy clump in one spot, gives the most consistent flavor in every bite.

Getting Even Drying Across the Batch
Arranging the apple rings in a single layer with a little space between each one, rather than letting them overlap, allows warm air to circulate evenly around every ring. Flipping the rings halfway through the long bake time is what keeps both sides drying at the same rate, since the side facing up dries differently than the side resting on the parchment.
Knowing When It’s Done
These rings are ready not by any single visual cue but by feel: they should be leathery and pliable rather than wet or mushy, with no sticky moisture left on the surface. Depending on how thick the slices are and how much natural moisture the apples held to begin with, the full drying time can land anywhere between 2 and 3 hours, so it’s worth checking the texture starting around the two-hour mark rather than relying on the clock alone.
Tips for Perfect Apple Rings
Slicing all the rings to a consistent thickness, ideally with a mandoline if you have one, helps the whole batch finish drying at close to the same time. Resist the urge to raise the oven temperature to speed things along, since a hotter oven tends to brown the edges of the rings well before the centers have had a chance to dry through properly.
Troubleshooting Common Issues
My rings are still soft and leathery-wet after 3 hours. Give them more time in 20-minute increments, since thicker slices or extra-juicy apples can take longer than the typical range. My rings are browning too quickly at the edges. Your oven may be running hot; double check the temperature with an oven thermometer and lower it slightly if needed. The spice isn’t sticking to the apples. The slices were likely still damp; pat them dry thoroughly with a paper towel before sprinkling on the pumpkin pie spice. My rings are cracking instead of bending. They’ve dried a bit past the chewy stage into a crispier texture, which still tastes great but won’t bend the same way; pull the next batch slightly earlier for a chewier result.
A Few Ways to Make It Yours
Cinnamon-Only Version
Swap the pumpkin pie spice for plain ground cinnamon for a simpler, more classic flavor.
Spiced Sugar Finish
Toss the warm, just-baked rings in a little cinnamon sugar for extra sweetness.
Crispier Rings
Dry for the full 3 hours or a touch longer for a crisper, chip-like texture instead of chewy.
Dipped in Chocolate
Dip one edge of each dried ring in melted dark chocolate for a spookier, richer finish.
The classic version is worth trying first so you know the baseline flavor before adding any extras.
How to Store Spiced Apple Rings
Once fully cooled, store the rings in an airtight container at room temperature for up to a week, or in the refrigerator for closer to two weeks if your kitchen tends to run warm or humid. Keeping them in a sealed container matters more than usual here, since dried fruit left exposed to air will slowly pull moisture back in and lose its chewy texture.
When to Serve These Apple Rings
These rings make a naturally better-for-you addition to a Halloween spread, offering something lighter alongside heavier chocolate and candy-based treats. They also work well packed into a lunchbox or a hiking snack bag any time of year, since dried apples travel well and don’t need refrigeration.
Nutrition and Serving Information
This recipe makes about 4 servings at roughly 50 calories per serving, though exact calorie content will vary depending on the size of the apples used and how long they’re dried. Because the only ingredients are apples and pumpkin pie spice, this recipe is naturally low in added sugar and fits comfortably into most diets.
Make-Ahead Tips
These apple rings are an excellent make-ahead snack, since they keep well in an airtight container for a week or more at room temperature. Making a batch a few days before a Halloween party or a weekend of trick-or-treating means there’s already a ready-to-go snack on hand when hunger strikes.
The Science Behind Dried Apples
Drying fruit at a low oven temperature over a long stretch of time slowly pulls water out of the apple’s cell structure through evaporation, without cooking the fruit the way a higher heat would. As the water leaves, the natural sugars already present in the apple become more concentrated relative to the remaining mass, which is why dried apple rings taste noticeably sweeter than a fresh slice despite having no added sugar.
Portioning and Yield
Two large apples typically yield enough rings for about 4 servings, depending on how many usable rings each apple produces once the stem and blossom ends are trimmed away. Doubling the apples works well for a bigger batch, though it’s worth using two baking sheets so the rings still have enough room between them to dry evenly.
A Little Bit of History
Drying fruit at home is one of the oldest ways to preserve a harvest, long predating refrigerators and sealed containers, and apples in particular have been dried this way for generations as a way to stretch a fall apple harvest well into the colder months. This spiced version leans on that same simple preservation method while adding a playful, Halloween-ready presentation that turns a practical snack into a seasonal centerpiece.
Serving Suggestions
Serve these rings piled on a dark platter or a piece of slate so their deep, spiced color stands out, and consider tucking a couple of thin almond slivers into the edge of each ring to look like vampire fangs. A small bowl of cinnamon yogurt dip alongside gives guests something to dunk the rings into for extra flavor and a little more indulgence.
Choosing the Right Spice Blend
Pumpkin pie spice, a blend that typically includes cinnamon, nutmeg, ginger, and clove, gives these rings a warm, layered flavor that leans into the fall and Halloween season. If pumpkin pie spice isn’t on hand, a simple mix of cinnamon with a pinch of nutmeg makes a close substitute, though the flavor will be slightly simpler and less layered.
Why This Recipe Is So Beginner-Friendly
If you’ve never dried fruit at home before, this is a genuinely forgiving place to start. There’s no candy thermometer and no precise timing window the way a baked good might require, since dried apples simply need enough time in a low oven to reach the texture you’re after. With just two ingredients, there’s very little room for mistakes, which makes this a great project for a first-time cook or a kid who wants to help slice, spice, and arrange the rings before the oven takes over.
Adjusting the Flavor to Your Taste
As written, these rings get their flavor almost entirely from the apples themselves and the pumpkin pie spice dusted over the surface, giving a warm, fall-forward taste. If you’d like a different flavor profile, swapping in a different spice blend, like apple pie spice or a simple cinnamon-sugar mix, shifts the whole ring in a new direction. Because this recipe has so few ingredients to begin with, small changes to the spice tend to have a noticeable effect on the final flavor, so it’s worth trying the classic version first before deciding what, if anything, you’d like to change.
Pairing These Apple Rings With Other Treats
Because the flavor here is warm, spiced, and naturally sweet rather than rich or heavy, these rings pair nicely alongside richer chocolate or caramel-based Halloween treats, since the contrast keeps a dessert spread from feeling one-note. A cup of warm cider or spiced tea makes a natural drink pairing, while a scoop of vanilla ice cream alongside a few warm rings turns this simple snack into a more complete dessert.
A Note on Ingredient Proportions
Using 2 teaspoons of pumpkin pie spice across two whole apples gives a noticeable but not overwhelming coating once it’s dusted over every ring, and it’s worth understanding why that balance matters before adjusting it. Too much spice relative to the surface area of the rings can leave a bitter, overly intense coating, while too little barely registers once the apples have dried and concentrated in flavor. This particular ratio is what gives the finished rings their balanced, warmly spiced taste, so it’s worth treating the stated amount as a tested baseline.
A Quick Note on Serving Temperature
These rings taste good at room temperature, which is also how they’re easiest to store and transport, though a few minutes in a warm oven right before serving brings out their spice and aroma even more. If serving warm, let them cool just slightly before handling, since a fresh-from-the-oven ring can be surprisingly hot despite its thin shape.
Why This Recipe Is Naturally Kid-Friendly to Make
Because the hands-on steps here involve arranging rings on a tray and sprinkling on spice, with the slicing and coring handled by an adult, this is a genuinely fun recipe to make with kids. Watching the rings slowly shrink and darken over a couple of hours in the oven also makes for a neat, low-stakes kitchen science lesson about how drying works.
A Quick Note on Portion Control
Because these rings are naturally low in calories and contain no added sugar, they’re an easy snack to enjoy a few of without much guilt compared to a typical Halloween candy. Portioning out a small handful per serving rather than setting out the whole batch loose on a table still helps keep snacking a little more mindful at a party.
A Note on Presentation
How you serve these rings changes the impression they make almost as much as the flavor itself. Piled plainly in a bowl, they read as a simple, wholesome snack. Arranged on a dark platter with a bowl of deep red dipping sauce and a scatter of cinnamon sticks, the same rings suddenly look like something from a haunted bakery, which makes this a surprisingly dramatic recipe to keep in rotation each Halloween.

A Final Note on Batch Size
This recipe is sized to make about 4 servings from two apples, which keeps the whole process manageable within a single oven load. For a bigger batch to fill out a longer Halloween snack table, slice and spice the apples in the same way but spread them across two baking sheets rather than crowding them onto one, since too many rings packed too closely together will dry unevenly and take longer overall.
A Word on Texture
The texture of these rings sits somewhere between a soft dried fruit and a leathery chew, depending on how long they spend in the oven. Pulled early, around the two-hour mark, they stay pliable and tender; left the full three hours, they firm up into something closer to a dried-fruit chip. Neither result is wrong, so it’s worth checking in on the rings partway through the bake to see which direction they’re heading.
A Note on Working With Thin Apple Slices
Cutting apples into thin, even rings takes more care than slicing for a pie, since unevenly cut rings dry at different rates and some finish well before others. A mandoline set to roughly a quarter inch gives the most consistent results, though a sharp knife and a steady hand work fine too. Removing the core cleanly, ideally with a small round cutter, keeps the ring shape intact.
A Note on Gifting This Batch
Because dried apple rings hold up well outside the refrigerator, they travel nicely as a homemade gift, packed into a cellophane bag or a small tin with a ribbon. A dozen or so rings layered with parchment makes a simple, naturally better-for-you gift for a neighbor or a classroom treat exchange that stands apart from the usual sugary Halloween fare.
A Note on Scaling Down the Batch
If a full batch of 4 servings is more than you need, this recipe halves easily using a single apple instead of two, with the spice reduced to match. A smaller batch is a good option for a quick snack without committing to a full tray, and it still only takes a couple of minutes to slice, core, and spice before the oven takes over.
Common Questions
Do I need to peel the apples first?
No, the peel is left on; it holds its shape well during drying and adds a slightly deeper color to the finished ring.
Why is my oven set so low?
A low temperature of 200°F dries the apples slowly without cooking or browning them the way a hotter oven would.
Can I use a different spice instead of pumpkin pie spice?
Yes, plain cinnamon or apple pie spice both work well as substitutes.
How do I know when the rings are done?
They should feel leathery and pliable rather than wet, with no sticky moisture left on the surface.
Can I speed up the drying time with a higher oven temperature?
It’s not recommended, since a hotter oven tends to brown the edges before the centers have fully dried.
How should I store the finished rings?
Keep them in an airtight container at room temperature for up to a week, or in the refrigerator for closer to two weeks.
Can I double this recipe?
Yes, simply double both ingredients and use two baking sheets so the rings still have room to dry evenly.
However you dress them up for the table, these vampire spiced apple rings deliver warm, concentrated apple flavor with nothing more than two pantry ingredients and a patient oven. It’s proof that a simple, wholesome snack can still earn its place on a spooky Halloween spread.