
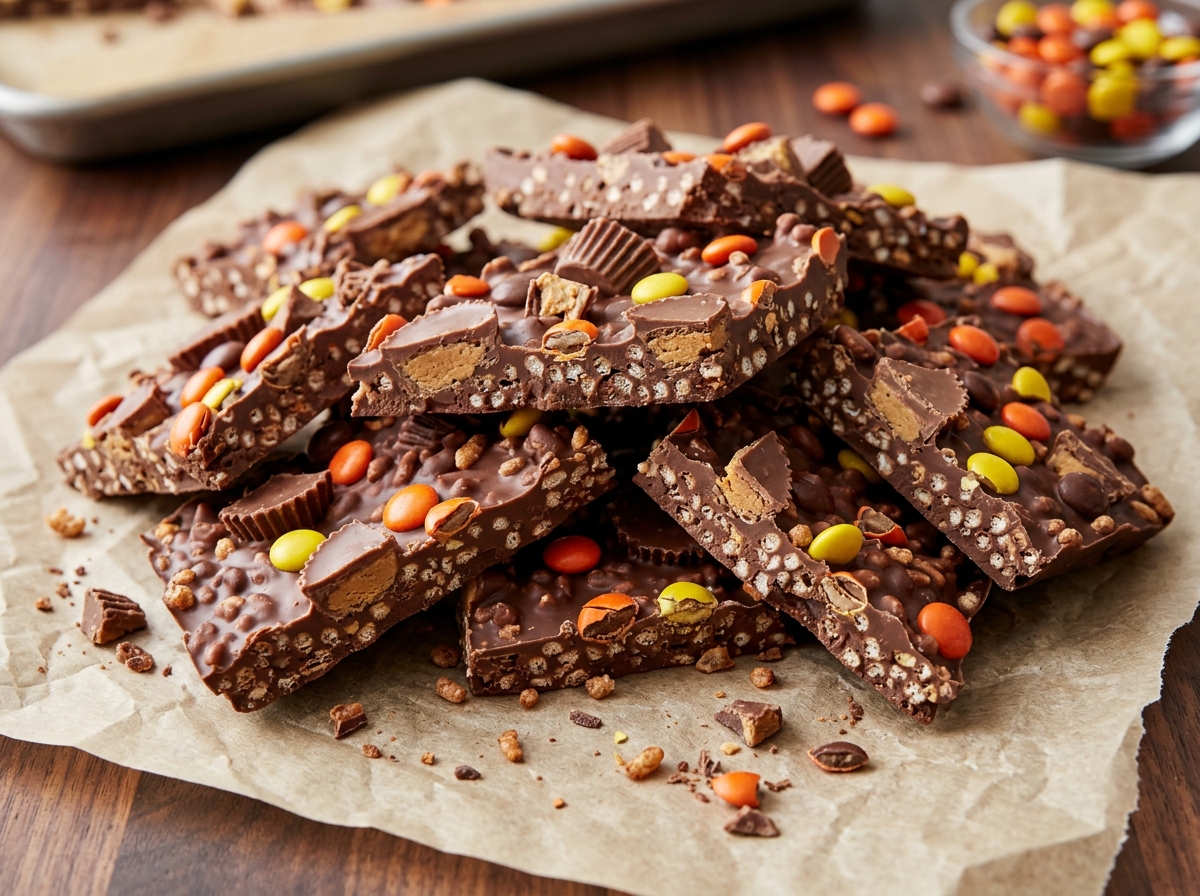
Reese’s Peanut Butter Cup Bark
Melted milk chocolate swirled with warm peanut butter and chilled into a crackable bark that tastes just like a peanut butter cup.
Thank you for reading this post, don't forget to subscribe!
Just two ingredients turn into a swirled chocolate and peanut butter bark that tastes exactly like a peanut butter cup, no oven and no candy thermometer required. There’s a smooth milk chocolate base poured onto a sheet and swirled with warm peanut butter before it chills into a firm, snappable bark.
Melting milk chocolate chips, spreading most of it onto a lined baking sheet, drizzling warm peanut butter over the top, and swirling the rest of the chocolate through with a toothpick is most of the process here. A chill in the refrigerator is all that’s left before this bark is ready to break into pieces.
Rich, chocolatey, and swirled with warm peanut butter, this bark is a quick no-bake treat for a movie night, a holiday candy tray, or any time a craving for something that tastes like a peanut butter cup hits.
Why This Recipe Works
Melting milk chocolate chips and spreading most of it onto a lined baking sheet creates a smooth, even base without any cooked sugar syrup or candy thermometer involved, since melted chocolate firms up on its own as it cools and chills. Drizzling warm peanut butter over that still-soft chocolate and swirling in the remaining chocolate with a toothpick creates a marbled, peanut-buttery pattern that sets right into the bark as it firms.
Because milk chocolate and peanut butter are both soft and pourable while warm, this swirling technique works without needing any layering or folding, just a spread, a drizzle, and a few gentle strokes of a toothpick through the top.
Why Working While Warm Matters
Swirling the peanut butter into the chocolate while everything is still warm and soft, rather than waiting until the base starts to firm up, is what creates that smooth, marbled pattern. Once the chocolate begins to set, a toothpick will only drag through the surface rather than blending the two together into a true swirl.
What You’ll Need
- 2 cups (340g) milk chocolate chips
- ¾ cup (190g) creamy peanut butter
You’ll also need a baking sheet lined with parchment paper. This recipe makes about 12 pieces.
A Note on Ingredient Choices
Good-quality milk chocolate chips, rather than a chocolate confectionery coating, melt more smoothly and give a richer, more authentic flavor to the finished bark. A standard creamy peanut butter, rather than a natural, oil-separated style, swirls more evenly and holds a cleaner pattern once chilled.
Equipment You’ll Need
A microwave, a microwave-safe bowl, an offset spatula or the back of a spoon, a toothpick or skewer, and a baking sheet lined with parchment paper are all you need; no oven required.
How to Make It
- Prep. Line a baking sheet with parchment paper.
- Melt. Melt the chocolate chips in the microwave in 20–30-second intervals, stirring until smooth.
- Warm the peanut butter. Warm the peanut butter slightly until easy to drizzle.
- Spread. Spread about two-thirds of the melted chocolate onto the prepared baking sheet.
- Drizzle and swirl. Drizzle the peanut butter over the chocolate, then add the remaining chocolate and swirl gently with a toothpick.
- Chill. Refrigerate for 1–2 hours, until completely firm.
- Break and serve. Break into pieces and serve.
Getting a Pretty Swirl
Drizzling the warm peanut butter in thin, even lines across the spread chocolate, rather than in one large pool, gives you more control when swirling and leads to a more even, marbled pattern. Dragging the toothpick through in a loose figure-eight motion, rather than stirring in circles, keeps the swirl looking natural rather than muddled.

Getting an Even Layer
Spreading the melted chocolate onto the baking sheet with an offset spatula before drizzling, working from the center outward, helps it settle into a level, even layer. An uneven base layer can make the swirled topping look lopsided once the bark is broken into pieces.
Knowing When It’s Done
This bark is ready to break into pieces once it feels completely firm throughout, with no soft or tacky spots left anywhere on the sheet. If the center still feels slightly soft after 2 hours, give it more time, checking every 20 minutes until it firms up fully.
Tips for Perfect Peanut Butter Cup Bark
Working quickly once the chocolate is melted and spread helps you drizzle and swirl in the peanut butter before the chocolate starts to firm up on its own. Using a thin wooden skewer instead of a regular toothpick gives a little more reach and control for a more intricate swirl pattern.
Troubleshooting Common Issues
My chocolate is seizing up instead of melting smoothly. It was likely overheated; melt in shorter 15-second bursts and stir more frequently. My swirl looks muddled instead of defined. The chocolate and peanut butter were probably overmixed; a few gentle strokes of the toothpick is usually enough. My peanut butter is sinking instead of swirling on top. The chocolate may have cooled too much before drizzling; work a little faster next time. My bark is too soft to break even after chilling. Give it more time in the refrigerator; a full 2 hours, or even overnight, gives the cleanest break.
A Few Ways to Make It Yours
Chopped Peanut Butter Cups
Press chopped peanut butter cups into the swirl before it chills for an even more candy-like finish.
Sea Salt Finish
Sprinkle a little flaky sea salt over the wet swirl for a sweet-salty contrast.
Dark Chocolate Version
Swap the milk chocolate chips for dark chocolate chips for a deeper, less sweet bark.
Crushed Peanut Topping
Scatter chopped roasted peanuts over the swirl before chilling for extra crunch.
The classic version is worth trying first so you know the baseline flavor before adding any extras.
How to Store Peanut Butter Cup Bark
Keep the bark in an airtight container in the refrigerator for up to two weeks, since the chocolate base holds its texture best when kept cool. Let it sit for a few minutes at room temperature before serving if you prefer a slightly softer bite.
When to Serve This Bark
This bark works beautifully for a movie night, a holiday candy tray, or any time a quick chocolate and peanut butter fix sounds appealing. It also makes a lovely addition to a homemade gift box alongside other no-bake treats.
Nutrition and Serving Information
This recipe makes about 12 pieces at roughly 230 calories per serving, though exact calorie content will vary depending on the specific brands of chocolate and peanut butter used. Because this recipe contains dairy and peanuts, it isn’t appropriate for anyone avoiding those ingredients.
Make-Ahead Tips
This bark is a genuinely good make-ahead treat, since it holds its texture well in the refrigerator for up to two weeks after chilling. Making a batch several days before a gathering removes any last-minute pressure entirely.
The Science Behind This Bark
Milk chocolate is made mostly of cocoa solids, cocoa butter, milk solids, and sugar, which is why it melts smoothly at a moderate temperature but also scorches easily if overheated too quickly. As the melted chocolate cools, the cocoa butter re-solidifies into a firm, snappable base, while the peanut butter swirled through stays slightly softer, since its oil content keeps it from firming up quite as hard as the chocolate around it.
Portioning and Yield
This recipe makes about 12 pieces from a single baking sheet, a good amount for a gathering or a gift tray. Doubling the ingredients and using two separate baking sheets works well for a larger batch, since spreading too much warm chocolate across one sheet makes it harder to drizzle and swirl evenly before it firms.
A Little Bit of History
Bark-style candy, where melted chocolate is spread thin and studded or swirled with mix-ins before being broken into irregular pieces, has long been a popular way to turn a simple candy into something that looks far more impressive than the effort required. Swirling in peanut butter leans directly into the flavor of a classic peanut butter cup, giving this bark its own familiar, crowd-pleasing personality.
Serving Suggestions
Serve this bark broken into irregular pieces, arranged on a wood board with a few whole peanut butter cups and a small jar of peanut butter scattered around for a playful, candy-shop presentation. A light dusting of cocoa powder over the platter adds a nice finishing touch if you want to dress it up further.
Choosing the Right Peanut Butter
A standard, shelf-stable creamy peanut butter works best here, since it stays smooth and pourable when warmed and swirls into a defined pattern rather than separating. If the only peanut butter available seems stiff, warming it just a few extra seconds in the microwave helps it drizzle more like a looser peanut butter.
Why This Recipe Is So Beginner-Friendly
If you’ve never made swirled bark before, this is a genuinely forgiving place to start, since there’s no cooked sugar stage and no candy thermometer involved. With just two ingredients and a few gentle strokes of a toothpick, there’s very little room for the kind of mistakes that can derail a more involved candy recipe, which makes this a great project for a first-time cook or a kid who wants to help with the swirling step.
Adjusting the Flavor to Your Taste
As written, this bark gets its flavor almost entirely from the milk chocolate base and the peanut butter swirled through it, giving a sweet, nutty, classic peanut butter cup taste. If you’d like a different flavor profile, swapping in dark chocolate or a flavored peanut butter shifts the whole bark in a new direction while keeping the same simple method. Because this recipe has so few ingredients to begin with, small changes tend to have a noticeable effect on the final flavor, so it’s worth trying the classic version first before deciding what, if anything, you’d like to change.
Pairing This Bark With Other Treats and Drinks
Because the flavor here is rich and chocolatey with a nutty peanut butter swirl, this bark pairs naturally with lighter, fruit-based desserts if you’re serving more than one, since the contrast keeps a spread from feeling too heavy. A simple fruit salad or a light sorbet balances these nicely, while another chocolate or peanut butter treat leans further into the same indulgent direction. On the drink side, this bark pairs well with coffee, cold milk, or hot chocolate.
A Note on Ingredient Proportions
Using 2 cups of milk chocolate against ¾ cup of peanut butter keeps the bark mostly chocolatey, with the peanut butter appearing as a rich, swirled accent rather than overwhelming the base, and it’s worth understanding why that balance matters before adjusting it. Using too much peanut butter relative to the chocolate can keep the bark from setting firmly, since the extra oil interferes with how the chocolate solidifies. This particular ratio is what gives the finished bark its classic marbled look and balanced sweetness, so it’s worth treating the stated amounts as a tested baseline.
A Quick Note on Serving Temperature
This bark tastes good straight from the refrigerator, which is also how it holds its shape best, since a warm piece can soften enough for the chocolate base to lose its snap. If serving at a warm gathering, keeping the platter in a cooler or shaded spot helps the bark hold.
Why This Recipe Is Naturally Kid-Friendly to Make
Because this recipe involves spreading melted chocolate onto a sheet and swirling peanut butter on top with a toothpick, it’s a genuinely fun treat to make with kids, with the microwave melting step handled by an adult. Swirling the peanut butter into different patterns is an especially fun, creative task that makes this an easy weekend project.
A Quick Note on Portion Control
Because this bark is rich with chocolate and peanut butter, a small piece goes a long way here compared to a lighter snack. Breaking the sheet into smaller pieces, as the yield suggests, is an easy way to stretch the batch further for a larger gathering.

A Note on Presentation
How you finish this bark changes the impression it makes almost as much as the flavor itself. Broken plainly into pieces, it reads as a simple homemade candy. Arranged on a wood board with whole peanut butter cups and a jar of peanut butter nearby, the same bark suddenly looks like something from a specialty candy shop, which makes this a recipe worth dressing up for a gathering or keeping simple for an everyday treat.
A Final Note on Batch Size
This recipe is sized to make about 12 pieces from a single baking sheet, which keeps the whole process manageable within about two hours including the chilling step. For a bigger batch to fill out a longer candy table, melt the chocolate in separate rounds and use two baking sheets rather than trying to scale everything up onto a single sheet, since too large a volume of warm chocolate becomes harder to spread and swirl evenly.
A Word on Texture
The texture of this bark comes from the contrast between the firm, snappable chocolate base and the slightly softer peanut butter swirled through the top. That contrast is part of what makes this bark interesting to eat, and it’s why working while everything is still warm matters so much, since a cooled, firm base won’t take the swirl nearly as well as a warm, pourable one.
A Note on Working With Melted Chocolate
Milk chocolate behaves a little differently from dark chocolate when melted, since its higher milk solid and sugar content make it scorch more easily under too much heat. Melting it in short intervals and stirring thoroughly between each is the simplest way to avoid a grainy, seized mixture that won’t spread or swirl smoothly. Using a completely dry bowl and dry utensils also matters more than usual here, since even a single drop of water can cause melting chocolate to seize into a thick, unworkable mass.
A Note on Gifting This Batch
Because it holds its shape well once chilled, this bark travels nicely as a homemade gift, provided it’s kept reasonably cool along the way. Layered into a small tin with parchment between layers, a dozen or so pieces makes a simple, pretty gift for a peanut butter cup fan, and the swirled top looks lovely without any extra decorating needed.
A Note on Scaling Down the Batch
If a full batch of 12 pieces is more than you need, this recipe halves easily, since the ratio between chocolate and peanut butter stays simple to work out either way. A smaller batch is a good option for a quick craving or a single gift box without committing to a full sheet, and it still only takes the same handful of minutes to melt, spread, drizzle, and chill before the bark is ready to break.
A Note on Choosing Your Baking Sheet
A standard rimmed baking sheet gives this bark a nicely even thickness once the chocolate is spread and swirled. A smaller sheet, or a sheet pan with higher sides, works too, but keep in mind a smaller surface area will leave the bark noticeably thicker, which means it may need a little extra time in the fridge before it’s completely firm. Metal baking sheets conduct cold efficiently, which can help the bark set a touch faster than it would on a different surface. Whatever sheet is used, the parchment lining matters more than the material, since it’s what allows the finished bark to lift off cleanly in one solid piece rather than needing to be scraped off in pieces.
Why Parchment Paper Makes a Difference
It’s worth taking the extra minute to line the baking sheet properly, letting the parchment hang over two opposite edges so there’s something to grip when it’s time to lift the set bark off. Smoothing out any major wrinkles before spreading the chocolate keeps the bottom of the bark from picking up a textured pattern. This small step saves a lot of frustration later, since bark that’s stuck to a bare sheet is much harder to remove in neat pieces, and a few jagged edges can throw off how evenly sized the broken pieces turn out to be.
Common Questions
Can I use dark chocolate instead of milk chocolate?
Yes, dark chocolate chips work well here and give a less sweet, more intense bark.
Why is my chocolate seizing up instead of melting smoothly?
It was likely overheated; melt in shorter bursts and stir more frequently between each.
Why does my swirl look muddled instead of defined?
The chocolate and peanut butter were likely overmixed; a few gentle strokes of the toothpick is usually enough.
How do I know when the bark is fully set?
It should feel completely firm throughout, with no soft or tacky spots anywhere on the sheet.
Can I double this recipe?
Yes, simply double both ingredients and use two baking sheets instead of one.
How should I store leftovers?
Keep the bark in an airtight container in the refrigerator for up to two weeks.
Can I freeze this bark?
Yes, it freezes well in an airtight container for up to 2 months; thaw in the refrigerator before serving.
However you swirl it and whoever you share it with, this Reese’s peanut butter cup bark delivers rich, chocolatey sweetness with a warm, nutty peanut butter swirl from nothing more than two simple ingredients. It’s proof that a quick no-bake treat can taste just like the candy it’s named after.