
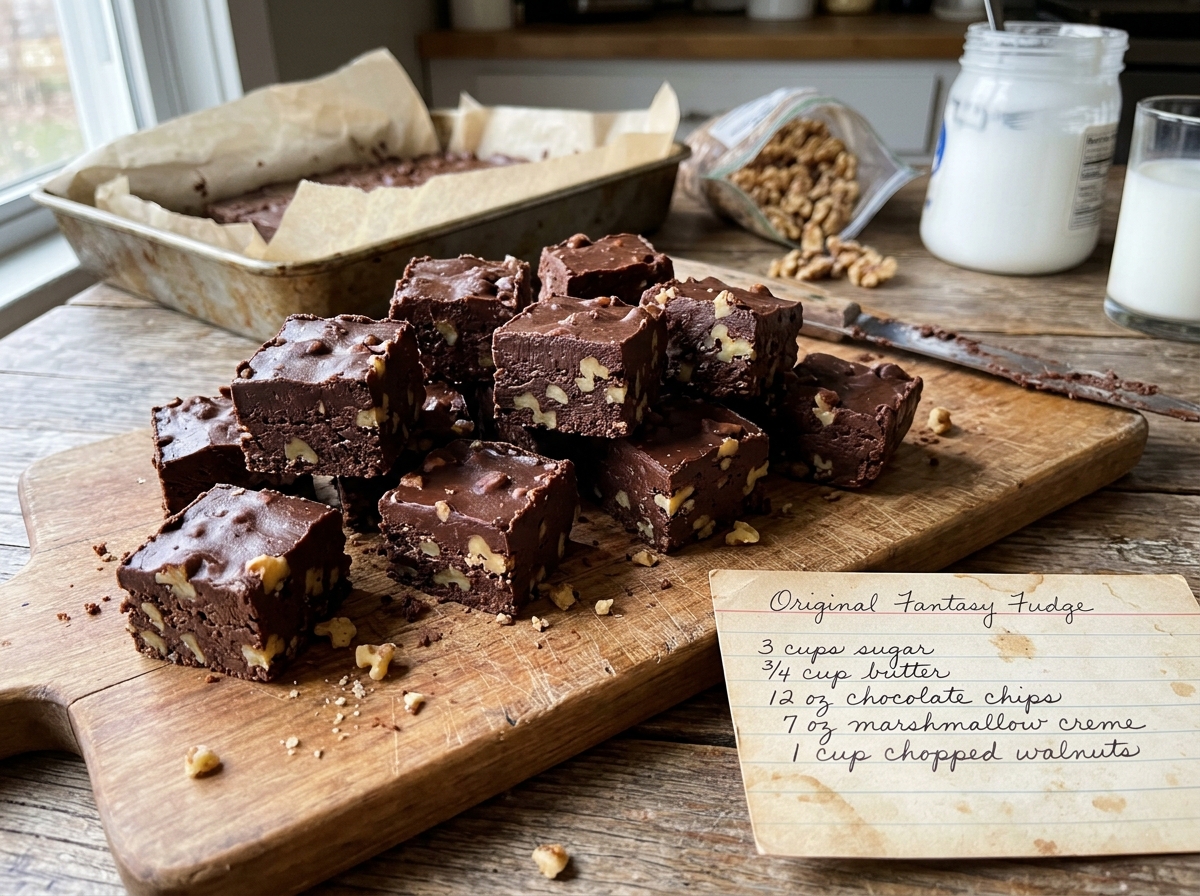
Original Fantasy Fudge
Sugar, butter, and evaporated milk boiled to the soft-ball stage, then stirred with chocolate chips and marshmallow creme into rich, creamy, classic fudge.
Thank you for reading this post, don't forget to subscribe!
A handful of pantry staples turn into the rich, creamy, wonderfully chocolatey fudge so many families make every holiday season. There’s sugar, butter, and evaporated milk boiled together on the stovetop, then stirred with chocolate chips, marshmallow creme, and vanilla until thick, glossy, and smooth.
Bringing the sugar mixture to a full rolling boil, cooking it for five minutes while stirring constantly, stirring in the chocolate and marshmallow creme off the heat, and spreading everything into a lined pan is most of the process here. A few hours of cooling at room temperature is all that’s left before this fudge is ready to slice.
Smooth, rich, and full of old-fashioned charm, this fudge is a classic for Christmas candy trays, holiday parties, homemade gift boxes, or any time a square of real chocolate fudge sounds just right.
Why This Recipe Works
Boiling sugar, butter, and evaporated milk together drives off water and concentrates the sugar until the mixture reaches the soft-ball stage, around 234°F, which is the point where fudge will set firm but stay creamy once it cools. Stirring in chocolate chips off the heat melts them into that hot syrup, adding deep chocolate flavor and extra richness from the cocoa butter.
The marshmallow creme is the secret to this recipe’s reputation for being nearly foolproof. It keeps the sugar from forming large, gritty crystals as the fudge cools, so the finished squares come out smooth and creamy every time, without the careful beating and cooling that traditional fudge requires.
Why Stirring Constantly Matters
Stirring the sugar mixture continuously while it boils, rather than leaving it to bubble on its own, keeps the milk solids and sugar from settling on the bottom of the pan and scorching. Evaporated milk browns quickly at high temperatures, and constant stirring is what keeps the fudge tasting rich and chocolatey instead of burnt.
What You’ll Need
- 3 cups (600g) granulated sugar
- ¾ cup (170g) butter
- ⅔ cup (160ml) evaporated milk
- 12 oz (340g) semi-sweet chocolate chips
- 1 jar (7 oz / 198g) marshmallow creme
- 1 teaspoon vanilla extract
- 1 cup (115g) chopped walnutsOptional.
You’ll also need a 9-inch square pan lined with parchment paper or lightly greased, a large heavy saucepan, and a candy thermometer for best results. This recipe makes 36 squares.
A Note on Ingredient Choices
Evaporated milk, not sweetened condensed milk, is what this classic recipe calls for, since condensed milk already contains a large amount of sugar and would throw off the balance of the fudge. Real butter gives the richest flavor and smoothest texture, and good-quality semi-sweet chocolate chips keep the sweetness in check against the sugar and marshmallow creme.
Equipment You’ll Need
A large heavy-bottomed saucepan, a wooden spoon or heatproof spatula, a candy thermometer, and a 9-inch square pan lined with parchment paper are all you need; no oven required.
How to Make It
- Prepare the pan. Line a 9-inch square pan with parchment paper or lightly grease it.
- Combine. Combine the sugar, butter, and evaporated milk in a large saucepan.
- Boil. Bring the mixture to a full rolling boil over medium heat, stirring constantly.
- Cook. Boil for 5 minutes, stirring continuously to prevent scorching. For best results, use a candy thermometer and cook to approximately 234°F (112°C).
- Add the chocolate. Remove the saucepan from the heat. Stir in the chocolate chips until melted and smooth.
- Add the creme and vanilla. Add the marshmallow creme and vanilla extract, mixing until fully combined.
- Add the walnuts. Fold in the chopped walnuts if desired.
- Spread. Pour the mixture into the prepared pan and spread evenly.
- Cool and cut. Let cool at room temperature until set, then cut into small squares.
Getting a Smooth, Glossy Finish
Stirring the chocolate chips and marshmallow creme in quickly and thoroughly while the syrup is still very hot is what gives this fudge its glossy, even finish. Keep stirring until no streaks of white creme remain and the mixture looks uniformly dark and shiny, then spread it into the pan right away, before it begins to thicken.

Getting an Even Layer
Pouring the hot fudge into the center of the pan and spreading it quickly toward the corners with a spatula helps it settle into a smooth, level layer before it begins to set. Because the mixture thickens fast, work in a few confident strokes rather than going back over it repeatedly, which can leave the surface dull and streaky.
Knowing When It’s Done
On the stovetop, the syrup is ready once it reaches about 234°F on a candy thermometer, or after a full 5 minutes at a rolling boil. In the pan, the fudge is ready to cut once it feels completely firm across the whole surface, including the center, which usually takes 2 to 3 hours at room temperature.
Tips for Perfect Fantasy Fudge
Using a large, heavy saucepan, rather than a small or thin one, gives the boiling mixture room to bubble up without spilling over and spreads the heat evenly to prevent scorching. Starting the 5-minute timer only once the mixture reaches a full rolling boil, one that keeps bubbling even while you stir, is key to a fudge that sets properly.
Troubleshooting Common Issues
My fudge didn’t set. The syrup likely didn’t boil long enough or reach 234°F; use a candy thermometer and start timing only at a full rolling boil. My fudge is grainy. Sugar crystals may have formed on the sides of the pan; stir constantly and brush down the sides with a wet pastry brush if needed. My fudge tastes slightly burnt. The milk scorched on the bottom; stir continuously and use a heavy-bottomed pan. My fudge set too hard. It was probably cooked too long or too hot; check your thermometer’s accuracy in boiling water before the next batch.
A Few Ways to Make It Yours
Peanut Butter Fantasy Fudge
Swap the chocolate chips for peanut butter chips for a creamy peanut butter version.
Pecan Fudge
Use chopped toasted pecans in place of walnuts for a sweeter, buttery crunch.
Mint Chocolate
Replace the vanilla with peppermint extract and top with crushed candy canes.
Walnut Topping
Press a few extra walnut pieces into the top before the fudge sets for a classic finish.
The classic version is worth trying first so you know the baseline flavor before adding any extras.
How to Store This Fudge
Keep the fudge in an airtight container at room temperature for several days, with parchment between any stacked layers so the squares don’t stick together. For longer storage, keep it in the refrigerator for up to two weeks, or freeze it well wrapped for up to three months and thaw it in the refrigerator before serving.
When to Serve This Fudge
This fudge works beautifully on a Christmas candy tray, at a holiday open house, a cookie exchange, or a family gathering. It’s also a classic homemade gift during the holiday season, when a tin of real chocolate fudge is always welcome.
Nutrition and Serving Information
This recipe makes 36 squares at roughly 150 calories per square, though exact calorie content will vary depending on portion size and whether the optional walnuts are included. Because this recipe contains dairy and, when walnuts are added, tree nuts, it isn’t appropriate for anyone avoiding dairy or with a nut allergy; simply leave the walnuts out for a nut-free version.
Make-Ahead Tips
This fudge is a genuinely good make-ahead treat, since it keeps well for several days at room temperature and even longer in the refrigerator. Making it a week or so before the holidays, then storing it airtight, removes any last-minute pressure entirely.
The Science Behind This Fudge
As the sugar, butter, and evaporated milk boil, water steadily evaporates and the sugar becomes more concentrated, raising the temperature of the syrup. At about 234°F, the soft-ball stage, there’s just enough water left for the fudge to set firm but still feel soft and creamy. Traditional fudge relies on careful cooling and beating to keep sugar crystals small, but the marshmallow creme in this recipe, made from corn syrup, sugar, and egg whites, gets in the way of large crystals forming, which is why fantasy fudge turns out smooth with so little fuss.
Portioning and Yield
This recipe makes 36 small squares from a single 9-inch pan, cut 6 rows by 6 rows, a generous amount for a holiday party or several gift tins. Cutting it 8 by 8 gives 64 bite-sized pieces for a crowded candy tray.
A Little Bit of History
Fantasy fudge became a holiday favorite in the mid-twentieth century, when a version of this recipe was printed on jars of marshmallow creme and quickly found its way into family recipe boxes across the country. Its reputation for being easier and more reliable than old-fashioned cooked fudge made it a Christmas tradition in countless homes, often copied by hand onto well-loved recipe cards.
Serving Suggestions
Serve this fudge at room temperature, cut into neat squares and stacked on a wooden board or platter lined with parchment. A small bowl of walnuts and a vintage recipe card set alongside make a warm, nostalgic presentation for a holiday table.
Choosing the Right Chocolate
Semi-sweet chocolate chips are the classic choice here, offering a rich, balanced chocolate flavor that holds its own against the sugar and marshmallow creme. Milk chocolate chips make a sweeter, milder fudge, while bittersweet chips give a deeper, more intense chocolate taste for anyone who prefers a less sweet treat.
Why This Recipe Is Approachable With a Thermometer
If you’ve never made stovetop fudge before, this is a genuinely approachable place to start, since the marshmallow creme makes the fudge far more forgiving than traditional recipes. A candy thermometer takes the guesswork out of knowing when the syrup is ready, and the rest of the process is simply stirring and spreading.
Adjusting the Flavor to Your Taste
As written, this fudge gets its flavor from semi-sweet chocolate, butter, and vanilla, with walnuts adding a toasty crunch when included. If you’d like a different flavor profile, swapping in peanut butter chips, peppermint extract, or toasted pecans shifts the whole fudge in a new direction while keeping the same classic method. Because the base is so rich, small changes tend to have a noticeable effect on the final flavor, so it’s worth trying the original version first before deciding what, if anything, you’d like to change.
Pairing This Fudge With Other Treats and Drinks
Because the flavor here is rich and chocolatey, this fudge pairs naturally with lighter, brighter treats if you’re serving more than one, since the contrast keeps a spread feeling balanced. Sugar cookies, lemon bars, or peppermint bark round out a holiday tray nicely alongside this, while peanut butter fudge leans further into the same indulgent direction. On the drink side, this fudge pairs well with a cold glass of milk, a hot coffee, or a mug of hot cocoa.
A Note on Ingredient Proportions
Using three cups of sugar with three-quarters of a cup of butter and two-thirds of a cup of evaporated milk gives a syrup that reaches the soft-ball stage reliably in about five minutes, and it’s worth understanding why that balance matters before adjusting it. Adding more milk means a longer cooking time, while reducing the butter makes the fudge less creamy and more likely to turn crumbly. This particular ratio is the one generations of home cooks have relied on, so it’s worth treating the stated amounts as a tested baseline.
A Quick Note on Serving Temperature
This fudge tastes best at room temperature, when it’s soft, creamy, and full of chocolate flavor. If it’s been stored in the refrigerator, let it sit out for 15 to 20 minutes before serving so the texture softens again.
How Kids Can Safely Help
Because this recipe involves boiling sugar syrup to 234°F, the stovetop steps are a job for adults only, and children should stay well away from the saucepan while it’s hot. Kids can still join in by lining the pan, measuring the chocolate chips, chopping walnuts with supervision, and helping cut and pack the cooled fudge, which makes it a fun, safe holiday project to share.
A Quick Note on Portion Control
Because this fudge is so rich with sugar, butter, and chocolate, a small square goes a long way here compared to a lighter dessert. Cutting the slab into 36 small pieces, as the yield suggests, is an easy way to share a single batch with a larger crowd.

A Note on Presentation
How you finish this fudge changes the impression it makes almost as much as the flavor itself. Cut into plain squares, it reads as a simple homemade treat. Topped with a few walnut halves pressed into the surface and set in little paper candy cups, the same fudge suddenly looks like something from an old-fashioned candy shop, which makes this a recipe worth dressing up for a party or keeping simple for an everyday treat.
A Final Note on Batch Size
This recipe is sized to make 36 squares from a single 9-inch pan, which keeps the whole process manageable in about 25 minutes of hands-on time plus cooling. For a bigger batch, make two separate batches rather than doubling the recipe in one pot, since a larger amount of syrup takes longer to reach temperature and is harder to stir evenly.
A Word on Texture
The texture of this fudge comes from the careful balance of cooked sugar, butter, and marshmallow creme, which together create a dense, smooth, melt-in-your-mouth bite. That creamy texture is part of what makes fantasy fudge so beloved, and it’s why cooking to the right temperature matters so much, since undercooked fudge stays soft while overcooked fudge turns firm and crumbly.
A Note on Working With Hot Sugar Syrup
Boiling sugar syrup is much hotter than boiling water and clings to skin, so it’s worth working carefully throughout this recipe. Using a long-handled spoon, wearing an oven mitt on your stirring hand, and choosing a pan large enough to keep the bubbling mixture well below the rim all help keep the process safe. Keep children and pets out of the kitchen until the syrup is off the heat and the fudge is in the pan.
A Note on Gifting This Batch
Because it keeps well at room temperature for several days, this fudge makes a lovely homemade gift for neighbors, teachers, or friends during the holidays. Packed in a tin lined with parchment, with a sheet between layers and a handwritten tag, it’s the kind of gift that brings back memories of holiday kitchens.
A Note on Scaling Down the Batch
If a full pan is more than you need, this recipe can be halved and set in an 8×4-inch loaf pan. Keep in mind that a smaller amount of syrup can reach temperature a little faster, so rely on a candy thermometer rather than the 5-minute timer alone.
A Note on Choosing Your Saucepan
A large, heavy-bottomed saucepan, at least 3 to 4 quarts, is the best choice for this recipe, since the mixture bubbles up considerably as it boils. A heavy base spreads heat evenly and helps prevent scorching, while a light-colored interior makes it easier to see if anything starts to brown. Whatever pan is used, make sure your candy thermometer can clip on securely with its tip in the syrup.
Why a Candy Thermometer Makes a Difference
A candy thermometer is the most reliable way to know exactly when the syrup reaches the soft-ball stage, since stovetops and pans vary enough that a timer alone can leave fudge too soft or too firm. Testing the thermometer in boiling water beforehand confirms that it’s calibrated correctly, and clipping it so the tip is submerged but not touching the bottom gives the most accurate reading.
Common Questions
Can I make this without a candy thermometer?
Yes, boil for a full 5 minutes once the mixture reaches a rolling boil, though a thermometer gives more reliable results.
Why didn’t my fudge set?
The syrup likely didn’t reach 234°F; start timing only at a full rolling boil and use a thermometer if possible.
Can I use sweetened condensed milk instead of evaporated milk?
No, condensed milk contains a lot of added sugar and won’t work as a substitute in this recipe.
Can I leave out the walnuts?
Yes, the walnuts are optional; simply leave them out for a smooth, nut-free fudge.
Can I use a different pan size?
An 8-inch pan gives thicker squares and a 9×13-inch pan gives thinner ones; both work well.
How should I store leftovers?
Keep the fudge airtight at room temperature for several days or in the refrigerator for longer storage.
Can I freeze this fudge?
Yes, wrap it well and freeze for up to three months, then thaw in the refrigerator before serving.
However you dress it up and whoever you share it with, this original fantasy fudge delivers rich, creamy, chocolatey sweetness from a few simple pantry ingredients and one saucepan. It’s proof that a true holiday classic never goes out of style.