
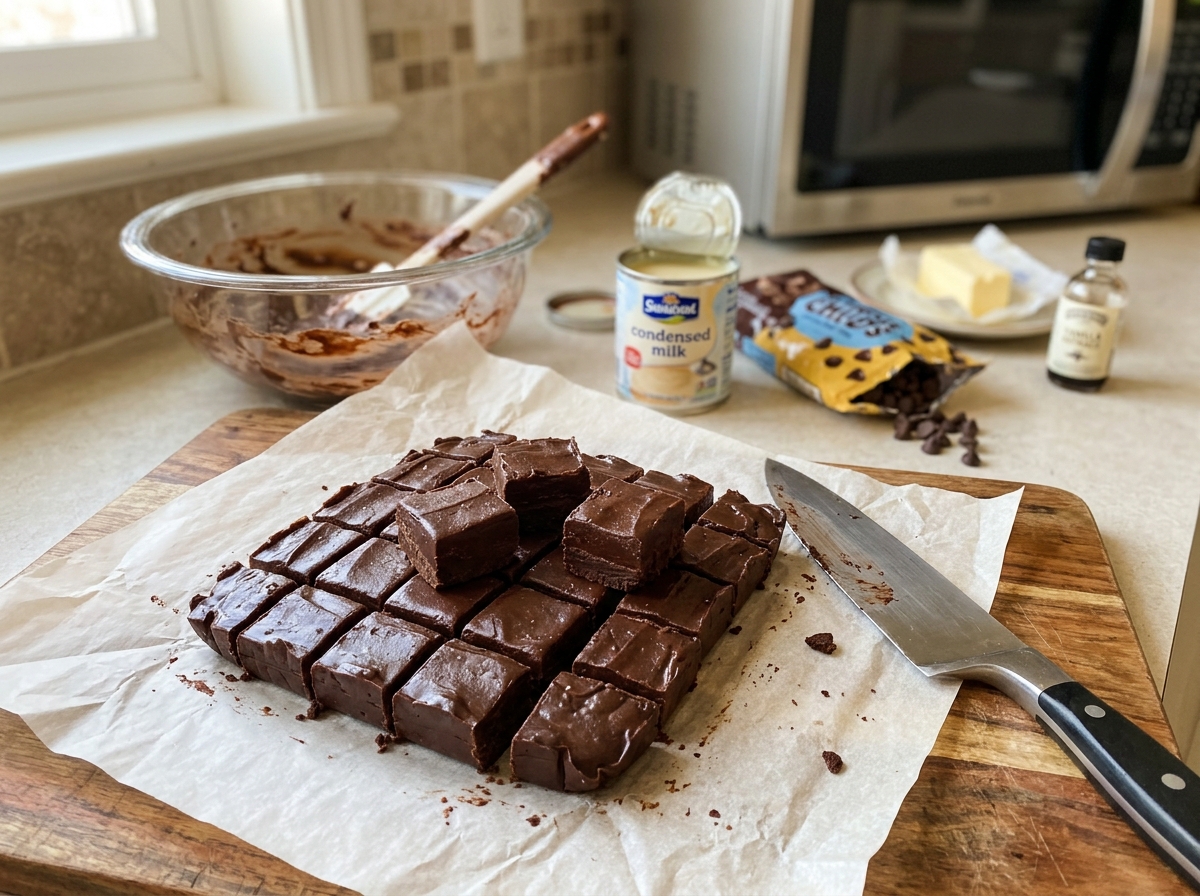
Microwave 4-Ingredient Chocolate Fudge
Semi-sweet chocolate, condensed milk, and a little butter melted together in the microwave and finished with vanilla for rich, glossy fudge.
Thank you for reading this post, don't forget to subscribe!
Four simple ingredients and a microwave are all it takes to make a rich, smooth, deeply chocolatey fudge, with no stovetop and no candy thermometer required. There’s semi-sweet chocolate, sweetened condensed milk, and a little butter melted together until glossy, then finished with a splash of vanilla.
Melting everything in one bowl in short bursts, stirring in the vanilla, and spreading the fudge into a lined pan is most of the process here. A few hours in the refrigerator is all that’s left before it’s ready to cut into squares.
Rich, smooth, and full of chocolate flavor, this fudge is perfect for holiday treats, sharing with friends, bake sales, or satisfying a chocolate craving with almost no effort.
Why This Recipe Works
The microwave is the secret to this fudge’s ease. Instead of standing at the stove, you simply melt everything together in one bowl in short intervals, which gives you full control over the heat and leaves almost nothing to wash up.
Each of the four ingredients plays a part. Semi-sweet chocolate gives deep, balanced flavor; condensed milk provides sweetness and creamy body; butter adds richness and a glossy, silky finish; and vanilla rounds everything out, making the chocolate taste fuller and more aromatic.
Why the Butter Matters
Just two tablespoons of butter make a noticeable difference here. It adds a rich, rounded flavor and helps the fudge melt more smoothly, giving the finished squares a glossier surface and a softer, creamier bite than fudge made with chocolate and condensed milk alone. Unsalted butter is best here, since it lets the chocolate flavor shine without adding extra saltiness.
What You’ll Need
- 3 cups (510g) semi-sweet chocolate chips
- 1 can (14 oz / 397g) sweetened condensed milk
- 2 tablespoons (28g) unsalted butter
- 1 teaspoon vanilla extract
You’ll also need an 8-inch square baking pan lined with parchment paper. This recipe makes 16 pieces.
A Note on Ingredient Choices
Unsalted butter lets you control the flavor, and pure vanilla extract tastes noticeably better than imitation. Make sure to use sweetened condensed milk rather than evaporated milk, which won’t let the fudge set. Letting the butter soften slightly and the condensed milk come to room temperature helps everything melt together more evenly.
Equipment You’ll Need
A large microwave-safe bowl, a rubber spatula, an 8-inch square pan lined with parchment, and a sharp knife are all you need; no stovetop or thermometer required. Choose a bowl that’s labeled microwave-safe and large enough to stir without spilling, since the mixture is thick and heavy. A glass bowl is ideal because it heats evenly and lets you see how the chocolate is melting.
How to Make It
- Prepare the pan. Line an 8-inch square baking pan with parchment paper.
- Combine. Combine the chocolate chips, sweetened condensed milk, and butter in a large microwave-safe bowl.
- Melt. Microwave in 30-second intervals, stirring well after each interval until the mixture is completely melted and smooth.
- Add vanilla. Stir in the vanilla extract.
- Spread. Pour the mixture into the prepared pan and spread it evenly.
- Chill. Refrigerate for 2–3 hours, or until firm.
- Cut. Cut into small squares and serve.
Getting a Smooth, Glossy Fudge
Stirring thoroughly after every 30-second burst, as the recipe advises, spreads the heat evenly and prevents scorching at the edges of the bowl. Adding the vanilla after melting, rather than before, protects its delicate flavor from the heat. If the mixture looks dull or thick, stir vigorously for a minute; it often comes back together into a smooth, shiny fudge.
Getting an Even Layer
Spreading the warm fudge from the center of the pan outward and pushing it into the corners gives a smooth, level slab. Work quickly, since the mixture thickens as it cools. An offset spatula makes smoothing the top especially easy, though the back of a large spoon works well too. A few gentle taps of the pan on the counter help release any air bubbles and level the surface.
Knowing When It’s Done
The fudge is ready to cut once it feels firm across the whole pan, including the center. Two hours is usually enough, but three gives the cleanest squares. Pressing lightly in the center with a fingertip is the simplest test; if it feels firm and doesn’t leave a deep dent, the fudge is ready to lift out. If you’re in a hurry, a short stay in the freezer after the first hour can help it firm up faster.
Tips for Perfect Microwave Fudge
Every microwave heats a little differently, so watch the first few bursts closely and stir well each time. For clean slices, use a sharp knife warmed under hot water and wiped dry, just as the recipe suggests. Scraping every bit of condensed milk from the can also helps the fudge set with the right creamy texture. Lining the pan before you start melting means you can pour the fudge the moment it’s smooth.
Troubleshooting Common Issues
My fudge scorched. It wasn’t stirred often enough; stir thoroughly between every burst. My fudge is grainy. It was overheated; use shorter intervals. My fudge is too soft. It needs more chilling, or evaporated milk was used. My fudge looks greasy. It was heated too long; stir vigorously off the heat to bring it back together.
A Few Ways to Make It Yours
Walnut Fudge
Stir in a cup of chopped walnuts with the vanilla.
Peppermint
Swap the vanilla for peppermint extract and top with crushed candy canes.
Salted Fudge
Sprinkle flaky sea salt over the top before chilling.
Mocha
Add a teaspoon of instant espresso powder for a coffee note.
The classic version is worth trying first so you know the baseline flavor before adding any extras.
How to Store This Fudge
Keep the fudge in an airtight container in the refrigerator for up to two weeks, with parchment between layers. It also freezes well for up to two months. Wrapping the slab before cutting and slicing only what you need keeps the rest fresher. If you freeze it, wrap the pieces individually so you can take out just a few at a time.
When to Serve This Fudge
This fudge is perfect for holiday trays, bake sales, gift tins, and family gatherings, or any time a quick chocolate treat is needed. Because it’s made with just one bowl, it’s also a great recipe for busy weeks when you need a homemade treat without much cleanup. It fits neatly into lunchboxes and makes a sweet surprise at the office.
Nutrition and Serving Information
This recipe makes 16 pieces at roughly 200 calories per piece, though exact calorie content will vary depending on the brands used and piece size. Because it contains dairy, it isn’t appropriate for anyone avoiding dairy products. Cutting smaller squares is an easy way to enjoy the same flavor with fewer calories per serving.
Make-Ahead Tips
This fudge is a genuinely good make-ahead treat, keeping for two weeks in the refrigerator. Make it ahead of busy holiday weeks. Cutting the fudge into squares and freezing them means you’ll always have a homemade treat ready for unexpected guests or last-minute gifts.
The Science Behind This Fudge
Microwaves heat food by agitating water molecules, which is why the mixture can develop hot spots and why stirring between bursts is so important. Sweetened condensed milk contains fully dissolved sugar, so there’s no risk of the crystallization that makes stovetop fudge grainy. Butter adds milk fat that softens the set and gives the fudge its glossy sheen. Adding the vanilla after melting protects its aromatic compounds, which can evaporate when exposed to high heat.
Portioning and Yield
This recipe makes 16 pieces from an 8-inch pan. Cutting 6 by 6 gives 36 smaller bites for a candy tray. Smaller pieces are also easier to pack into gift tins and share at parties.
A Little Bit of History
As microwaves became common in home kitchens in the 1970s and 1980s, cooks quickly discovered they were perfect for melting chocolate. Microwave fudge became a beloved shortcut, delivering classic homemade fudge in minutes instead of an afternoon at the stove. Today, microwave fudge is one of the most searched-for holiday candy recipes, loved for its simplicity and reliability.
Serving Suggestions
Serve this fudge slightly cool, cut into neat squares and stacked on a board or set in paper candy cups. For a party, set each piece in a mini paper cup and arrange them on a tiered stand or platter. A light dusting of cocoa powder or a few chocolate curls make the presentation feel extra special. Pair the platter with a bowl of fresh berries for a pop of color.
Choosing the Right Chocolate
Semi-sweet chips give a rich, balanced flavor. Milk chocolate makes a sweeter, softer fudge, while bittersweet gives a deeper, more intense result. Avoid candy coating or chocolate-flavored chips, since they don’t contain enough cocoa butter to set with the same creamy texture. Chopped chocolate bars also work and often melt even more smoothly.
Why This Recipe Is So Beginner-Friendly
If you’ve never made fudge, this is a genuinely forgiving place to start, with no stovetop, no thermometer, and only one bowl to wash. Even if the top isn’t perfectly smooth, the fudge will still taste fantastic, which makes this a stress-free first candy project. It’s also a great recipe to master before trying more complicated stovetop fudge.
Adjusting the Flavor to Your Taste
As written, this fudge is rich and chocolatey with a warm vanilla finish. Different extracts, a pinch of salt, or a bit of espresso powder can all change its character while keeping the same simple method. Stirring in a handful of chopped nuts, mini marshmallows, or crushed cookies just before spreading adds both flavor and texture. Orange zest is another lovely addition that pairs beautifully with semi-sweet chocolate.
Pairing This Fudge With Other Treats and Drinks
Because the flavor here is deep and chocolatey, this fudge pairs nicely with bright fruit treats or vanilla cookies. On the drink side, it pairs well with coffee, hot cocoa, or cold milk. On a holiday tray, it looks lovely alongside sugar cookies, peppermint bark, and peanut butter treats. A glass of cold milk is always a classic match.
A Note on Ingredient Proportions
Three cups of chocolate chips with one can of condensed milk and two tablespoons of butter gives a fudge that’s creamy yet firm enough to slice, and it’s worth understanding why that balance matters before adjusting it. More butter makes the fudge too soft, while less chocolate leaves it sticky. This ratio is a tested baseline.
A Quick Note on Serving Temperature
This fudge tastes best slightly cool, about 10 minutes out of the refrigerator, when it’s soft and creamy but holds its shape. If it’s been chilled for a long time, letting it sit at room temperature for a few minutes brings out its full chocolate flavor and creamy texture.
Why This Recipe Is Naturally Kid-Friendly to Make
Because this recipe uses only the microwave and a bowl, it’s a genuinely fun treat to make with kids. With an adult handling the hot bowl, little helpers can measure ingredients, line the pan, and add the vanilla. Kids also love adding toppings like sprinkles or crushed candy canes, which makes every batch feel like their own creation.
A Quick Note on Portion Control
Because this fudge is rich, a small square goes a long way. Cutting smaller pieces makes it easy to share.
A Note on Presentation
How you finish this fudge changes the impression it makes almost as much as the flavor itself. Cut into plain squares, it reads as a simple homemade treat. Topped with a sprinkle of sea salt or crushed candy canes and packed in a gift tin, the same fudge suddenly looks like something from a candy shop, which makes this a recipe worth dressing up for a party or keeping simple for an everyday treat.
A Final Note on Batch Size
This recipe makes 16 pieces from one 8-inch pan. For a bigger batch, make two separate batches rather than doubling, since a large amount is harder to heat evenly in the microwave.
A Word on Texture
The texture of this fudge is dense, smooth, and creamy, with a glossy surface thanks to the butter. It’s softer than chocolate bars but firm enough to slice cleanly. Giving the fudge its full chilling time is what keeps that creamy texture from feeling sticky, so it slices cleanly and holds its shape on the plate.
A Note on Working With the Microwave
Microwaves vary in power, so start with 30-second bursts and stir thoroughly each time. If your microwave runs hot, use 50 percent power. Stop heating while a few small lumps remain and let residual heat finish the job. Using a microwave-safe glass bowl and keeping every utensil completely dry also protects the chocolate from seizing.
A Note on Gifting This Batch
Because it keeps for two weeks, this fudge makes a wonderful homemade gift. Pack it in a parchment-lined tin tied with ribbon. A small handwritten label with the name of the fudge and a note to keep it chilled is a thoughtful finishing touch. For holiday gifts, a sprinkle of crushed candy canes on top makes it look extra festive.
A Note on Scaling Down the Batch
For a smaller batch, halve all four ingredients and use a loaf pan. It will melt even faster, so watch it closely. A smaller batch also sets a little faster, often in about two hours.
A Note on Choosing Your Pan
An 8-inch square pan gives thick, satisfying squares. Lining it with parchment ensures an easy lift and clean cuts. A 9-inch pan works too but makes thinner squares that may set a little faster. Metal pans chill quickly and evenly.
Why Parchment Paper Makes a Difference
Parchment lets you lift the whole slab out at once and cut it on a board, giving straighter edges and protecting your pan. Leaving a little overhang on two sides makes lifting the fudge out especially easy.
Common Questions
Can I make this without butter?
Yes, but the butter adds richness and gloss; without it, the fudge is slightly firmer.
Why did my fudge scorch?
It wasn’t stirred often enough; stir thoroughly between every burst.
Can I use milk chocolate?
Yes, it makes a sweeter, softer fudge.
Can I use evaporated milk?
No, sweetened condensed milk is essential for the fudge to set.
How do I get clean slices?
Use a sharp knife warmed under hot water and wiped dry.
How long does it keep?
Up to two weeks in the refrigerator.
Can I freeze it?
Yes, for up to two months; thaw in the refrigerator.
However you dress it up and whoever you share it with, this microwave 4-ingredient chocolate fudge delivers rich, glossy, chocolatey sweetness from one bowl and a few minutes of stirring. It’s proof that homemade fudge can be wonderfully quick.