
Chocolate Peanut Butter Fudge Bars
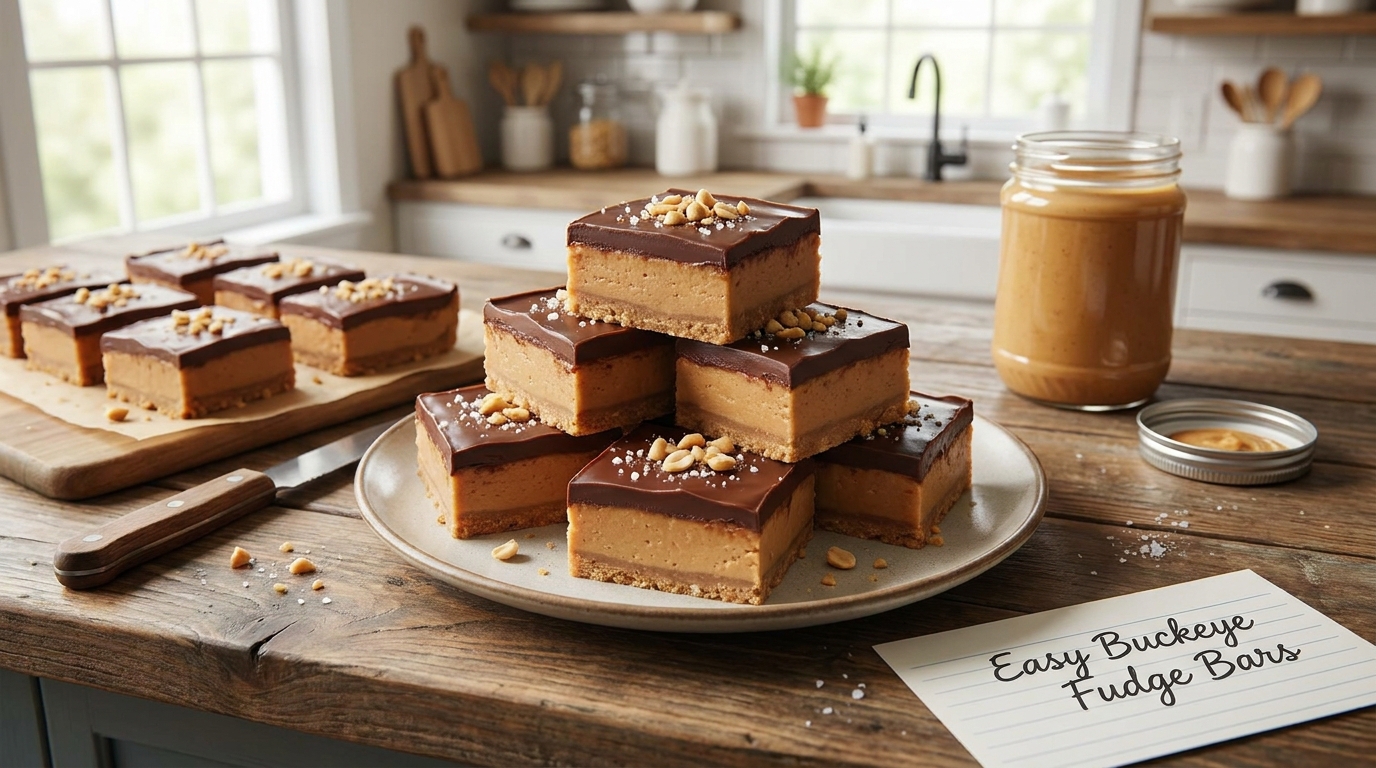
A thick peanut butter fudge base under a glossy chocolate top, finished with a swirl and a scatter of chopped peanuts.
Thank you for reading this post, don't forget to subscribe!
There’s a specific kind of candy-shop bar that shows up in bakery cases and specialty chocolate shops — dense peanut butter fudge under a clean, glossy chocolate top, finished with a little flourish on top. This recipe brings that exact bar into a home kitchen with no candy thermometer and no oven required.
A thick, fudge-like peanut butter layer forms the base, sweetened and firmed with powdered sugar rather than cooked syrup. A smooth layer of melted chocolate goes on top, sometimes finished with a swirl of extra peanut butter dragged through the surface before it sets, then a scatter of chopped peanuts and flaky sea salt for texture and contrast.
The result slices into clean, dense squares with a distinct two-tone layer running through the middle — rich, fudgy, and finished just enough to look like it came from somewhere far more specialized than your own kitchen counter.
What makes this bar particularly satisfying is the contrast between the two layers. The peanut butter base is soft, dense, and almost melts on the tongue, while the chocolate top has just enough snap to hold its own against that softness. It’s a textural pairing that a lot of favorite candy bars rely on, and it translates beautifully into a homemade, no-bake format.
A Little Bit of History
Peanut butter and chocolate as a paired flavor combination has a long, well-documented history in American confectionery, tracing back to the early 20th century when peanut butter became widely affordable and popular as a pantry staple. Combining it with chocolate in layered candy bars became a natural extension of that popularity, eventually inspiring countless homemade copycat versions of beloved store-bought candy.
Layered fudge bars specifically — a firm, sweetened peanut butter base topped with a set chocolate layer — represent a home-kitchen adaptation of this classic pairing, built to be achievable without professional candy-making equipment. Rather than the precise sugar work traditional fudge requires, this style relies on powdered sugar to thicken the peanut butter layer and simple melting and chilling to set the chocolate, making it accessible to bakers of any skill level.
The swirled top layer, where a bit of extra peanut butter is dragged decoratively through the still-soft chocolate, reflects a broader trend in home baking toward treating even simple, no-bake desserts with the same visual polish as a professional bakery item — a small technique that turns a straightforward layered bar into something that photographs and presents beautifully with only a few extra seconds of effort.
It’s also worth noting that this style of bar sits at the intersection of two related dessert traditions — classic peanut butter fudge, and the more contemporary trend of no-bake candy bar copycats. Borrowing the density and richness of fudge while keeping the clean, layered structure of a candy bar gives this recipe a texture and presentation that’s distinct from either tradition on its own.
Why This One Works
The peanut butter layer sets firm not through cooling alone, but through the ratio of powdered sugar to peanut butter, which thickens the mixture into a dense, moldable fudge consistency straight out of the bowl, well before it ever touches the fridge. Chilling afterward simply firms that structure further and helps it hold a clean edge when sliced.
The chocolate top layer works differently, relying entirely on the natural fat in the chocolate solidifying as it cools. Because the two layers set through separate mechanisms — one from sugar content, one from cooling fat — they end up with genuinely different textures once finished: a dense, slightly softer fudge base beneath a firmer, snappier chocolate top, which is exactly the contrast that makes this style of bar so satisfying to bite into.
The swirl technique used on top isn’t just decorative — it also very slightly changes the texture of the top layer, since the extra peanut butter dragged through the chocolate softens it in those specific streaks, creating small pockets of extra peanut butter flavor and a slightly less rigid bite in those spots compared to the rest of the chocolate layer.
There’s also a reason powdered sugar specifically, rather than granulated sugar, is used to sweeten and thicken the peanut butter layer. Powdered sugar dissolves smoothly into the peanut butter without any graininess, since it’s already been ground to a fine, near-instant-dissolving texture, while granulated sugar would leave a slightly gritty texture in a no-cook mixture that never reaches a temperature high enough to fully dissolve coarse sugar crystals.
It’s worth noting that this style of bar is genuinely one of the more forgiving no-bake recipes to make, precisely because both layers set through mechanisms that don’t require any precise temperature monitoring the way traditional cooked fudge or caramel would. As long as the peanut butter layer has enough powdered sugar to firm up and the chocolate is melted gently rather than scorched, there’s very little that can go seriously wrong here.
What You’ll Need
- 1 cup creamy peanut butter
- 1/2 cup unsalted butter, softened
- 2 cups powdered sugar
- 1½ cups semi-sweet chocolate chips
- 2 tablespoons peanut butter, for swirling on topOptional
- Chopped peanuts and flaky sea salt for toppingOptional
A Closer Look at Each Ingredient
The peanut butter. A smooth, shelf-stable peanut butter gives the most reliable, sliceable base layer. Natural peanut butter can work, but its higher oil content sometimes prevents the layer from firming up quite as densely, since there’s more liquid fat working against the powdered sugar’s thickening effect.
The butter. Softened butter blended into the peanut butter layer adds richness and helps bind the powdered sugar in smoothly, giving the base a slightly creamier, more fudge-like texture than peanut butter and sugar alone would produce.
The powdered sugar. This is what thickens the peanut butter layer into a dense, fudge-like consistency. Because it dissolves smoothly without any graininess, it’s the right choice here over granulated sugar, which wouldn’t fully dissolve in a no-cook mixture.
The chocolate chips. Semi-sweet chocolate chips balance nicely against the sweetness of the peanut butter base, though dark or milk chocolate both work depending on preference. Melt gently to avoid seizing, which would leave the top layer grainy rather than smooth and glossy.
The toppings. Chopped peanuts add crunch and reinforce the peanut flavor, while flaky sea salt cuts through the sweetness of both layers. Both are optional, but together they add meaningful texture and flavor contrast for very little extra effort.
Equipment You’ll Need
An 8-inch square pan lined with parchment paper is essential for easy removal once the bars are set. A hand mixer helps beat the peanut butter, butter, and powdered sugar into a smooth, thick base, though a sturdy spoon and some effort will also get the job done. A butter knife or skewer is ideal for creating the swirl pattern on top — anything with a thin edge works better than a wide spoon for dragging clean lines through the chocolate.
How to Make Them
- Make the peanut butter layer. Beat the peanut butter and softened butter together until smooth, then gradually mix in the powdered sugar until the mixture is thick and fudge-like.
- Press into the pan. Press the peanut butter mixture firmly and evenly into a parchment-lined 8-inch square pan.
- Melt the chocolate. Melt the chocolate chips gently until smooth, either in the microwave in short bursts or over a double boiler.
- Pour the chocolate layer. Pour the melted chocolate over the peanut butter layer and spread evenly to the edges.
- Swirl, if using. Warm the extra 2 tablespoons of peanut butter slightly until pourable, then drizzle over the chocolate and swirl gently with a knife or skewer.
- Add toppings. Sprinkle chopped peanuts and flaky sea salt over the surface while the chocolate is still soft.
- Chill. Refrigerate for at least 3 hours, or until the chocolate layer is fully set.
- Slice and serve. Lift out using the parchment overhang and cut into squares while cold for the cleanest edges.
Troubleshooting Common Issues
My bars fell apart when I sliced them. This almost always comes down to the peanut butter layer not being pressed firmly enough before the chocolate went on top. Press hard and evenly across the entire pan, and don’t skip the full chilling time before slicing.
My chocolate topping cracked when I cut into it. Chilled chocolate can crack rather than slice cleanly if the bars are extremely cold straight from the fridge. Let them sit at room temperature for 5–10 minutes before slicing, and use a sharp knife for the cleanest cuts.
My peanut butter layer is too soft and won’t hold its shape. This can happen with a very oily natural peanut butter. A standard, shelf-stable peanut butter combined with the full amount of powdered sugar gives a firmer, more reliable base.
My swirl disappeared into the chocolate instead of staying visible. This usually means the peanut butter used for swirling was too warm and thin, or the chocolate had already started to firm up before swirling. Swirl the peanut butter in soon after pouring the chocolate, while it’s still fully liquid.
My chocolate looks streaky or dull instead of glossy. This is chocolate bloom, usually caused by melting too quickly or at too high a temperature. Melt low and slow, stirring frequently, for the glossiest finish.
My finished bars taste greasy rather than rich. This can happen with a very oily natural peanut butter in the base layer. A standard, shelf-stable peanut butter tends to give a cleaner, less greasy finish since its fat content is more evenly emulsified throughout the product.
Serving Suggestions
These bars are rich enough to serve in small squares straight from the fridge, and the layered, swirled top makes them an easy standout on any dessert table without needing extra garnish. Serve them chilled for the cleanest slices and the best textural contrast between the dense peanut butter base and the firm chocolate top.
Because they hold their shape well chilled, these bars travel nicely for potlucks, bake sales, or homemade gift boxes, provided they stay reasonably cool along the way. They also cut easily into smaller, bite-sized squares if you’re serving a crowd or want a lighter portion size — simply score the pan into more, smaller pieces before the final chill.
A cold glass of milk is the classic pairing here, echoing the same simple, nostalgic combination that’s made peanut butter and chocolate such an enduring flavor pairing in American snacking and dessert traditions for generations. For a more polished presentation, arrange the bars on a platter with a few whole peanuts scattered around for a bit of visual continuity with the topping.
These bars also make a thoughtful homemade holiday gift when packaged in a small tin or box lined with parchment paper, especially for anyone on your list who loves the classic peanut butter and chocolate combination in a candy bar format.
A Few Ways to Make Them Yours
Extra Salty Finish
Increase the flaky sea salt on top for a more pronounced sweet-and-salty contrast.
Crunchy Peanut Butter Base
Use crunchy peanut butter in the base layer for extra texture running through the bottom.
White Chocolate Top
Swap the chocolate topping for melted white chocolate for a sweeter, creamier finish.
Almond Butter Swap
Substitute almond butter for the peanut butter in the base for a milder, slightly different nutty flavor.
Make-Ahead Tips
These bars are well suited to making ahead, since they need a solid chilling period before slicing regardless of when you plan to serve them. They can be fully prepared up to a week in advance and kept covered in the fridge, making them a convenient choice for parties, potlucks, or a make-ahead treat for the week.
If you’re transporting them somewhere warm, keep them chilled as long as possible before serving, since both the peanut butter layer and the chocolate topping will soften noticeably in heat and lose their clean, sliceable structure. These bars are also a strong candidate for holiday baking specifically because they require no oven time at all, freeing up valuable oven space when multiple dishes are competing for limited capacity.
A Note on Dietary Adjustments
This recipe can be adjusted for a few common dietary needs. For a dairy-free version, use dairy-free butter and dairy-free chocolate chips, both of which are widely available and work well as direct substitutes. For a lower-sugar version, reduce the powdered sugar slightly in the peanut butter layer, though this will make that layer noticeably softer and less structured, since the sugar contributes to firmness as well as sweetness.
This recipe isn’t naturally suited to a nut-free adaptation given how central peanut butter is to both flavor and structure, though a seed butter alternative like sunflower seed butter can sometimes be substituted with a similar texture, keeping in mind the flavor will be noticeably different from the classic peanut butter version. For those managing portion sizes, these bars are rich enough that cutting the pan into smaller pieces than a standard square — 20 or 24 pieces instead of 16 — still delivers a satisfying dessert experience while stretching the recipe further for a larger gathering.
Storage
Keep the bars in an airtight container in the fridge for up to a week — the layered structure holds up well chilled. They also freeze nicely for up to 2 months; thaw in the fridge before serving, or eat them cold straight from the freezer for a firmer, fudgier bite.
Common Questions
Can I skip the swirl and toppings?
Yes — the bars will still taste great with a plain chocolate top. The swirl and toppings are purely for visual appeal and added texture.
Why did my peanut butter layer crack when I sliced the bars?
This usually happens if the layer was chilled very cold before slicing. Let the bars sit at room temperature for 5–10 minutes before cutting for cleaner slices.
Can I make these gluten-free?
Yes — this recipe is naturally gluten-free as written, provided your chocolate chips and peanut butter don’t contain any hidden gluten-based additives.
Can I double this recipe for a bigger batch?
Yes — double all the ingredients and use a 9×13-inch pan instead of an 8-inch square pan, keeping the same chilling time.
Why is my base crumbly instead of holding together?
This usually means there wasn’t enough powdered sugar to firm up the peanut butter mixture, or it wasn’t pressed firmly enough into the pan. Press hard and evenly for the best results.
Do these bars need to stay refrigerated once cut?
Yes — because of the peanut butter and chocolate layers, these bars hold their shape and texture best when kept chilled, especially in warmer weather.
Can I use crunchy peanut butter for the swirl on top?
Smooth peanut butter works best for swirling since it’s easier to drizzle and drag through the chocolate cleanly, but a well-stirred crunchy peanut butter can work in a pinch.
Can I use natural peanut butter for the swirl but shelf-stable for the base?
Yes — mixing peanut butter types between the base and the swirl is fine, since the swirl is a much smaller, purely decorative amount that won’t meaningfully affect the overall structure of the bars.
How thick should each layer be?
The peanut butter base is typically slightly thicker than the chocolate top, giving a roughly two-to-one ratio between the layers, though you can adjust the amount of each to your own preference once you’ve made the recipe a time or two.
One last thing worth mentioning: these bars are a genuinely good project for anyone new to no-bake candy-style desserts, since every step is low-risk and forgiving. There’s no hot sugar syrup to manage and no precise temperature window to hit — just melt, layer, chill, and slice.