
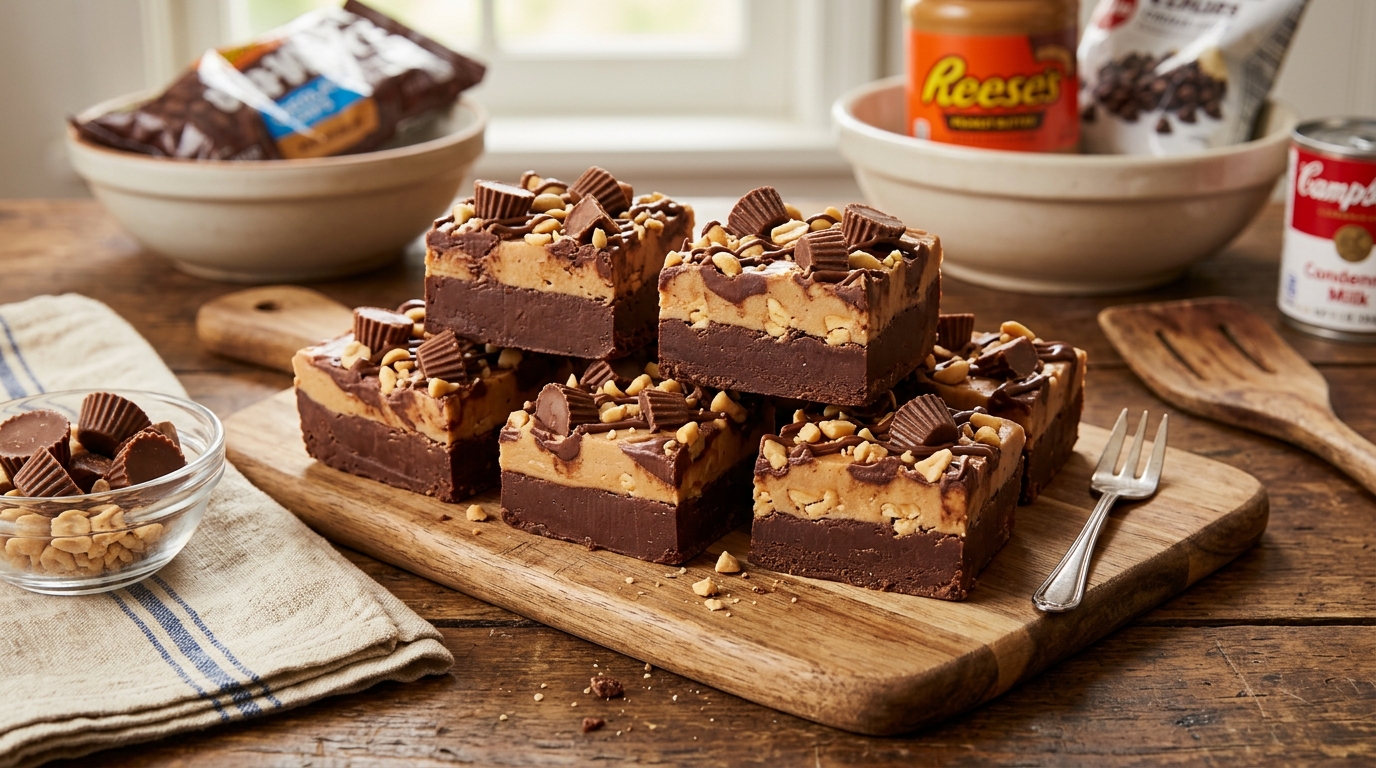
Peanut Butter Cup Fudge
Rich chocolate fudge swirled with peanut butter and loaded with mini peanut butter cups — no candy thermometer needed.
Thank you for reading this post, don't forget to subscribe!
If chocolate peanut butter fudge and a bag of miniature peanut butter cups had a baby, this would be it. Dense, glossy chocolate fudge, swirled through with ribbons of peanut butter, studded throughout with chopped peanut butter cups, and finished with a drizzle of both chocolate and peanut butter on top.
The base comes together on the stovetop in just a few minutes — melted chocolate chips and sweetened condensed milk, stirred until smooth and glossy. No candy thermometer, no soft-ball stage, none of the precision traditional fudge demands. Swirl in peanut butter, fold in chopped peanut butter cups, pour into a pan, and let the fridge do the rest.
What sets once chilled is genuinely decadent — dense, rich, and loaded with pockets of peanut butter cup in nearly every bite, finished with a marbled top that looks like it came from a specialty candy shop rather than a home kitchen.
This is the fudge to make when a standard chocolate or peanut butter fudge feels like it’s missing something. The addition of chopped peanut butter cups throughout gives every square little bursts of that classic candy flavor and texture, on top of the fudge’s own rich chocolate-peanut butter base.
A Little Bit of History
Sweetened condensed milk fudge — sometimes called ‘never-fail fudge’ or ‘two-ingredient fudge’ — became popular in American home kitchens as a reliable alternative to traditional cooked fudge, which depends on precisely controlled sugar crystallization to set correctly. Condensed milk already contains sugar cooked down to a thick, stable consistency, meaning it can set a rich, fudge-like texture with just melted chocolate and a few hours in the fridge, without any of the temperature monitoring that classic fudge requires.
Peanut butter cups themselves have been a beloved American candy since the 1920s, and their pairing with fudge is a fairly natural extension of the broader peanut butter and chocolate tradition that’s shaped so much of American confectionery. Chopping up a beloved candy and folding it directly into a homemade dessert is a common technique across countless recipes — cookies, brownies, ice cream — and this fudge applies that same idea to a no-bake format.
The swirled peanut butter pattern on top, along with the drizzle finish, reflects the same visual tradition seen in many other layered and marbled no-bake desserts: taking a simple, reliable base recipe and adding a small decorative technique that makes the finished product look considerably more polished and intentional than the actual effort required to achieve it.
Fudge recipes built around a beloved candy folded directly into the mixture have become an increasingly popular category in home baking, largely because they combine the reliability of a simple, no-cook method with the built-in appeal of a familiar, well-loved candy. Rather than trying to recreate a peanut butter cup’s flavor from scratch, this approach simply incorporates the real thing, guaranteeing an authentic peanut butter cup taste in every bite without any guesswork.
Why This One Works
This fudge relies on sweetened condensed milk’s naturally thick, sugar-rich consistency to set the chocolate into a dense, sliceable texture once chilled, rather than the sugar-crystal structure traditional cooked fudge depends on. Melting the chocolate chips together with the condensed milk over low heat creates a smooth, glossy mixture that firms up predictably in the fridge, with essentially no risk of the graininess or failed setting that can plague classic stovetop fudge.
Swirling peanut butter through the still-warm chocolate mixture, rather than mixing it in completely, is what creates the marbled ribbons running through the finished fudge. Because peanut butter and melted chocolate have a similar consistency when both are warm, they swirl together cleanly with just a few passes of a knife, without fully blending into a single uniform color.
Folding chopped peanut butter cups into the mixture, rather than melting them in, keeps their distinct layered texture intact throughout the fudge — you can still see and taste the individual chocolate and peanut butter layers of each candy piece within a bite, rather than having them dissolve completely into the base mixture.
It’s also worth understanding why this method is so much more forgiving than a traditional stovetop fudge that relies on sugar syrup reaching a precise soft-ball stage. Sweetened condensed milk arrives already cooked down to a stable, thick consistency, meaning there’s no risk of undercooking or overcooking a sugar syrup — the chocolate simply needs to melt into it smoothly, a process with a much wider margin for error than classic candy-making.
What You’ll Need
- 2 cups semi-sweet chocolate chips
- 1 can (14 oz) sweetened condensed milk
- 1/2 cup creamy peanut butter, for swirling
- 1 cup mini peanut butter cups, chopped
- Extra peanut butter and melted chocolate for drizzling on topOptional
A Closer Look at Each Ingredient
The chocolate chips. Semi-sweet chocolate chips give a balanced sweetness against the peanut butter and candy throughout. Dark or milk chocolate chips can be substituted depending on preference, though the sweetness of the finished fudge will shift accordingly.
The sweetened condensed milk. This is the key setting agent here, and it’s not the same product as evaporated milk despite similar-looking cans. Double-check the label before buying, since sweetened condensed milk is essential to how this fudge sets.
The peanut butter. A smooth, shelf-stable peanut butter swirls most cleanly through the warm chocolate mixture. Natural peanut butter can work but may create a slightly less defined swirl due to its thinner, oilier consistency.
The peanut butter cups. Mini peanut butter cups, roughly chopped, distribute evenly throughout the fudge and are easier to fold in than full-sized cups. If only full-sized cups are available, chop them into similarly small pieces before folding in.
Equipment You’ll Need
A medium saucepan is essential for gently melting the chocolate chips and condensed milk together, and a heatproof spatula makes stirring and folding in the peanut butter cups much easier. An 8-inch square pan lined with parchment paper allows for easy removal once the fudge is set. A butter knife or skewer works well for creating the swirl pattern on top.
How to Make Them
- Line the pan. Line an 8-inch square pan with parchment paper, leaving overhang on the sides.
- Melt the chocolate and milk. In a saucepan over low heat, combine the chocolate chips and sweetened condensed milk, stirring until fully melted and smooth.
- Fold in the peanut butter cups. Remove from heat and fold in the chopped peanut butter cups.
- Pour into the pan. Pour the mixture into the prepared pan and smooth the top with a spatula.
- Swirl in peanut butter. Warm the peanut butter slightly until pourable, then drizzle over the top and swirl gently with a knife.
- Add a finishing drizzle, if using. Drizzle a bit of extra melted chocolate and peanut butter over the top for a decorative finish.
- Chill. Refrigerate for at least 3 hours, or until fully firm.
- Slice and serve. Lift out using the parchment overhang and cut into squares while cold.


Troubleshooting Common Issues
My fudge is too soft to slice cleanly. This usually means it hasn’t chilled long enough. Give it the full 3 hours, and consider an extra hour if your kitchen runs warm.
My chocolate mixture seized while melting. This happens when chocolate is overheated or comes into contact with even a small amount of water. If this happens, it’s usually best to start over with fresh chocolate rather than trying to rescue a seized batch.
My peanut butter cups melted into the fudge instead of staying visible. This can happen if the chocolate mixture was still very hot when the peanut butter cups were folded in. Let the mixture cool slightly, just until it’s no longer steaming, before folding in the chopped candy.
My swirl pattern disappeared into a single solid color. This means the peanut butter was stirred in too thoroughly rather than gently swirled. Use a light touch with a knife, dragging through the mixture just a few times rather than fully combining it.
My fudge tastes greasy rather than rich. This can happen with a very oily natural peanut butter. A standard, shelf-stable peanut butter tends to give a cleaner, less greasy finish.
My fudge has small white or grey spots on the surface. This is chocolate bloom, caused by fat separating out during uneven cooling. It’s cosmetic only and doesn’t affect the taste — storing the fudge at a consistent, cool temperature helps prevent it.
Serving Suggestions
This fudge is rich enough to serve in small squares straight from the fridge, and genuinely benefits from staying chilled right up until serving, since the texture is at its cleanest, most sliceable best when cold. A few pieces on a small plate alongside coffee makes for an easy, indulgent after-dinner treat.
Because it’s dense and loaded with candy throughout, this fudge works well cut into smaller bite-sized pieces than a standard candy bar portion, especially if serving alongside other desserts on a holiday or party spread. It holds its shape and flavor well at room temperature for a couple of hours, making it a reliable addition to a dessert table or homemade gift box.
For gifting, these squares pack beautifully into small paper candy cups or a lined tin. Since each piece already contains visible chunks of peanut butter cup and a swirled top, they look intentionally decorated with almost no extra effort required.
This fudge also holds up surprisingly well as an ice cream topping — let a few pieces sit at room temperature until just soft enough to chop into small chunks, then scatter over vanilla or chocolate ice cream for an easy, indulgent upgrade to a simple dessert.
A Few Ways to Make Them Yours
Extra Peanut Butter Cups on Top
Press a few whole or halved mini peanut butter cups into the surface before chilling for extra visual appeal.
Dark Chocolate Base
Use dark chocolate chips instead of semi-sweet for a more bittersweet, less sugary finished fudge.
Salted Version
Sprinkle flaky sea salt over the top along with the drizzle for a sweet-and-salty contrast.
Pretzel Crunch
Fold in a handful of crushed pretzels along with the peanut butter cups for a salty, crunchy addition.
Make-Ahead Tips
This fudge is an excellent make-ahead option, since it needs a solid chilling period regardless of when you plan to serve it. It can be made up to a week in advance and kept covered in the fridge, which makes it a convenient choice for holidays and gatherings where kitchen time on the day of the event is already stretched thin.
If you’re making this for gifting, consider slicing it into squares and storing them in a single layer between sheets of parchment paper, rather than stacking pieces directly on top of each other, to keep the peanut butter cup pieces and swirl pattern looking clean until you’re ready to package and give them away.
A Note on Dietary Adjustments
This recipe can be adapted for a few common dietary needs with some care. For a dairy-free version, use dairy-free chocolate chips and a dairy-free sweetened condensed milk alternative, both of which are increasingly available at well-stocked grocery stores. For a lower-sugar version, a reduced-sugar chocolate chip and condensed milk combination can be used, though the setting behavior may vary slightly by brand.
This recipe isn’t naturally suited to a nut-free adaptation given how central both peanut butter and peanut butter cups are to the flavor and structure — a sunflower seed butter alternative combined with a nut-free candy substitute can sometimes work, though the flavor and texture will be noticeably different from the classic version.
For those managing portion sizes, this fudge is quite dense and rich, meaning a smaller square than you might expect goes a long way — cutting the pan into 20 or 24 smaller pieces rather than the standard 16 can help with portion control without sacrificing any of the flavor experience.
Storage
Keep the fudge in an airtight container in the fridge for up to 2 weeks — the texture holds up well since there’s no cooked sugar to crystallize or dry out over time. It also freezes well for up to 3 months; thaw in the fridge before serving.
Common Questions
Can I use full-sized peanut butter cups instead of minis?
Yes — chop full-sized peanut butter cups into small pieces roughly the size of mini cups before folding them into the fudge for even distribution.
Why is my fudge too soft to slice cleanly?
This usually means it hasn’t chilled long enough. Give it the full 3 hours, and consider an extra hour if your kitchen runs warm.
Can I use milk chocolate instead of semi-sweet?
Yes — milk chocolate works fine and produces a sweeter, creamier finished fudge, though it may set slightly softer than semi-sweet chocolate.
Can I double this recipe for a bigger batch?
Yes — double all the ingredients and use a 9×13-inch pan instead of an 8-inch square pan, keeping the chilling time the same.
Do I have to swirl in extra peanut butter, or can I skip that step?
You can skip it if you prefer — the fudge will still taste great with just the chopped peanut butter cups folded in, though the swirl adds extra peanut butter flavor and a nice visual touch.
Can I add nuts to this fudge as well?
Yes — chopped roasted peanuts can be folded in alongside the peanut butter cups for extra crunch and reinforced peanut flavor.
Can I use crunchy peanut butter for the swirl instead of creamy?
Smooth peanut butter swirls most cleanly through the warm chocolate mixture, but a well-stirred crunchy peanut butter can work if that’s what you have on hand, giving a slightly more textured swirl.
Why did my peanut butter cups sink to the bottom of the pan?
This can happen if the chocolate mixture was still quite thin and warm when poured into the pan. Letting the mixture cool and thicken slightly before pouring, or gently stirring once more just before pouring, helps distribute the pieces more evenly throughout.
One last thing worth mentioning: this fudge is a genuinely reliable recipe to lean on for last-minute gifting or entertaining, since it requires no specialized candy-making skill and comes together with ingredients most people already have on hand or can easily grab in one trip to the store.