
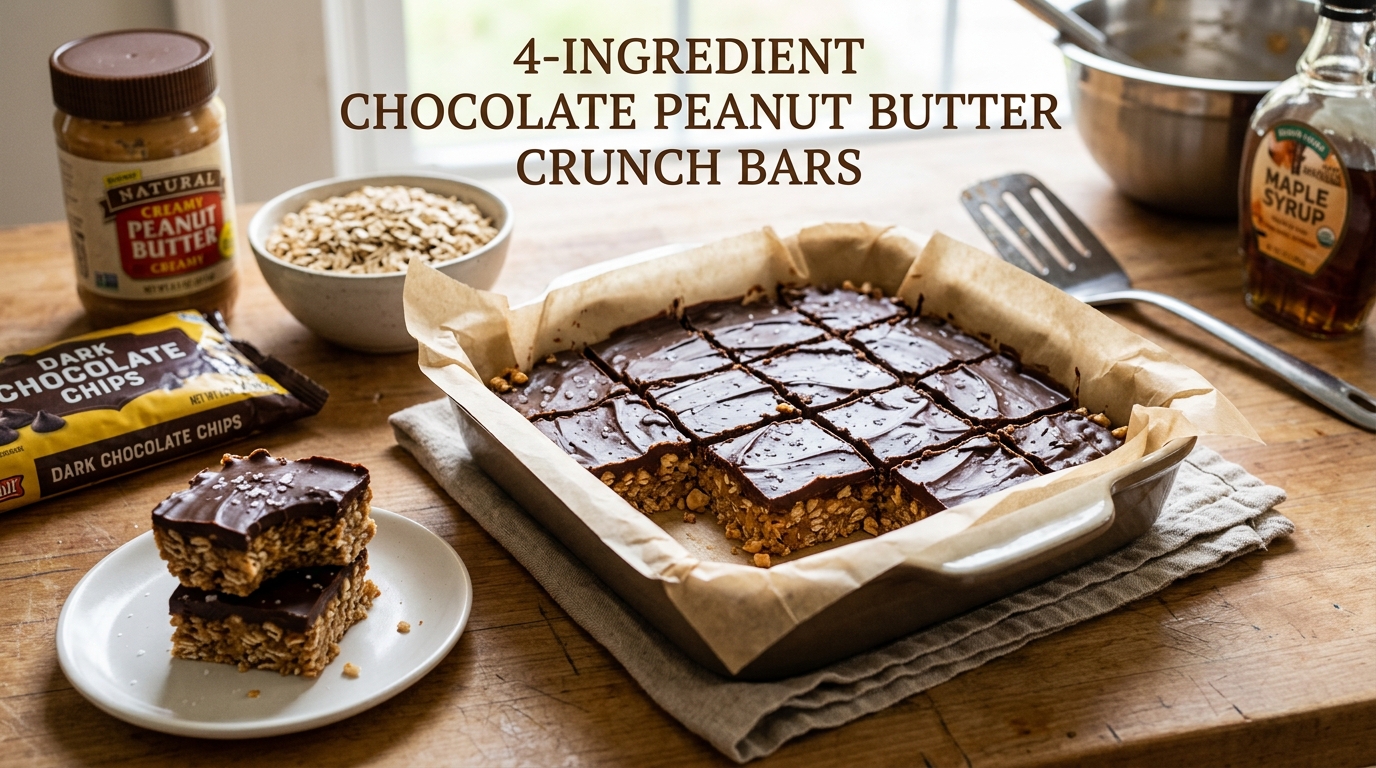
Chocolate Peanut Butter Crunch Bars
Puffed rice cereal, peanut butter, and maple syrup, topped with a firm chocolate layer and a scatter of flaky sea salt.
Thank you for reading this post, don't forget to subscribe!
There’s a particular satisfaction in a bar that manages to be both crisp and dense at the same time — light puffed cereal bound together tightly enough to hold its shape, topped with a clean layer of set chocolate. That’s exactly what these bars deliver, and they do it with a shorter, more natural ingredient list than most versions of this style of treat.
Puffed rice cereal, peanut butter, and maple syrup form the base, warmed together just enough to combine into a thick, bindable mixture, then pressed firmly into a pan. A layer of melted chocolate goes on top, finished with a scatter of flaky sea salt that cuts through the sweetness of both layers below it.
What sets in the fridge is dense, crunchy, and satisfying in a way that feels a little more grown-up than a classic marshmallow-based cereal treat — no marshmallow at all here, with maple syrup instead doing the work of binding everything together while adding its own distinct, slightly caramel-like sweetness.
This is the bar to reach for when you want something that tastes indulgent but is built from ingredients that read a little cleaner than a candy-shop treat — real peanut butter, real maple syrup, and good chocolate, with nothing else standing between you and the flavors doing the actual work.
It’s also worth noting how well this particular combination scales for different occasions. Cut into standard bars, these work as an afternoon snack or lunchbox treat. Cut smaller, they become a shareable party bite. The same base recipe adapts easily to whatever the occasion calls for, without any change to the method itself.
A Little Bit of History
Crispy rice cereal treats trace back to the 1930s, when a version built on melted marshmallow first appeared on the back of a cereal box as a way to showcase the product in a new, kid-friendly format. That original recipe — cereal, butter, and marshmallow — became one of the most widely reproduced no-bake treats of the 20th century, largely because it required no oven and almost no cooking skill to execute successfully.
Peanut butter-based variations emerged over the following decades as home bakers began experimenting with different binders in place of marshmallow, looking for deeper, more complex flavor than the original’s fairly one-note sweetness. Peanut butter offered exactly that — richness, a slightly savory edge, and a flavor that paired naturally with the chocolate toppings that started appearing on countless homemade versions of the classic treat.
Maple syrup as a binder specifically reflects a somewhat more recent shift in home baking toward natural sweeteners in place of processed sugar or marshmallow, part of a broader trend of reworking classic treats with ingredients that feel a bit more wholesome without sacrificing the indulgent character of the original. Maple syrup brings its own distinct flavor to the mix — a caramel-like depth that plain white sugar or marshmallow simply doesn’t offer — while still providing enough stickiness to bind the cereal together effectively.
This particular combination — puffed rice, peanut butter, maple syrup, and a chocolate topping — sits at an interesting crossroads between a classic childhood treat and something that could reasonably show up on a specialty snack shelf. It keeps the nostalgic crunch and satisfaction of the original marshmallow treat while swapping in ingredients that read as more deliberate and adult, which is likely a big part of why this style of bar has found such a devoted following among home bakers looking for a slightly more sophisticated version of a familiar favorite.
It’s worth situating this recipe within the broader movement toward ‘cleaner’ or more natural adaptations of classic treats that’s shaped a lot of home baking over the past fifteen to twenty years. Home cooks increasingly look for ways to recreate beloved, nostalgic recipes using ingredients that feel a bit more transparent and less processed — swapping marshmallow for natural sweeteners, refined sugar for maple syrup or honey, without necessarily aiming for a health food, but simply wanting a treat built from ingredients whose names they recognize and can pronounce.
This particular bar sits comfortably within that trend without making any real health claims of its own — it’s still a rich, sweet, indulgent treat, just built from a slightly different, more natural set of building blocks than its marshmallow-based ancestor. That distinction matters to a meaningful number of home bakers, even if the finished product’s calorie and sugar content isn’t dramatically different from the classic version.
Why This One Works
Peanut butter and maple syrup, warmed gently together, become thin and pourable enough to coat every piece of puffed rice cereal evenly. As the mixture cools, both ingredients firm back up — peanut butter’s natural fat content solidifies, and maple syrup’s sugar concentration thickens — locking the cereal into a dense, cohesive bar rather than a loose, crumbly mixture.
This is a genuinely different binding mechanism than the classic marshmallow version relies on. Marshmallow sets through gelatin, giving a lighter, airier, more stretchy texture. Peanut butter and maple syrup set through fat solidification and sugar concentration instead, which produces a denser, chewier bar with a more substantial bite — closer to a candy bar in texture than to a light, puffed cereal treat.
The chocolate top layer sets simply through cooling, the same way it would on any no-bake bar, giving a firm, snappable cap that contrasts nicely against the denser, chewier base beneath it. Because the base doesn’t rely on marshmallow’s more temperature-sensitive setting behavior, these bars also tend to hold their shape a bit more reliably at room temperature than a classic marshmallow-based treat would, making them a bit more forgiving for transport and storage.
It’s worth understanding, too, why the ratio of cereal to binder matters so much for the final texture. Too much peanut butter and maple syrup relative to cereal, and the bars turn overly dense and heavy, losing the light crunch that makes rice cereal treats appealing in the first place. Too little, and the cereal won’t hold together at all once sliced. The ratio used in this recipe strikes a middle ground that produces a bar substantial enough to feel like a real treat, without tipping over into something too rich or dense to enjoy more than a small piece of at a time.
It’s also worth understanding why gentle, low heat matters so much when combining the peanut butter and maple syrup. Both ingredients can scorch if heated too aggressively — peanut butter’s proteins can separate and turn grainy under high heat, while maple syrup’s natural sugars can caramelize unevenly or even burn if left over too-high heat for too long. A patient, low-and-slow approach here, whether on the stovetop or in short microwave bursts, gives you the smoothest, most reliably combined mixture to work with.
What You’ll Need
- 3 cups puffed rice cereal
- 1 cup natural peanut butter
- 1/3 cup pure maple syrup
- 1 cup semi-sweet chocolate chipsFor the top layer
- Flaky sea salt for toppingOptional
A Closer Look at Each Ingredient
The puffed rice cereal. Any crisp, puffed rice cereal works here, whether a name-brand product or a store-brand equivalent. Fresh cereal matters more than brand — stale cereal that’s lost its crunch will result in a softer, less satisfying finished bar.
The peanut butter. This recipe calls for natural peanut butter specifically, which brings a cleaner, more pronounced peanut flavor and pairs especially well with maple syrup’s natural sweetness. Stir it thoroughly before measuring, since natural peanut butter tends to separate, and using it unstirred can throw off both the texture and the ratio of fat in the recipe.
The maple syrup. Pure maple syrup, rather than a maple-flavored pancake syrup, is worth seeking out here — the flavor difference between the two is significant, and pure maple syrup’s more complex, less one-dimensional sweetness is a big part of what sets this bar apart from a standard marshmallow-based treat.
The chocolate chips. Semi-sweet chocolate chips balance nicely against the sweetness of the peanut butter and maple syrup base, though dark chocolate works especially well too if you’d like a less sweet, more intense finish.
The sea salt. A scatter of flaky sea salt over the chocolate before it sets is genuinely worth including — it cuts through the sweetness of both layers and gives the finished bars a more balanced, less cloying overall flavor.
Equipment You’ll Need
A medium saucepan is useful for gently warming the peanut butter and maple syrup together, though a microwave-safe bowl works just as well if you’d rather use the microwave in short bursts. An 8-inch square pan lined with parchment paper allows for easy removal once the bars are set. A flat-bottomed measuring cup or glass is genuinely one of the most useful tools here, helping you press the cereal base down firmly and evenly across the entire pan — a step that matters more for the final texture than almost anything else in this recipe.
How to Make Them
- Line the pan. Line an 8-inch square pan with parchment paper, leaving overhang on the sides.
- Warm the peanut butter and syrup. In a saucepan over low heat, or in the microwave in short bursts, gently warm the peanut butter and maple syrup together until smooth and pourable.
- Combine with cereal. Place the puffed rice cereal in a large bowl and pour the warm peanut butter mixture over it, stirring until every piece is evenly coated.
- Press into the pan. Transfer the mixture to the prepared pan and press firmly and evenly across the bottom using the back of a spoon or a flat-bottomed measuring cup.
- Melt the chocolate. Melt the chocolate chips gently until smooth, either in the microwave in short bursts or over a double boiler.
- Top with chocolate. Pour the melted chocolate evenly over the pressed cereal base and spread to the edges with a spatula.
- Add the salt. Sprinkle flaky sea salt evenly over the surface while the chocolate is still soft.
- Chill and slice. Refrigerate for at least 2 hours, until the chocolate is fully set, then lift out using the parchment overhang and cut into squares while cold.


Troubleshooting Common Issues
My bars fell apart when I sliced them. This almost always comes down to the cereal base not being pressed firmly enough before the chocolate went on top. Press hard and evenly across the entire pan, and don’t skip the full chilling time before slicing.
My chocolate topping looks dull or streaky instead of glossy. This is chocolate bloom, typically caused by melting too quickly or at too high a temperature. Melt low and slow, stirring frequently, for the glossiest finish.
My bars taste greasy rather than rich. This can happen with a particularly oily natural peanut butter, since the extra liquid fat doesn’t fully bind into the set bar structure. Stirring the peanut butter thoroughly before measuring, so the oil is evenly distributed rather than pooled at the top, helps prevent this.
My cereal base turned out too soft or sticky. This usually means the peanut butter and maple syrup mixture wasn’t warmed and combined thoroughly enough, or the bars didn’t chill long enough before slicing. A longer, undisturbed chill in the fridge typically resolves this.
My bars are too dense and heavy. This can happen if the ratio of peanut butter and syrup to cereal was too high, either from imprecise measuring or from using a particularly thick natural peanut butter. Measuring carefully and using a well-stirred, standard-consistency peanut butter helps keep the ratio balanced.
My chocolate cracked when I sliced the bars. Chilled chocolate can crack rather than cut cleanly if the bars are extremely cold straight from the fridge. Let them sit at room temperature for 5–10 minutes before slicing, and use a sharp, warmed knife for the cleanest cuts.
My peanut butter and maple syrup mixture separated instead of combining smoothly. This can happen if the mixture was heated too quickly or unevenly. Whisk vigorously as you warm the mixture, and consider using slightly lower heat with more frequent stirring next time to help everything emulsify together smoothly.
My bars taste bland or one-note. Since this recipe relies on natural sweeteners rather than refined sugar, the flavor profile leans a bit more subtle than a classic marshmallow treat. A pinch of salt stirred directly into the cereal mixture, in addition to the flaky salt on top, can help boost the overall flavor without needing more sweetener.
Serving Suggestions
These bars are rich and satisfying enough to serve straight from the fridge, and hold their shape and crunch best when kept chilled rather than left at room temperature for extended periods. A few pieces on a small plate alongside a glass of milk makes for a simple, satisfying snack or light dessert.
Because they hold their shape reasonably well at cool room temperature for a few hours, these bars travel nicely for lunchboxes, picnics, and potlucks, provided they don’t sit somewhere too warm for too long. They also cut easily into smaller, bite-sized pieces if you’re serving a crowd or want a lighter portion — simply score the pan into more, smaller squares before the final chill.
For a slightly more elevated presentation, drizzle a bit of extra melted chocolate over the top in thin lines after the main chocolate layer has set, giving the bars a decorative, bakery-style finish with very little additional effort. These bars also make a thoughtful homemade snack gift, packaged in a small box or tin, especially for anyone who appreciates a treat built from real, recognizable ingredients rather than a long list of processed additives.
A cold glass of milk remains the classic pairing here, cutting through the richness of the peanut butter and chocolate in a familiar, satisfying way. For an afternoon coffee break, these bars also pair surprisingly well with a strong cup of coffee, since the bitterness of the coffee balances nicely against the sweetness of the maple syrup and chocolate.
These bars also make a genuinely good project to prepare ahead for the week as a grab-and-go snack, since they hold their texture well over several days in the fridge and provide a more substantial, protein-forward alternative to many typical sweet snacks, thanks to the peanut butter base.
It’s also worth talking about texture consistency across the pan, since that’s one of the small details that separates a good batch from a great one. Pressing the cereal mixture down evenly, corner to corner, matters more than people expect — an unevenly pressed base will have some sections that hold together firmly and others that crumble apart, simply because the density of cereal-to-binder ratio varies across the pan. Taking an extra thirty seconds to press methodically, working from the center outward and checking the corners specifically, pays off noticeably in the final sliced bars.
A Few Ways to Make Them Yours
Extra Crunch
Fold chopped roasted peanuts into the cereal mixture for additional texture and a more pronounced peanut flavor throughout.
Dark Chocolate Top
Use dark chocolate instead of semi-sweet for a less sweet, more intense chocolate finish.
Almond Butter Swap
Substitute almond butter for the peanut butter for a milder, slightly different nutty flavor using the same method.
Honey Version
Swap the maple syrup for honey for a different, slightly more floral sweetness, using the same ratio.
Make-Ahead Tips
These bars are naturally suited to being made ahead, since they need a solid chilling period regardless of when you plan to serve them. They can be fully prepared up to 5 days in advance and kept covered in the fridge, making them a convenient choice for parties, potlucks, or a make-ahead lunchbox treat for the week.
If you know you’ll be serving these over several days, consider slicing only what you need and keeping the remaining block uncut in the fridge, wrapped tightly. An uncut block tends to hold its texture slightly better over time than pre-sliced pieces, which have more exposed surface area and can dry out a little faster at the edges.
For transport to a gathering somewhere warm, keep the bars chilled as long as possible before serving, since both the peanut butter base and the chocolate topping will soften noticeably in heat and lose some of their clean, sliceable structure.
A Note on Dietary Adjustments
This recipe can be adjusted for a few common dietary needs without much trouble. For a gluten-free version, double-check that your puffed rice cereal is certified gluten-free, since some brands are processed in facilities that also handle wheat. For a dairy-free version, use dairy-free chocolate chips, which are widely available and melt in essentially the same way as standard chocolate chips.
For those managing sugar intake, keep in mind that maple syrup, while a more natural sweetener than refined sugar, still contributes meaningfully to the overall sugar content here. Reducing the maple syrup slightly can work, though it may affect how well the cereal base holds together, since the syrup plays a structural as well as a flavoring role.
For those managing portion sizes, these bars are dense and satisfying enough that a smaller square than you might expect goes a long way — cutting the pan into 20 or 24 pieces instead of the standard 16 can help with portion control without sacrificing any of the flavor experience.
For those curious about the nutritional profile compared to a classic marshmallow-based treat, natural peanut butter does contribute meaningful protein and healthy fats to these bars, which is genuinely different from a treat built purely on marshmallow and butter. This doesn’t transform the bars into a health food by any means, but it does mean they’re a somewhat more satiating snack than a purely sugar-based treat of similar size.
For those tracking added sugar specifically, it’s worth knowing that maple syrup, while classified nutritionally as a form of added sugar just like refined sugar, does carry a somewhat lower glycemic impact and contains trace minerals like manganese and zinc that refined white sugar lacks entirely. This is a modest distinction rather than a dramatic health benefit, but it’s part of why many home bakers reach for maple syrup specifically when reworking a classic treat.
Storage
Keep the bars in an airtight container in the fridge for up to a week — the texture holds up well since there’s no marshmallow to dry out or turn stale the way a classic version might. They also freeze nicely for up to 2 months; thaw in the fridge before serving, or eat them cold straight from the freezer for a firmer, denser bite.
Common Questions
Can I use crunchy peanut butter instead of creamy?
Yes — crunchy peanut butter adds extra texture to the base and works just as well structurally as creamy peanut butter in this recipe.
Why did my chocolate layer turn white or streaky after chilling?
This is called chocolate bloom, and it happens when chocolate is melted and cooled too quickly or stored somewhere with fluctuating temperatures. It’s purely cosmetic and doesn’t affect flavor, but melting chocolate slowly and evenly helps prevent it.
Can I skip the maple syrup or use a different sweetener?
Honey works as a direct substitute using the same ratio. Skipping the sweetener entirely isn’t recommended, since it plays a structural role in binding the peanut butter and cereal together, not just a flavoring one.
How long do these bars last?
Stored in an airtight container in the fridge, they’ll stay fresh for up to a week. They can also be frozen for up to 2 months, wrapped tightly, and thawed in the fridge before serving.
Can I double this recipe for a bigger batch?
Yes — simply double all four ingredients and use a 9×13-inch pan instead of an 8-inch square pan. The process and chilling time stay the same.
Can I use a different type of cereal?
Puffed rice cereal gives the classic light, crisp texture this recipe is known for, but other lightly sweetened, crisp cereals can be substituted with slightly different results. Avoid anything overly dense or heavily flavored, since it can overpower the peanut butter and maple syrup.
Why is my finished bar not sweet enough for my taste?
Since this recipe relies on maple syrup rather than refined sugar or marshmallow, the overall sweetness is naturally a bit more subdued than a classic version. If you’d like it sweeter, a bit more maple syrup, or a sweeter variety of chocolate for the top layer, can help.
Can I make these nut-free using a seed butter instead of peanut butter?
Yes — sunflower seed butter can be substituted for the peanut butter using the same ratio, giving a similar texture with a different, slightly earthier flavor profile.
Can I use a microwave instead of the stovetop for the whole recipe?
Yes — warm the peanut butter and maple syrup together in a microwave-safe bowl in 20–30 second bursts, stirring between each, until smooth. Melt the chocolate separately the same way.
Why does my natural peanut butter separate in the jar, and does that matter for this recipe?
Natural peanut butter separates because it doesn’t contain the stabilizers found in many conventional peanut butter brands, allowing the natural oils to rise to the top over time. Stirring it thoroughly before measuring is important here, since an unstirred jar will give you an inconsistent ratio of oil to solids depending on where in the jar you scoop from.
Can I add protein powder to this recipe to boost the protein content further?
A small amount of protein powder, roughly a quarter cup, can sometimes be worked into the cereal mixture, though it may require a touch more maple syrup or peanut butter to maintain the right texture, since protein powder tends to absorb moisture and can make the mixture drier than intended.
One last thing worth mentioning: these bars are a genuinely reliable recipe to keep in regular rotation for anyone who wants a homemade snack that feels a step above a typical candy bar, without asking for anything more complicated than a saucepan, a pan to press the mixture into, and a bit of patience while it chills.