
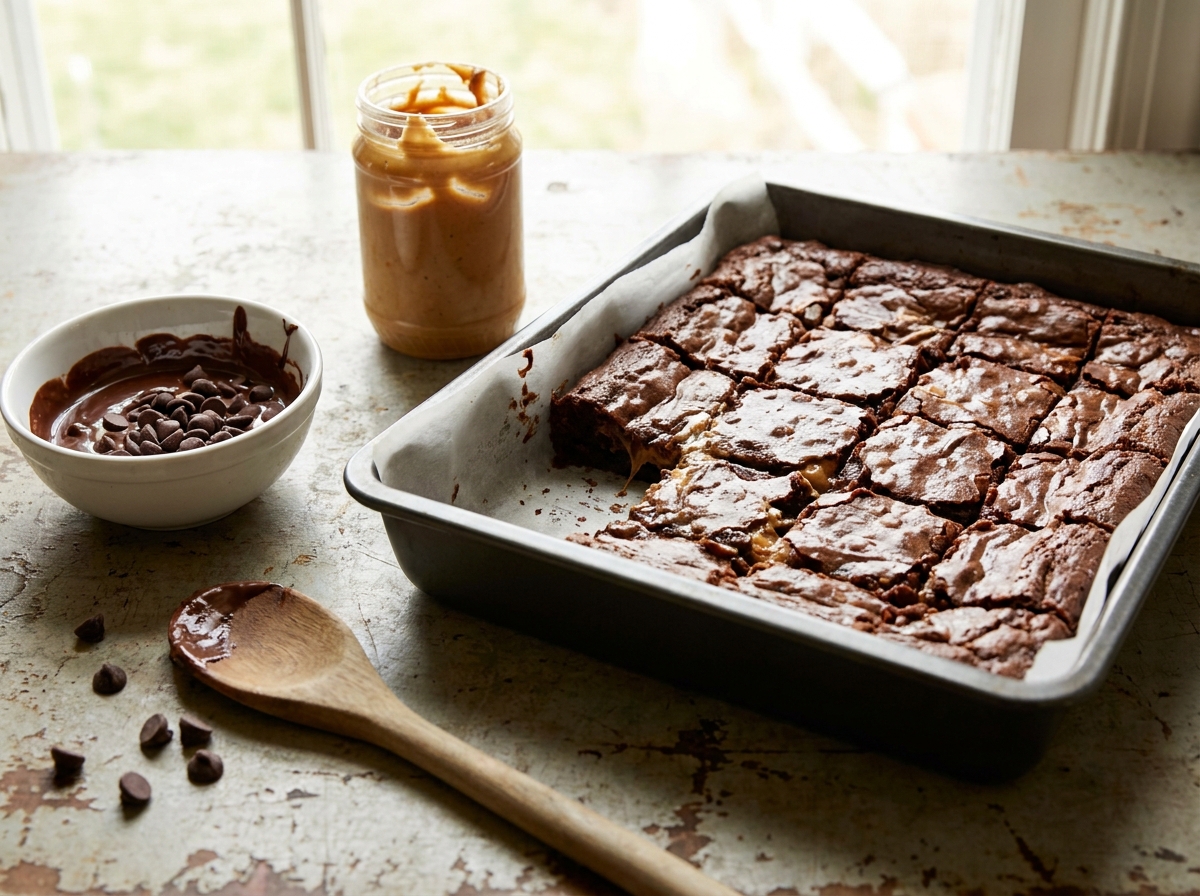
2-Ingredient Chocolate Peanut Butter Brownies
Creamy peanut butter and chocolate hazelnut spread, stirred together and baked into a soft, fudgy brownie — no flour, eggs, or butter.
Thank you for reading this post, don't forget to subscribe!
There are few desserts as satisfying as a homemade brownie, but traditional brownie recipes can involve a surprisingly long ingredient list. These 2-Ingredient Chocolate Peanut Butter Brownies take a completely different approach.
They rely on just creamy peanut butter and chocolate hazelnut spread to create a rich, fudgy-style treat. There is no need for flour, granulated sugar, eggs, butter, or cocoa powder in this particular recipe. Instead, the creamy texture and sweetness come directly from the two ingredients being combined. That simplicity makes these brownies especially appealing when you want something sweet without making a trip to the grocery store for a dozen ingredients.
The preparation takes only about five minutes, and after a short bake, you have a pan of chocolate-peanut butter brownies ready to cool and slice. The flavor combination is familiar for a reason: peanut butter contributes a roasted, nutty richness, while chocolate hazelnut spread brings sweetness, chocolate flavor, and a smooth consistency. When baked together, the mixture transforms into a soft, dense dessert with a wonderfully rich center.
The trick is not to overbake them. You want the center set enough to hold its shape while retaining some softness — that’s what creates the texture people expect from a satisfying brownie. If you love quick baking projects, beginner-friendly desserts, or recipes that require almost no measuring, this is one to keep handy. Sometimes a recipe does not need a long ingredient list to deliver something delicious.
Why These Two-Ingredient Brownies Are So Easy
The charm of this recipe begins with its simplicity. You measure equal amounts of creamy peanut butter and chocolate hazelnut spread, stir them together, spread the mixture into a lined pan, and bake — that is essentially the entire process. Yet the resulting brownies can taste surprisingly indulgent because both ingredients already contain concentrated flavor. Chocolate hazelnut spread supplies a sweet chocolate profile with a creamy texture, while peanut butter adds a roasted depth that prevents the chocolate from tasting flat. The combination resembles the flavor of a chocolate peanut butter candy but in a soft, baked form.
Because there are only two ingredients, the quality and consistency of those ingredients matter. Choose peanut butter with a smooth texture so the batter is easy to mix. A conventional creamy peanut butter is generally convenient for this style of recipe, while natural peanut butter may require thorough stirring before measuring. The chocolate hazelnut spread should also be smooth and easy to stir; if it’s very cold or stiff, allow it to sit at room temperature briefly before combining.
A Simple Dessert With Rich Chocolate Flavor
The batter does not need complicated preparation. In fact, overworking it is unnecessary — simply stir until the two ingredients are fully incorporated and the mixture looks uniform. Once baked, the brownies should have a soft, dense texture that becomes easier to slice after cooling. This recipe is a good reminder that convenience and flavor do not have to be opposites. With the right ingredient pairing, two pantry staples can become a dessert that feels special enough for sharing.
Why Peanut Butter and Chocolate Work So Well Together
Chocolate and peanut butter are one of those classic flavor combinations that seem almost impossible to get tired of. The reason is partly the contrast between sweet and savory flavors. Chocolate hazelnut spread brings sweetness and cocoa richness, while peanut butter contributes roasted peanut flavor and a subtle salty quality. The two ingredients also have naturally complementary textures — both are creamy, so they combine smoothly into a thick batter without requiring elaborate mixing techniques. During baking, that mixture firms enough to become sliceable while retaining a soft texture, similar to taking a creamy candy filling and giving it the structure of a brownie.
The equal proportions in this recipe make the combination especially straightforward. You do not have to calculate a complicated ratio or prepare separate components; just combine one cup of each ingredient and let the oven do the rest. The flavor is also adaptable — if your chocolate hazelnut spread is particularly sweet, the peanut butter helps balance it, and if your peanut butter has a pronounced roasted flavor, the chocolate spread rounds it out with sweetness. That balance is what makes the brownies appealing to both chocolate lovers and peanut butter fans, and it’s why the flavor is instantly recognizable without needing any explanation to guests.
What You’ll Need
- 1 cup creamy peanut butter
- 1 cup chocolate hazelnut spread
That’s the entire list. Each brownie comes out to roughly 250 calories, and the recipe makes 9 squares.
Choosing the Best Peanut Butter and Chocolate Hazelnut Spread
For the peanut butter, creamy peanut butter is the most straightforward choice. Its smooth consistency makes it easier to blend with the chocolate hazelnut spread and helps create a uniform batter. If you use natural peanut butter, make sure it has been thoroughly stirred so the oil is evenly distributed throughout the jar — otherwise, you could end up with a batter that is either too oily or too dry. For the chocolate hazelnut spread, choose a smooth commercial spread with a consistency that is easy to stir. Different brands can vary in sweetness, hazelnut intensity, and thickness, so the final flavor will reflect the product you choose.
Because this is a two-ingredient recipe, those differences can be more noticeable than they would be in a traditional brownie recipe containing many other ingredients. If you want the peanut butter flavor to stand out, choose a peanut butter with a pronounced roasted peanut taste; if you prefer a sweeter brownie, a sweeter chocolate hazelnut spread will naturally push the flavor in that direction. The key is consistency — both ingredients need to combine without excessive effort, and there’s no need to add extra oil or liquid to make the batter smoother.
Equipment You’ll Need
An 8×8-inch baking pan gives you the right thickness for this recipe’s two-ingredient batter. Parchment paper, with a little overhang on two sides, makes lifting the finished slab out of the pan effortless once it’s cooled. A sturdy spatula or wooden spoon is all you need to mix the batter by hand — no electric mixer required, since the ingredient quantities are small and the mixture comes together quickly. A sharp knife, wiped clean between cuts, gives you the neatest squares once the brownies have cooled completely.
How to Make It
- Preheat and prep. Preheat the oven to 350°F (175°C) and line an 8×8-inch baking pan with parchment paper, leaving some overhang on the sides.
- Combine. Place the creamy peanut butter and chocolate hazelnut spread in a mixing bowl and stir together until the color and texture are completely uniform, with no streaks of either ingredient remaining.
- Spread into the pan. Transfer the thick batter to the prepared pan and spread it evenly from edge to edge, creating a relatively level surface.
- Bake. Bake for 18 to 22 minutes. The center should be set but still slightly soft — don’t wait for it to look completely dry and firm.
- Cool completely. Allow the brownies to cool completely in the pan before slicing; the texture continues to firm as they cool.
- Slice. Lift the slab out using the parchment paper and cut into 9 brownies.
Combine the Two Ingredients
At first, you will probably see distinct ribbons of peanut butter and chocolate. Continue mixing until those streaks disappear and the mixture becomes completely uniform — the batter should look glossy and thick, with a consistent chocolate-brown color. If the peanut butter or chocolate spread is unusually stiff, let them sit at room temperature for a few minutes before mixing, and avoid adding unnecessary liquid, since the recipe is balanced around the original two ingredients. Once combined, scrape the sides and bottom of the bowl to make sure no pockets of peanut butter remain; uneven mixing can create sections with different textures or sweetness. The final batter won’t look exactly like traditional brownie batter because it contains no flour or eggs — expect a dense, creamy mixture instead. That is precisely what you want.

Bake Until Just Set
The goal is not to bake the brownies until they become completely firm. You want the center to be set but still slightly soft, which helps preserve the rich, fudgy quality that makes these brownies enjoyable. Start checking around the lower end of the suggested baking range, since ovens can vary — a brownie that looks completely dry and firm in the center may already be more baked than you want. The edges may appear more set while the center retains a little softness; that difference is a useful visual clue. Remember that the brownies will continue to firm as they cool, so removing them at the right moment matters more than simply reaching a particular minute mark. Once the baking time is reached and the center looks set but tender, remove the pan from the oven and place it on a heat-safe surface to cool completely.
Cool and Slice
Cooling is not merely a waiting period; it’s part of the texture-building process. As the brownies cool, the chocolate-peanut butter mixture firms and becomes easier to handle. Allow the pan to cool completely before attempting to slice — cutting while hot can cause the brownies to fall apart. Once cooled, use the parchment paper to lift the entire brownie slab from the pan, place it on a cutting board, and use a sharp knife to divide it into nine brownies, cutting the slab into three rows by three rows for evenly sized pieces. If the knife becomes coated with chocolate, wipe it clean between cuts for a neater finish. If the brownies seem too soft after cooling, refrigerating them briefly can help firm them further; if they’re firmer than expected, letting them sit at room temperature for a short time before serving can soften the texture slightly.
Tips for Perfect Two-Ingredient Brownies
The first rule for these brownies is to avoid overbaking, since the texture depends heavily on the baking time when there are only two ingredients. Remove the brownies when the center is set but still slightly soft, remembering that they’ll firm as they cool. Mix the ingredients thoroughly, scraping the bottom and sides of the bowl as you go, and use room-temperature ingredients when possible, since they tend to combine more smoothly. When spreading the batter in the pan, take a moment to level the surface, since an even layer promotes more consistent baking from edge to center. Finally, allow the brownies to cool completely before cutting — patience at this stage rewards you with cleaner slices and a more stable texture.
Troubleshooting Common Issues
My batter had visible streaks of peanut butter or chocolate. Keep stirring until the color and texture are completely uniform, scraping the bottom and sides of the bowl as you go so nothing is left unmixed.
My brownies turned out dry instead of fudgy. This is almost always overbaking. Since there are only two ingredients here, baking time has an outsized effect on texture — pull them when the center still looks a little soft, not when it looks completely firm.
My brownies fell apart when I cut them. They likely weren’t fully cooled. Let the pan cool completely before slicing; a warm brownie without any flour or eggs for structure needs that cooling time to hold together.
My batter was oily or inconsistent. This usually traces back to natural peanut butter that wasn’t stirred well before measuring. Make sure the oil and peanut solids are fully combined, or use a conventional creamy peanut butter instead.
My brownies seem too soft even after cooling. A brief stay in the refrigerator can firm them up further. If they’re firmer than you’d like, let them sit at room temperature for a few minutes before serving.

A Few Ways to Make It Yours
Chocolate Chips
Fold a handful of chocolate chips into the batter, or sprinkle them on top before baking, for a more intense chocolate bite.
Chopped Peanuts
Scatter chopped roasted peanuts over the batter before baking for extra crunch and a stronger peanut flavor.
Flaky Salt Finish
A small sprinkle of flaky salt over the top plays up the sweet-and-salty contrast between the chocolate and peanut butter.
Brownie à la Mode
Serve a slightly warm square with a scoop of vanilla ice cream for a simple, more indulgent plated dessert.
Remember that every addition changes the recipe’s original two-ingredient appeal, so consider variations optional rather than necessary. If you’re making this for the first time, try the original version first — it gives you a reference point for understanding how any changes affect sweetness, texture, and richness.
How to Store Chocolate Peanut Butter Brownies
After the brownies have cooled and been sliced, store them in an airtight container. Keeping the container sealed helps prevent the brownies from drying out and protects them from absorbing other odors. You can store them at room temperature for short-term serving, provided the environment isn’t excessively warm. Refrigeration can be useful if you prefer a firmer texture or your kitchen is warm — chilled brownies will generally become denser and easier to handle, so let a piece sit at room temperature briefly before serving if you prefer a softer bite. When stacking brownies, use parchment or wax paper between layers to prevent them from sticking together, and avoid leaving them uncovered for long periods, since the exposed surface can dry out with no frosting or filling to protect it.
When to Serve These Easy Brownies
These brownies are useful for almost any occasion where a quick chocolate dessert is welcome: family gatherings, casual dinners, potlucks, bake sales, birthday parties, afternoon snacks, and weekend treats. Because the recipe requires only two ingredients, it’s also a great emergency dessert when unexpected guests arrive, since the five-minute preparation time means you can have the batter in the oven almost immediately. For a dessert table, cut the brownies into smaller squares so guests can enjoy a bite alongside other treats; for family serving, the recommended nine brownies create substantial pieces. You can also serve them warm or slightly softened with ice cream for a simple dessert that feels much more elaborate than the preparation suggests.
Nutrition and Serving Information
The recipe estimates approximately 250 calories per brownie when the batch is divided into nine servings. This number should be treated as an estimate, since the nutritional content of peanut butter and chocolate hazelnut spread varies among brands, and different products can contain different amounts of sugar, fat, and carbohydrates per cup. The exact serving size also matters: cutting the brownies into more than nine pieces gives you fewer calories per piece, while larger portions naturally contain more. These brownies are an indulgent dessert built around two rich, energy-dense ingredients, so they’re best enjoyed as an occasional treat, and smaller pieces can make portion control easier for a gathering. As with any packaged ingredient, people with food allergies should read labels carefully — peanut butter contains peanuts, while chocolate hazelnut spreads commonly contain tree nuts or other ingredients relevant to individual dietary needs.
Make-Ahead Tips
Because the batter takes only minutes to mix, these brownies are easy to make ahead without much planning. Bake and cool the full pan a day before you need it, keep it covered at room temperature or in the fridge, and slice it just before serving so the cut edges stay looking fresh. If you’re bringing them somewhere, transporting the uncut slab and slicing it on arrival is an easy way to keep the pieces looking neat, since a freshly cut edge always looks cleaner than one that’s had time to sit exposed to air.
Common Questions
Do I need flour to make these brownies?
No. This recipe uses only creamy peanut butter and chocolate hazelnut spread, so flour isn’t part of the ingredient list. The texture is therefore different from a traditional flour-based brownie — expect a rich, dense, soft texture rather than a cakey crumb.
Can I double this recipe?
Yes, using a larger pan such as a 9×13-inch to keep the batter roughly the same thickness. A thicker layer in the same size pan will need extra time in the oven, so watch the center rather than relying on the original timing.
Can I freeze these brownies?
Yes. Wrap individual squares or layer them with parchment in an airtight, freezer-safe container, then thaw them in the refrigerator or at room temperature before serving.
Can I use natural peanut butter?
Yes, but stir it thoroughly before measuring. The oil in natural peanut butter can separate during storage, and using only the thicker portion may affect the consistency of the batter.
How do I know when the brownies are done?
They should be set around the edges and in the center while still slightly soft. Don’t wait for the entire surface to look completely dry and firm — start checking around 18 minutes and continue toward 22 if needed.
Why did my brownies turn out too dry?
Overbaking is the most likely reason. Make sure your oven temperature is accurate, begin checking near the lower end of the baking range, and let the brownies cool before judging their texture, since they firm up as they sit.
Can I add chocolate chips or nuts?
Yes, although doing so means the recipe will no longer contain only two ingredients. Chopped roasted peanuts, chocolate chips, or a small sprinkle of flaky salt can all complement the flavor — just start with a modest amount so the brownies retain their soft texture.
2-Ingredient Chocolate Peanut Butter Brownies are a wonderful example of how a dessert can be incredibly simple without feeling boring. With just creamy peanut butter and chocolate hazelnut spread, you can create a rich, soft brownie-style treat with very little preparation. The secret is the balance between the two ingredients and the decision to avoid overbaking — mix, spread, bake, cool, and slice, and you have a dessert that needs no complicated frosting or filling. Sometimes the smartest recipe is the one that keeps things simple, and these two-ingredient brownies make a convincing case for exactly that.