
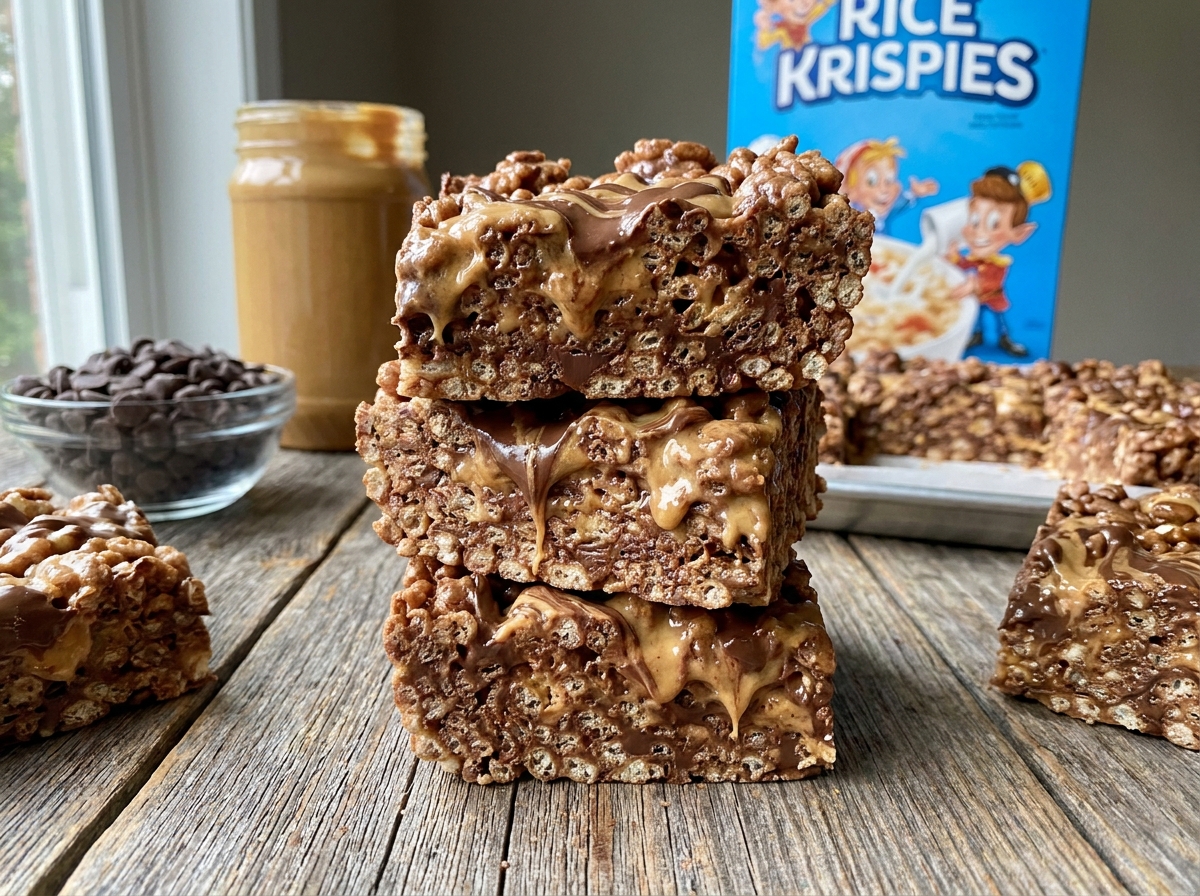
3-Ingredient Chocolate Peanut Butter Rice Krispie Bars
Crisp rice cereal bound together with melted peanut butter and chocolate — no marshmallows, no oven, no fuss.
Thank you for reading this post, don't forget to subscribe!
Traditional rice krispie treats lean on marshmallows and butter for their sticky, chewy structure. These 3-Ingredient Chocolate Peanut Butter Rice Krispie Bars take a completely different route, using melted peanut butter and chocolate chips to bind the cereal instead.
The result is a bar that’s denser and richer than the classic marshmallow version, with a flavor that leans into chocolate-peanut-butter candy territory rather than sugary marshmallow sweetness. There’s no stovetop pot of melted marshmallow to manage and no butter to measure — just cereal, peanut butter, and chocolate chips, melted together and pressed into a pan.
The whole process takes about ten minutes of hands-on time, most of it spent stirring a bowl in the microwave. After that, the pan goes into the refrigerator to firm up while the peanut butter and chocolate solidify around the cereal, locking in that satisfying crisp-tender bite. If you keep a jar of peanut butter and a bag of chocolate chips on hand, you likely already have everything you need for this one, which makes it a reliable go-to whenever a chocolate-peanut-butter craving hits and you don’t want to turn on the oven.
Why These Three-Ingredient Bars Are So Easy
The whole method comes down to melting two ingredients together and stirring them into a third. Peanut butter and chocolate chips melt into a smooth, glossy mixture in the microwave in just a couple of minutes, and that warm mixture is fluid enough to coat every piece of cereal evenly when you pour it over the Rice Krispies. There’s no candy thermometer to watch, no marshmallow to scorch, and no risk of a sticky mess bubbling over on the stovetop. You stir, pour, press, and chill — four steps standing between you and a pan of bars.
Because the recipe relies on just cereal, peanut butter, and chocolate chips, the quality of those three ingredients does a lot of the work. A creamy, well-blended peanut butter melts smoothly and coats the cereal evenly, while good chocolate chips melt into a silky mixture rather than seizing into a grainy paste. Getting those basics right is really the only technique this recipe demands.
A No-Bake Treat With Big Peanut Butter and Chocolate Flavor
Skipping the oven doesn’t mean skipping flavor. Melting the peanut butter and chocolate together concentrates their flavor around every piece of cereal, so each bite delivers a hit of both instead of a thin coating on top. The cereal itself keeps its light crunch even after chilling, which is part of what makes these bars feel different from a dense fudge or a soft cookie — they have real crispness running through a rich, chocolate-peanut-butter base.
Why Peanut Butter and Chocolate Chips Work So Well Together
Peanut butter and chocolate are one of the most dependable flavor pairings in the dessert world, and melting them together plays to both of their strengths. Chocolate chips are formulated to melt into a smooth, stable coating, while peanut butter thins out slightly when warmed, making it easier to combine the two into a pourable mixture. Peanut butter’s natural oil content also helps keep the melted chocolate from seizing and gives the finished bars a slightly softer bite than pure melted chocolate would on its own. The combination sets firm enough to hold a bar shape once chilled, but never turns rock-hard, which is exactly the texture you want from a no-bake cereal treat.
What You’ll Need
- 4 cups Rice Krispies cereal
- 1 cup creamy peanut butter
- 2 cups chocolate chips
That’s the whole ingredient list. Each bar comes out to roughly 290 calories, and the recipe makes 12 bars.
Choosing the Best Peanut Butter and Chocolate Chips
Creamy peanut butter is the easiest choice for this recipe, since it melts smoothly and coats the cereal evenly without any chunky bits getting in the way of a clean press into the pan. If you prefer to use natural peanut butter, stir it thoroughly before measuring so the oil is well distributed; a natural peanut butter that’s separated can throw off the texture of the melted mixture. For the chocolate, standard semisweet chocolate chips are a reliable, widely available option, though milk chocolate chips will give you a sweeter, milder bar, and dark chocolate chips will push the flavor in a richer, less sweet direction. Whichever you choose, chips formulated to hold their shape (rather than a chopped baking bar) tend to melt more predictably in the microwave.
Equipment You’ll Need
An 8×8-inch baking pan is the right size to give these bars a satisfying thickness. Line it with parchment paper, leaving a little overhang on two sides, so you can lift the entire slab out cleanly once it’s chilled. You’ll need a large, microwave-safe bowl for melting the peanut butter and chocolate together, and a sturdy spatula for stirring and for pressing the cereal mixture firmly into the pan. A sharp knife, wiped clean between cuts, makes for the neatest bars once everything has set.
How to Make It
- Prep the pan. Line an 8×8-inch baking pan with parchment paper, leaving some overhang on the sides for easy removal.
- Melt. In a microwave-safe bowl, combine the peanut butter and chocolate chips. Microwave in 30-second intervals, stirring after each one, until completely smooth.
- Combine with cereal. Pour the melted peanut butter and chocolate mixture over the Rice Krispies cereal in a large bowl, and gently stir until every piece is evenly coated.
- Press into the pan. Transfer the mixture to the prepared pan and press it down firmly and evenly with the back of a spatula or lightly greased hands.
- Chill. Refrigerate for 1 to 2 hours, or until completely set and firm to the touch.
- Slice. Lift the slab out using the parchment paper and cut into 12 bars.
Melt the Peanut Butter and Chocolate
Microwaving in short 30-second bursts, stirring in between each one, is the key to melting the peanut butter and chocolate chips without scorching either one. Chocolate can seize or burn quickly if it’s overheated, so resist the urge to microwave it in one long stretch. After the second or third interval, the mixture should look mostly smooth with just a few unmelted flecks of chocolate remaining; stirring at that point is usually enough to finish melting them using residual heat, without needing another round in the microwave. The finished mixture should be glossy, pourable, and free of lumps before you pour it over the cereal.

Press Firmly for the Best Texture
How firmly you press the mixture into the pan has a real effect on how the bars hold together once sliced. Press with even, deliberate pressure across the entire pan, working from the center outward, rather than lightly patting the surface. If the mixture sticks to your spatula or hands, lightly greasing them, or pressing through a sheet of parchment paper laid on top, makes the job much easier. A firmly packed pan will produce bars that hold their shape well when sliced and eaten out of hand; a loosely packed one is more likely to crumble apart at the edges.
Chill Until Completely Set
Refrigeration is what turns this from a bowl of coated cereal into a sliceable bar. As the chocolate and peanut butter cool, they firm up around each piece of cereal, locking the whole structure together. Give the pan the full 1 to 2 hours in the refrigerator, and resist the temptation to slice early — a bar that hasn’t fully set will fall apart rather than hold a clean edge. If your kitchen runs warm, lean toward the longer end of the chilling window, or place the pan in the freezer for a faster set if you’re short on time.
Tips for Perfect Rice Krispie Bars
Melt the peanut butter and chocolate slowly, in short microwave intervals, to avoid scorching either ingredient. Stir the cereal in gently once the melted mixture is added, since a light hand preserves more of the cereal’s crunch. Press the mixture into the pan with real, even pressure so the bars hold together once sliced, and give the pan the full chilling time before cutting. If you’d like a firmer bar for easier snacking on the go, an extra 30 minutes in the freezer after the initial chill firms things up further without changing the flavor.
Troubleshooting Common Issues
My chocolate mixture looks grainy or seized instead of smooth. This usually happens from overheating. Microwave in shorter intervals, stirring frequently, and stop as soon as the mixture looks mostly smooth — residual heat will finish the job.
My bars fell apart when I sliced them. They likely weren’t pressed firmly enough into the pan, or didn’t get the full chilling time. Press with real pressure next time, and let the pan chill until completely firm before cutting.
My bars turned out too hard. This can happen if the pan spent too long in the freezer instead of the refrigerator. A quick stint at room temperature before serving will soften them back up.
The cereal got crushed and mushy instead of staying crisp. Stir gently once you combine the melted mixture with the cereal; vigorous stirring crushes the crisped rice and dulls the crunchy texture that makes these bars enjoyable.
My bars are sticking to the knife. Wipe the blade clean between cuts, and consider running it under warm water first — a warm blade glides through the chilled chocolate coating more cleanly.

A Few Ways to Make It Yours
Extra Drizzle
Melt a little extra peanut butter and chocolate to drizzle over the top of the finished bars for a bakery-style finish.
Flaky Salt Finish
A light sprinkle of flaky sea salt over the top plays up the contrast between the sweet chocolate and the salty peanut butter.
Chopped Peanuts
Stir a handful of chopped roasted peanuts into the mixture along with the cereal for extra crunch and a stronger peanut flavor.
Dark Chocolate Swap
Use dark chocolate chips instead of semisweet for a richer, less sweet bar that leans further into chocolate flavor.
Try the classic three-ingredient version first so you have a baseline for texture and sweetness, then decide whether any of these small additions are worth making part of your regular routine.
How to Store Chocolate Peanut Butter Rice Krispie Bars
Store the bars in an airtight container to keep them from drying out or picking up other odors from the refrigerator. They’ll keep well in the refrigerator for up to a week, and can also be kept at cool room temperature for a day or two if your kitchen isn’t too warm. Layer parchment or wax paper between the bars if you’re stacking them, since the chocolate coating can stick to itself in a warm container. For longer storage, the bars also freeze well — wrap them individually or layer them with parchment in a freezer-safe container, and thaw at room temperature or in the refrigerator before serving.
When to Serve These Easy Bars
These bars work well anywhere a portable, no-bake chocolate-peanut-butter treat is welcome: lunchboxes, after-school snacks, bake sales, potlucks, and casual get-togethers. Because there’s no oven involved, they’re also a convenient option to make ahead for a busy week, since a batch keeps well in the refrigerator and can be portioned out as needed. Cut them into smaller squares for a dessert table alongside other treats, or keep them at the full bar size for a more substantial snack. They also travel well, holding their shape at room temperature for a few hours, which makes them a practical choice for packed lunches or a road trip snack.
Nutrition and Serving Information
The recipe estimates approximately 290 calories per bar when the batch is divided into 12 pieces. This is only an estimate, since the exact calorie, sugar, and fat content will vary depending on the specific brands of peanut butter and chocolate chips used, along with the type of rice cereal. Cutting the bars into smaller or larger pieces will change the calories per serving accordingly. Because the recipe is built around cereal, peanut butter, and chocolate, it’s an indulgent snack best enjoyed in moderation, and smaller portions can make it easier to fit into a broader eating pattern. As always, check ingredient labels for peanut and tree nut allergens, since both peanut butter and many chocolate products are processed in facilities that handle a variety of nuts.
Make-Ahead Tips
Because the bars need time in the refrigerator regardless, this is a naturally make-ahead recipe. Prepare the full pan a day or two before you need it, keep it covered in the refrigerator, and slice just before serving so the cut edges look their freshest. If you’re transporting them somewhere, carrying the uncut slab and slicing on arrival keeps the bars looking neat, since a freshly cut edge always looks cleaner than one that’s had time to sit out.
The Science Behind No-Marshmallow Cereal Bars
Classic rice krispie treats depend on melted marshmallow, which is mostly sugar, gelatin, and air, to glue the cereal together into a chewy, stretchy bar. This recipe swaps that binder entirely, relying instead on the natural fat in peanut butter and the cocoa butter in chocolate chips. When those two are melted together and then cooled, the fats re-solidify around each piece of cereal, creating a firm but not rock-hard structure that holds the bars together without any gelatin at all. That’s why these bars feel denser and chewier in a different way than a marshmallow-based treat — the binding comes from fat rather than sugar and air, which also means the bars stay a little softer at room temperature and firmer straight from the refrigerator.
This fat-based binding is also why chilling matters so much here. A marshmallow-bound treat sets up at room temperature as the sugar cools, but a peanut-butter-and-chocolate mixture needs the colder temperature of a refrigerator to fully solidify around the cereal. Skip the chilling step, or cut the time too short, and the bars will hold together loosely rather than slicing into clean, sturdy pieces.
A Little Bit of History
Rice krispie treats trace back to a marshmallow company recipe from the 1930s, originally created as a way to sell more marshmallows by pairing them with a popular puffed rice cereal. The treat became a lunchbox and bake-sale staple almost immediately, prized for how quickly it could be made with only a few ingredients. Over the decades, home cooks have adapted the basic idea in countless directions, swapping the marshmallow binder for other sticky, meltable ingredients — caramel, condensed milk, and, as in this recipe, a combination of peanut butter and chocolate. The chocolate-peanut-butter version leans on a pairing that has its own long history in American candy making, going back to peanut butter cups and other combinations that paired roasted peanut flavor with sweet chocolate. Combining that flavor tradition with the quick, no-bake format of a classic cereal treat is part of what makes this particular bar feel both familiar and a little different from the marshmallow version most people grew up with.
Portioning and Yield
This recipe fills an 8×8-inch pan and is typically cut into 12 bars, which makes for a satisfying but not overly large portion given how rich the peanut butter and chocolate coating is. If you’re serving a crowd or setting these out alongside other treats on a dessert table, cutting the pan into 16 smaller squares stretches the yield further while still giving everyone a satisfying bite. For a heartier snack bar meant to be eaten on its own, sticking with the original 12-bar cut, or even cutting it into just 9 larger pieces, gives you a more substantial portion. If you want to double the recipe for a bigger gathering, use a 9×13-inch pan and keep the same ratio of cereal, peanut butter, and chocolate chips, checking that the mixture still presses into an even layer roughly the same thickness as the smaller batch.
Common Questions
Do I need marshmallows for this recipe?
No. Unlike classic rice krispie treats, this version skips marshmallows entirely and relies on melted peanut butter and chocolate chips to bind the cereal, which gives the bars a denser, richer texture.
Can I use a different cereal?
Yes, though the classic Rice Krispies texture is what this recipe is built around. Other puffed or crisped rice cereals will work similarly, but flavor and crunch may vary slightly by brand.
Can I freeze these bars?
Yes. Wrap individual bars or layer them with parchment in an airtight, freezer-safe container, then thaw them in the refrigerator or at room temperature before serving.
Can I use natural peanut butter?
Yes, but stir it thoroughly before measuring, since the oil in natural peanut butter can separate during storage and affect how smoothly the mixture melts and coats the cereal.
Why did my mixture turn out grainy?
This is usually caused by overheating the chocolate. Melt in short microwave intervals, stirring frequently, and stop as soon as the mixture looks mostly smooth rather than waiting for it to look perfect in the bowl.
How do I get clean slices?
Make sure the bars are completely chilled and firm before cutting, and use a sharp knife wiped clean, or warmed under running water, between each cut.
Can I add nuts or other mix-ins?
Yes, chopped peanuts, mini chocolate chips, or a sprinkle of flaky salt can all be folded in or added on top. Just keep in mind that the recipe will no longer be strictly three ingredients once you start adding extras.
3-Ingredient Chocolate Peanut Butter Rice Krispie Bars show that you don’t need marshmallows, butter, or an oven to get a satisfying chocolate-peanut-butter treat with real crunch. Melt two ingredients, stir them into a third, press into a pan, and let the refrigerator do the rest. The result is a dense, chewy, chocolate-and-peanut-butter bar that comes together almost entirely hands-off, which makes it one of the easiest treats to keep in regular rotation whenever a craving strikes.