
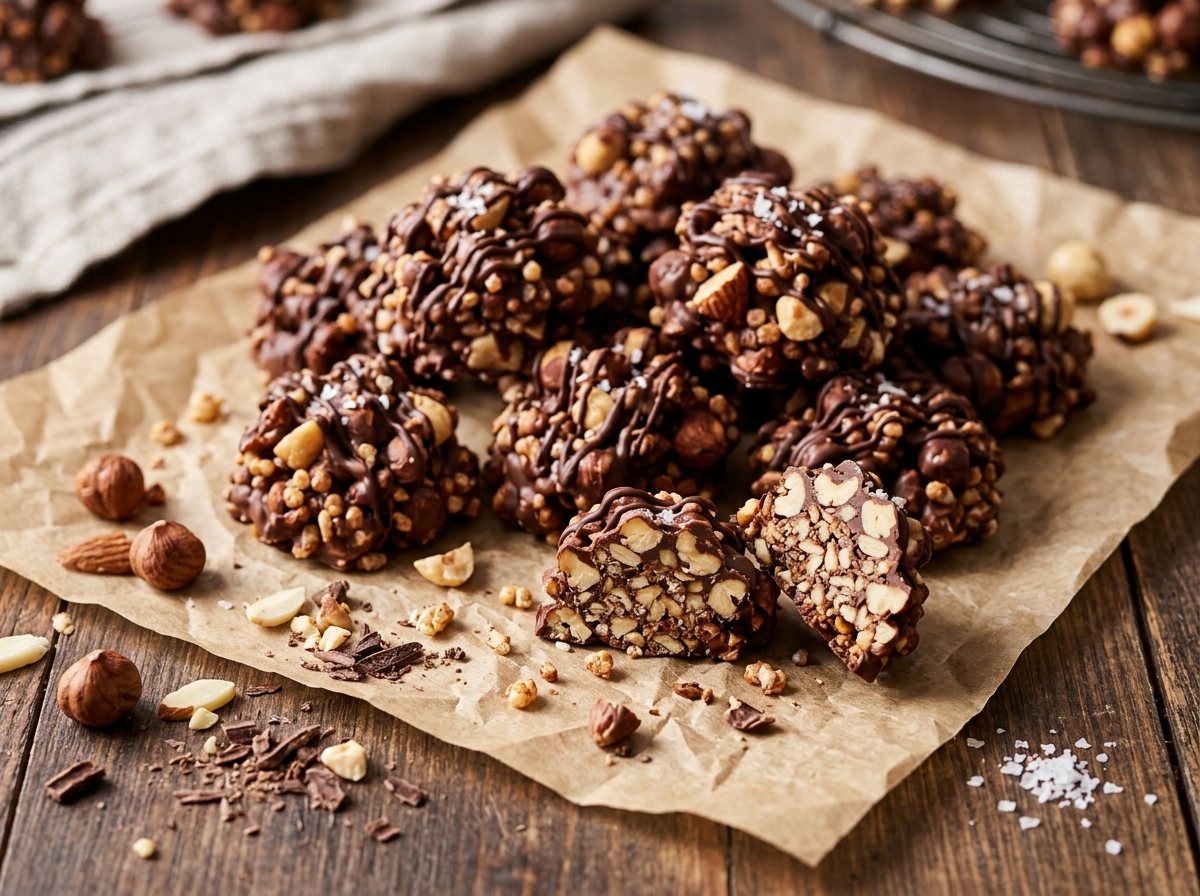
Chocolate Nut Crunch Bites
Smooth melted chocolate stirred with roasted mixed nuts and dropped into crunchy, bite-sized mounds that set in just 30 minutes.
Thank you for reading this post, don't forget to subscribe!
Just two ingredients turn into rich, crunchy, bite-sized chocolate treats, with no oven and no candy thermometer required. There’s semi-sweet chocolate melted until smooth, stirred together with roasted mixed nuts, and dropped onto a sheet in little mounds to set.
Roughly chopping the nuts, melting the chocolate in short bursts, stirring until every piece is coated, and spooning the mixture into small mounds on parchment is most of the process here. Half an hour in the refrigerator is all that’s left before these bites are ready to enjoy.
Crunchy, chocolatey, and satisfying, these bites are an easy afternoon snack, a party treat, a holiday candy tray addition, or a simple homemade dessert when a chocolate craving hits.
Why This Recipe Works
Semi-sweet chocolate sets firm on its own as it cools, which makes it the perfect binder for a generous handful of roasted nuts. Once the melted chocolate coats every piece and the mounds are chilled, the cocoa butter solidifies and holds the nuts together in a sturdy, crunchy cluster, with no butter, syrup, or extra sugar needed.
Roasted nuts bring a deep, toasty flavor and a satisfying crunch that contrasts beautifully with the smooth chocolate, and using a mix of nuts means every bite is a little different from the last.
Why Leaving Some Larger Pieces Matters
Chopping the nuts roughly, rather than finely, and leaving some larger pieces whole is what gives these bites their chunky, crunchy texture. Larger pieces create craggy, rustic clusters with plenty of bite, while smaller pieces fill in the gaps and help the mounds hold together. A large chef’s knife and a rocking motion make quick work of the chopping, and any nut dust left on the board can go right into the bowl too.
What You’ll Need
- 2 cups (340g) semi-sweet chocolate chips
- 1 cup (140g) roasted mixed nuts, roughly chopped
You’ll also need a baking sheet lined with parchment paper. A pinch of flaky sea salt on top is optional. This recipe makes 16 bites.
A Note on Ingredient Choices
Roasted nuts, rather than raw, give these bites a deeper, toastier flavor and a crisper crunch. A mix of almonds, peanuts, cashews, hazelnuts, or pecans works beautifully, and semi-sweet chocolate keeps the sweetness balanced, while milk chocolate chips make a sweeter, softer bite.
Equipment You’ll Need
A cutting board and knife, a microwave-safe bowl, a rubber spatula, two spoons or a small cookie scoop, and a baking sheet lined with parchment paper are all you need; no oven or candy thermometer required.
How to Make It
- Prepare the nuts. Roughly chop the roasted mixed nuts into small pieces. Leave some larger pieces for extra crunch.
- Melt the chocolate. Add the chocolate chips to a microwave-safe bowl. Microwave in 20–30 second intervals, stirring each time, until the chocolate is smooth.
- Add the crunch. Stir the chopped nuts into the melted chocolate until every piece is coated.
- Form the bites. Line a baking sheet with parchment paper. Drop spoonfuls of the chocolate nut mixture onto the sheet, shaping them into small mounds.
- Chill. Refrigerate for about 30 minutes, or until the chocolate is firm.
- Serve. Remove the bites from the parchment paper and enjoy.
Getting Every Nut Fully Coated
Stirring the nuts into the chocolate with a few slow, folding turns, scraping up from the bottom of the bowl each time, is what coats every piece evenly. The mixture should look glossy all over, with no bare, dry-looking nuts peeking through.

Getting Even Mounds
Using two spoons or a small cookie scoop to portion out the mixture helps every bite come out about the same size, so they all set in the same amount of time. Scooping while the chocolate is still warm is key, since it thickens as it cools and becomes harder to shape the longer it sits.
Knowing When They’re Done
These bites are ready once the chocolate looks matte and feels completely firm to the touch, and the mounds lift cleanly off the parchment without leaving chocolate behind. If they still feel soft after 30 minutes, give them another 10 to 15 minutes in the refrigerator.
Tips for Perfect Chocolate Nut Crunch Bites
Melting the chocolate slowly in short bursts, rather than one long stretch, keeps it glossy and smooth instead of thick and grainy. Making sure the nuts are completely dry and at room temperature before stirring them in helps the chocolate coat them evenly without firming up too quickly. If your mixed nuts are salted, give them a quick shake in a sieve to remove any loose salt so the bites don’t taste overly salty.
Troubleshooting Common Issues
My chocolate turned thick and grainy. It was likely overheated or touched by water; melt in shorter intervals and keep everything dry. My bites are falling apart. There may not have been enough chocolate for the nuts; measure carefully and coat every piece. My chocolate looks streaky or dull after setting. It was probably heated too much; this doesn’t affect flavor, and melting more gently next time keeps it glossy. My bites are sticking to the parchment. They’re not fully set yet; chill a little longer.
A Few Ways to Make It Yours
Crispy Rice Crunch
Stir in a handful of crispy rice cereal or crushed cornflakes for an extra-light, crackly texture.
Sea Salt Finish
Top each mound with a pinch of flaky sea salt to balance the sweetness.
Milk Chocolate Version
Swap the semi-sweet chips for milk chocolate for a sweeter, creamier bite.
Chocolate Drizzle
Finish the set bites with thin lines of melted chocolate for a bakery-style look.
The classic version is worth trying first so you know the baseline flavor before adding any extras.
How to Store These Bites
Keep the bites in an airtight container in a cool place or in the refrigerator for up to two weeks, with parchment between any stacked layers. Keeping them away from heat and sunlight stops the chocolate from softening or developing a dull, streaky surface. If they do develop a pale bloom, they’re still perfectly safe to eat; the cocoa butter has simply shifted to the surface and the flavor is unchanged.
When to Serve These Bites
These bites work beautifully as an afternoon snack, a holiday candy tray addition, a game-day treat, or a simple homemade dessert. They’re also a welcome addition to a cheese board, where their crunch and rich chocolate pair nicely with fruit and cheese.
Nutrition and Serving Information
This recipe makes 16 bites at roughly 150 calories per bite, though exact calorie content will vary depending on the nuts and chocolate used and the size of each mound. Because this recipe contains tree nuts and often peanuts, it isn’t appropriate for anyone with a nut allergy, and semi-sweet chocolate may contain traces of milk.
Make-Ahead Tips
These bites are a genuinely good make-ahead treat, since they keep their crunch for up to two weeks when stored airtight. Making them several days before a party or holiday removes any last-minute pressure entirely. They’re also handy to keep on hand for unexpected guests, since a plate of chocolate nut bites makes a quick, homemade-looking dessert with no extra effort.
The Science Behind These Bites
Melted chocolate is a mixture of cocoa solids and sugar suspended in liquid cocoa butter, and as it cools in the refrigerator the cocoa butter crystallizes back into a solid, holding everything together. Roasting nuts drives off moisture and triggers browning reactions that create deep, toasty flavors and a crisp texture, and coating them in chocolate seals that crunch in by keeping humidity out. That same seal is why these bites stay crisp for days, while uncoated roasted nuts left in an open bowl soften within a day or two as they absorb moisture from the air.
Portioning and Yield
This recipe makes about 16 bites using a heaping tablespoon for each one, a good amount for a small gathering or a couple of weeks of snacking. Using a teaspoon instead gives about 30 tiny bites, which is a nice option for a candy tray or party platter.
A Little Bit of History
Chocolate-covered nuts have been a candy shop favorite for well over a century, and nut clusters became a staple of American holiday candy boxes in the early twentieth century. Homemade versions made with simply melted chocolate and a handful of nuts have long been a go-to treat for home cooks who want candy-shop flavor without any special equipment. Today, chocolate nut clusters remain one of the most popular treats in holiday candy boxes, and this easy version captures the same crunchy, chocolatey appeal in about 40 minutes.
Serving Suggestions
Serve these bites piled on a parchment-lined board or set in small paper candy cups for an easy, grab-and-go presentation. A few whole nuts and chocolate shavings scattered around them make a simple, rustic display. For a party, arranging them in neat rows on a long board alongside fresh berries and a few squares of chocolate makes an easy, eye-catching dessert spread.
Choosing the Right Nuts
Roasted mixed nuts are the easiest choice here, offering a variety of flavors and textures in every bite. Almonds give a firm crunch, cashews add a buttery softness, peanuts bring a classic candy-bar flavor, and hazelnuts or pecans add a rich, toasty depth, so feel free to use whatever combination you enjoy most.
Why This Recipe Is So Beginner-Friendly
If you’ve never made a chocolate candy before, this is a genuinely forgiving place to start, since there’s no boiling sugar, no tempering, and no candy thermometer involved. With just two ingredients, a bowl, and a spoon, there’s very little room for mistakes, which makes this a great first project.
Adjusting the Flavor to Your Taste
As written, these bites get their flavor almost entirely from the semi-sweet chocolate and the roasted nuts, giving a rich, toasty, classic chocolate-nut taste. If you’d like a different flavor profile, a pinch of cinnamon, a little espresso powder in the chocolate, or a sprinkle of flaky sea salt shifts the whole bite in a new direction while keeping the same simple method. Because this recipe has so few ingredients to begin with, small changes tend to have a noticeable effect on the final flavor, so it’s worth trying the classic version first.
Pairing These Bites With Other Treats and Drinks
Because the flavor here is rich and nutty, these bites pair naturally with lighter, fruitier desserts if you’re serving more than one, since the contrast keeps a spread feeling balanced. A lemon bar or a fruit tart rounds out a dessert table nicely alongside these, while a caramel or fudge treat leans further into the same indulgent direction. On the drink side, these bites pair well with a hot coffee, a cold glass of milk, or a mug of hot cocoa.
A Note on Ingredient Proportions
Using two cups of chocolate chips against one cup of nuts gives enough chocolate to coat and bind every piece while still letting the crunch shine through, and it’s worth understanding why that balance matters before adjusting it. Adding too many nuts leaves dry pieces that fall away from the clusters, while too few makes the bites more like plain chocolate drops. This particular ratio is what gives the finished bites their crunchy, chocolatey balance, so it’s worth treating the stated amounts as a tested baseline.
A Quick Note on Serving Temperature
These bites taste best at cool room temperature, when the chocolate is firm but not hard and the nuts are at their crunchiest. If serving at a warm gathering, keep them in a shaded spot or on a chilled plate to help them hold their shape.
Why This Recipe Is Naturally Kid-Friendly to Make
Because this recipe involves melting, stirring, and spooning, with no oven or hot stovetop involved at any point, it’s a genuinely fun treat to make with kids. With an adult handling the chopping and the warm bowl, little helpers can stir in the nuts, spoon out the mounds, and add their own toppings, which makes this an easy, rewarding weekend project.
A Quick Note on Portion Control
Because these bites are rich with chocolate and nuts, one or two go a long way compared to a lighter snack. Making them smaller is an easy way to stretch a single batch further for a larger gathering.

A Note on Presentation
How you finish these bites changes the impression they make almost as much as the flavor itself. Dropped plainly onto parchment, they read as a simple homemade snack. Drizzled with extra chocolate, topped with chopped nuts and a pinch of flaky salt, and set in little paper cups, the same bites suddenly look like something from a chocolatier’s counter, which makes this a recipe worth dressing up for a party or keeping simple for an everyday treat.
A Final Note on Batch Size
This recipe is sized to make 16 bites, which keeps the whole process manageable within about 40 minutes including the chilling step. For a bigger batch, double both ingredients and use two lined baking sheets, working quickly so the chocolate doesn’t thicken before every mound is spooned out.
A Word on Texture
The texture of these bites comes from the contrast between smooth, snappy chocolate and the crunchy, toasty nuts packed inside. That contrast is part of what makes each bite so satisfying, and it’s why leaving some nuts in larger pieces matters, since big chunks give the bites their rustic, crunchy character.
A Note on Working With Melted Chocolate
Chocolate chips contain stabilizers that help them hold their shape, which means they can look solid even when they’re mostly melted. Stirring between every short microwave burst is the best way to judge how melted they really are, and keeping every bowl and spatula completely dry protects the chocolate from seizing.
A Note on Gifting This Batch
Because they keep well for up to two weeks, these bites make a lovely homemade gift for neighbors, teachers, or friends during the holidays. Packed in a tin or a small box lined with parchment, or tucked into individual candy cups, they travel well and keep their shape nicely.
A Note on Scaling Down the Batch
If 16 bites is more than you need, this recipe halves easily, using one cup of chocolate chips and half a cup of nuts. A smaller batch is a good option for a quick craving, and it still only takes a few minutes to stir together before chilling.
A Note on Choosing Your Baking Sheet
A standard rimmed baking sheet gives plenty of room to space the mounds apart so they set evenly. A large plate or tray works too if it fits in your refrigerator, as long as it’s lined first. Leaving a little space between each mound keeps them from fusing together. Whatever surface is used, lining it with parchment gives the cleanest release.
Why Parchment Paper Makes a Difference
Lining the baking sheet with parchment paper lets the bites set without sticking, so they lift off cleanly in one piece with smooth, glossy bottoms. It also makes cleanup almost effortless, since any stray drips of chocolate stay on the paper rather than the pan.
Common Questions
Which nuts work best?
Roasted almonds, peanuts, cashews, hazelnuts, and pecans all work well, alone or mixed together.
Can I use milk chocolate instead?
Yes, milk chocolate chips make a sweeter, creamier bite.
Why did my chocolate seize?
It was likely overheated or touched by water; melt in short intervals and keep everything dry.
Can I use raw nuts?
You can, but roasted nuts give a deeper flavor and a crisper crunch; toast raw nuts first if you have time.
Do these need to be refrigerated?
They can be stored in a cool place, but the refrigerator helps in warm weather.
How long do they keep?
Up to two weeks in an airtight container in a cool place or the refrigerator.
Can I freeze these bites?
Yes, freeze them in a sealed container for up to three months and thaw in the refrigerator before serving.
However you top them and whoever you share them with, these chocolate nut crunch bites deliver rich, crunchy, chocolatey goodness from nothing more than two simple ingredients and a bowl. They’re proof that a candy-shop-worthy treat doesn’t need any special equipment to come together beautifully.