
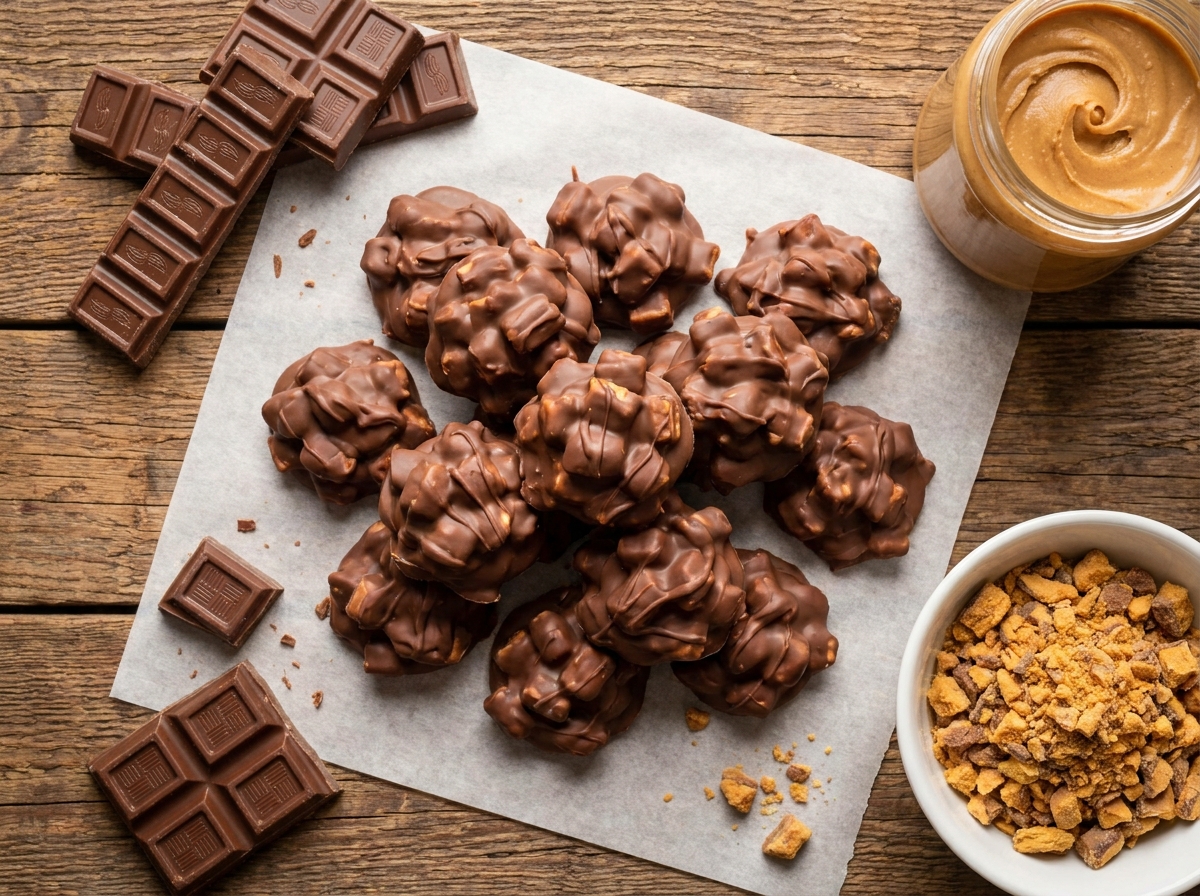
Homemade Butterfinger Clusters
Peanut butter and crushed corn flakes press into crunchy little mounds, then get dipped in melted chocolate for a treat that tastes just like the candy bar.
Thank you for reading this post, don't forget to subscribe!
Homemade Butterfinger Clusters take the flavor everyone loves about that crunchy, peanut-buttery candy bar and turn it into an easy no-bake treat you can make in your own kitchen. Creamy peanut butter gets softened just enough to fold in lightly crushed corn flakes, keeping some real crunch intact, then the mixture gets pressed into small mounds and chilled until firm.
A dip in melted chocolate finishes each cluster with a smooth, snappable coating that sets in the refrigerator into a treat with genuine candy bar texture, crunchy and buttery inside, coated in chocolate outside. There’s no candy thermometer needed and no cooking beyond softening the peanut butter and melting the chocolate, both quick microwave steps.
It’s a genuinely simple recipe for anyone who loves that classic combination of crunchy peanut butter and chocolate but would rather make a batch at home than reach for the candy aisle.
Why This Recipe Works
Peanut butter, softened just slightly in the microwave, becomes easy to fold together with crushed corn flakes without breaking the cereal down into crumbs, which is exactly what preserves the crunchy texture that makes a real Butterfinger bar so recognizable. Chilling the pressed mounds before dipping them in chocolate is what gives the clusters enough structure to hold together through the dipping process, rather than falling apart in the melted chocolate.
The chocolate coating itself sets through simple cooling, since melted chocolate firms back up as its cocoa butter solidifies at cold temperatures, giving the finished clusters a clean, snappable shell around the crunchy peanut butter center. Together, the softened peanut butter, crushed cereal, and chocolate coating recreate the same crunchy-buttery-chocolatey combination that defines the candy bar this recipe is named after.
Why Crushing the Cereal Lightly Matters
Crushing the corn flakes lightly, rather than pulverizing them into fine crumbs, is what gives these clusters their signature crunch. Corn flakes that are too finely crushed lose the distinct texture that makes these taste like a real Butterfinger, while flakes that are barely broken up can make the mixture harder to hold together in a cohesive cluster. A rough crush, with pieces still visibly flake-shaped, hits the right balance.
What You’ll Need
- 1 cup creamy peanut butter
- 2 cups crispy corn flakes, lightly crushed
- 2 cups milk or semi-sweet chocolate chips
- 1 tablespoon coconut oil, optional
- ½ cup finely chopped roasted peanuts, optional
This makes about 18 clusters, at roughly 175 calories per cluster.
A Note on Chocolate and Cereal
Semi-sweet chocolate chips give the best balance of sweetness against the peanut butter, though milk chocolate works well too if you’d prefer a sweeter finish. The optional tablespoon of coconut oil melted in with the chocolate helps it stay smooth and glossy once set, while also making it easier to dip the clusters evenly.
Equipment You’ll Need
A baking sheet lined with parchment paper is where the clusters take shape and chill, both before and after dipping. Two microwave-safe bowls, one for softening the peanut butter and one for melting the chocolate, along with a spoon or small fork for dipping, round out the short equipment list.
How to Make It
- Soften the peanut butter. Add the peanut butter to a microwave-safe bowl. Microwave for 20–30 seconds, just until slightly softened and easy to stir.
- Fold in the cereal. Fold in the crushed corn flakes and chopped peanuts, if using. Mix gently until the cereal is evenly coated while keeping some crunch.
- Shape the clusters. Line a baking sheet with parchment paper. Scoop tablespoon-sized portions of the peanut butter mixture onto the prepared sheet. Lightly press each mound together to form compact clusters.
- Chill briefly. Place the tray in the refrigerator for about 15 minutes to firm up.
- Melt the chocolate. Add the chocolate chips and coconut oil, if using, to a microwave-safe bowl. Microwave in 20-second intervals, stirring well after each interval, until completely smooth and melted.
- Coat the clusters. Dip each chilled peanut butter cluster into the melted chocolate, turning gently to coat. Place the chocolate-covered clusters back onto the parchment-lined baking sheet.
- Chill and serve. Refrigerate the clusters for 20–30 minutes, or until the chocolate is completely set. Serve chilled or let them sit at room temperature for a few minutes before enjoying.
Getting the Peanut Butter to the Right Softness
The peanut butter only needs 20 to 30 seconds in the microwave, just enough to loosen it without turning it fully runny. Overheating it can make the mixture too thin to hold together once the cereal is folded in, so it’s worth checking it early and adding a few more seconds only if it still feels stiff.

Dipping the Clusters Evenly
Using a fork or spoon to turn each cluster gently in the melted chocolate helps coat all sides without pressing so hard that the cluster falls apart. Letting any excess chocolate drip off for a second or two before setting the cluster back on the parchment keeps the coating from pooling too thickly around the base.
Knowing When They’re Ready
These clusters are ready once the chocolate coating feels completely firm and set to the touch, not soft or tacky. Press very gently on the top of a cluster; if the chocolate gives at all, it needs more time in the refrigerator. A fully set batch will have a clean, matte-to-glossy chocolate shell that doesn’t smear when touched.
Tips for Perfect Butterfinger Clusters
Don’t skip the initial 15-minute chill before dipping, it firms the peanut butter mixture enough to hold together through the dipping process. Work in small batches when dipping if your kitchen is warm, since the chocolate can start to firm up on the surface and become harder to dip into evenly if it sits out too long.
Troubleshooting Common Issues
My clusters fell apart during dipping. They likely needed more time to firm up before dipping; chill them closer to 20 minutes if 15 wasn’t enough.
My chocolate coating was too thick or clumpy. Add the optional coconut oil next time, or thin the chocolate slightly with an extra teaspoon of oil for a smoother, more even coating.
My chocolate seized while melting. This usually happens from overheating; melt more slowly in shorter intervals, stirring frequently between each one.
My clusters tasted too sweet. Try semi-sweet chocolate instead of milk chocolate, and skip the roasted peanuts if you’d like to dial back the richness slightly.

A Few Ways to Make It Yours
Extra Crunch
Add finely chopped roasted peanuts to the peanut butter mixture for even more texture in every bite.
Sea Salt Finish
Sprinkle a pinch of flaky sea salt over the clusters right after dipping for a sweet-and-salty contrast.
White Chocolate Drizzle
A drizzle of melted white chocolate over the finished clusters adds a decorative, bakery-style touch.
Smaller Bite-Size Clusters
Use a teaspoon-sized scoop instead of a tablespoon for smaller, more shareable treats.
The classic version is worth making first so you know the baseline flavor before adding any extras.
How to Store Butterfinger Clusters
Keep the clusters in an airtight container in the refrigerator for up to a week, since the chocolate coating and peanut butter filling are both best kept cool. They also freeze well in a sealed container for up to 2 months; thaw briefly at room temperature before serving.
When to Serve These Clusters
These clusters work well as a quick after-school snack, a lunchbox addition, or a homemade candy alternative for a holiday cookie tray. Because they need no oven and set up quickly in the refrigerator, they’re also an easy last-minute treat to pull together when a chocolate and peanut butter craving hits.
Nutrition and Serving Information
Each cluster comes to approximately 175 calories, based on standard peanut butter, corn flakes, and chocolate chip measurements, with the recipe making about 18 clusters. This is only an estimate, since exact calorie and fat content will vary depending on the specific brands used. Because this recipe is built around peanut butter and may include peanuts, it isn’t appropriate for anyone with a peanut allergy.
Make-Ahead Tips
These clusters keep well in the refrigerator for up to a week, making them a genuinely convenient make-ahead treat for a party or a busy week of snacking. Make the full batch a day or two ahead and store in an airtight container, since the chilled texture holds up nicely over time.
The Science Behind the Crunchy Center
Corn flakes get their crispness from being baked into thin, dehydrated flakes, and folding them gently into softened peanut butter coats each piece in fat without fully breaking down their structure, which is what preserves the crunch once everything sets. The peanut butter’s fat content firms back up in the refrigerator, the same way it would in any no-bake peanut butter treat, locking the coated cereal pieces into a cohesive cluster that holds its shape through dipping and beyond.
Portioning and Yield
This recipe makes about 18 clusters using tablespoon-sized portions, a good amount for a family snack or a small party platter. For smaller, more bite-sized treats, using a teaspoon-sized scoop instead stretches the same batch into closer to 30 smaller clusters, which works well for a cookie tray or a crowd where smaller portions are preferred.
A Little Bit of History
The Butterfinger candy bar, known for its crunchy, layered peanut butter center and chocolate coating, has been a favorite candy bar for generations, and home bakers have long looked for ways to recreate that same flavor and texture without the specialized candy-making process the real bar requires. This recipe follows that same tradition of candy bar-inspired treats, using pantry staples like peanut butter and corn flakes to approximate that same crunchy, buttery flavor in an easy, no-bake format.
Serving Suggestions
Serve these clusters chilled, straight from the refrigerator, for the cleanest bite and the most defined chocolate shell. Arranged on a small platter or tucked into a treat bag, they make a nice addition to a holiday cookie exchange or a homemade candy gift, and a light sprinkle of extra chopped peanuts over the top adds a decorative finishing touch.
Choosing the Right Chocolate
Semi-sweet chocolate chips give the best balance of sweetness against the rich peanut butter filling, letting the peanut butter flavor come through clearly rather than getting overwhelmed by sugar. Milk chocolate works well too if you prefer a sweeter overall treat, and dark chocolate is worth trying if you’d like a more bittersweet contrast to the buttery center.
Why This Recipe Is So Beginner-Friendly
If you’ve never made homemade candy before, this is about as forgiving a place to start as you’ll find. There’s no candy thermometer, no cooking sugar to a precise temperature, and no risk of a caramel or fudge seizing up on the stovetop. The two real steps, softening peanut butter and melting chocolate, are both simple microwave tasks that are hard to get seriously wrong as long as you go slowly and stir often. This makes it a genuinely approachable recipe to make with kids, since folding the cereal into the peanut butter and shaping the clusters are both easy, low-mess tasks that even a young helper can take on with a little guidance around the microwave steps.
Adjusting the Sweetness and Crunch
As written, this recipe balances the natural saltiness of peanut butter against the sweetness of milk or semi-sweet chocolate, giving a flavor that leans toward the classic candy bar it’s inspired by. If you’d like a less sweet cluster, dark chocolate chips cut the overall sugar while still giving a smooth, snappable coating. If you prefer more crunch throughout, increasing the crushed corn flakes slightly, or adding the optional chopped roasted peanuts, builds even more texture into each bite without changing the basic process. A pinch of flaky salt sprinkled over the clusters right after dipping is one of the simplest ways to sharpen the peanut butter flavor and balance the sweetness of the chocolate shell.
Pairing These Clusters With Other Treats and Drinks
Because the flavor here is rich, crunchy, and distinctly peanut buttery with a chocolate finish, these clusters pair naturally with other homemade candy and no-bake treats on a dessert table. Simple chocolate bark or a batch of peanut butter fudge echoes the same flavor profile without feeling repetitive, while something lighter like a fruit-based dessert offers a nice contrast if you’re serving a wider spread. On the drink side, a cold glass of milk is the classic pairing for anything peanut butter and chocolate, while coffee works well for an afternoon treat or a holiday gathering. If you’re putting together a homemade candy tray or a cookie exchange plate, these clusters hold their own next to other chocolate-dipped treats, since the crunchy texture and small size make them easy to include alongside other bite-sized sweets.
A Note on Ingredient Proportions
The balance of peanut butter, cereal, and chocolate in this recipe was chosen carefully, and it’s worth understanding why before making adjustments. The full cup of peanut butter provides enough binding fat to hold two full cups of crushed corn flakes together into cohesive clusters, without so much peanut butter that the mixture becomes too soft to hold its shape. The two cups of chocolate chips gives enough melted chocolate to fully coat all 18 clusters in a generous, even layer, and using less can leave some clusters under-coated by the time you reach the end of the batch. If you scale up the cereal without adding more peanut butter, the mixture can turn dry and crumbly rather than holding together in a cluster; if you scale up the peanut butter without more cereal, the clusters lose some of their signature crunch. It’s worth treating the stated ratios as a tested baseline before experimenting with different proportions.
A Quick Note on Serving Temperature
These clusters are good served chilled, straight from the refrigerator, or after a few minutes at room temperature, which is part of what makes them such a flexible treat to keep on hand. Served cold, the chocolate shell is at its firmest and snaps cleanly when bitten into. Left out for a few minutes, the peanut butter center softens slightly, giving a more tender bite while the chocolate coating stays mostly intact. If you’re serving these at a party on a warm day, keeping them chilled until close to serving time helps the chocolate hold its shape and prevents the clusters from becoming too soft to handle easily.
Why This Recipe Is Naturally Kid-Friendly to Make
Because there’s no oven and no hot stovetop step beyond quick microwave intervals, this is a genuinely easy recipe to make with kids in the kitchen, whether that means letting them fold the cereal into the peanut butter or handing them the job of shaping the mounds on the parchment-lined tray. Dipping the chilled clusters into melted chocolate is a fun, hands-on task for a slightly older child to help with under supervision, since the chocolate is only warm rather than hot enough to pose a real safety concern. Watching the clusters go from a loose, crunchy mixture to a finished, chocolate-coated treat in under an hour is a satisfying, visual process that keeps younger cooks engaged from start to finish.
A Quick Note on Portion Control
Because these clusters are rich and crunchy, one or two at a time tends to feel satisfying rather than needing a large handful to feel like a real treat. Using a teaspoon-sized scoop instead of a tablespoon stretches the same batch into smaller, more numerous clusters, which works well for a party tray where guests are likely to sample a few different treats rather than filling up on just one.
Common Questions
Can I use a different cereal instead of corn flakes?
Yes, crushed bran flakes or a similar flaked cereal work well as a substitute, though the flavor will shift slightly from the classic Butterfinger taste.
Why did my clusters fall apart when I dipped them?
They likely needed more chill time before dipping; give them closer to 20 minutes in the refrigerator to firm up fully.
Can I use natural peanut butter?
Yes, though the mixture may be looser and could need a bit more crushed cereal to hold together well.
Can I freeze these clusters?
Yes, freeze them in a sealed container for up to 2 months and thaw briefly at room temperature before serving.
Do these need to stay refrigerated?
Yes, since the chocolate and peanut butter filling both hold their texture best when kept cool.
Can I double this recipe?
Yes, this recipe doubles easily; just work in batches when dipping so the chocolate doesn’t firm up before you’re through.
What if my chocolate is too thick to dip smoothly?
Stir in the optional coconut oil, or a teaspoon more if you already added it, to thin the chocolate for smoother, easier dipping.
Homemade Butterfinger Clusters turn peanut butter, crushed corn flakes, and melted chocolate into a crunchy, candy bar-inspired treat with almost no effort at all. Soften, fold, shape, chill, dip, and chill again, that’s the entire process, and the result tastes remarkably close to the real candy bar it’s named after.