
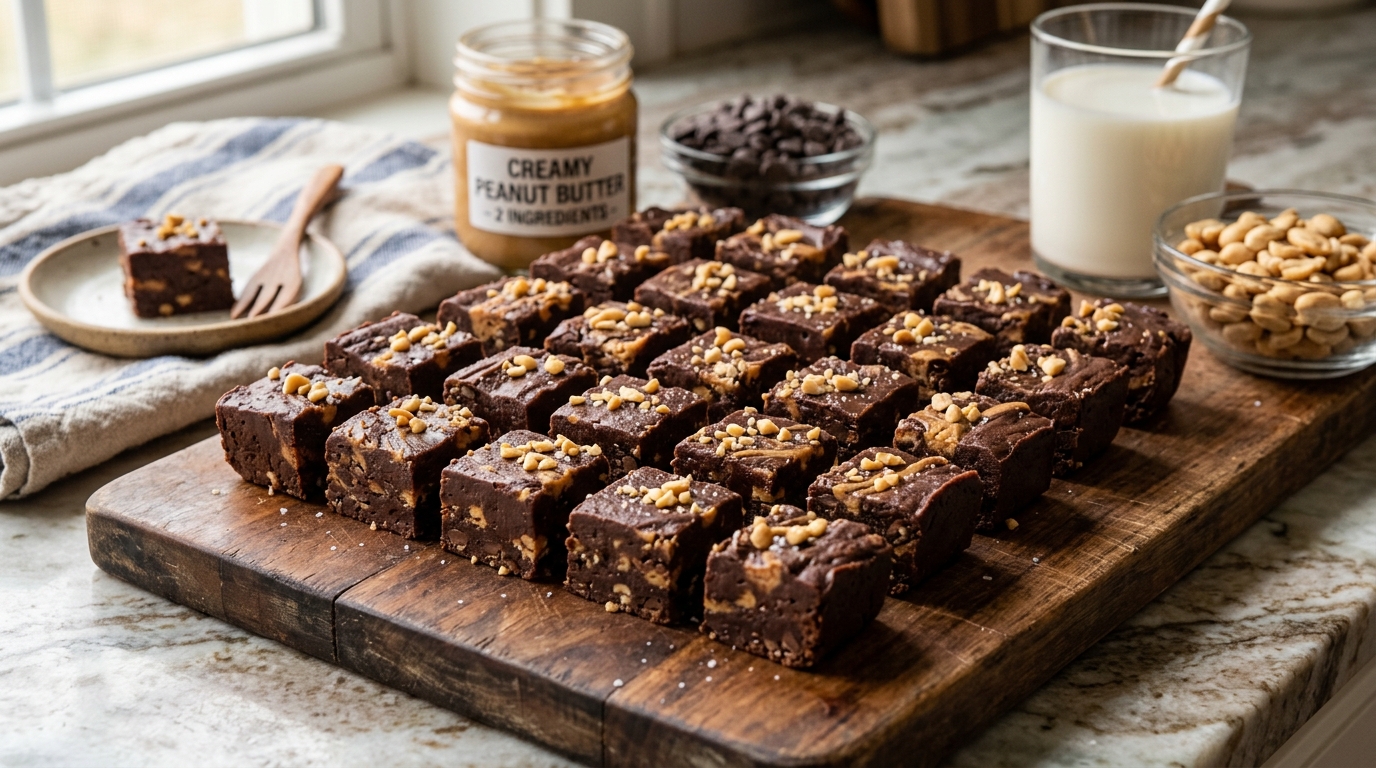
Peanut Butter Chocolate Fudge Cubes
Puffed cereal, peanut butter, and maple syrup, coated in chocolate and cut into small, rich, bite-sized cubes finished with chopped peanuts.
Thank you for reading this post, don't forget to subscribe!
Not every treat needs to be a big, shareable bar cut into large squares. Sometimes the better format is small, dense, and deliberately portioned — a single, rich bite rather than a full-sized slice. That’s exactly the idea behind these fudge cubes, built from the same core combination of crispy cereal, peanut butter, and maple syrup, but cut down small and dressed up with a coating of chocolate and a scatter of chopped peanuts on top.
The base comes together the same simple way — puffed cereal bound with warmed peanut butter and maple syrup, pressed firmly into a pan. But instead of slicing into standard bar-sized pieces, this version gets cut into small, dense cubes, then finished individually with a chocolate coating and a few chopped peanuts pressed onto each piece.
What results is something closer to a piece of candy than a snack bar — dense, rich, and sized for exactly one or two bites, making it easy to enjoy a small portion without committing to a full-sized square. The smaller format also means these travel and portion beautifully for a party or gift box, where individually-sized pieces are often more practical than a large, sliceable pan.
This is the treat to make when you want something that feels a little more refined and considered than a typical homemade bar — a format that says ‘petit four’ or ‘artisan candy’ more than ‘kid’s snack,’ even though the underlying ingredients and method are just as simple and approachable as ever.
It’s also worth noting how naturally this smaller cube format lends itself to portion control and mindful snacking, without ever needing to be marketed that way. A single cube is genuinely satisfying on its own, in a way that a large bar sometimes isn’t — the concentrated richness of each small piece does a lot of work in a small package.
A Little Bit of History
The tradition of cutting a dense, set confection into small, uniform cubes traces back to classic fudge-making, where a cooked sugar mixture is poured into a shallow pan and cut into neat squares once set — a format that’s been standard for fudge in American home kitchens for well over a century. That same cutting convention has carried over into countless no-bake treats built on similar principles, even when the underlying mixture, as in this recipe, isn’t a traditional cooked sugar fudge at all.
Bite-sized confections in general have a long history in candy-making traditions worldwide, from French petit fours to British fudge squares to countless regional variations on small, individually-portioned sweets. The appeal has always been fairly consistent: a small, dense, richly flavored piece that delivers real satisfaction without requiring a large serving, making these formats especially popular for gifting, holiday trays, and situations where a variety of different treats are being offered together.
This particular cube format, built on a puffed cereal and peanut butter base rather than a traditional cooked sugar fudge, represents a more contemporary adaptation of that classic small-format tradition — borrowing fudge’s cutting convention and bite-sized appeal while relying on the same simple, no-cook binding method used in classic marshmallow cereal treats and their more natural, maple syrup-based descendants.
The chopped peanut topping pressed into each individual cube, rather than scattered loosely over a full pan before slicing, reflects a bit more deliberate, candy-shop styling than a typical homemade bar usually gets — a small detail that signals these pieces were finished individually, one at a time, rather than simply cut apart after the fact.
It’s also worth considering how the smaller, individually-finished format changes the overall impression a treat makes, even when the underlying ingredients are nearly identical to a larger bar. Something cut into neat, uniform cubes and individually coated reads, almost automatically, as more polished and more deliberately crafted than the same mixture cut into a few large bar-sized pieces — a psychological effect that candy-makers and confectioners have leaned on for a very long time, well before this particular recipe existed. Format alone can meaningfully change how a dessert is perceived, independent of taste.
There’s also a practical logic behind why smaller-format treats have remained so consistently popular for gifting and entertaining specifically. A tray of uniform, bite-sized pieces is simply easier for guests to serve themselves from than a pan that requires cutting on the spot, and it portions out more predictably when you’re trying to stretch a single batch across a larger group of people. These practical advantages, layered on top of the format’s more polished visual appeal, help explain why bite-sized versions of larger desserts have remained such a durable, popular category across so many different culinary traditions.
Why This One Works
The underlying chemistry here works the same way it does in the full-sized bar version of this recipe. Peanut butter and maple syrup, warmed gently together, become thin and pourable enough to coat every piece of puffed cereal evenly. As the mixture cools, both ingredients firm back up, locking the cereal into a dense, cohesive base rather than a loose, crumbly mixture.
What changes with the smaller cube format is mostly about proportion and finishing technique. Because each cube is so much smaller than a standard bar, the ratio of chocolate coating to interior base ends up noticeably higher per bite — more of the eating experience comes from that outer chocolate layer relative to the denser cereal base inside, which is part of why these taste a bit more like a coated candy than a straightforward snack bar, even though the ingredients are nearly identical.
Coating each cube individually, rather than pouring a single chocolate layer over the whole pan before slicing, also changes the texture in a meaningful way. A full, even coating around each piece means chocolate on every exposed surface, not just the top — giving a more complete, all-around chocolate experience with each bite, closer to what you’d get from a piece of enrobed candy than from a bar with chocolate only on one face.
The chopped peanuts pressed into the chocolate coating while it’s still soft do double duty here, both adding crunch and helping to visually distinguish these smaller pieces from a plain, uniform coating. Because each cube is finished somewhat individually, there’s naturally a bit more visual variation from piece to piece than you’d see in a uniformly sliced bar, which many people find adds to the appeal rather than detracting from it — it reads as more handmade and less mass-produced.
It’s also worth talking about why this recipe includes a two-stage chilling process, rather than a single chill at the end the way the full-sized bar version does. The first chill firms the base enough to cut clean, even cubes — attempting to cut a soft, unchilled base would result in ragged, uneven pieces that squish and lose their shape under the knife. The second chill, after coating, sets the chocolate into its final firm, glossy state. Skipping either step, or rushing through them, tends to show up clearly in the finished product, whether that’s messy, uneven cubes or a soft, unset chocolate coating.
What You’ll Need
- 3 cups puffed rice cereal
- 1 cup natural peanut butter
- 1/3 cup pure maple syrup
- 1½ cups semi-sweet chocolate chipsFor coating
- Chopped peanuts and flaky sea salt for toppingOptional
A Closer Look at Each Ingredient
The puffed rice cereal. Any crisp, puffed rice cereal works here, whether a name-brand product or a store-brand equivalent. Fresh cereal matters more than brand — stale cereal that’s lost its crunch will result in a softer, less satisfying finished cube.
The peanut butter. This recipe calls for natural peanut butter specifically, which brings a cleaner, more pronounced peanut flavor and pairs especially well with maple syrup’s natural sweetness. Stir it thoroughly before measuring, since natural peanut butter tends to separate, and using it unstirred can throw off both the texture and the ratio of fat in the recipe.
The maple syrup. Pure maple syrup, rather than a maple-flavored pancake syrup, is worth seeking out here — the flavor difference between the two is significant, and pure maple syrup’s more complex, less one-dimensional sweetness is a big part of what sets this treat apart from a standard marshmallow-based version.
The chocolate chips. Because these cubes get more fully coated in chocolate relative to their size than a standard bar would, using a slightly larger amount of chocolate chips than you might expect is intentional here, ensuring there’s enough to coat each piece generously.
The toppings. Chopped peanuts pressed into the chocolate coating while still soft add crunch and visual texture to each individual cube, while flaky sea salt cuts through the sweetness of both the base and the chocolate coating.
Equipment You’ll Need
A medium saucepan is useful for gently warming the peanut butter and maple syrup together, though a microwave-safe bowl works just as well if you’d rather use the microwave in short bursts. An 8-inch square pan lined with parchment paper allows for easy removal once the base is set. A sharp knife is essential for cutting clean, even cubes — wiping the blade clean between cuts helps keep the edges neat rather than dragging sticky residue from one cut into the next. A fork is genuinely the best tool for dipping each cube into melted chocolate, letting excess coating drip off cleanly before you set each piece back down.
How to Make Them
- Line the pan. Line an 8-inch square pan with parchment paper, leaving overhang on the sides.
- Warm the peanut butter and syrup. In a saucepan over low heat, or in the microwave in short bursts, gently warm the peanut butter and maple syrup together until smooth and pourable.
- Combine with cereal. Place the puffed rice cereal in a large bowl and pour the warm peanut butter mixture over it, stirring until every piece is evenly coated.
- Press into the pan. Transfer the mixture to the prepared pan and press firmly and evenly across the bottom using the back of a spoon or a flat-bottomed measuring cup.
- Chill briefly. Refrigerate for about 30 minutes, until firm enough to slice cleanly.
- Cut into cubes. Lift the block out using the parchment overhang and cut into small, even cubes, roughly 1 inch square.
- Melt the chocolate. Melt the chocolate chips gently until smooth, either in the microwave in short bursts or over a double boiler.
- Coat each cube. Using a fork, dip each cube into the melted chocolate, letting excess drip off, then place back on parchment and press a few chopped peanuts and a pinch of sea salt onto the top while still soft.
- Chill and serve. Refrigerate for at least 1 hour, until the chocolate coating is fully set, then serve chilled.


Troubleshooting Common Issues
My cubes crumbled apart when I tried to cut them. This almost always comes down to the base not being pressed firmly enough before chilling, or not chilling long enough before cutting. Press hard and evenly, and give the base the full 30 minutes to firm up before slicing.
My chocolate coating looks dull or streaky instead of glossy. This is chocolate bloom, typically caused by melting too quickly or at too high a temperature. Melt low and slow, stirring frequently, for the glossiest finish.
My cubes fell apart while I was dipping them in chocolate. This can happen if the cubes weren’t chilled firm enough before dipping. Make sure they’re cold and firm to the touch, and consider a brief stint in the freezer if your kitchen runs warm, before attempting to coat them.
My chocolate coating is uneven, thicker in some spots than others. Using a fork to dip and lift each cube, then gently tapping the fork against the bowl a few times before placing the cube back on the parchment, helps excess chocolate drip away evenly rather than pooling unevenly at the base.
My cubes taste greasy rather than rich. This can happen with a particularly oily natural peanut butter. Stirring the peanut butter thoroughly before measuring, so the oil is evenly distributed rather than pooled at the top of the jar, helps prevent this.
My cubes are inconsistent in size. Using a ruler or a sharp knife with consistent, deliberate cuts helps keep the cubes uniform. Chilling the base thoroughly before cutting also makes it easier to achieve clean, even lines.
My cubes look messy or uneven after coating. This is common with a first attempt at this dipping technique and tends to improve quickly with practice. Working in a steady rhythm — dip, lift, tap gently against the bowl, place down — helps develop a consistent motion that produces cleaner results the more pieces you coat.
Serving Suggestions
These cubes are rich enough to serve just a few at a time, and their bite-sized format makes them especially easy to offer at a party without needing plates or forks. Arrange them on a small platter or in individual paper cups for a clean, polished, candy-shop presentation.
Because they’re small and individually coated, these cubes travel exceptionally well for gifting, packed into a lined tin or box with parchment paper between layers to keep the chocolate coating from sticking together. They also make a nice addition to a holiday cookie and candy tray, offering a different texture and format alongside more traditional cookies and bars.
For a dinner party or gathering, these work beautifully as a coffee-and-dessert pairing — small enough to enjoy alongside a cup of coffee or tea without needing to commit to a full dessert portion. A few cubes arranged on a small plate, dusted lightly with cocoa powder if you’d like an extra decorative touch, make for an elegant, low-effort presentation.
A cold glass of milk remains a classic, simple pairing here too, especially if you’re serving these as more of a casual snack than a formal dessert. Their concentrated richness means they pair surprisingly well with something plain and unsweetened alongside them, which helps balance out the overall experience.
These cubes also make a genuinely fun project to prepare with kids, since the dipping and topping steps are hands-on, low-risk, and satisfying to watch come together piece by piece — a nice contrast to the more passive waiting involved in a full-pan bar recipe, where there’s really only one big reveal at the end rather than two dozen small ones.
It’s also worth talking about knife technique specifically, since clean cuts matter more visibly here than they would for a larger bar. A long, sharp knife, wiped clean with a damp cloth between each cut, produces far neater edges than a smaller or duller blade dragged repeatedly through the sticky base. Cutting in one smooth, decisive motion rather than sawing back and forth also helps keep the edges of each cube crisp rather than crumbled or torn.
A Few Ways to Make Them Yours
Extra Crunch
Fold chopped roasted peanuts into the cereal mixture itself, in addition to the topping, for even more texture throughout.
Dark Chocolate Coating
Use dark chocolate instead of semi-sweet for a less sweet, more intense finish that contrasts nicely against the sweeter cereal base.
Almond Butter Swap
Substitute almond butter for the peanut butter for a milder, slightly different nutty flavor using the same method.
Cocoa Dusted Finish
Skip the peanut topping and instead dust the finished chocolate-coated cubes lightly with cocoa powder for a more truffle-like appearance.
Make-Ahead Tips
These cubes are naturally suited to being made ahead, since they need chilling at two separate stages — once before cutting, and again after coating — regardless of when you plan to serve them. They can be fully prepared up to 5 days in advance and kept covered in the fridge, making them a convenient choice for parties, gift-giving, or a make-ahead treat for the week.
If you’re making these for gifting, consider coating and finishing them a day or two before you plan to package them, giving the chocolate coating plenty of time to fully set and firm up before handling and boxing them up.
For transport somewhere warm, keep the cubes chilled as long as possible before serving, since the chocolate coating especially will soften and lose its clean, glossy finish in heat.
A Note on Dietary Adjustments
This recipe can be adjusted for a few common dietary needs without much trouble. For a gluten-free version, double-check that your puffed rice cereal is certified gluten-free, since some brands are processed in facilities that also handle wheat. For a dairy-free version, use dairy-free chocolate chips, which are widely available and melt in essentially the same way as standard chocolate chips.
For those managing sugar intake, keep in mind that between the maple syrup in the base and the chocolate coating surrounding each cube, these are a genuinely concentrated, sweet treat despite their small size. The bite-sized format actually works in your favor here, naturally encouraging a smaller portion than a full bar slice would.
This recipe isn’t naturally suited to a nut-free adaptation given how central peanut butter is to both flavor and structure, though a seed butter alternative like sunflower seed butter can sometimes be substituted with a similar texture, keeping in mind the flavor will be noticeably different from the classic peanut butter version.
For those managing portion sizes specifically, this recipe’s bite-sized format is genuinely one of its biggest practical advantages. Rather than needing to consciously cut a smaller slice from a larger pan, as you would with the standard bar version, each cube here is already portioned to a sensible, single-serving size from the start, which can make mindful snacking noticeably easier without requiring any extra thought or willpower.
For those tracking added sugar specifically, it’s worth knowing that maple syrup, while classified nutritionally as a form of added sugar just like refined sugar, does carry a somewhat lower glycemic impact and contains trace minerals like manganese and zinc that refined white sugar lacks entirely. This is a modest distinction rather than a dramatic health benefit, but it’s part of why many home bakers reach for maple syrup specifically when reworking a classic no-bake treat like this one.
Storage
Keep the cubes in an airtight container in the fridge for up to a week — the texture holds up well since there’s no marshmallow to dry out or turn stale over time. They also freeze nicely for up to 2 months; thaw in the fridge for about 15 minutes before serving, or eat them cold straight from the freezer for a firmer, denser bite.
Common Questions
Can I use crunchy peanut butter instead of creamy?
Yes — crunchy peanut butter adds extra texture to the base and works just as well structurally as creamy peanut butter in this recipe.
Why did my chocolate coating turn white or streaky after chilling?
This is called chocolate bloom, and it happens when chocolate is melted and cooled too quickly or stored somewhere with fluctuating temperatures. It’s purely cosmetic and doesn’t affect flavor, but melting chocolate slowly and evenly helps prevent it.
Can I make these without individually coating each cube, and just pour chocolate over the whole pan instead?
Yes — if you’d rather skip the individual dipping step, you can pour melted chocolate over the pressed base before chilling and cutting, similar to the full-sized bar version of this recipe. You’ll lose the all-around coating effect, but it’s a genuinely simpler process.
How long do these cubes last?
Stored in an airtight container in the fridge, they’ll stay fresh for up to a week. They can also be frozen for up to 2 months, wrapped tightly, and thawed in the fridge before serving.
Can I double this recipe for a bigger batch?
Yes — simply double the base ingredients and use a 9×13-inch pan instead of an 8-inch square pan, and prepare a larger batch of melted chocolate for coating. The process stays the same.
What’s the best way to keep the chocolate coating from getting on my hands while dipping?
Using a fork rather than your fingers to lower and lift each cube keeps things considerably cleaner, and letting excess chocolate drip off over the bowl before placing the cube back on parchment helps minimize mess further.
Can I use a different sweetener instead of maple syrup?
Honey works as a direct substitute using the same ratio. Both contribute to the base’s structure as well as its sweetness, so it’s not recommended to skip a liquid sweetener entirely.
Can I make these nut-free using a seed butter instead of peanut butter?
Yes — sunflower seed butter can be substituted for the peanut butter using the same ratio, giving a similar texture with a different, slightly earthier flavor profile, and simply skip the chopped peanut topping for a fully nut-free version.
Can I make these cubes without cutting them, and instead roll the mixture into balls?
Yes — rolling the mixture into small balls rather than pressing and cutting it into a pan works as an alternative shaping method, though the texture will be slightly different, more compact and rounded rather than having clean, straight edges.
Why is my chocolate coating too thick and clumpy?
This usually means the chocolate wasn’t thin enough for dipping. A small amount of coconut oil or shortening stirred into the melted chocolate can thin it slightly for a smoother, more even coating around each cube.
Can I skip the second chill after coating if I’m short on time?
It’s not recommended — the chocolate coating needs that time to fully set and firm up. Serving the cubes before the coating has set will result in a soft, messy chocolate layer that smudges easily rather than a clean, firm shell.
One last thing worth mentioning: this cube format is a genuinely useful technique to keep in mind beyond just this specific recipe. The same basic principle — press a no-bake base into a pan, chill, cut into small pieces, then individually coat and finish — can be applied to countless other no-bake bar recipes whenever you’d rather serve something in a smaller, more polished, candy-like format instead of standard-sized bars.