
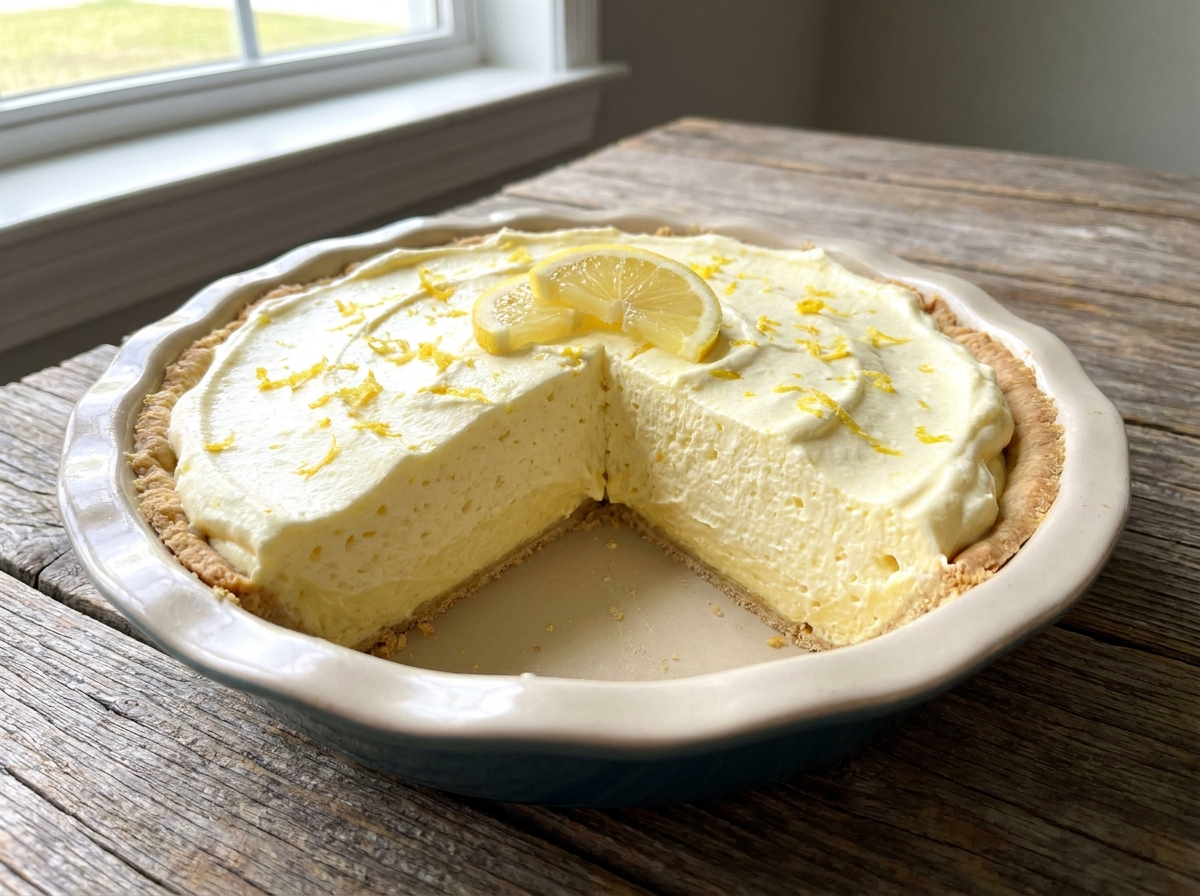
2-Ingredient Lemon Creamsicle Pie
Fluffy whipped topping and instant lemon pudding mix folded together and chilled in a graham crust — bright, tangy, and creamy all at once.
Thank you for reading this post, don't forget to subscribe!
There’s something about the combination of lemon and cream that feels both bright and comforting at the same time, and this pie captures exactly that. It’s called a creamsicle pie for the way the tangy lemon flavor plays against a soft, cloud-like filling, much like the citrus-and-cream flavor of a classic creamsicle bar.
What makes it especially appealing is how little it asks of you. The filling comes together from just two ingredients: thawed whipped topping and instant lemon pudding mix. There’s no oven, no cooking on the stovetop, and no need to separate eggs or temper anything. You beat the two ingredients together until smooth, spoon the mixture into a graham cracker crust, and let the refrigerator do the rest.
A few hours later, you have a pie with a light, airy texture and a bright lemon flavor that tastes far more involved than the five minutes of prep would suggest. It’s an easy make-ahead dessert for spring and summer gatherings, but it’s also simple enough to throw together whenever you want something citrusy and sweet without much effort. If you love the flavor of lemon paired with something creamy, this pie is worth keeping in your regular dessert rotation.
Why This 2-Ingredient Lemon Creamsicle Pie Is So Easy
The whole appeal of this recipe comes down to how few decisions it requires. There’s no cooking step to monitor, no gelatin to bloom, and no eggs to worry about curdling. You combine two ready-to-use ingredients, beat them until smooth, and let the mixture set in the refrigerator. The whipped topping supplies the light, airy texture that makes the pie feel more like a mousse than a dense custard, while the instant lemon pudding mix delivers both the tart lemon flavor and enough thickening power to help the filling set into clean slices.
Because instant pudding mix is designed to thicken quickly once it’s combined with a liquid or a creamy base, it does double duty here — flavoring the filling and giving it structure at the same time. That’s part of what makes the two-ingredient formula work so well: you’re not relying on baking or gelatin to set the pie, just the natural thickening properties already built into the pudding mix.
A No-Bake Pie With Bright, Tangy Lemon Flavor
Lemon and cream is a pairing that shows up again and again in desserts, from lemon meringue pie to lemon cheesecake, because the tartness of the lemon keeps a creamy filling from tasting flat or one-note. This pie leans into that same balance. The whipped topping brings sweetness and a light, fluffy texture, while the lemon pudding mix cuts through with a tangy brightness that keeps every bite feeling fresh rather than heavy. It’s a lighter option compared to a baked custard pie, which makes it especially well-suited to warm-weather serving.
Why Whipped Topping and Instant Pudding Work So Well Together
Whipped topping is stable and already sweetened, holding its airy structure well once it’s combined with something else and chilled. Instant lemon pudding mix, meanwhile, contains both flavoring and a starch-based thickener designed to set up without any cooking, as long as it has something to absorb into. When beaten into whipped topping, the dry pudding mix draws moisture from the topping and begins to thicken almost immediately, which is why the mixture firms up noticeably even before it goes into the refrigerator. That quick-setting behavior, combined with the airy structure of the whipped topping, is what gives this pie its light but sliceable texture once fully chilled.
What You’ll Need
- 1 container (8 oz) whipped topping, thawed
- 1 package (3.4 oz) instant lemon pudding mix
- 1 store-bought graham cracker pie crust (9-inch)not counted toward the 2 ingredients — a ready-made crust keeps the recipe fast
That’s the whole filling. The recipe makes one 9-inch pie, cut into 8 slices.
Choosing the Best Whipped Topping and Pudding Mix
For the whipped topping, a standard frozen tub that’s been thawed in the refrigerator overnight gives you the most stable base — it holds air better than fresh-whipped cream and won’t deflate as quickly once the pudding mix is beaten in. Make sure it’s fully thawed but still cold; a topping that’s still partly frozen is hard to beat smoothly, while one that’s sat out too long at room temperature can turn soft and loose.
For the pudding mix, look specifically for an instant variety rather than a cook-and-serve type, since instant pudding thickens on contact with moisture without needing to be heated. Lemon is the classic choice here for that bright, citrusy creamsicle flavor, but the same method works with other citrus or fruit-flavored instant pudding mixes if you’d like to change the flavor entirely.
Equipment You’ll Need
Beyond the crust itself, you need a mixing bowl large enough to beat the whipped topping and pudding mix together without much spilling, and either a whisk or a hand mixer on low speed to combine them smoothly. A hand mixer makes quick work of dissolving the dry pudding mix evenly into the whipped topping, though a sturdy whisk and a bit of patience will get you there too. If you’d like to pipe a decorative border of whipped topping on the finished pie, a piping bag or a zip-top bag with the corner snipped works well.
How to Make It
- Thaw the whipped topping. Move the whipped topping to the refrigerator several hours ahead, or the night before, so it’s fully thawed but still cold when you’re ready to mix.
- Combine. In a large bowl, add the thawed whipped topping and the instant lemon pudding mix.
- Beat until smooth. Beat gently with a whisk or hand mixer until the mixture is completely smooth, creamy, and free of any dry pudding streaks.
- Fill the crust. Spoon the mixture into the graham cracker crust and smooth the top with the back of a spoon or an offset spatula.
- Chill until firm. Cover loosely and refrigerate for at least 2 hours, or until fully set.
- Slice and serve. Slice with a knife wiped clean between cuts for the cleanest slices.
Combine the Filling
The technique here is straightforward, but a little care goes a long way. Add the whipped topping to the bowl first, then sprinkle the dry pudding mix evenly over the top rather than dumping it in one spot, which makes it easier to beat in without leaving dry pockets. Beat on low speed if you’re using a hand mixer, or whisk steadily by hand, until the mixture turns a uniform pale yellow with no streaks of dry powder remaining. You’ll notice the mixture thickening slightly as you beat, which is the pudding mix beginning to set — that’s exactly what you want, since it means the filling will hold its shape once chilled.

Fill the Crust and Chill Until Firm
Once the filling is smooth, spoon it into the graham cracker crust in generous scoops, working from the outer edge toward the center so it settles evenly without large air pockets forming underneath. Smooth the surface with the back of a spoon or an offset spatula, and if you’d like a decorative finish, pipe a simple border of extra whipped topping around the edge or reserve a few dollops for the center before it sets.
Cover the pie loosely with plastic wrap, taking care that the wrap doesn’t press down and flatten the top, and place it in the refrigerator for at least 2 hours. Because the pudding mix begins thickening the filling almost right away, this pie sets up a little faster than some other no-bake fillings, but the full chilling time still matters for the cleanest slices and the best flavor, since the lemon flavor rounds out and mellows slightly as the pie chills.
Slice and Serve
For the cleanest slices, run a sharp knife under warm water and wipe it dry before each cut. The warm blade glides through the chilled filling instead of dragging or tearing it. Wipe the knife clean between slices for the neatest presentation, and serve straight from the refrigerator. A dollop of extra whipped topping, a sprinkle of lemon zest, or a thin lemon slice on top of each piece makes for a simple, pretty garnish that also hints at the flavor inside.
Tips for the Best Lemon Creamsicle Pie
Make sure the whipped topping is fully thawed before you start; cold, partially frozen topping is much harder to beat smoothly with the dry pudding mix. Sprinkle the pudding mix evenly over the topping rather than adding it all in one spot, and beat just until the streaks disappear and the color is uniform — there’s no need to overbeat, since instant pudding thickens on its own once combined. Give the pie the full chilling time before slicing, since a filling that hasn’t set completely will slump rather than hold a clean wedge. Finally, taste the finished filling before it goes into the crust; if you’d like a more pronounced lemon flavor, a small amount of finely grated lemon zest beaten in along with the pudding mix brightens the flavor further.
Troubleshooting Common Mistakes
My filling has dry, powdery streaks in it. This usually means the pudding mix wasn’t beaten in thoroughly enough before it started to set. Beat a bit longer next time, scraping the sides and bottom of the bowl to catch any pockets of dry mix.
My pie didn’t set firm enough to slice cleanly. Give it more time in the refrigerator — 2 hours is the minimum, and a pie that’s just a bit underchilled will firm up further with an extra hour or two.
My filling looks deflated or dense instead of light and fluffy. This can happen if the whipped topping wasn’t fully thawed and cold when you started, or if it was overbeaten once combined with the pudding mix. Beat just until smooth and uniform.
My crust got soggy. A graham cracker crust can soften slightly over a couple of days in the refrigerator as the filling releases a little moisture. This is normal, but for the crispest crust, serve the pie within the first day or two.
My slices aren’t clean. Warm your knife under running water and wipe it dry before every cut for the neatest presentation.

A Few Ways to Make It Yours
Fresh Lemon Zest
Beat a teaspoon of finely grated lemon zest into the filling, or sprinkle it over the top, for a brighter, more fragrant citrus note.
Graham Cracker Swirl
Fold a few crushed graham crackers into the filling before chilling for extra texture running through every slice.
Berry Topping
Top the finished pie with fresh raspberries or blueberries just before serving for a pop of color and a slightly tart contrast.
Mini Pies
Divide the filling among individual mini graham crusts or small jars for easy, no-slice single servings at a party.
As with any two-ingredient recipe, make the classic version first so you know what the base flavor and texture taste like, then decide whether a garnish or swap is worth adding the next time around.
How to Store Lemon Creamsicle Pie
Store the pie covered in the refrigerator for up to 3 to 4 days. Keep it tightly covered with plastic wrap or a pie dome to prevent the surface from drying out or picking up odors from other foods in the refrigerator. This pie is best enjoyed chilled and isn’t recommended for freezing, since the whipped topping and pudding-based filling can separate and turn watery once thawed. If you have leftover slices, cover them individually with plastic wrap for the neatest storage.
When to Serve This Easy Pie
This pie is especially well suited to spring and summer gatherings — brunches, garden parties, potlucks, and warm-weather celebrations all suit its light, bright, citrusy character. Because it needs to chill for a couple of hours, it’s also a convenient make-ahead dessert: assemble it earlier in the day and it will be ready and set by the time guests arrive. It’s easy enough to make on a whim for a weeknight treat, but its bright color and light texture also make it a refreshing alternative to a rich, heavy dessert at the end of a big meal. Individual slices travel well to a potluck if the pie has had enough time in the refrigerator to hold its shape during transport.
Nutrition and Serving Information
Cut into 8 slices, each serving of this pie is a relatively light dessert compared to many baked pies, since the filling itself contains no eggs or butter beyond what’s already in the whipped topping. Exact calorie and sugar counts will vary depending on the specific brands of whipped topping, pudding mix, and graham cracker crust you use, so treat any number you calculate as an estimate. If you’re watching sugar intake, look for a reduced-sugar whipped topping or a sugar-free instant pudding mix, both of which are widely available and work the same way in this recipe.
Make-Ahead Tips
This pie is well suited to being made ahead, since it needs chilling time regardless of when you plan to serve it. Assemble it a day before your event, keep it covered in the refrigerator, and add any garnish like lemon zest, lemon slices, or extra whipped topping just before serving so it looks fresh. Because the filling sets relatively quickly thanks to the instant pudding mix, this is also a good option if you’re short on time and need a make-ahead dessert that doesn’t require the longer chilling window some other no-bake pies do.
A Little Bit of History
The idea of an instant, no-bake pudding pie has roots going back to when boxed instant pudding mixes first became a pantry staple, giving home cooks a way to build a creamy, set dessert without a stovetop custard or a trip to the oven. Folding whipped topping into instant pudding, rather than using milk as the package instructions usually call for, became a popular shortcut for exactly this reason: it produces a lighter, mousse-like filling that sets up fast and slices cleanly, all without needing to whisk a hot custard or worry about it curdling. The “creamsicle” name attached to citrus versions of this style of pie borrows from the classic orange-and-vanilla frozen treat, but the pairing works just as well with lemon, where the tartness plays off the sweet, creamy base in much the same contrasting way. This pie is really an extension of that long tradition of simple, chilled, no-bake pudding desserts, updated with a bright citrus twist that makes it feel a little more special than a standard pudding pie.
Portioning and Yield
This recipe fills a standard 9-inch graham cracker crust and is typically cut into 8 even slices, which is a generous but not overly heavy portion given how light the filling is. If you’re serving a larger crowd or adding this pie to a table with several other desserts, cutting it into 10 or 12 smaller wedges stretches the yield further without leaving anyone shortchanged, since the tangy, sweet filling is satisfying even in a smaller slice. For a party where guests are grazing rather than sitting down to a full dessert course, the mini pie variation mentioned above turns the same filling into individual portions that are easy to pick up and eat without a plate and fork. If you want to double the recipe to fill two crusts, simply double both the whipped topping and the pudding mix, keeping the ratio exactly the same, and divide the filling evenly between the two crusts before chilling as directed.
Common Questions
Can I use cook-and-serve pudding mix instead of instant?
No, this recipe relies on instant pudding mix, which thickens on contact with the whipped topping without any cooking. Cook-and-serve pudding needs to be heated on the stovetop first and won’t set properly if simply beaten into whipped topping.
Can I use a different pudding flavor?
Yes. Vanilla, orange, or another citrus-flavored instant pudding mix will all work with the same method, giving you a similarly easy no-bake pie with a different flavor profile.
Can I make this pie ahead of time?
Yes, and it’s ideal for making ahead since it needs at least 2 hours to chill regardless. It keeps well covered in the refrigerator for a few days.
Can I freeze this pie?
Freezing isn’t recommended, since the whipped topping and pudding-based filling can separate and turn watery once thawed. This pie is best made and enjoyed within a few days, kept in the refrigerator.
Why is my filling not setting firm?
This usually means it hasn’t had enough chilling time, or the pudding mix wasn’t fully beaten in. Give it the full 2 hours in the refrigerator, and make sure the mixture looked completely smooth and uniform before you spooned it into the crust.
2-Ingredient Lemon Creamsicle Pie proves that a bright, citrusy dessert doesn’t need a long ingredient list or any time in the oven. Beat two ready-to-use ingredients together, spoon the mixture into a ready-made crust, and let the refrigerator do the rest. What you get in return is a light, tangy, creamy dessert that’s just as at home at a spring brunch as it is on a random afternoon when you want something sweet and citrusy without turning on the oven. Sometimes the easiest recipes end up being the ones you make again and again.