
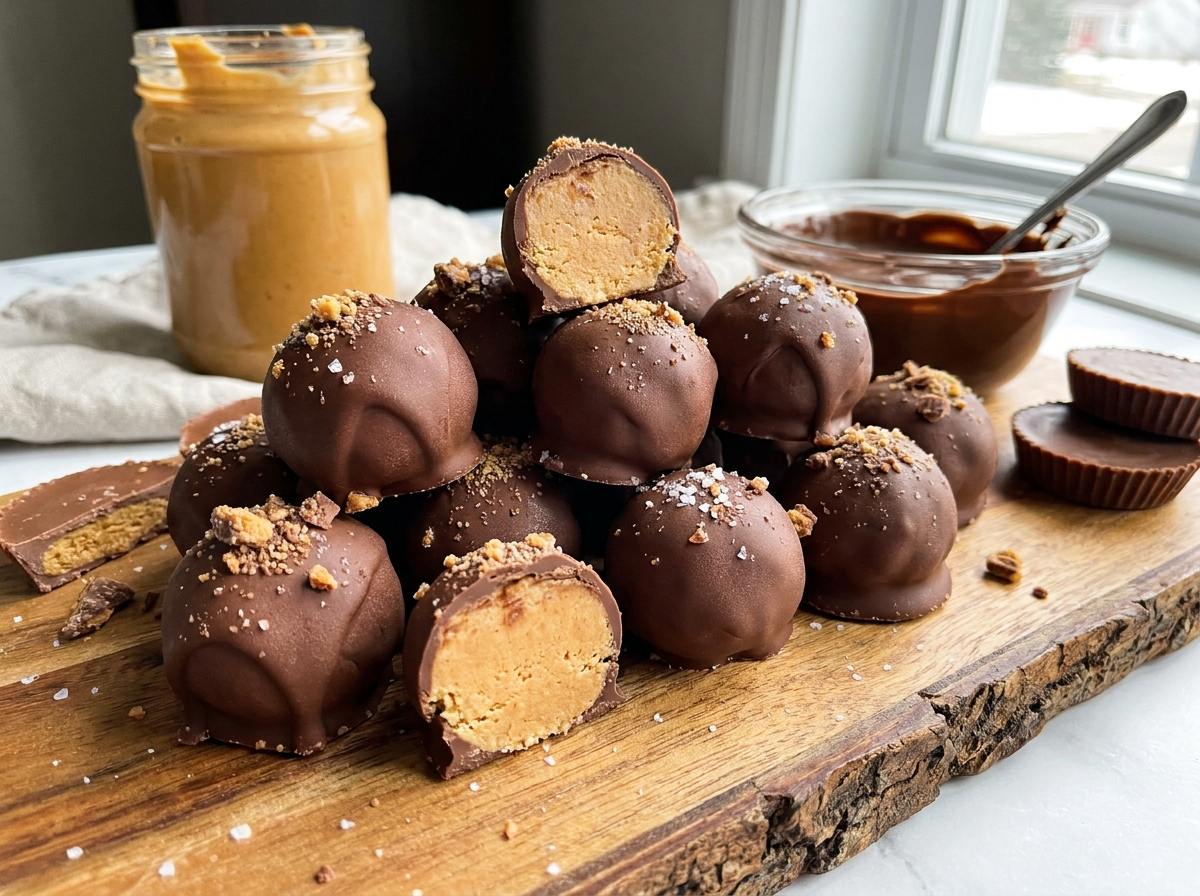
3-Ingredient No-Bake Reese’s Peanut Butter Chocolate Truffles
A simple peanut butter dough rolled into balls and dipped in melted chocolate for a candy-shop-style truffle at home.
Thank you for reading this post, don't forget to subscribe!
Rich, sweet, and tasting exactly like the inside of a favorite peanut butter candy, these truffles come together with just three ingredients and no baking at all. There’s no candy thermometer and no fussy technique, just a simple peanut butter dough rolled into balls and dipped in chocolate.
Mixing peanut butter and powdered sugar into a thick, dough-like mixture, rolling it into balls, and dipping each one in melted chocolate is the entire process. Chilled until firm, these truffles taste remarkably close to a favorite peanut butter cup, just in a slightly different, homemade shape.
It’s an easy treat for a holiday platter, a gift tin, or any time a peanut butter and chocolate craving calls for something quick and no-bake.
Why This Recipe Works
Mixing peanut butter with powdered sugar creates a thick, moldable dough without any butter or cooking required, since the sugar absorbs the moisture in the peanut butter and firms it up into something sturdy enough to roll. Dipping the chilled balls in melted chocolate gives them a glossy, candy-shop finish and a contrast of textures between the soft, sweet center and the firm chocolate shell.
Because the peanut butter and powdered sugar together provide all the body these truffles need, there’s no cooking beyond melting the chocolate for dipping.
Why Chilling First Matters
Chilling the rolled peanut butter balls before dipping them in chocolate, rather than dipping them right away, is what keeps them firm enough to hold their shape through the dipping process. A ball that’s too soft when it hits warm melted chocolate can start to fall apart or lose its round shape.
What You’ll Need
- 1 cup creamy peanut butter
- 2 cups powdered sugar
- 2 cups milk chocolate chips, melted
You’ll also need a parchment-lined baking sheet. This recipe makes 24 truffles.
A Note on Ingredient Choices
Standard creamy peanut butter, rather than natural peanut butter, gives the most reliable dough here, since natural peanut butter’s looser, oilier texture can make the mixture too soft to roll cleanly. Milk chocolate chips give these truffles a sweet, classic flavor close to the candy they’re inspired by, though dark chocolate works well for a less sweet version.
Equipment You’ll Need
A large bowl, a baking sheet lined with parchment paper, and two forks or a dipping tool for the chocolate are all you need; no oven or mixer required.
How to Make It
- Mix the dough. In a large bowl, mix the peanut butter and powdered sugar until a thick, dough-like mixture forms.
- Roll. Roll the mixture into 1-inch balls and place them on a parchment-lined baking sheet.
- Chill. Refrigerate for 30 minutes, or until firm.
- Dip. Dip each peanut butter ball into the melted chocolate, coating completely.
- Set. Return the truffles to the baking sheet and refrigerate for 15–20 minutes until the chocolate hardens.
- Store. Store in an airtight container in the refrigerator.
Getting a Smooth Dough
Mixing the peanut butter and powdered sugar thoroughly, working the sugar in a little at a time rather than all at once, helps avoid a lumpy, uneven dough. The mixture should feel firm and slightly stiff, similar to a cookie dough, once fully combined.

Getting an Even Dip
Using a fork to lower each ball into the melted chocolate and gently turning it to coat all sides, rather than stirring it around, keeps the round shape intact. Tapping the fork lightly against the bowl’s edge after lifting the truffle out lets excess chocolate drip off for a cleaner, more even coating.
Knowing When It’s Done
These truffles are ready once the chocolate coating feels completely firm and no longer looks wet or glossy. If the coating still feels soft after 20 minutes, give the truffles another 10 minutes in the refrigerator before serving.
Tips for Perfect Peanut Butter Truffles
Roll the peanut butter balls to a consistent size using a small cookie scoop or a tablespoon measure, which helps them chill and dip at the same rate. Keep the melted chocolate warm but not hot while dipping, since chocolate that’s too hot can soften the peanut butter centers before they’re fully coated.
Troubleshooting Common Issues
My dough is too dry to roll. Add a touch more peanut butter, a tablespoon at a time, until the mixture holds together smoothly. My dough is too soft to roll. Add a little more powdered sugar until the mixture firms up enough to hold a ball shape. My chocolate coating is cracking. The truffles were likely too cold when dipped; let them sit for a few minutes at room temperature before dipping. My truffles are losing their round shape in the chocolate. They likely weren’t chilled long enough before dipping; a full 30 minutes gives the most stable shape.
A Few Ways to Make It Yours
Dark Chocolate Version
Swap in dark chocolate for a richer, less sweet finish.
Crushed Peanut Topping
Roll the dipped truffles in crushed peanuts before the chocolate sets.
Sea Salt Finish
Sprinkle flaky sea salt over the top for a sweet-and-salty contrast.
White Chocolate Drizzle
Drizzle melted white chocolate over the finished truffles for a decorative touch.
The classic version is worth trying first so you know the baseline flavor before adding any extras.
How to Store These Truffles
Keep the truffles in an airtight container in the refrigerator for up to two weeks, since the peanut butter center stays softest when kept cold. Let them sit at room temperature for a few minutes before serving for the best texture.
When to Serve These Truffles
These truffles work well for holiday platters, gift tins, or any time a peanut butter and chocolate craving strikes and a full baking session isn’t realistic. They also make an easy, homemade candy to pack into a box for a holiday gift exchange.
Nutrition and Serving Information
This recipe makes 24 truffles at roughly 180 calories per truffle, though exact calorie content will vary depending on the specific brands of peanut butter and chocolate used. Because this recipe contains peanuts, it isn’t appropriate for anyone avoiding that ingredient.
Make-Ahead Tips
These truffles are a genuinely good make-ahead treat, since they need to chill at two separate points and hold their texture well for weeks afterward in the refrigerator. Making a batch several days before a holiday gathering removes any last-minute pressure entirely.
The Science Behind a No-Bake Truffle
Powdered sugar is fine enough to blend smoothly into peanut butter without any cooking, absorbing moisture and firming the mixture into a dough sturdy enough to roll and hold its shape. The chocolate shell, melted and then allowed to set at a cold temperature, hardens around that dough without any additional binder, giving the finished truffle its two distinct textures.
Portioning and Yield
This recipe makes about 24 truffles from a single batch, a good amount for a holiday platter or several small gift tins. Doubling the ingredients works well for a larger batch, though it’s easiest to melt the chocolate in two separate rounds so the dipping step stays manageable.
A Little Bit of History
Peanut butter and chocolate candies have been a beloved American pairing for generations, with the classic peanut butter cup inspiring countless homemade versions over the years. This truffle version leans on that same iconic flavor combination while using a simple roll-and-dip method that’s far more approachable than molding candies in individual cups.
Serving Suggestions
Serve these truffles chilled or at room temperature, arranged on a platter with a light dusting of cocoa powder for a bakery-style presentation. A few truffles alongside a cup of coffee or a glass of cold milk makes for an easy, satisfying treat any time of year.
Choosing the Right Chocolate
Milk chocolate chips give these truffles a sweet, classic flavor closest to a traditional peanut butter cup, while dark chocolate chips shift the balance toward a deeper, less sweet finish. A chocolate specifically meant for melting and dipping, rather than chips meant for baking, can give an even smoother, glossier coating.
Why This Recipe Is So Beginner-Friendly
If you’ve never made truffles before, this is about as forgiving a place to start as you’ll find. There’s no cooked sugar stage, no tempering chocolate in the traditional sense, and no delicate technique required beyond mixing, rolling, and dipping. With only three ingredients and a handful of simple steps, there’s very little room for the kind of mistakes that can derail a more involved candy recipe. This makes it a genuinely approachable recipe for a first-time cook or a child who wants to help roll the balls, since the process is simple, safe, and produces a real, impressive-looking result within about an hour.
Adjusting the Flavor to Your Taste
As written, these truffles get their flavor almost entirely from the peanut butter center and chocolate coating, giving a sweet, nutty, classic candy-bar taste. If you’d like a bolder peanut flavor, a natural peanut butter with a stronger roasted taste leans further in that direction, though the dough may need a touch more powdered sugar to firm up properly. Because this recipe has so few ingredients to begin with, small changes tend to have a noticeable effect on the final flavor, so it’s worth trying the classic version first before deciding what, if anything, you’d like to change.
Pairing These Truffles With Other Desserts and Drinks
Because the flavor here is rich, sweet, and peanut-forward, these truffles pair naturally with lighter options if you’re serving more than one dessert, since the contrast keeps a spread from feeling too heavy. A crisp, light cookie or a fruit-based treat balances the richness of these truffles nicely, while another peanut butter or chocolate dessert leans further into the same indulgent direction. On the drink side, these truffles pair well with coffee, cold milk, or hot cocoa.
A Note on Ingredient Proportions
Using one cup of peanut butter against two cups of powdered sugar gives a dough firm enough to roll and hold its shape without tasting overly sugary, and it’s worth understanding why that balance matters before adjusting it. Too much peanut butter relative to the sugar leaves the dough too soft to roll cleanly, while too much sugar can make the centers dry and crumbly rather than smooth. This particular ratio is what gives the finished truffles their classic, fudgy center, so it’s worth treating the stated amounts as a tested baseline.
A Quick Note on Serving Temperature
These truffles taste good at any temperature, but they hold their shape best served chilled or at cool room temperature, since a warm truffle can soften enough for the chocolate shell to slide off the center. If serving at a warm gathering, keeping the platter in a cooler or shaded spot helps the coating hold.
Why This Recipe Is Naturally Kid-Friendly to Make
Because this recipe involves mixing a simple dough and rolling it into balls, it’s a genuinely fun treat to make with kids, with the chocolate melting and dipping steps handled by an adult. Rolling the peanut butter balls is a satisfying, hands-on task that gives a real sense of accomplishment once the finished truffles come out of the refrigerator set and ready to enjoy.
A Quick Note on Portion Control
Because these truffles are rich with peanut butter, sugar, and chocolate, one or two go a long way here compared to a lighter snack. Rolling slightly smaller balls is an easy way to stretch the batch further and keep portions naturally smaller for a holiday platter or gift tin.
A Note on Presentation
How you serve these truffles changes the impression they make almost as much as the flavor itself. Piled plainly in a bowl, they read as a simple, homemade candy. Arranged on a tiered tray with a dusting of cocoa powder and a few crushed peanuts scattered around, the same truffles suddenly look like something from a specialty chocolate shop, which makes this a surprisingly versatile recipe to keep in rotation for both casual snacking and holiday gifting.

A Final Note on Batch Size
This recipe is sized to make about 24 truffles, which keeps the whole process quick and manageable within about an hour including both chilling steps. For a bigger batch to fill out a longer holiday dessert table, melt the chocolate in two or three separate rounds rather than overloading one bowl at once, since too much melted together at one time can cool and thicken before all the truffles are dipped. Working through the dipping in smaller rounds keeps the coating glossy and even across the whole batch.
A Word on Texture
The texture of these truffles is really two textures working together: a firm, snappable chocolate shell giving way to a soft, dense, almost fudgy peanut butter center. That contrast is exactly what makes a truffle feel special compared to a plain candy, and it’s why chilling at both stages matters so much here. A truffle that’s been given the full chilling time at each step holds that clean break between shell and center, rather than the two textures blurring together.
A Note on Cutting Clean Halves
If you’d like to show off the inside of these truffles on a platter, slicing a few in half with a thin, sharp knife once they’re fully set gives a clean cross-section that shows the contrast between the chocolate shell and the peanut butter center. Warming the knife slightly under hot water and wiping it clean between cuts helps the chocolate shell crack cleanly rather than crumbling.
A Note on Working With Melted Chocolate
Melted chocolate is sensitive to both heat and moisture, and a few small habits make the dipping process go much more smoothly. Keeping the bowl of melted chocolate over a very low, indirect heat source, or reheating it briefly between batches, keeps it fluid enough to dip the truffles cleanly without needing to microwave it repeatedly. Using a completely dry fork and dry hands throughout also keeps stray drops of water from causing the chocolate to seize into a thick, grainy mass partway through dipping.
A Note on Gifting These Truffles
Because they hold their shape well once chilled, these truffles travel nicely as a homemade gift, provided they’re kept reasonably cool along the way. Layered into a small box or tin with parchment between layers, a dozen truffles makes a simple, impressive-looking gift for a teacher, a neighbor, or a holiday exchange. A few opened Reese’s wrappers tucked alongside the tin is a playful touch that lets the recipient know exactly what flavor inspired them.
A Note on Scaling Down the Batch
If a full batch of 24 truffles is more than you need, this recipe halves just as easily as it doubles, since the ratio between peanut butter, powdered sugar, and chocolate stays simple to work out either way. A smaller batch is a good option for a quick craving or a single gift box without committing to a full tray, and it still only takes the same handful of minutes to mix, roll, and dip before the batch goes into the refrigerator to set.
Common Questions
Can I use crunchy peanut butter instead of creamy?
Yes, crunchy peanut butter works well and adds extra texture to the centers.
Why is my dough too soft to roll?
It likely needs more powdered sugar; add it a little at a time until the mixture firms up.
Can I use white chocolate for dipping?
Yes, white chocolate works well and gives a sweeter, different-looking finish.
How do I know when the truffles are fully set?
The chocolate coating should feel completely firm and no longer look wet or glossy.
Can I double this recipe?
Yes, simply double all three ingredients and melt the chocolate in multiple rounds so the dipping step stays manageable.
How should I store leftovers?
Keep the truffles in an airtight container in the refrigerator for up to two weeks.
Can I freeze these truffles?
Yes, they freeze well in an airtight container for up to 3 months; thaw in the refrigerator before serving.
However you dip them and whoever you share them with, these peanut butter chocolate truffles deliver all the familiar flavor of a favorite candy in a homemade, no-bake form, with no oven and no complicated process required. It’s proof that a simple roll-and-dip method can turn into the most requested treat on any holiday tray.