
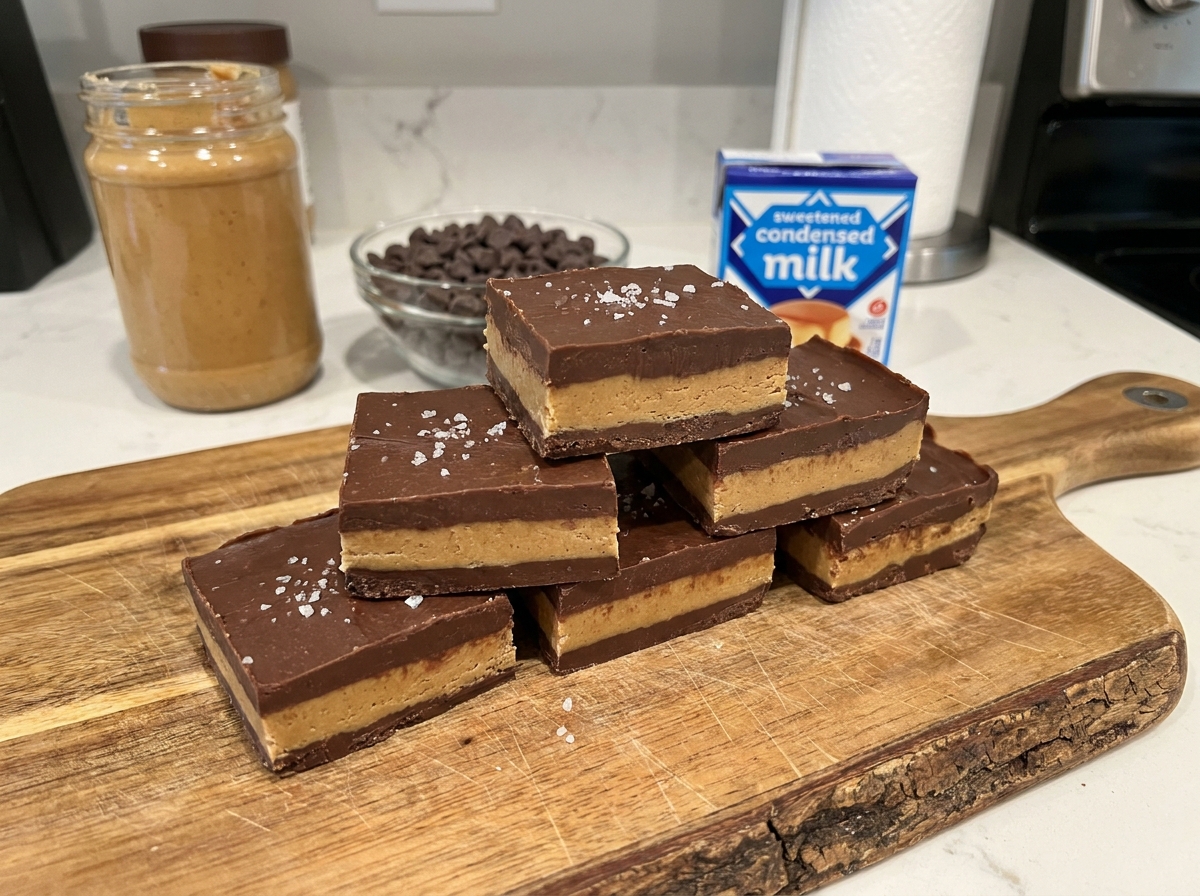
3-Ingredient Peanut Butter Chocolate Fudge Bars
Melted chocolate, sweetened condensed milk, and peanut butter swirled together and chilled until firm — rich, dense fudge with no candy thermometer required.
Thank you for reading this post, don't forget to subscribe!
These 3-Ingredient Peanut Butter Chocolate Fudge Bars turn chocolate chips, sweetened condensed milk, and peanut butter into a dense, rich fudge with a marbled swirl of peanut butter running through it. Melted together in the microwave and chilled until firm, this is fudge without a candy thermometer, a rolling boil, or any real risk of the whole batch seizing or turning grainy.
There’s no butter, no corn syrup, and no cooking on the stovetop. Sweetened condensed milk supplies the sugar and moisture that a traditional fudge recipe would get from a carefully cooked sugar syrup, which means this version skips the most finicky, failure-prone part of making fudge entirely.
Because everything melts together in one bowl in the microwave, this is one of the fastest ways to get real, dense fudge without babysitting a pot on the stove.
Why This Recipe Works
Traditional fudge depends on cooking sugar to a precise temperature so it sets with the right texture, a process with plenty of room for error if the mixture overcooks, undercooks, or crystallizes at the wrong moment. Sweetened condensed milk sidesteps all of that by already containing the concentrated sugar and milk solids fudge needs, pre-cooked and stabilized during manufacturing. Melting it together with chocolate chips creates a smooth, thick base that only needs to cool and firm up in the refrigerator, rather than hitting an exact temperature on a thermometer.
Swirling in peanut butter after the chocolate mixture is smooth adds richness and a marbled look without fully blending into the chocolate, since the two have slightly different consistencies even when both are warm. That partial swirl is what gives these bars their signature marbled top, with distinct ribbons of peanut butter running through the fudge rather than a uniformly blended flavor.
Why Condensed Milk Replaces a Cooked Sugar Syrup
A classic fudge recipe cooks sugar, butter, and milk to the soft-ball stage, a specific temperature where the sugar concentration is just right for a smooth, creamy set once it cools. Sweetened condensed milk has already been through a similar concentration process during manufacturing, which is why it can stand in for that cooked syrup here without a thermometer or any risk of the sugar crystallizing unpredictably.
What You’ll Need
- 1 cup creamy peanut butter
- 1 cup chocolate chips
- 1 can (14 oz) sweetened condensed milk
That’s the entire list. Each bar comes out to roughly 220 calories, and the recipe makes 16 bars.
A Note on Chocolate and Peanut Butter
Standard semi-sweet chocolate chips give a balanced sweetness that lets the peanut butter come through clearly, though dark or milk chocolate chips both work if you prefer a different flavor direction. Standard creamy peanut butter swirls in most smoothly and evenly; a natural peanut butter will work too, but its looser consistency can make the swirl pattern a bit less defined.
Equipment You’ll Need
A microwave-safe bowl and a spatula are all you need to melt and combine the chocolate and condensed milk, since there’s no stovetop cooking involved. An 8×8-inch pan lined with parchment paper holds the fudge as it sets, and a butter knife or skewer works well for creating the peanut butter swirl on top.
How to Make It
- Line the pan. Line an 8×8-inch baking pan with parchment paper.
- Melt the base. Add the chocolate chips and sweetened condensed milk to a microwave-safe bowl. Microwave in 30-second intervals, stirring between each, until smooth and melted.
- Add peanut butter. Stir in the peanut butter until completely combined.
- Pour and spread. Pour the mixture into the prepared pan and spread evenly.
- Chill. Refrigerate for 2–3 hours, or until firm.
- Slice and serve. Lift the fudge from the pan, slice into bars, and serve.
Getting a Smooth Chocolate Base
Microwaving the chocolate and condensed milk in short 30-second bursts, stirring thoroughly between each, is the key to melting the chocolate without scorching it or causing it to seize. Chocolate can go from perfectly melted to grainy and separated very quickly in the microwave, so patience with shorter intervals pays off with a smoother, glossier final fudge.

Creating the Marbled Swirl
Stirring the peanut butter in only partially, rather than blending it completely smooth into the chocolate, is what creates the marbled look these bars are known for. Dragging a knife or skewer through the mixture a few times after pouring it into the pan pulls the two colors together into distinct ribbons without fully mixing them into one uniform brown.
Knowing When It’s Set
The fudge needs the full 2 to 3 hours in the refrigerator to firm up enough to slice cleanly. Press gently in the center of the pan; if it still feels soft, give it another 30 minutes. A properly and fully set batch should hold a clean, sharp edge when carefully cut, without the soft fudge sticking too heavily to the knife blade.
Tips for Perfect Peanut Butter Chocolate Fudge
Melt the chocolate and condensed milk in short intervals to avoid scorching, and stir the peanut butter in gently for a marbled look rather than a fully blended one. Give the fudge the full chill time before slicing, since a rushed batch will be noticeably softer and harder to cut into clean squares.
Troubleshooting Common Issues
My chocolate seized or turned grainy. This usually happens from overheating; use shorter microwave intervals and stir thoroughly between each one.
My fudge didn’t set firm enough. Give it more chill time; a few extra hours, or overnight, usually solves this.
My swirl disappeared into the chocolate. Stirring the peanut butter in too thoroughly blends the colors together; stir just until combined, then swirl gently with a knife.
My fudge stuck to the pan. Make sure the parchment paper extends up and over the sides of the pan so you can lift the whole block out cleanly before slicing.

A Few Ways to Make It Yours
Sea Salt Finish
Sprinkle a pinch of flaky sea salt over the top before chilling for a sweet-and-salty contrast.
Chopped Peanut Topping
Press chopped peanuts into the top of the fudge before it sets for extra crunch.
Dark Chocolate Base
Use dark chocolate chips instead of semi-sweet for a richer, less sweet fudge.
Double Swirl
Reserve a spoonful of melted chocolate to swirl back in on top of the peanut butter for an even more dramatic marbled look.
The classic swirled version is worth trying first so you know the baseline flavor and texture before adding any extras.
How to Store Peanut Butter Chocolate Fudge Bars
Store the bars in an airtight container in the refrigerator for up to two weeks, since they’re built to stay cold and can soften at room temperature. They also freeze well; place them in a freezer-safe container with parchment between layers and thaw in the refrigerator before serving.
When to Serve These Bars
These bars work well as a rich, bite-sized dessert for a party or holiday gathering, since a small square goes a long way given how dense and satisfying the fudge is. They’re also an easy homemade gift when packaged in a small box or tin, since they hold their shape and texture well for weeks in the refrigerator.
Nutrition and Serving Information
The recipe estimates approximately 220 calories per bar when the batch is divided into 16 pieces, based on standard chocolate chips, peanut butter, and condensed milk measurements. This is only an estimate, since exact calorie and fat content will vary depending on the specific brands used. This recipe contains peanuts and dairy, so check labels carefully if you’re serving guests with either of those allergies.
Make-Ahead Tips
This fudge keeps well for two weeks or more, making it an excellent make-ahead treat for a holiday gathering or a gift. Make the full batch several days ahead and store in an airtight container, since the flavor and texture actually hold up beautifully with time in the refrigerator.
The Science Behind a No-Cook Fudge
Traditional fudge relies on carefully controlling sugar crystallization, cooking a sugar syrup to a precise concentration and then cooling it under specific conditions so that only very fine sugar crystals form, giving fudge its smooth, creamy texture rather than a grainy one. Sweetened condensed milk has already undergone a similar concentration process during manufacturing, with its sugar and milk proteins stabilized in a way that prevents large crystal formation. That’s what allows this recipe to skip the cooking and cooling steps that make traditional fudge so finicky, while still achieving a dense, smooth texture once the mixture is chilled.
Portioning and Yield
This recipe makes about 16 bars from one cup each of peanut butter and chocolate chips plus one can of condensed milk, a good amount for a party or a couple of weeks of treats. If you’d like smaller portions, cutting the pan into 25 pieces stretches the batch further for a crowd, while cutting it into 9 larger squares makes a more substantial dessert portion. The recipe doubles cleanly in a 9×13-inch pan if you’d like a bigger batch.
A Little Bit of History
Fudge recipes built around sweetened condensed milk, sometimes called “never-fail fudge,” became popular in home kitchens specifically because they removed the temperature-sensitive cooking stage that tripped up so many traditional fudge attempts. This peanut butter and chocolate version follows that same practical tradition, simplifying the process down to melting and stirring while still delivering the dense, rich texture people expect from real fudge.
Serving Suggestions
Serve these bars chilled, straight from the refrigerator, for the cleanest slices and firmest texture. Arranged on a small platter or tucked into a decorative tin, they make a natural addition to a holiday cookie and candy tray, and a light sprinkle of chopped peanuts or flaky salt over the top dresses them up nicely for a gathering.
Understanding the Texture
These bars are dense, rich, and fudgy, closer to a classic confectionery fudge than to a lighter, airier bar. That density comes directly from the concentrated milk solids in the condensed milk, which give the finished fudge its characteristic melt-in-your-mouth quality without any graininess. Once you know to expect a rich, substantial square rather than a light one, the texture reads as indulgent and satisfying exactly as real fudge should.
Choosing the Right Chocolate
Semi-sweet chocolate chips give the most balanced, classic fudge flavor, letting the peanut butter swirl come through clearly without the whole bar tasting overly sugary. Dark chocolate pulls the flavor in a richer, more bittersweet direction, which pairs nicely with how sweet the condensed milk and peanut butter already make the base. Milk chocolate pushes everything sweeter and creamier, a good option if you’re serving a crowd that leans toward a sweeter palate.
Why This Recipe Is Naturally Kid-Friendly to Make
With no stovetop cooking, no candy thermometer, and no risk of hot sugar syrup splattering anywhere, this is a genuinely easy fudge recipe to make alongside kids, whether that means letting them measure the chocolate chips or handing them the job of swirling the peanut butter through the melted chocolate with a butter knife. Watching the two colors twist together into a marbled pattern is a satisfying, low-stakes task for a young helper, and because the microwave intervals are short and the bowl cools quickly once removed, there’s very little risk involved compared to a stovetop fudge recipe that requires careful attention to a boiling sugar mixture.
Adjusting the Swirl to Your Preference
If you’d like a more subtle marbled look, stirring the peanut butter in a bit more thoroughly before pouring the mixture into the pan blends the two flavors closer together while still leaving faint streaks throughout. For a bolder, more dramatic swirl, stir the peanut butter in only enough to break it up into large streaks, then use a knife or skewer to drag it through the surface of the poured fudge in a few sweeping motions, creating wide, distinct ribbons of peanut butter against the chocolate. Neither approach changes the underlying flavor or texture of the finished fudge in any real way, so this really just comes down to whichever visual effect you happen to prefer for serving or gifting.
Getting Clean, Even Slices
A sharp knife run under hot water and wiped dry between cuts glides through dense, chilled fudge far more cleanly than a dry blade, which tends to drag and leave ragged edges. Cutting the fudge while it’s still cold, straight from the refrigerator, also helps considerably, since the fat in both the chocolate and peanut butter is at its firmest right out of the cold and will only soften the longer it sits at room temperature. If you’re packaging these bars as a gift or serving them at a party, marking out a light grid on the surface before cutting all the way through helps keep every square close to the same size.
Pairing These Bars With Drinks and Other Desserts
A cold glass of milk is the classic pairing for any rich, chocolate-forward fudge, and these bars are no exception, since their dense texture practically calls for something cold to cut through the richness. Coffee also works well alongside them, particularly a slightly bitter cup, since it balances the sweetness of the condensed milk nicely. If you’re building out a larger holiday dessert or candy tray, these bars pair naturally alongside other easy no-bake treats like clusters or bark, since none of them require any oven time at all and all of them hold up nicely sitting out at a party for a few hours.
A Note on Ingredient Ratios
The equal parts peanut butter and chocolate chips, paired with one standard can of sweetened condensed milk, were balanced specifically to produce a fudge that’s rich but still firm enough to slice cleanly. Adding extra peanut butter beyond this ratio will make the fudge softer and may require a longer chill time to set firmly, while adding extra chocolate chips produces a denser, more classically fudge-like bar with less peanut butter flavor coming through. Sticking close to the exact ratio given here on your very first batch is the most reliable way to get a genuine feel for how the mixture should look and behave before experimenting with any further adjustments.
A Note on Serving Temperature
This fudge is best served cold or just slightly below room temperature, since it holds its shape and clean-cut edges best when it hasn’t had too much time to soften. If it sits out at room temperature for an extended period, particularly in a warm room, the peanut butter and chocolate can both begin to soften noticeably, making the bars feel greasier and harder to pick up cleanly by hand. For a party or larger gathering, it’s worth keeping the whole tray in the refrigerator until shortly before serving, then setting it out gradually in smaller batches rather than all at once if the room happens to be especially warm that day.
Making These Ahead for a Party or Gift
Because this fudge actually improves with a little extra time in the refrigerator, letting the flavors settle and meld together, it’s an excellent make-ahead option when you’re planning for a holiday party or putting together homemade gifts for neighbors and coworkers. Cutting and carefully packaging the bars a day or two in advance frees up valuable time closer to the actual event, and stacking the squares between layers of parchment or wax paper in a decorative tin keeps them from sticking together while giving the gift a tidy, finished presentation. If you’re making several batches at once for a longer gifting list, doubling the recipe in a 9×13-inch pan is far more time-efficient overall than running several smaller batches back to back through the microwave.
Common Questions
Can I make this without a microwave?
Yes, melt the chocolate and condensed milk together in a saucepan over low heat, stirring constantly to prevent scorching.
Why did my chocolate seize?
This usually happens from overheating. Use shorter intervals and stir thoroughly between each one to prevent this.
Can I use natural peanut butter?
Yes, though the swirl pattern may be a little less defined due to its looser consistency.
Can I freeze this fudge?
Yes, freeze it in a freezer-safe container with parchment between layers and thaw in the refrigerator before serving.
How long does this fudge keep?
Store it in an airtight container in the refrigerator for up to two weeks.
Can I double this recipe?
Yes, this recipe doubles cleanly in a 9×13-inch pan.
What if my swirl blended in too much?
The fudge will still taste great; just stir the peanut butter in more gently and swirl briefly next time for a more defined pattern.
3-Ingredient Peanut Butter Chocolate Fudge Bars turn a bag of chocolate chips, a can of condensed milk, and a jar of peanut butter into a rich, marbled fudge with real depth of flavor. Melt, swirl, chill, and slice — that’s the entire process, and the result is a genuinely dense, satisfying treat that’s ready with just a couple of hours of easy, hands-off chilling time and almost no cleanup afterward, no thermometer or stovetop pot required at any point.