
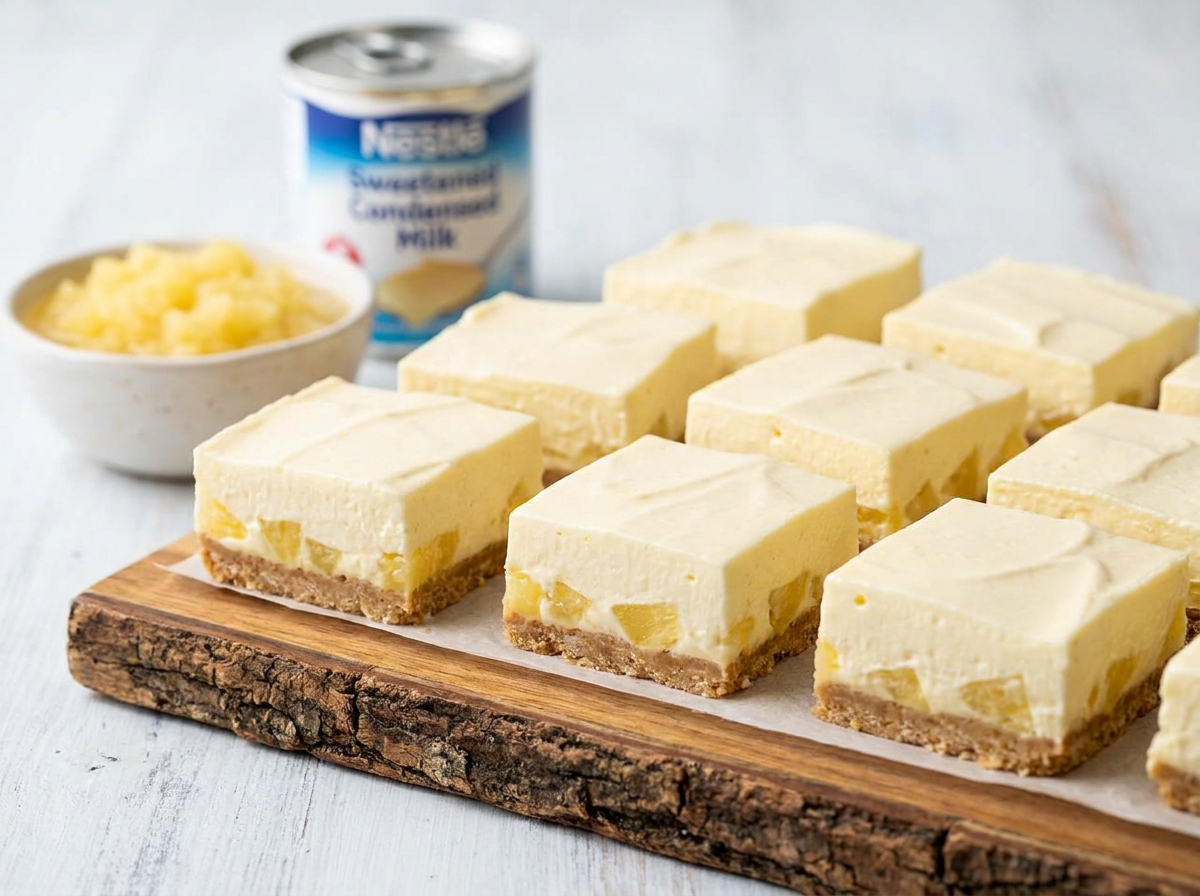
2-Ingredient No-Bake Pineapple Creamsicle Bars
Instant vanilla pudding and crushed pineapple whisked together and chilled until sliceable — bright, creamy, and genuinely tropical, with no oven and no baking required at all.
Thank you for reading this post, don't forget to subscribe!
These 2-Ingredient No-Bake Pineapple Creamsicle Bars turn just instant vanilla pudding mix and crushed pineapple into a bright, creamy bar with a genuinely tropical flavor. Whisked together right in the can’s own juice and spread into a lined pan, the mixture sets up in the refrigerator into bars that slice cleanly and taste like a creamsicle with a fruity, pineapple twist.
There’s no cooking, no baking, and no dairy beyond what’s already in the instant pudding mix itself. The starches in the instant pudding do all of the thickening work here, absorbing the pineapple’s juice as the mixture sits and firming up into a sliceable bar without ever needing heat.
Because everything comes together in one bowl with just a whisk, this is one of the quickest fruity desserts to put together, especially when a light, bright treat feels more appealing than something heavy or chocolate-based.
Why This Recipe Works
Instant pudding mix is built around modified food starch, which is specifically designed to thicken quickly at room temperature once it’s combined with a liquid, without needing to be cooked on the stovetop the way old-fashioned pudding does. Whisked directly into crushed pineapple and its juice, that starch absorbs the liquid and swells, thickening the entire mixture into something closer to a firm, spreadable filling within just a few minutes of whisking.
Chilling the spread mixture in the refrigerator finishes the job, giving the starch time to fully hydrate and set the bars into a sliceable texture. Because the pineapple is used undrained, with all of its natural juice included, the starch has plenty of liquid to absorb, which is part of what gives these bars their notably bright, fruity flavor rather than tasting diluted or bland.
Why the Juice Stays In
Using the crushed pineapple undrained, juice and all, is an important detail in this recipe, since that juice is exactly what the instant pudding mix needs to thicken properly. Draining the pineapple first would leave too little liquid for the starch to absorb, resulting in a mixture that’s too thick and pasty rather than smooth and creamy once it sets.
What You’ll Need
- 1 box (3.4 oz) instant vanilla pudding mix
- 1 can (20 oz) crushed pineapple in juice, undrained
That’s the entire list. Each bar comes out to roughly 95 calories, and the recipe makes 12 bars.
A Note on Pudding Mix and Pineapple
Make sure to use instant pudding mix rather than the cook-and-serve variety, since instant pudding is specifically formulated to thicken without any heat, which is essential to how this no-bake recipe works. A standard 20-ounce can of crushed pineapple in its own juice, not syrup, gives the most balanced sweetness and the brightest natural pineapple flavor.
Equipment You’ll Need
A large mixing bowl and a whisk are all you need to combine the pudding mix and pineapple, since the starch does the thickening work on its own without any additional equipment. An 8×8-inch pan lined with parchment paper holds the mixture as it sets, and a spatula helps spread it evenly and lift the finished bars out for slicing.
How to Make It
- Combine. Add the instant vanilla pudding mix and crushed pineapple with its juice to a large bowl.
- Whisk. Whisk until thick and creamy.
- Line the pan. Line an 8×8-inch pan with parchment paper.
- Spread. Spread the mixture evenly into the pan.
- Chill. Refrigerate for at least 3 hours, or until firm enough to slice.
- Slice and serve. Cut into bars and serve chilled.
Getting the Right Consistency While Whisking
The mixture will thicken noticeably within the first minute or so of whisking, going from a loose, juicy mixture to something closer to a thick, spoonable pudding. Keep whisking steadily until there are no dry, powdery streaks of pudding mix left anywhere and the overall texture looks uniform throughout, since any unmixed pockets of dry mix left behind can leave a noticeably inconsistent, uneven texture once the finished bars are fully chilled and sliced.

Spreading the Mixture Evenly
Because the mixture is fairly thick even before chilling, taking a moment to spread it evenly into every corner of the pan with a spatula helps the bars set into a uniform thickness. A few firm, even strokes across the surface also smooths out the top, giving the finished bars a clean, tidy appearance once they’re sliced.
Knowing When They’re Ready
The bars need the full 3 hours in the refrigerator to firm up enough to slice cleanly, and a longer chill only helps. Press gently in the center of the pan; if it still feels soft and quite loose, give it another 30 minutes to a full hour. A properly and fully set batch should hold a clean, neat edge when cut, without the soft filling spreading or oozing out at the sides.
Tips for Perfect Pineapple Creamsicle Bars
Whisk the pudding mix and pineapple thoroughly until no dry streaks remain, and spread the mixture evenly into the pan for the cleanest slices. Give the bars the full chill time, or longer, before cutting, since a rushed batch will be noticeably softer and harder to slice neatly.
Troubleshooting Common Issues
My bars didn’t firm up enough. This usually means they need more chill time; give them another hour or two in the refrigerator before slicing again.
My mixture looked too thin after whisking. Make sure you’re using instant pudding mix, not cook-and-serve, since only the instant variety thickens without heat.
My bars tasted bland. Using pineapple packed in juice rather than a lighter syrup, and not draining it, gives the brightest, most concentrated pineapple flavor.
My bars were difficult to slice cleanly. A knife run under hot water and wiped dry between cuts glides through the chilled mixture much more cleanly than a dry blade.

A Few Ways to Make It Yours
Whipped Topping Layer
Fold in a cup of whipped topping before spreading the mixture into the pan for a lighter, fluffier texture.
Orange Zest Finish
Stir in a bit of fresh orange zest for an even more pronounced creamsicle flavor.
Toasted Coconut Topping
Sprinkle toasted coconut over the top before chilling for a tropical finishing touch.
Fresh Pineapple Garnish
Top the sliced bars with a few small fresh pineapple chunks right before serving.
The plain two-ingredient version is worth trying first so you know the baseline flavor and texture before adding any extras.
How to Store Pineapple Creamsicle Bars
Store the bars in an airtight container in the refrigerator for up to 4 days, since the pudding-based filling needs to stay cold. They don’t freeze particularly well, since the texture of the pudding can separate slightly once thawed, so these are best enjoyed fresh within a few days.
When to Serve These Bars
These bars work well as a light, refreshing dessert for a warm-weather gathering, a pool party, or a summer barbecue, since the bright pineapple flavor feels less heavy than a chocolate or caramel-based treat. They’re also an easy make-ahead option for a potluck, since they need no last-minute preparation beyond slicing.
Nutrition and Serving Information
The recipe estimates approximately 95 calories per bar when the batch is divided into 12 pieces, based on standard instant pudding mix and canned crushed pineapple. This is only an estimate, since exact calorie and sugar content will vary depending on the specific brands used. This recipe contains dairy from the instant pudding mix, so check labels carefully if you’re serving guests with dairy sensitivities.
Make-Ahead Tips
These bars are a genuinely good make-ahead dessert, since they need at least 3 hours to set anyway and hold up well in the refrigerator for several days after that. Make them the day before a gathering so they have plenty of time to fully firm up, and slice them just before serving for the cleanest presentation.
The Science Behind a No-Bake Set
Instant pudding mix relies on a pre-treated, modified food starch that’s engineered to absorb liquid and thicken almost immediately at room temperature, unlike the raw cornstarch used in old-fashioned, cooked pudding recipes, which needs heat to activate. When that starch is whisked into the pineapple and its juice, it swells rapidly, trapping the liquid within its structure and thickening the entire mixture into a spreadable filling within minutes. Chilling the pan afterward slows everything down and gives the starch time to fully hydrate and firm up evenly throughout, which is what allows these bars to hold a clean slice despite never being cooked or baked at any point in the process.
Portioning and Yield
This recipe makes about 12 bars from one box of pudding mix and one can of pineapple, a good amount for a small gathering or a few days of light desserts. If you’d like smaller portions for a bigger crowd, cutting the pan into 16 pieces instead of 12 stretches the batch further while still giving everyone a satisfying taste. The recipe doubles cleanly in a 9×13-inch pan if you’d like a bigger batch, though the chill time may need to extend slightly given the noticeably larger volume of mixture spread into the bigger pan.
A Little Bit of History
Instant pudding mix became a pantry staple in the mid-20th century, and home cooks quickly discovered that its rapid, no-cook thickening made it useful for far more than just a bowl of pudding, including simple pie fillings, dips, and bars built around canned fruit. Pairing it with crushed pineapple draws on that same tradition of convenient, fruit-forward no-bake desserts, echoing classic creamsicle flavor combinations of vanilla and citrus while swapping in pineapple for a brighter, more tropical twist on the familiar pairing.
Serving Suggestions
Serve these bars chilled, straight from the refrigerator, for the cleanest slices and the brightest flavor. A dollop of whipped topping and a few fresh pineapple chunks on top make for a simple, pretty presentation if you’re serving them for a gathering. Arranged on a platter alongside other light, fruity desserts, they also make a nice addition to a summer dessert spread.
Why This Recipe Is a Good Introduction to No-Bake Bars
Because there’s no thickening technique to master beyond whisking two ingredients together, this is one of the most approachable no-bake bars for someone who hasn’t made one before. There’s no gelatin to bloom, no condensed milk to balance with acid, and no risk of overcooking anything, since nothing here ever touches heat. Once you’ve made this version successfully, the same basic approach, instant pudding mixed with a canned or pureed fruit, opens the door to plenty of other fruit-based variations without much of a learning curve at all.
Understanding the Texture
The finished bars have a soft, creamy texture with distinct pieces of pineapple throughout, closer to a chilled fruit pudding than to a firm, dense bar. That texture comes directly from the crushed pineapple, which keeps some texture even after the starch thickens around it, giving each bite a bit of chew alongside the smooth, creamy base. Once you know to expect a soft, spoonable texture rather than a firm, chewy one, these read as a light, refreshing treat rather than a recipe that didn’t set quite right.
Choosing the Right Pineapple
Crushed pineapple packed in its own juice, rather than in heavy syrup, gives the most balanced sweetness and the brightest, most natural pineapple flavor in the finished bars. Pineapple packed in syrup will make these noticeably sweeter and can sometimes mute the fruit’s natural tartness, so if that’s all you happen to have on hand, it’s worth carefully tasting the mixture before it goes into the pan to check the overall sweetness balance ahead of time.
Why This Recipe Is Naturally Kid-Friendly to Make
With no oven, no raw eggs, and no hot stovetop involved anywhere in the process, this is an easy recipe to make alongside kids, whether that means letting them measure the pudding mix or handing them the whisk to watch the mixture thicken right before their eyes. The transformation from a loose, juicy mixture to a thick, spoonable filling happens quickly enough, usually within a minute or two of steady whisking, that it holds a young helper’s attention and gives them a real, hands-on sense of how the two ingredients work together without any risk of hot equipment or open flames anywhere nearby.
Adjusting Sweetness and Tartness
If you’d like a slightly less sweet bar, using pineapple packed in its own juice rather than a heavier syrup is the easiest adjustment, since juice-packed pineapple naturally carries less added sugar while still delivering plenty of bright, tropical flavor. For an even more pronounced creamsicle flavor, stirring in a small amount of fresh orange zest along with the pudding mix and pineapple adds a citrus note that leans further into the classic creamsicle pairing of vanilla and orange, without changing the basic method or thickening process at all. Tasting the mixture before it goes into the pan is always the easiest way to fine-tune the balance to your own preference before it sets.
Working With Different Pudding Flavors
Classic vanilla instant pudding is the traditional base for this recipe and gives the most authentic creamsicle flavor when paired with the pineapple, but this recipe is flexible enough to work with a few other mild pudding flavors if you’d like to experiment. A French vanilla pudding mix brings a slightly richer, more custard-like flavor, while a cheesecake-flavored instant pudding adds a tangy note that plays nicely against the sweetness of the pineapple. Whichever flavor you choose, stick with a mild, light-colored pudding rather than a bold flavor like chocolate or butterscotch, since those would clash with the bright, fruity character this recipe is built around.
Pairing These Bars With Other Desserts
Because these bars are so light and bright, they pair especially well alongside richer, denser desserts on a larger dessert table, offering a refreshing contrast to something like a peanut butter bar or a chocolate-based treat. A summer dessert spread that includes both these pineapple bars and something like the lemon cream pie keeps things feeling varied and citrus-forward without any single dessert overwhelming the others. Iced tea or a cold glass of lemonade alongside these bars also plays up their bright, tropical character nicely, making them a natural fit for an outdoor gathering or a warm-weather celebration.
A Note on Ingredient Ratios
The ratio of one box of instant pudding mix to one standard 20-ounce can of crushed pineapple was developed specifically to give the mixture enough starch to thicken the full amount of juice in the can without becoming too stiff or pasty. Using a smaller can of pineapple with the same amount of pudding mix will result in a thicker, denser bar with less pineapple flavor throughout, while using extra pineapple beyond the standard can size may leave the mixture too loose to set firmly within the standard chill time. Sticking close to the ratio given here on your first attempt is the most reliable way to get a feel for how the mixture should look and behave before experimenting with any adjustments to the recipe.
A Note on Serving Temperature
These bars are best served cold, straight from the refrigerator, since the pudding-based filling is at its firmest right after chilling and softens noticeably the longer it sits out at room temperature, especially on a warm day. If you’re serving them at an outdoor gathering or a picnic, keeping the pan in a cooler until just before serving helps the bars hold their shape and clean edges rather than turning soft and difficult to pick up by hand. For the neatest presentation, slice the bars right before setting them out rather than in advance, so the cut edges stay crisp and don’t have extra time to soften.
Common Questions
Can I use cook-and-serve pudding instead of instant?
No, only instant pudding mix will thicken properly without heat; cook-and-serve pudding needs to be cooked on the stovetop to set.
Why did my bars not firm up?
They likely need more chill time. Give them another hour or two in the refrigerator before slicing again.
Can I drain the pineapple first?
No, the juice is essential for the pudding mix to thicken properly; using undrained pineapple gives the best texture and flavor.
Can I freeze these bars?
It’s not recommended, since the pudding-based filling can separate slightly once thawed, affecting the texture.
Can I use a different flavor of pudding?
Yes, a French vanilla or cheesecake-flavored instant pudding both work well and add a slightly different flavor note.
How long do these bars keep?
Store them covered in the refrigerator for up to 4 days for the best texture and flavor.
Can I double this recipe?
Yes, this recipe doubles cleanly in a 9×13-inch pan; just allow a little extra chill time given the larger volume.
2-Ingredient No-Bake Pineapple Creamsicle Bars turn a box of instant pudding and a can of crushed pineapple into a bright, creamy bar with real tropical flavor in every slice. Whisk, spread, chill, and slice — that’s the entire process, and the result is a genuinely refreshing no-bake treat that’s ready with just a few hours of easy, hands-off chilling time and almost no dishes to clean up afterward.