
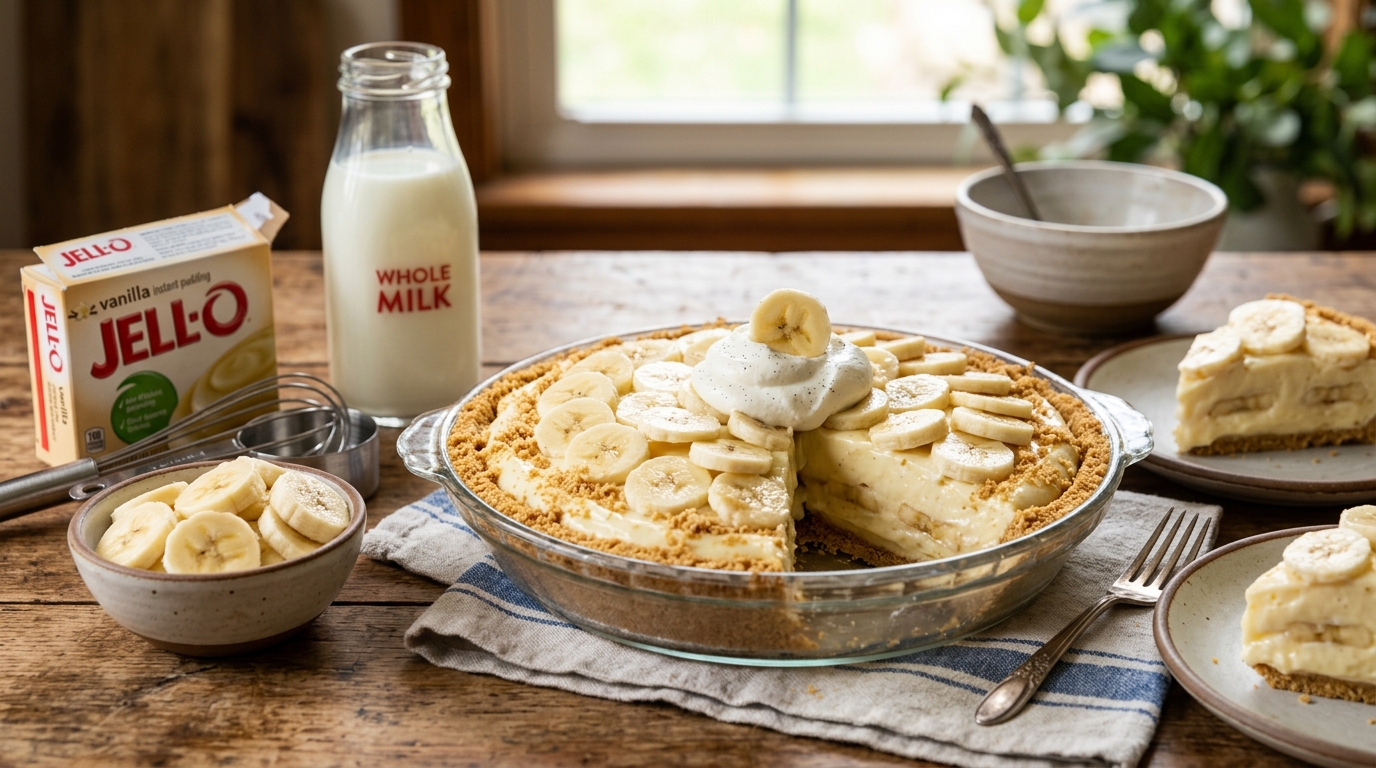
3-Ingredient Vanilla Banana Pudding Pie
Instant vanilla pudding, sliced banana, and a graham cracker crust — layered, chilled, and ready in about fifteen minutes of hands-on work.
Thank you for reading this post, don't forget to subscribe!
Banana pudding is comfort food in its purest form — soft, sweet, familiar, and about as easy to love as dessert gets. This pie takes that same flavor combination and turns it into a proper sliceable pie, using just three ingredients and absolutely no baking.
Instant vanilla pudding mix, whisked with cold milk, sets into a smooth, creamy filling in minutes. Layered with fresh banana slices inside a ready-made graham cracker crust, then chilled until firm, it slices into clean, distinct layers of banana and pudding sitting on that classic graham base.
There’s no cooking, no eggs, no water bath, no risk of a cracked filling — just whisking, layering, and patience while the fridge does the rest of the work. It’s the kind of pie that looks like real effort went into it, when in reality the hardest part is waiting for it to chill.
This is the pie to make when you want something that tastes deeply nostalgic and familiar, without needing a single specialized ingredient or technique. Pudding mix, bananas, and a crust — that’s genuinely the whole story.
A Little Bit of History
Banana pudding holds a cherished place in Southern American cooking, with recipes appearing in community cookbooks since at least the late 1800s. The classic version layers vanilla wafers, sliced banana, and a cooked vanilla custard, chilled until the wafers soften into a cake-like texture — a dessert built more on patience and layering than technical baking skill.
Turning that pudding into a sliceable pie format is a natural adaptation, following the same broader tradition of icebox pies that became popular once home refrigeration made it possible to reliably set a dessert without ever using the oven. Instant pudding mix, widely available since the 1950s, made this kind of no-cook pie filling accessible to home bakers without the time or confidence to make a stovetop custard from scratch.
This particular version leans into simplicity even further than many banana pudding pie recipes, skipping any additional binding ingredients like cream cheese or whipped topping in favor of just pudding mix, milk, and banana — proof that sometimes the most beloved desserts really do come down to just a few well-chosen ingredients.
The enduring popularity of banana pudding across generations speaks to something deeper than just convenience — it’s a dessert closely tied to family gatherings, church potlucks, and Sunday dinners across much of the American South, carrying real nostalgic weight for many people well beyond its simple ingredient list. Turning it into an easy, three-ingredient pie format keeps that emotional connection intact while making it far more approachable for anyone short on time or baking experience.
Why This One Works
Instant pudding mix is formulated to thicken almost immediately upon contact with cold liquid, using modified food starch rather than the egg-based cooking process a traditional custard would require. Whisked with cold milk, it sets into a smooth, spoonable filling within minutes, and continues to firm up further as it chills in the fridge, which is exactly the texture this pie needs to slice cleanly.
Layering the banana slices directly into the pudding, rather than only placing them on top, means the banana flavor and texture run through the entire pie rather than sitting only as a garnish. Because the pudding sets around the banana slices as it chills, each slice of the finished pie shows those distinct banana layers running through the cream-colored filling.
The graham cracker crust provides structure and a bit of textural contrast against the smooth, creamy filling, without requiring any baking of its own if you’re using a store-bought crust. Because the whole pie depends on chilling rather than baking, there’s very little that can go wrong here structurally — the main variable is simply giving it enough time in the fridge to set fully before slicing.
It’s also worth understanding why layering the banana into the pudding, rather than just placing it on top, makes such a difference in the final result. When banana slices are embedded within the pudding itself, they’re partially protected from air exposure by the surrounding filling, which slows the browning process compared to banana left fully exposed on the surface. This is part of why the inner layers of this pie tend to look fresher for longer than a simple top garnish would.
What You’ll Need
- 1 box (3.4 oz) instant vanilla pudding mix
- 2 cups cold milk
- 4 ripe bananas, sliced
- 1 9-inch graham cracker crustStore-bought or homemade
A dollop of whipped cream and a few extra banana slices make a simple, classic garnish for serving.
A Closer Look at Each Ingredient
The pudding mix. Instant vanilla pudding mix is the base of this filling and needs to be the instant variety, not the cook-and-serve kind, since this recipe relies entirely on cold-set thickening rather than any stovetop cooking.
The milk. Cold milk is essential here — instant pudding mix is formulated to activate and thicken through a reaction with cold liquid, and warm or room-temperature milk can prevent it from setting properly or extend the time it takes to thicken.
The bananas. Ripe, yellow bananas with just a few brown speckles offer the best balance of sweetness and firm texture for layering and slicing. Overripe, very soft bananas can turn mushy once layered into the chilled pudding.
The crust. A standard store-bought graham cracker crust works well and saves a step, though a homemade version — graham crumbs, melted butter, and a touch of sugar, pressed into a pie dish — gives a slightly thicker, more substantial base if you prefer to make your own.
Equipment You’ll Need
A large mixing bowl and a sturdy whisk are all this recipe really requires — whisking by hand works perfectly well here since instant pudding thickens quickly without needing a mixer. A rubber spatula helps smooth each layer evenly, and if you’re making your own graham cracker crust rather than using a store-bought one, a 9-inch pie dish and a flat-bottomed measuring cup for pressing the crumbs are useful additions.
How to Make It
- Whisk the pudding. In a large bowl, whisk the instant vanilla pudding mix with the cold milk until smooth and starting to thicken, about 2 minutes.
- Slice the bananas. Slice the bananas into rounds while the pudding sets slightly.
- Layer the crust. Arrange a single layer of banana slices across the bottom of the graham cracker crust.
- Add the first pudding layer. Pour about half the pudding mixture over the banana layer.
- Add another banana layer. Arrange another layer of banana slices over the pudding.
- Add the remaining pudding. Pour the remaining pudding mixture over the top, smoothing with a spatula.
- Chill. Refrigerate for at least 3 hours, or until fully set.
- Garnish and serve. Top with whipped cream and a few extra banana slices just before serving.


Troubleshooting Common Issues
My pudding didn’t thicken properly. This is almost always due to using warm milk instead of cold, or not whisking long enough. Always use milk straight from the fridge, and whisk for a full two minutes until you see the mixture visibly thicken.
My pie didn’t set firm even after the full chilling time. Give it more time — this filling benefits from a full 3 to 4 hours in the fridge, and can even improve with an overnight chill, especially in a warmer kitchen.
My banana slices turned brown before I could serve the pie. This happens naturally once bananas are cut and exposed to air. Toss the banana slices lightly in a little lemon juice before layering to slow this down, especially for the top garnish layer added closer to serving time.
My crust turned soggy underneath the filling. This can happen if the pudding was still very loose when poured in, or if the pie sat at room temperature too long before chilling. Whisk the pudding until properly thickened before layering, and refrigerate the assembled pie promptly.
My pie tastes bland. This can happen with a lower-flavor-intensity pudding mix brand. A touch of vanilla extract whisked into the pudding, or slightly riper bananas, can help boost the overall flavor.
My layers blended together instead of staying distinct. This can happen if the first layer of pudding was still very loose when the second banana layer and remaining pudding were added. Let the pudding thicken for the full whisking time before layering, and work fairly promptly once it’s ready, since it continues to set as it sits.
Serving Suggestions
This pie is rich, creamy, and nostalgic enough to serve entirely on its own, chilled straight from the fridge, though a dollop of whipped cream and a few extra banana slices arranged on top make for a classic, appealing presentation. A light sprinkle of crushed vanilla wafers over the top echoes the texture of traditional banana pudding for anyone who wants that extra bit of crunch.
Because it slices cleanly and holds its shape well chilled, this pie is a reliable choice for potlucks, family dinners, or a simple make-ahead dessert for a busy week. It pairs naturally with a cup of coffee, and its familiar, comforting flavor makes it a crowd-pleaser across nearly every age group.
For a slightly more polished presentation, pipe the whipped cream topping in small rosettes around the edge of the pie rather than spreading it, and finish with a few thin banana slices arranged in the center — a simple touch that makes the pie look considerably more intentional for a gathering.
This pie also makes a wonderful contribution to a potluck specifically because it travels well chilled and requires no last-minute assembly once you arrive — simply keep it cool during transport and add any final whipped cream garnish right before serving.
It’s also worth talking about texture consistency across the pie, since that’s one of the small details that separates a good version of this pie from a great one. Slicing the bananas to a fairly even, consistent thickness — around a quarter inch — helps each slice of the finished pie show clean, uniform banana layers rather than uneven, chunky sections in some bites and thin, barely-there banana in others.
A Few Ways to Make It Yours
Vanilla Wafer Crust
Use a crushed vanilla wafer crust instead of graham cracker for a flavor closer to classic banana pudding.
Chocolate Version
Swap the vanilla pudding mix for chocolate pudding mix for a completely different but equally easy flavor.
Whipped Topping Swirl
Fold a cup of whipped topping into the pudding mixture before layering for an even lighter, fluffier filling.
Individual Cups
Layer the same components into small jars or cups for portioned, no-slice servings.
Make-Ahead Tips
This pie is genuinely well suited to making ahead, since it needs a substantial chilling period regardless of when you plan to serve it. It can be assembled up to a day in advance and kept covered in the fridge, which makes it a reliable choice for gatherings where oven time and prep time on the day of serving are already stretched thin.
If you’re adding a whipped cream or extra banana garnish, hold off on that until closer to serving time, so it looks as fresh as possible when the pie reaches the table.
A Note on Dietary Adjustments
This recipe can be adapted for a few common needs with a little care. For a gluten-free version, use a certified gluten-free graham cracker crust — the pudding filling itself is naturally gluten-free. For a lower-sugar version, a sugar-free instant pudding mix works well and doesn’t meaningfully change the texture or set of the filling.
For a dairy-free version, use a dairy-free milk alternative with a fairly neutral flavor, such as oat or soy milk, since these tend to mimic dairy milk’s texture more closely than options like almond milk. Double-check that your pudding mix and graham cracker crust are also dairy-free, since some brands include milk-based ingredients.
For those managing portion sizes, this pie is rich and filling enough that a standard eighth-slice portion is genuinely satisfying on its own — cutting slightly smaller slices works well if you’re serving it alongside other desserts at a larger gathering.
For those tracking sugar intake, most of the sweetness in this pie comes from the pudding mix and the graham cracker crust rather than any added sugar in the method itself, so a sugar-free pudding mix paired with a lower-sugar crust option is the most effective way to meaningfully reduce the overall sugar content without changing anything else about the recipe.
Storage
Keep the pie covered in the fridge for up to 3 days — banana desserts are best enjoyed within a few days, since the banana layers will gradually soften and darken over time. It doesn’t freeze well due to the fresh fruit and pudding-based filling, so plan to make it close to when you’ll serve it.
Common Questions
Can I use a different pudding flavor?
Yes — banana cream pudding mix can be used instead of vanilla for an even more pronounced banana flavor throughout the filling.
Why did my banana slices turn brown?
This happens naturally once bananas are cut and exposed to air. Toss slices lightly in lemon juice before layering, and add any garnish bananas as close to serving time as possible.
Can I make this pie the night before a gathering?
Yes — it holds up well overnight in the fridge, and the flavors often meld together nicely with a longer chill, though the banana garnish is best added the next day, closer to serving.
Can I use a homemade graham cracker crust instead of store-bought?
Yes — combine about 1½ cups of graham cracker crumbs with a third cup of melted butter and a couple tablespoons of sugar, press firmly into a 9-inch pie dish, and chill briefly before filling.
Why is my filling too thin even after chilling?
This usually means the milk used was warm rather than cold, preventing the pudding from thickening fully. Always start with milk straight from the fridge for the most reliable set.
Can I double this recipe for a bigger pie or a 9×13 pan?
Yes — double all the ingredients and use a 9×13-inch pan with a full graham cracker crust base pressed in, layering the same way for a larger, sheet-style dessert.
Can I add whipped topping to make the filling extra fluffy?
Yes — folding in a cup of thawed whipped topping after the pudding has thickened gives a lighter, airier filling, closer in texture to a whipped banana pudding mousse.
Do I need to cook the pudding mix, or is it truly no-cook?
This recipe relies entirely on instant pudding mix, which sets through a reaction with cold milk rather than any cooking — just double-check the box says “instant” rather than “cook and serve” before you begin.
One last thing worth mentioning: this pie is about as forgiving a dessert as you can make, precisely because there’s no baking, no eggs, and no precise temperature window to worry about. Whisk, layer, chill, and you have a genuinely comforting, crowd-pleasing dessert with almost no room for anything to go wrong.