
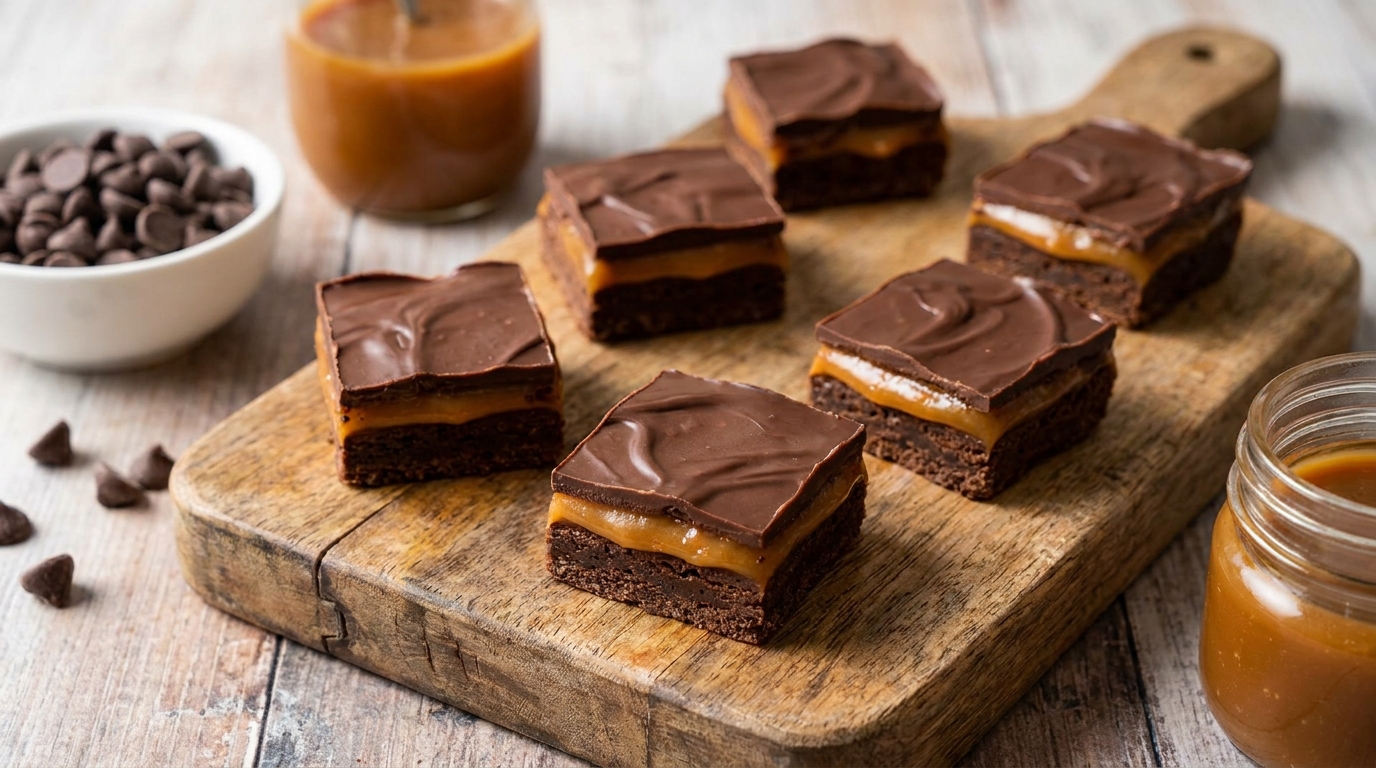
Chocolate Caramel Bars
A buttery shortbread base, a thick layer of soft caramel, and a firm chocolate top finished with flaky sea salt.
Thank you for reading this post, don't forget to subscribe!
These are the bars that make people stop mid-conversation at a party to ask what they are. A crisp, buttery shortbread base, a thick, chewy layer of caramel, and a clean, firm chocolate top finished with a scatter of flaky sea salt — three distinct layers, three distinct textures, all in a single square.
This style of bar, sometimes called millionaire’s shortbread, has earned its reputation the honest way: it genuinely does taste like something from a specialty bakery, with a level of textural contrast that’s hard to get from a simpler one-layer treat. Crisp shortbread gives way to soft, stretchy caramel, which gives way to a clean chocolate snap on top.
It takes a bit more patience than a simple no-bake bar — there’s a shortbread base to bake, a caramel to cook and cool, and a chocolate layer to set — but none of the individual steps are difficult. It’s simply a recipe built in stages, each one setting up the next.
The payoff is worth the extra time. These bars hold their shape beautifully, slice into clean, defined layers, and have that rich, buttery-caramel flavor that makes them disappear quickly from any dessert table.
A Little Bit of History
Millionaire’s shortbread, the dessert this recipe is closely modeled on, originated in Scotland and has been a beloved treat there for decades, known for its rich, indulgent combination of shortbread, caramel, and chocolate. The name itself reflects just how decadent the combination felt compared to simpler, everyday biscuits and shortbreads — a treat rich enough to feel like it belonged to millionaires.
The classic version relies on a caramel made by slowly cooking sweetened condensed milk with butter and sugar until it thickens into a soft, chewy layer — a technique that requires patience and steady attention at the stove, but very little in the way of specialized equipment or advanced skill. That approachability is part of why the dessert spread well beyond Scotland and became a beloved treat in home kitchens across the English-speaking world.
American adaptations of this dessert have varied the base slightly over the years — some use a graham cracker crust instead of traditional shortbread, others adjust the caramel recipe for a faster stovetop method — but the essential three-layer structure has remained largely unchanged, a testament to how well the original combination of textures and flavors works.
Layered dessert bars combining a baked base with a poured or cooked filling and a set topping represent a broader category of home baking that spans many cultures and traditions — from millionaire’s shortbread to American-style pecan pie bars to countless regional variations built on the same basic three-part structure. What unites them is the appeal of contrasting textures within a single bite, which is exactly what makes this style of dessert so consistently popular across so many different culinary traditions.
Why This One Works
Each of the three layers here relies on a different technique to set, and that variety is exactly what gives the finished bars their distinct textural contrast. The shortbread base bakes into a firm, slightly crumbly foundation, providing structure and a buttery counterpoint to the sweeter layers above it. Baking it separately, before adding the caramel, ensures it holds its shape and doesn’t turn soggy under the weight of the layers to come.
The caramel layer sets through a combination of sugar concentration and cooling — cooked slowly on the stovetop until it thickens, it firms up further as it cools, becoming soft and chewy rather than fully hard, which is exactly the texture that gives these bars their signature bite. Cooking the caramel to the right consistency matters more here than in almost any other step, since undercooking leaves it too loose to slice cleanly, while overcooking can turn it hard and brittle rather than soft and pliable.
The chocolate top sets simply through cooling, the same way it would in any layered bar, providing a firm, snappable cap that contrasts against the softer caramel beneath it. Because each layer needs to be at least partially set before the next goes on top, this recipe rewards patience — rushing any one stage risks the layers blending together rather than staying distinct.
It’s worth understanding why patience between layers matters so much for this particular recipe. Each layer needs to firm up at least partially before the next is added — a warm caramel poured onto a warm shortbread base can cause the two to blend together at the edges rather than staying distinct, and a warm chocolate layer poured onto a still-soft caramel can sink into it instead of setting as a clean, separate top. Building in those cooling pauses is what gives the finished bars their signature three-layer look.
What You’ll Need
- 1 cup all-purpose flour
- 1/2 cup unsalted butter, softenedFor the shortbread base
- 1/4 cup granulated sugar
- 1 can (14 oz) sweetened condensed milkFor the caramel
- 1/2 cup unsalted butter
- 1/2 cup brown sugar
- 2 cups semi-sweet chocolate chipsFor the top layer
- Flaky sea salt for toppingOptional
A Closer Look at Each Ingredient
The shortbread base. Flour, softened butter, and sugar combine into a simple, press-in shortbread crust. Baking it first, before adding the caramel, ensures it holds its structure and doesn’t turn soft or soggy under the layers above.
The caramel. Sweetened condensed milk, butter, and brown sugar cooked together over gentle heat form the soft, chewy caramel layer that’s the heart of this dessert. Constant stirring is essential here to prevent scorching, since the mixture is thick and sits close to the bottom of the pan.
The chocolate. Semi-sweet chocolate chips melted and poured over the set caramel give the bars their firm, glossy top layer. Dark or milk chocolate can be substituted depending on how sweet you’d like the finished bars to taste.
The sea salt. A scatter of flaky sea salt over the chocolate before it sets cuts through the sweetness of both the caramel and chocolate layers, and is genuinely worth including for the flavor balance it brings.
Equipment You’ll Need
An 8-inch square pan lined with parchment paper is essential for lifting the finished bars out cleanly once set. A heavy-bottomed saucepan is important for the caramel step, since it distributes heat more evenly and helps prevent scorching compared to a thin pan. A silicone spatula is ideal for stirring the caramel constantly and scraping the bottom of the pan, and a candy thermometer, while not strictly required, can help take some of the guesswork out of knowing when the caramel has cooked long enough.
How to Make Them
- Preheat and prepare. Preheat your oven to 350°F (175°C) and line an 8-inch square pan with parchment paper.
- Make the shortbread base. Combine the flour, softened butter, and sugar until a crumbly dough forms, then press firmly into the prepared pan.
- Bake the base. Bake for 12–15 minutes, until lightly golden, then let cool while you prepare the caramel.
- Cook the caramel. In a saucepan over medium-low heat, combine the sweetened condensed milk, butter, and brown sugar, stirring constantly until thickened, about 8–10 minutes.
- Pour the caramel layer. Pour the caramel over the cooled shortbread base and spread evenly. Let cool at room temperature for about 30 minutes.
- Melt the chocolate. Melt the chocolate chips gently until smooth, either in the microwave in short bursts or over a double boiler.
- Add the chocolate layer. Pour the melted chocolate over the caramel and spread evenly, then sprinkle with flaky sea salt.
- Chill and slice. Refrigerate for at least 2 hours, or until fully set, then lift out using the parchment overhang and slice into squares.


Troubleshooting Common Issues
My caramel is too soft and won’t hold its shape when sliced. This usually means the caramel wasn’t cooked long enough to thicken properly. It should coat the back of a spoon thickly and hold a brief trail when you drag a spatula through it before you pour it into the pan.
My caramel scorched or tastes burnt. This happens when the heat is too high or the mixture isn’t stirred frequently enough. Keep the heat at medium-low and stir constantly, scraping the bottom of the pan to prevent sticking.
My shortbread base is soggy. This can happen if the caramel was poured on before the base fully cooled, or if the base wasn’t baked long enough to firm up properly. Let the base cool completely before adding the caramel layer.
My chocolate topping cracked when I sliced the bars. Chilled chocolate can crack rather than slice cleanly if the bars are extremely cold straight from the fridge. Let them sit at room temperature for 5–10 minutes before slicing, and use a warmed, sharp knife for the cleanest cuts.
My layers separated when I lifted the bars out of the pan. This usually means the bars didn’t chill long enough before attempting to remove them. Give them the full 2 hours, and consider chilling overnight for the most stable, cleanly separated layers.
My finished bars taste too sweet. This is a genuinely rich, sweet dessert by design, but if you find it overly sweet, using a darker chocolate for the top layer and slightly reducing the brown sugar in the caramel can help bring more balance to the overall flavor.
Serving Suggestions
These bars are rich enough to serve in small squares, and hold their shape best when served slightly chilled or at cool room temperature, where the caramel layer stays soft but not runny. A few pieces on a small plate alongside coffee makes for an indulgent, satisfying dessert.
Because of their rich, layered structure, these bars work well cut into smaller bite-sized pieces than a standard square, especially if serving alongside other desserts on a holiday or party spread. They travel reasonably well for a few hours at room temperature, making them a strong choice for potlucks, bake sales, and homemade gift boxes.
For gifting, these squares pack beautifully into a lined tin or box, and their glossy, salt-flecked top gives them a genuinely bakery-quality look with very little extra styling effort required.
These bars also make a striking addition to a holiday dessert table specifically because of their clean, defined layers — slicing into one reveals that classic shortbread-caramel-chocolate stack, which looks intentional and impressive without requiring any advanced decorating skill.
A Few Ways to Make Them Yours
Extra Salty Finish
Increase the flaky sea salt on top for a more pronounced sweet-and-salty contrast.
Nutty Addition
Fold chopped toasted pecans or almonds into the caramel layer for extra texture and flavor.
Dark Chocolate Top
Use dark chocolate instead of semi-sweet for a less sweet, more intense chocolate finish.
Espresso Caramel
Stir a teaspoon of instant espresso powder into the caramel while it cooks for a subtle coffee depth.
Make-Ahead Tips
These bars are well suited to making ahead, since each layer needs time to cool and set before the next goes on, and the finished bars benefit from a solid chilling period before slicing. They can be fully prepared up to a week in advance and kept covered in the fridge, making them a convenient choice for parties, potlucks, or a make-ahead treat for the week.
If you’re transporting them somewhere warm, keep them chilled as long as possible before serving, since the caramel layer especially will soften noticeably in heat and can make the bars harder to hold their shape.
A Note on Dietary Adjustments
This recipe can be adjusted for a few common dietary needs. For a gluten-free version, use a 1:1 gluten-free all-purpose flour blend for the shortbread base — the caramel and chocolate layers are naturally gluten-free. For a dairy-free version, use dairy-free butter, a dairy-free sweetened condensed milk alternative, and dairy-free chocolate chips, all of which are increasingly available at well-stocked grocery stores.
For those managing portion sizes, these bars are rich enough that cutting the pan into smaller pieces than a standard square — 20 or 24 pieces instead of 16 — still delivers a satisfying dessert experience while stretching the recipe further for a larger gathering.
For those tracking sugar intake more closely, it’s worth noting that a large portion of the sweetness here comes from the caramel layer specifically, so a slightly smaller portion size, or using a darker, less sweet chocolate on top, can help moderate the overall sugar content without requiring any changes to the core method.
Storage
Keep the bars in an airtight container in the fridge for up to a week — the layered structure holds up well chilled. They also freeze nicely for up to 2 months; thaw in the fridge before serving, or eat them cold straight from the freezer for a firmer, chewier bite.
Common Questions
Can I use store-bought caramel instead of making it from scratch?
Yes — a good-quality store-bought caramel sauce, warmed slightly until spreadable, can save time, though it may set slightly softer than a homemade cooked caramel.
Why did my caramel turn grainy instead of smooth?
This can happen if the sugar wasn’t fully dissolved before the mixture came to a simmer, or if it was stirred too vigorously at certain points. Stir gently but consistently, and make sure the sugar dissolves fully in the early stages of cooking.
Can I make these gluten-free?
Yes — use a 1:1 gluten-free all-purpose flour blend for the shortbread base. The caramel and chocolate layers are naturally gluten-free.
Can I double this recipe for a bigger batch?
Yes — double all the ingredients and use a 9×13-inch pan instead of an 8-inch square pan, adjusting bake and cook times slightly for the larger quantity.
How do I know when the caramel is cooked enough?
It should coat the back of a spoon thickly and hold a brief trail when a spatula is dragged through it, rather than running back together immediately.
Can I skip baking the shortbread and use a no-bake crust instead?
A graham cracker crust can be substituted for a faster, no-bake alternative, though it will give a softer, less traditional base than baked shortbread.
Can I use a microwave to make the caramel instead of the stovetop?
A stovetop method gives the most control and even cooking, but a microwave can work if you stir the mixture in short bursts, checking and stirring every 30 seconds to prevent scorching or uneven cooking.
Why does my caramel layer look separated or oily after cooking?
This can happen if the mixture was cooked at too high a heat, causing the butter to separate out. Lower the heat and stir more frequently next time, and if it happens, a vigorous whisk at the end of cooking can sometimes bring it back together.
One last thing worth mentioning: these bars are a genuinely rewarding baking project for anyone looking to build confidence with layered desserts, since each individual step — baking a simple shortbread, cooking a caramel, melting chocolate — is a fundamental technique worth having in your back pocket for countless other recipes down the line.