
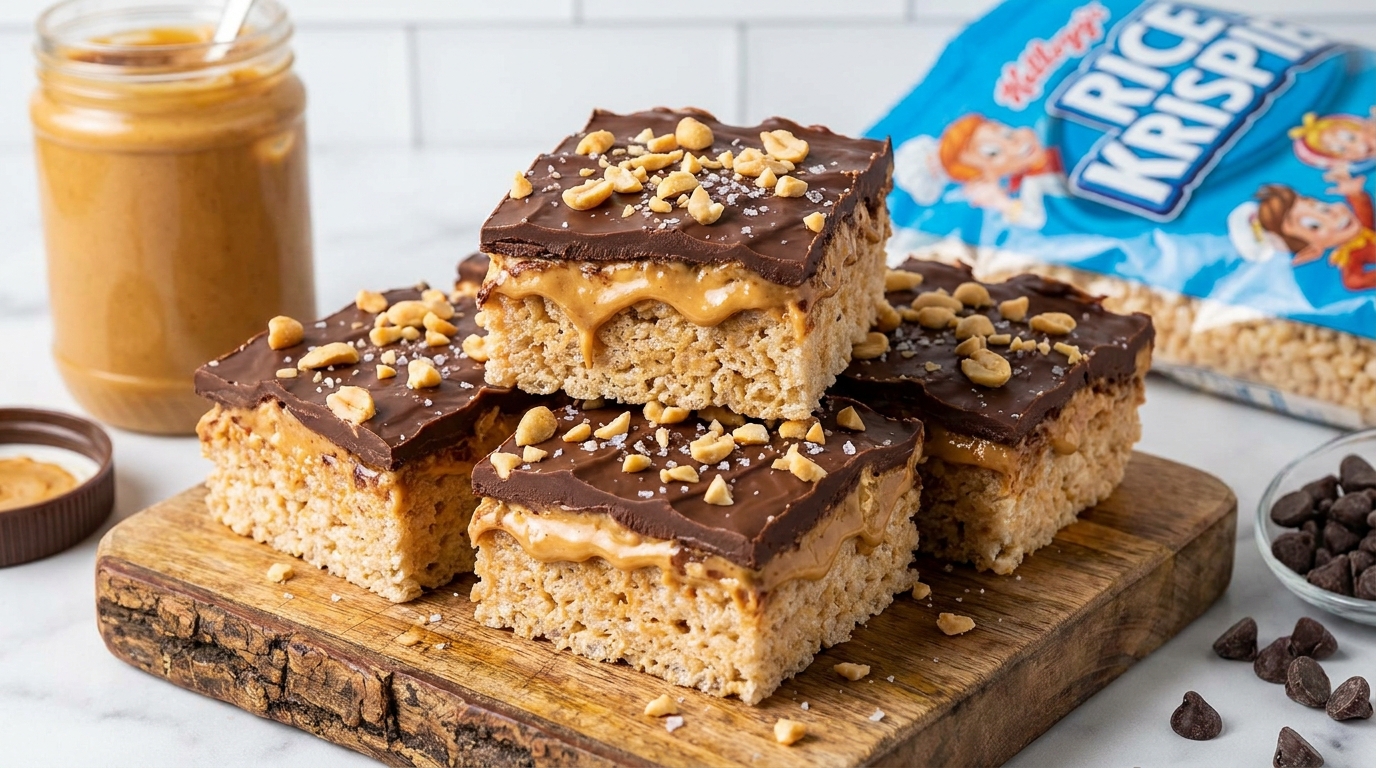
Peanut Butter Chocolate Rice Krispie Treats
The classic marshmallow treat, given a peanut butter core and a chocolate top — stovetop only, no oven needed.
Thank you for reading this post, don't forget to subscribe!
Rice Krispie treats are one of the most reliable recipes in American home cooking — marshmallow and butter melted together, folded through crisp rice cereal, pressed into a pan. This version keeps that same easy method but adds a peanut butter and chocolate layer that turns a kids’ snack into something a little more dessert-worthy.
Peanut butter melts right in with the marshmallow and butter, giving the base a deeper, nuttier flavor than the classic version. A layer of melted chocolate on top sets into a firm, glossy finish that adds contrast — both in flavor and in that satisfying snap when you bite through it.
It’s still a five-minute stovetop process from start to finish, just with a flavor upgrade that makes it just as appealing to adults as it is to kids.
This version has become a popular twist on the original precisely because it takes a nostalgic, universally loved treat and adds just enough richness and flavor complexity to make it feel a little more grown-up, without losing any of the simplicity that made the classic version a household staple in the first place.
A Little Bit of History
The original Rice Krispie treat dates back to the 1930s, when it first appeared as a recipe on the back of a cereal box, created as a way to showcase the cereal in a new, kid-friendly format. The combination of melted marshmallow, butter, and crisp rice cereal proved to be an instant hit, requiring no oven and almost no cooking skill, which made it one of the most widely reproduced no-bake treats of the 20th century.
Over the following decades, home bakers began experimenting with the basic formula, adding chocolate, peanut butter, and other mix-ins to build on the original’s simple, reliable base. The peanut butter and chocolate version specifically taps into one of the most enduringly popular American flavor combinations, following the same logic seen in countless other candy bars, cookies, and desserts that pair the two flavors together.
This particular version — peanut butter folded directly into the marshmallow base, topped with a layer of chocolate — represents one of the more popular ways home cooks have adapted the original recipe, since it adds meaningful new flavor without requiring any additional cooking steps or specialized techniques beyond the classic method.
The original marshmallow cereal treat has become something of a blank canvas over the decades, with home bakers adapting it for seasonal themes, holidays, and countless flavor variations well beyond the classic recipe. This peanut butter and chocolate version is one of the most consistently popular adaptations, precisely because it builds on an already-beloved base rather than reinventing the format entirely.
Why This One Works
Melted marshmallow is a naturally excellent binder — sticky and pliable while warm, it firms back up as it cools, holding the rice cereal together in a cohesive, chewy bar. Adding peanut butter to that melted marshmallow-butter mixture doesn’t change the basic chemistry at all; it simply adds fat and flavor, folding in smoothly since peanut butter melts at a similar temperature to the marshmallow and butter mixture already on the stove.
The chocolate top layer sets through simple cooling, the same way it would on any no-bake bar, giving a firm, contrasting cap over the softer, chewier base beneath it. Because the peanut butter is incorporated directly into the marshmallow mixture rather than layered separately, the flavor runs evenly through every bite of the base rather than being concentrated in just one section.
Working quickly while the marshmallow mixture is still warm is essential to this recipe’s success, since the mixture firms up rapidly as it cools. This is true of the classic version as well, but it’s worth emphasizing here since the peanut butter can make the mixture slightly thicker and stiffer as it cools compared to a standard marshmallow treat, making speed even more important during the pressing step.
It’s worth understanding why low heat matters so much when melting the butter and marshmallows together. Marshmallows are mostly sugar and gelatin, and high heat can scorch that sugar quickly, leading to a burnt flavor and a grainy, seized texture rather than the smooth, stretchy melt you’re aiming for. Low, gentle heat with frequent stirring gives you full control and the best final texture.
What You’ll Need
- 3 tablespoons unsalted butter
- 1 10 oz bag mini marshmallows
- 1/2 cup creamy peanut butter
- 6 cups crisp rice cereal
- 1 cup chocolate chips, meltedFor the top layer
A Closer Look at Each Ingredient
The butter. Unsalted butter is melted first as the base of the mixture, helping the marshmallows melt smoothly and adding a bit of richness to the overall flavor. Using unsalted butter gives more control over the final saltiness, especially with peanut butter also in the mix.
The marshmallows. Mini marshmallows melt faster and more evenly than large marshmallows, though either works — if using large marshmallows, simply allow a bit more time on the stove for them to fully melt down.
The peanut butter. A smooth, shelf-stable peanut butter incorporates most evenly into the warm marshmallow mixture. Natural peanut butter can work but may make the mixture slightly looser due to its higher oil content.
The rice cereal. Fresh, crisp rice cereal gives the best texture — stale cereal that’s lost some of its crunch will result in a softer, less satisfying finished treat. Measure gently rather than packing it into the cup for the most accurate ratio.
The chocolate topping. Semi-sweet chocolate chips are the classic choice, though milk or dark chocolate both work well depending on preference. Melt gently to avoid seizing, which would leave the top layer grainy instead of smooth.
Equipment You’ll Need
A large, heavy-bottomed pot is important here, since the marshmallow mixture needs room to be stirred without spilling once the rice cereal is folded in. A 9×13-inch pan lined with parchment paper makes for easy removal once set. A greased spatula or your own lightly greased hands are the best tools for pressing the sticky mixture into the pan evenly — a dry spoon will mostly just stick to the mixture rather than pressing it down.
How to Make Them
- Prepare the pan. Line a 9×13-inch pan with parchment paper, leaving overhang on the sides.
- Melt the butter and marshmallows. In a large pot over low heat, melt the butter, then add the marshmallows and stir until fully melted and smooth.
- Stir in the peanut butter. Remove from heat and stir in the peanut butter until fully combined.
- Fold in the cereal. Add the rice cereal and fold gently until every piece is evenly coated.
- Press into the pan. Transfer to the prepared pan and press down firmly and evenly using a greased spatula or your hands.
- Add the chocolate layer. Pour the melted chocolate evenly over the top and spread to the edges.
- Cool and set. Let cool at room temperature until the chocolate is fully set, about 20–30 minutes, or chill briefly to speed things up.
- Slice and serve. Lift out using the parchment overhang and cut into squares.

Troubleshooting Common Issues
My treats turned out hard instead of soft and chewy. This usually means the mixture was pressed into the pan after it had cooled and firmed up too much, or the marshmallows were overcooked and started to caramelize. Work quickly while the mixture is still warm and pliable.
My chocolate topping cracked when I sliced the bars. Chilling the bars too long or too cold before slicing can cause the chocolate layer to crack rather than cut cleanly. Let the bars sit at room temperature for a few minutes before slicing, and use a sharp knife.
My bars stuck badly to the pan. This usually means the pan wasn’t lined with parchment, or the spatula used to press the mixture down wasn’t greased. A light coating of butter or cooking spray on your tools makes the process much easier.
My peanut butter flavor is too faint. If you’d like a more pronounced peanut butter flavor, you can increase the amount slightly, though be aware that adding too much extra peanut butter can make the mixture looser and harder to hold its shape once pressed.
My marshmallow mixture seized or turned lumpy. This usually means the heat was too high, causing the sugar in the marshmallows to scorch or seize rather than melt smoothly. Start over with fresh marshmallows over lower heat, stirring more frequently.
My treats taste too sweet. If you find the classic version too sweet, using a dark chocolate topping rather than semi-sweet or milk chocolate can help balance the overall sweetness of the finished bars.
Serving Suggestions
These treats are best served at room temperature, where the base stays soft and chewy and the chocolate top holds a clean, firm snap. They make an easy lunchbox addition, wrapped individually in plastic wrap or parchment for grab-and-go convenience throughout the week.
Because they’re a familiar, universally loved treat, they’re a reliable choice for school events, bake sales, and casual parties where you want something that will disappear quickly without much fuss. Cutting them into smaller squares than a traditional Rice Krispie treat works well here too, since the added richness from the peanut butter and chocolate makes a smaller portion just as satisfying.
A cold glass of milk remains the classic pairing, cutting through the richness of both the peanut butter and chocolate in a way that feels just as nostalgic as the treat itself.
These treats also make an easy homemade addition to care packages or lunchboxes, since they hold their shape and flavor well at room temperature for several days without needing any special packaging beyond a simple airtight container or individually wrapped portions.
It’s also worth talking about pan size and how it affects the final texture of these treats, since this is a common point of confusion for anyone adapting the recipe. A 9×13-inch pan gives a moderate thickness that most people find ideal — thick enough to feel substantial, thin enough to eat in a couple of bites. Using a smaller pan will give you thicker, more substantial bars that take slightly longer to firm up, while a larger pan spreads the mixture thinner, giving a lighter, crispier treat that sets faster but feels less indulgent per piece. Neither is wrong — it simply comes down to personal preference for how dense and substantial you want the finished treats to be.
A Few Ways to Make Them Yours
Extra Peanut Butter Swirl
Warm a few extra tablespoons of peanut butter and swirl it into the chocolate layer before it sets.
Chopped Peanuts
Sprinkle chopped roasted peanuts over the chocolate layer while it’s still soft for added crunch.
Dark Chocolate Top
Use dark chocolate instead of semi-sweet for a less sweet, more intense chocolate finish.
Mini Treats
Press the mixture into a mini muffin tin instead of a pan for individual, bite-sized portions.
Make-Ahead Tips
These treats can be made a day or two in advance and stored at room temperature in an airtight container, which makes them a convenient option for parties or lunchbox prep earlier in the week. Avoid making them too far ahead, though, since the texture is at its best within the first few days, before the marshmallow base has a chance to firm up and dry out slightly over time.
If you’re making these for a specific event, consider timing the preparation for the morning of or the day before, rather than several days in advance, to keep that fresh, chewy texture that makes these treats so appealing straight out of the pan.
These treats are also a reliable choice for last-minute school or office treat requests, since the entire process from start to finish takes well under an hour, including cooling time, making it realistic to whip up a fresh batch on short notice.
A Note on Dietary Adjustments
This recipe can be adjusted for a few common dietary needs. For a gluten-free version, double-check that your rice cereal is certified gluten-free, since some brands are processed in facilities that also handle wheat. For a dairy-free version, use dairy-free butter and dairy-free chocolate chips, both of which are widely available.
This recipe isn’t naturally suited to a nut-free adaptation given how central peanut butter is to the flavor, though a seed butter alternative like sunflower seed butter can sometimes be substituted with a similar texture, keeping in mind the flavor will be noticeably different from the classic peanut butter version.
For those managing sugar intake, keep in mind that both the marshmallows and the chocolate topping contribute meaningfully to the overall sweetness here — using a slightly smaller amount of chocolate for the top layer, or opting for a darker, less sweet chocolate, are both simple ways to moderate the overall sugar content without changing the core method.
Storage
Keep the treats in an airtight container at room temperature for up to 4 days — they’re best enjoyed within the first couple of days while the cereal is at its crispiest. Avoid refrigerating for long stretches, since cold temperatures can dry out the marshmallow base over time; a brief chill just to set the chocolate is fine.
Common Questions
Can I use crunchy peanut butter instead of creamy?
Yes — crunchy peanut butter adds extra texture to the base and works just as well in terms of binding the mixture together.
Why are my treats hard instead of soft and chewy?
This usually means the mixture was pressed into the pan after it had cooled and firmed up too much, or the marshmallows were overcooked. Work quickly while the mixture is still warm and pliable.
Can I make these without the chocolate top layer?
Absolutely — the peanut butter rice krispie base is delicious on its own if you’d rather skip the chocolate layer entirely.
Can I use large marshmallows instead of mini?
Yes — large marshmallows work fine, though they’ll take slightly longer to melt down completely. Cut them into smaller pieces first to help them melt more evenly.
How do I keep the mixture from sticking to my hands while pressing it into the pan?
Lightly grease your hands or the spatula you’re using with butter or cooking spray before pressing — this makes a noticeable difference in how easily the sticky mixture releases.
Can I double this recipe for a bigger crowd?
Yes — double all the ingredients and use a larger pan, such as two 9×13-inch pans, to keep the layer thickness consistent.
Can I make these treats without any chocolate at all?
Yes — the peanut butter marshmallow base is delicious entirely on its own if you’d rather skip both the topping and any chocolate mix-ins.
Why do my treats taste stale within a day or two?
This usually means they weren’t stored in a fully airtight container. Exposure to air causes the marshmallow base to dry out and the cereal to lose its crisp texture more quickly than it should.
One last thing worth mentioning: this recipe is a great one to keep in your back pocket for unexpected treat requests, whether that’s a last-minute school bake sale, a spontaneous get-together, or simply a craving that needs solving quickly. From start to finish, including cooling, you can realistically have a full pan ready in well under an hour.